Whether you’re looking forward to creating your own nutrient-rich soil amendment or just looking to send less trash to the landfill, composting is an easy practice any household can adopt. And it doesn’t even have to cost anything to get started!
We made this simple homemade compost bin in one house with supplies we mostly already had on hand. There are definitely far more complex and expensive options for composting (including this container we later made from pallets). But to get our compositing feet wet, we followed this easy tutorial to making our own backyard bin. The steps are super simple
Steps For Making Your DIY Compost Bin
- Find a plastic storage bin
- Drill holes in the bin
- Create a dry base
- Add dirt
- Toss in food scraps
- Mix & moisten!
Step 1: Select Your Bin
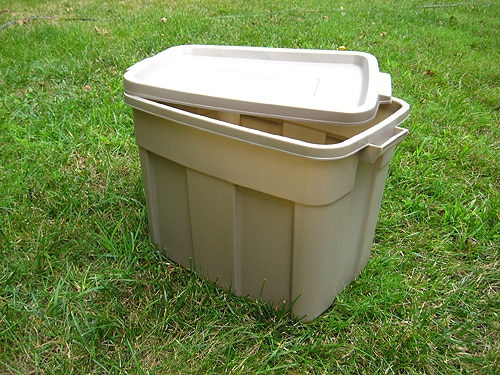
Find or buy a plastic bin with a tight-fitting lid about 24 inches tall or taller (it needs a lid to keep the soil moist and to keep critters out). We picked up a 30-gallon plastic storage bin. We chose a neutral color in hopes that would help it blend in with our backyard, but a dark option may work better for you.
Step 2: Drill Holes In Your Bin
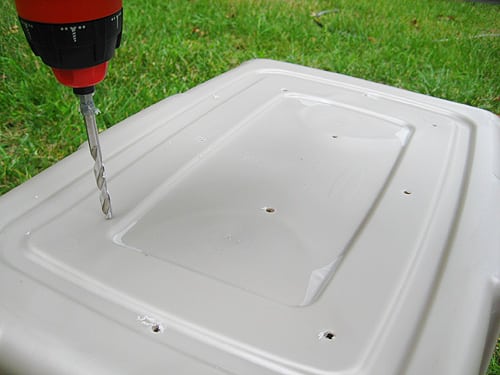
Use a handheld drill to make 8 – 10 small holes in the bottom of the container for airflow, since your organic waste will need oxygen for the composting process to take place. A 3/16″ drill bit or similar works great.
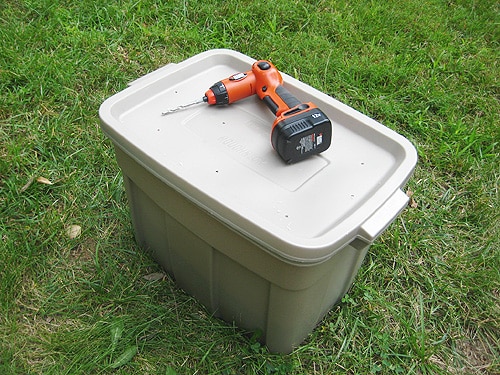
Use that same drill bit to make another 8 – 10 small holes in the lid. Remove the lid for now, but once you’ve finished your bin you’ll want to affix it tightly to the top.
Step 3: Create Your Brown Base
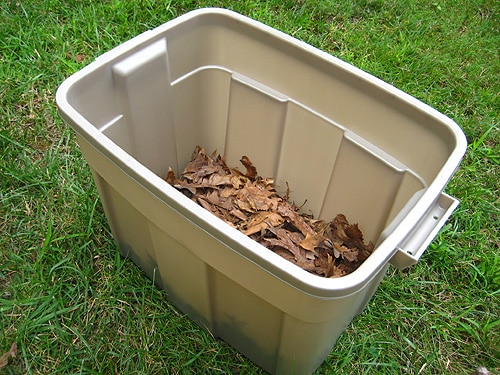
Place some dry leaves on the bottom of your compost bin, filling it about 1/8 – 1/4 full. You can think of composting as layers of “browns” (dead leaves, twigs, etc) and “greens” (food waste, grass clippings, etc.), so this step is the beginning of your brown base.
Step 4: Add Dirt
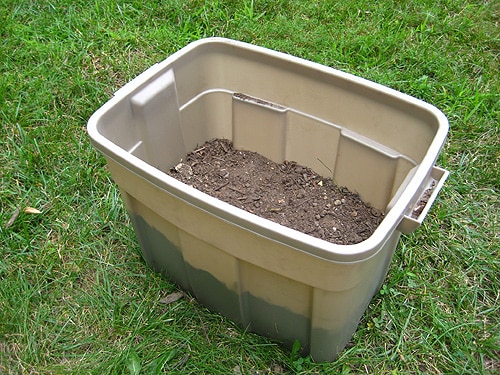
Place dirt on top of the leaves or newspaper until the container is 1/2 full. Again, we have PLENTY of that around, but you could also buy a bag of basic topsoil if needed. It’s not necessary to have worms in your dirt.
Step 5: Toss In Your Food Scraps!
Now to add your “greens!” Place any food scraps or paper products that you’d like to compost! Some great compostable materials are
- Fruit and vegetable scraps
- Coffee grounds, coffee filters, or tea bags
- Eggshells and nutshells
- Paper or cardboard
- Yard or grass clippings
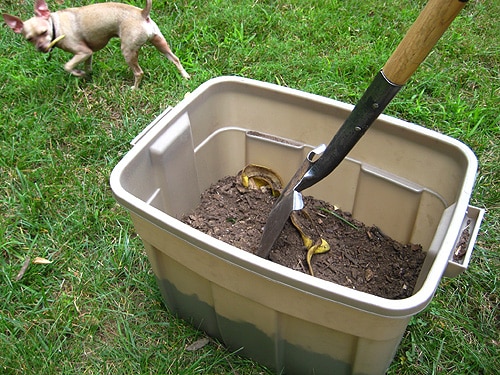
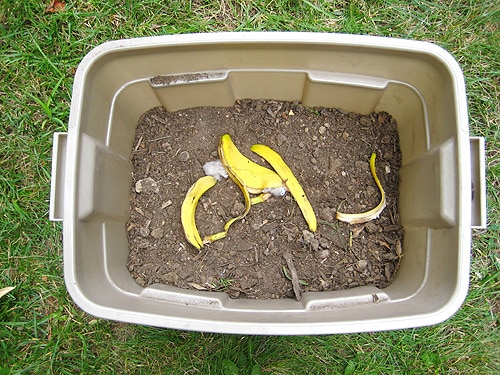
The EPA has a great guide with more items you can compost (as well as things you should definitely avoid – like dairy products or pet waste). Surprisingly, things like lint are compostable so we tossed some in with a couple of banana peels and a small ball of lint. That’s all we had at the moment, but maybe this will encourage us to eat more fruits and veggies? Or do more laundry?
Step 6: Stir Your Compost
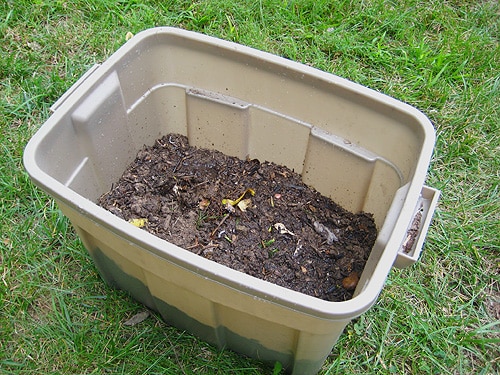
Give your compost a little stir (very little, in our case) with a shovel or stick, making sure to cover your food scraps with dirt. Canine supervision is optional.
Step 7: Moisten!
Spray with lukewarm water until moist, but not soaking wet. (Note: too much water can be the culprit if your compost starts to smell).
Step 8: Find A Convenient Spot For Your Compost Bin
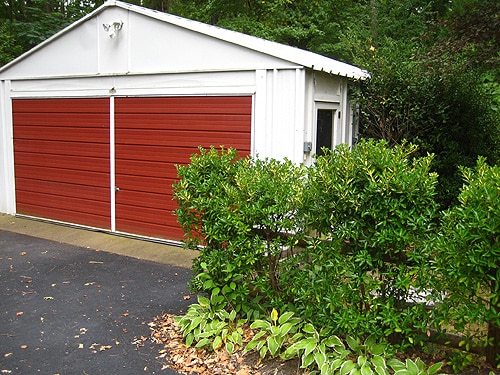
Place the bin in a shady area away from the house (if you live in an apartment or have no backyard you can place your bin on the patio). Be sure that it’s not in full sun or your compost will dry out. We found the perfect spot near our garage where our bin can hide behind some shrubs – inconspicuous and convenient (since we take the garbage and recycling out this way already). Can you spot it? HINT: check the bottom right.
Step 9: Collect Your Compostable Materials Inside
You’ll also want to think through how you’ll collect or separate your compostable waste inside as well (that way you’re not constantly digging through the trash for eggshells or coffee grounds). We wrote about this airtight container we bought to wrangle our food scraps under the sink. It’s tight seal keeps it from smelling between trips to dump it into our bin.

When Is Your Compost Ready To Use?
The amount of time depends on the size of your bin and how recently you’ve added new organic material. It may be ready in a couple of months or take up to a year. Some key signs that it’s ready for use in your lawn or garden are:
- All of your compostable materials have broken down (no food visible in its original form)
- It has a “earthy” or dirt-like smell (not acidic or sour smelling)
- It’s no longer producing heat (it should feel about the same temperature as the air)
- It’s dark and crumbly, not wet or clumpy
Once it’s ready, your finished compost can be used as mulch or potting soil and can also be sprinkled over grass as a lawn conditioner. Remember to save at least 1/3 of it to keep the composting process going. You may also want to create a second bin that you can add your food scraps to while your first bin is going through the decomposition stages to finished compost.
Seems pretty easy, right? And so far the whole thing has cost us less than $10.
Update: We installed a larger compost pile in our new house using old shipping palettes. Click here to check out this alternate composting project.

**This post was originally published on August 21, 2008**
**This post contains affiliate links**
PS: Wanna know where we got something in our house or what paint colors we used? Just click on this button:


Jenny says
I was all set to make one of these for our new (first!) home, but I’m having trouble finding plastic bins that are 24″ tall. Struck out at Lowes and Wal-Mart. Not to mention all the tubs I’m finding are at least twice as much as ya’ll paid. Anyone else run into a dearth of large tubs? Any suggestions? Can it be done with 18″ tall tubs, do you think?
YoungHouseLove says
Oh yeah- I bet that will work. So funny that bigger tubs are hard to find. Maybe start with an 18″ one and if you see larger ones on sale (possibly around the holidays) you can always start a bigger one too!
xo,
s
Megan says
I just followed these instructions tonight to set up our first compost bin. It took about 20 minutes altogether, and that includes the time it took me to wrestle an empty rubbermaid bin out of the attic. Thanks for posting!
YoungHouseLove says
Wahoo! Congrats! So glad to help.
xo,
s
Lyndsay says
I attempted this and it went very, VERY badly. I wish I had read this entry first. I used the same kind of bin and drilled holes in the bottom and top (and actually the sides, too, I think.) Then I just filled it with food waste and let it be. I kept adding and adding until it was full. (I never added leaves & soil or mixed it.) Then it filled with rain water. Then it started to rot, smell & leak all over our porch. I was afraid the wood would rot right out from under it, so I accosted my husband to drag it into the yard. WORST IDEA EVER. He said he & my sister dragged it down the stairs and it leaked rancid liquid all over them- so much so that they each ran to their respective houses and peeled their clothes off immediately. We have it currently hiding in the woods until I can figure out what to do with it. It haunts me in my sleep. Next time I’ll know to add leaves & soil. If there IS a next time… :/
YoungHouseLove says
Oh man – that sounds like a bad time! Hope the leaves and soil help!
xo,
s
Ben says
I am amazed at how fast after only one month that everything I put into is just about gone and that I have to add more, seems like you could end up putting a ton of scraps into a small plastic container
YoungHouseLove says
Wahoo! Your compost sounds like it’s doing its thing!
xo,
s
maribel says
The husband and I are starting a compost…in your post you mention that it would take 2-3 months before the compost would be ready. If that’s the case when do I stop adding scraps.
YoungHouseLove says
It’s awesome to have two bins going, that way when you want one of them to break down you can just put scraps in the other one so that one can “brew” and then it’s ready for use. Once you use it switch back to scraps in that bin and the second one can “brew.” Hope it helps!
xo,
s
maribel says
ok I just finished filling up my container with soil…a little hot and sweaty now so I will work on the another tomorrow. Thanks
YoungHouseLove says
Good luck!
xo
s
Monica says
Hey John & Sherry!
Is late September in Washington State too late to start this project?! Fall has definitely already begun here :)
Also- we have TONS of leaves here in this green state. should still only fill up to half?
Thanks you two. LOVE YOUR BLOG! Truly cannot stop reading :)
YoungHouseLove says
Hi Monica,
Unfortunately we’re still pretty green when it comes to composting so not sure we can provide expert advice on what to do in your state, but probably is best not to do much more than half full of leaves. We hear it’s important to have a good balance of brown matter (like leaves) and green (like kitchen scraps). Try Googling around for some more in depth info from real composters. :)
-John
Monica says
Thanks you two!
Jenn @My Southwestern Life says
Thank you guys so much for posting this guide. I’ve wanted to start composting for awhile now, but I didn’t know where to start, and all of the composting bins sold at big box stores are so expensive!!! I will be DIYing one like this.
Eka says
Found out your site from Pinterest :) Love the tip for easy composting. Your tips are just marvellous! If you don’t mind, I’d link your tips on my blog with direct link to yours, of course. :)
YoungHouseLove says
Sure thing. Thanks in advance for the link!
-John
Sarah says
Just came across your compost article. I saw that someone was looking for an option for a 3 seasons porch…I would really suggest they look into using worms for composting. You can use a container the same size without drainage holes on the bottom. You can have worms composting all year round much faster than a standard compost and it doesn’t smell if you don’t over feed. I have even brought mine in the house over winter with no issues and my parents have done the same thing, you would never know next to the back door is a working compost with 1000’s of red wigglers going to town!
YoungHouseLove says
Great tips Sarah!
xo,
s
Amber Smith says
I started a compost yesterday based off of your tips to making one. But, today I read that dirt isn’t needed for a compost and some say it may not be good for the compost. Why did you guys add dirt and do you think it is needed?
YoungHouseLove says
We were just following the tutorials we found online- it seemed to work well for us for years though! Perhaps the new no-dirt findings are more accurate than info from a while back though, so feel free to skip it!
xo,
s
Julia R. says
Is there any concern for leaking of BPA or other plastic products into the compost, which might then be absorbed by the garden, and then be in the food you eat from your garden?
YoungHouseLove says
If you look at the type of plastic of your bin you should be all good against BPA since the recycle code for that is #7 and most plastic bins are #4 or #5, which means they’re BPA free. If you’re worried you can still use the compost for non-edible things like planting trees and shrubs and buy organic compost for an edible garden. Hope it helps!
xo,
s
Karin says
My FIL used to compost by digging a hole large enough for an outside garbage can. He said it was much easier to haul it back out, and that he could cover it if necessary if kids were around so they wouldn’t fall in. :D
How’s the composting going? Any problems you’ve run into?
Thanks for posting!
YoungHouseLove says
That’s a cool method! Ours is going well. Very low maintenance and the soil we get is awesome.
xo,
s
Renae says
Finished this project today….easy, peasy….!!
Jessica says
I know this is an old post, but I just came across it. Did you end up buying worms to put in your bin, or did they make their way in the bin on their own? Also, since fall is upon us, do you think it would be smart to wait until the spring to make my compost bin, or could I start it now? Thanks!
YoungHouseLove says
I wish! We haven’t done it yet but I’d love to!
xo,
s
Caroline says
Yep. I’m gonna do it. My hubby is against composting because it will attract unwanted animals (we already have a ton of squirrels and rabbits… we’ve also had a wild turkey in the past!) but this seems like a good way to be green and keep away the stench and animals! (Plus I’m going to attempt to turn my black thumb green and, with the help of my neighbor, start a garden this summer growing veggies!)
Catherine Wood says
Do worms naturally wriggle their way up into the bin? If they’re not coming up enough, you can always buy worms from someone like Uncle Jim’s Worm Farm. They sell all kinds of worms but red wrigglers are the best for composting! My husband and I recently made a worm farm and I LOVE not throwing our food scraps into the trash anymore!
The method I found uses 3 bins. The top is for scraps and worms, the middle is extra space and the bottom is where the liquid (worm tea) goes!
Love your post!
http://unclejimswormfarm.com/
http://happilyevercrafterz.blogspot.com/2013/04/diy-worm-farm.html
YoungHouseLove says
Love the tips! Worms definitely found their way into our bins :)
xo
s
KMcD says
What about ants? We have a bit of a problem with ants in my beds. It seems like they’d be very attracted to the kitchen scraps. Have you ever had a problem with ants? Haven’t started yet, just trying to trouble shoot early:)
YoungHouseLove says
We never had an issue with them in our first compost bin or our second one. Maybe it depends on where you live though! Anyone else have ant issues?
xo
s
Scott says
This is a great idea. I never thought of making my own compost bin. Very cool :)
Leah says
Is there a certain point (time passed, or how full the bin gets) that you start a new bin?
Also, is it okay if bugs were to get in?
Thanks so much!
YoungHouseLove says
When we have filled it for about a month with good stirring as we go, we usually switch to the second bin and let that compost chill for a few more weeks and then use it to plant!
xo
s
bill@Wedding Dj Yorkshire says
I am so glad I found your blog. I really needed this for my garden. This would help my veggies in the garden grow better. I read it somewhere that the best vegetable grow with home made compost. Thanks for sharing.
Camille H says
Thank you so very much for posting this. Wow, so simple and easy, this is what I’ve been looking for.
katie says
I know this is an older post, but I finally did it! It does work just as you described, even if you are a slacker like me and forget about the bin most days! It’s so nice enjoying the fruits of my labor. Thanks! :) http://2-miracles.blogspot.com/2014/09/black-gold.html