Remember this old post about all the fun projects we were daydreaming about taking on with some bonus cash from BHG’s 48-Hour Challenge? Well 20,000+ votes later (!) we didn’t win the 5K (congrats Nicole!), but the good news is that plenty of those projects are still on the agenda. In fact, two of them are already completed! Remember we spruced up our patio a few weeks ago with a DIY firepit and some cheap-o lounge chairs? One down, four to go.
Well, better make that three because we’re back to share the second project that we tackled on the sly. We hinted at wanting to “introduce some layered, textural interest in the half bath” but then decided not to delve into details and surprise you guys instead. Well… surprise!
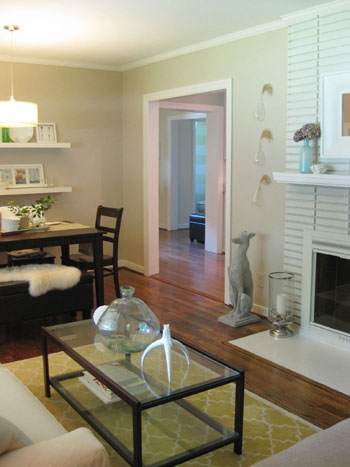
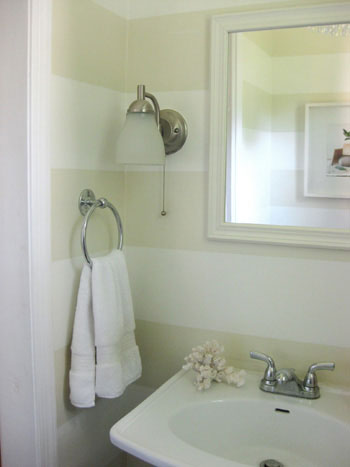
See that cream on cream texture that’s visible all the way from the front door? Let’s get closer shall we?
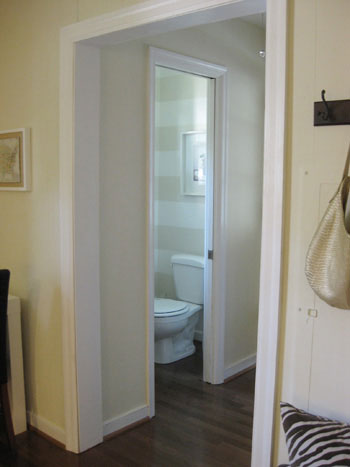
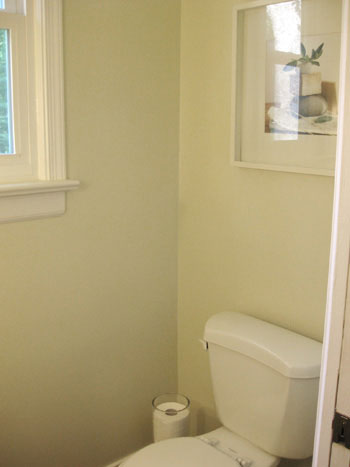
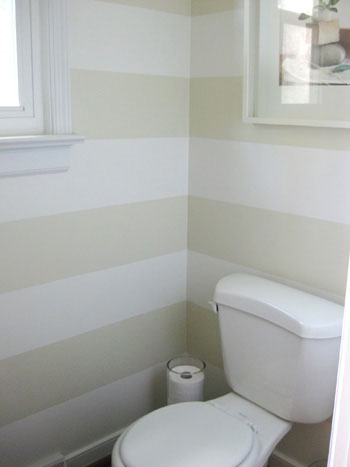
Yup, we painted cream on cream horizontal stripes in the half bathroom! It used to be the same tone as the hallways and the adjoining den (Wishes by Glidden) but we decided to amp it up in that jewel box of a bathroom with some lighter stripes to make the room feel a little more expansive (horizontal stripes have a way of creating that effect) and a heckova lot more interesting. Jenn’s Design Star makeover from last summer was actually our inspiration- it just took us twelve months to make it happen. Here’s the bathroom before our little paint intervention:
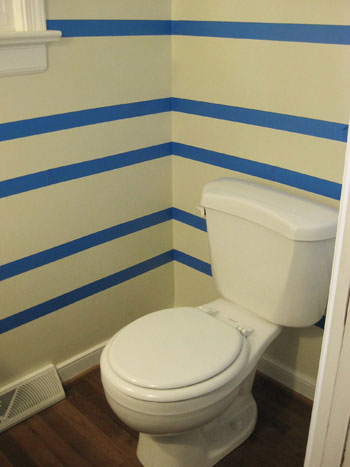
The entire project took just 4 hours one evening, and the steps were really simple:
Step 1: Divide & Conquer- Measure the full length of your wall and divide that number by twice the number of stripes that you want to have minus one (ex: our ceiling is 98″ tall and we wanted six horizontal stripes so we divided 98 by 11 (6 x 2 = 12 – 1 = 11) to get the thickness of each stripe. Ours came out to about 8.9 inches.
Step 2: Make Your Mark- Use a ruler to mark off every 8.9 inches starting from the floor and working up to the ceiling (we made two small pencil marks on each wall, one on each side).
Step 3: Tape It Off- Grab some blue painter’s tape and connect your pencil markings to create taped off stripes (once the tape is in place rub it a few times so you know that it’s flush with the wall for cleaner lines). The main thing to remember is that the tape should go outside the marks for the stripes you’ll be painting but inside the marks in the negative space that you won’t be painting. This might sound confusing, but just ask yourself if you’re taping off the stripe or the negative space as you go, and make sure the taped stripes are the right distance apart (ours were 8.9 inches) while the tape for the negative spaces is closer (once you remove the tape both areas will be the same width).
Step 4: Roll With It- Grab a good roller and some slightly lighter or darker paint (subtle is key for this look, so just going a shade or two away from the wall color makes for a soft layered look). Then apply two even and thin coats of latex paint between the tape that’s further apart to create your stripes. You’ll also need to use an angled brush to cut in near the base molding and the ceiling.
Step 5: Take It Off, Baby- This is a very very very important step. It’s crucial that you remove every strip of tape as soon as you’re done with your second coat of paint while the paint is still wet (assuming the coverage is good enough that you don’t need a third coat). Waiting to remove the tape until after the paint has fully dried will cause peeling and uneven lines that are less than crisp (which will make you want to cry after all that taping). In short: as soon as your roller is down, start pulling that tape off the wall for a clean stripe that looks seamless and sleek.
There you have it. Horizontal wall stripes. Easy eh? Oh and we used a quart of Valspar’s Honeymilk for the stripes because we actually had a $10-off coupon to Lowe’s. And thanks to that $10 off coupon, this entire project came in at just… (drumroll please)… $2.48. Gotta love that bang-for-your-buck upgrade!
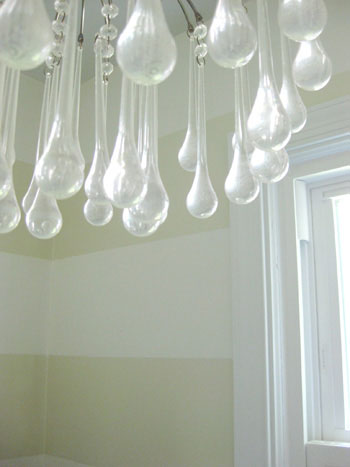
We really like how our crystal tear-drop chandelier (a cheap-o Urban Outfitter’s score from a while back) looks even more dreamy with the soft stripes around it.
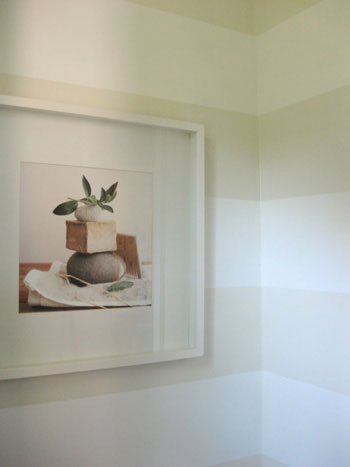
And our $9.99 art somehow feels even more spa-like with the tone on tone stripes:
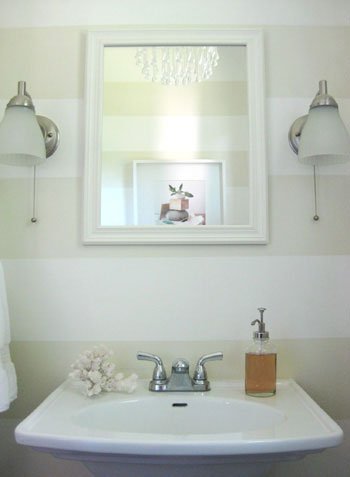
We also feel particularly lucky that our stripes ended up framing our wall sconces perfectly (of course this is something you can ensure by starting your stripes in that area and working up or down to tape off the rest of them so nothing cuts through your lighting at a funny spot).
So there it is. Our under $3 bathroom makeover. We’ve always had a soft spot for stripes (take our blog’s background for example, or our recently striped porch) and I guess we just had to bring ’em into our tiny half bath to fully embrace the linear love.
What do you guys think? Did any of you take on any cheap-o projects this weekend? Any striping stories of your own? Do tell.

Simon Mayport says
Bravo on what is an amazing and thought provoking wall makeover. I am always most impressed by the simple touches that give a real design aesthetic with little or no effort!
Kelly@ Feathered Flower says
I’m so dying to try this… now I just need the time to get started! Thanks so much for the inspiration!
Steph says
Question for you guys: my husband and i are planning to do something similar to this on one of the walls of my son’s nursery. we want to do x’s that start at the top of the wall and go down to the bottom. i know you said to pull off the painter’s tape while the paint is wet, but just to be clear, do you paint one coat, wait for it to dry, paint another, then pull off the tape? do you have to wait for the first to completely dry? what is the best method? just want to make sure we get this right because the taping is time consuming and we definitely want to avoid having to do it all over again!
thanks much!
steph
YoungHouseLove says
Yup, just try to do both coats semi close together (don’t wait 24 hours or anything) and pull the tape the second you’re done with the second coat (which should reset the first coat for a nice clean pull). Hope it helps!
xo,
s
christie says
I totally followed your advice and my husband and I painted our own bathroom stripes!
Thank you for your easy to maneuver and replicate instructions!
we are so happy with the results!
If interested – take a look:
easy how-to DIY bathroom stripes on grey wood steel blue blog:
http://greywoodsteelblue.blogspot.com/2011/03/bathroom-stripes.html
YoungHouseLove says
Love it! Awesome job!
xo,
s
Courtney says
LOVE LOVE LOVE! I am going to do this exact project in my mother-in-law’s bathroom for her. As for my house, I have a second bedroom I am currently re-doing. I really love the striped look and have found two subtle colors to use BM Woodmont Cream and BM Limestone.
My second bedroom is 11.5×11.5 with 9+ foot ceilings. There will be hardood floors and roughly 10inch moulding at the top.
How wide should my stripes be? I tested them at 12inches each in one corner of the room and love it, but have no idea if those are too big or too small for an entire room?
This will, hopefully, one day be a nursery. Thoughts?!!
Thanks and be well!
Courtney
YoungHouseLove says
12″ each sounds perfect – especially if you’ve tested it and love it! We say go for it!
xo,
s
Courtney says
Thanks so much for your incredibly quick response! I’m going to go for it!
Last question, what is the second color on top of glidden wishes in your bathroom? I’m going to replicate it exactly for my MIL’s bathroom!
Thanks!
Courtney
YoungHouseLove says
That’s Valspar’s Honeymilk. Hope it helps!
xo,
s
Joe says
Thank you! Particularly, for sharing the math! I never know how to figure that out and now it’s a simple as basic arithmetic. Thanks so much! And what a beautiful home.
miranda says
Do you happen to remember a paint color that would have this effect with the color “Sand White”? I would love to do these stripes but want them super subtle like this. Thank you for any info!
YoungHouseLove says
Maybe try Glidden’s Water Chestnut or Wishes? They’re both a little lighter and hopefully should work. Good luck!
xo,
s
Casey Burke says
I’ve painted horizontal stipes many times-mostly in finished basements(especially ones with low ceilings or that are tight in space-it tends to give the room a larger more roomy feeling w/the right colors)One great tip I’ve learned over the years when painting stripes or any patterns involving two colors up against eachother,is using a caulk-thinly smeared over the edge of where the tape meets the wall(before any painting is done)This forms a sealant like shield that prevents the paint from seaping or bleeding under the tape-leaving imperfections in the straight lines you’re attempting to achieve when painting 2 toned pattern.In other words-after taping,and before picking up any paint brushes,use your finger to smear a thin layer of caulk over top the edges of the tape and the wall(about 1/2 inch of caulk should cover both the tape and the wall)Allow the caulk to dry,and then proceed with painting.You’ll see an amazing difference in the straightness of your lines when using this method compared to just using tape to prevent your colors from bleeding.I agree with the helpful hint this site gives at the end of the steps-of removing your tape before your last coat dries!Try it out!
YoungHouseLove says
Love this tip! Thanks so much!
xo,
s
lynn says
love the stripes and your interior! if you don’t mind my asking, where did you get the yellow rug on your living room? i have a big crush on it. :)
YoungHouseLove says
That was from Pottery Barn a while back (called the Moorish Tile Rug). Maybe try ebay?
xo,
s
Melissa says
Hello! I have wanted to share the stripes that I painted in my daughter, Lily’s, nursery. Your advice was very helpful! I hope you like it:-) By the way, Clara and my Lily are birthday buddies. http://popsiclesandpaint.blogspot.com/2010/05/lilys-room.html
YoungHouseLove says
OH MY GOSH IT’S AMAZING! And so sweet that C & L are b-day buddies!
xo,
s
MARY A says
I have a large master bathroom, but for some reason the toilet is walled into a room of its own. I’m going to use the horizontal stripes, but any ideas for decorating the walls on a room so long and skinny?
YoungHouseLove says
Maybe add a gallery of frames to the wall to further break things up and stop the eye?
xo,
s
amanda says
This painting idea also looks great if you mix the paint you are using for your stripe with a glaze. I did vertical stripes on one wall in my dining room for a accent. So soft and pretty. It’s been 5 years and I still walk by and just stare at the wall!
YoungHouseLove says
Sounds so cool!
xo,
s
kim says
I just painted my half bath with gray and white stripes. I got the idea from your post and it looks awesome! I’m using yellow accents (table, rug, hand towel) to pull it all together. Thanks for the idea!
Sami says
Love the look! We’re attempting to replicate this in our half bath right now, but since our house was built in the 40’s, we found that there is about a 1/2 cm difference in the height from one corner of the room to another (which is making taping a nightmare!) Any thoughts on making up the difference?? Our painted stripes will not touch the baseboard or the ceiling.
YoungHouseLove says
I would just tape them off so they’re level (the 1/2 cm difference hopefully won’t be noticeable at all once you paint things as long as the stripes themselves read as level. Good luck!
xo,
s
Dani says
I am soon-to-be a homeowner for the first time, and a friend sent me a link that included a link to you guys. I’m so glad he did! Our new home is a cute, little red-brick Cape Cod. It is just a little thing, but perfect for us. I just went to Home Depot last night and picked out paint swatches. Then I found your blog and feel the need to rethink my choices.
A couple questions: you talk about keeping colors flowing to make a small house look more open. Our house isn’t really an open floor plan to begin with, so can I still use bright colors in small doses without making the house look even smaller? For example, a bright blue accent wall in the living room? Or yellow in the bathroom with creams and tans in the surrounding rooms? And speaking of yellow in the bathroom, how can this striping technique be used (safely) with brights?
I will be a frequent visitor to your blog in the future!
YoungHouseLove says
You definitely can use pops of color in certain strategic spots (sounds cheerful and fun!) just try not to make every room a different bright color so it doesn’t feel broken up and disconnected. Things feel airier and more open if they relate and sort of blend into each other whether it’s an open plan or a home made up of small rooms. Hope it helps!
xo,
s
lyndsay says
how would you add color to this look in a full bathroom — with towels, rugs, etc? what would you add in for a beautiful, eye catching pop?
YoungHouseLove says
Ooh maybe a big colorful chandelier (in ruby red or turquoise or emerald?). Of course towels and rugs and other accessories (the shower curtain) can add color too!
xo,
s
Mackenzie says
I Love this! My husband and I have purchased a 1950s ranch style home and I have been trying to figure out our tiny bathroom for over a year. It has honey oak trim and window sills. Do you think the same color scheme would look good? Thanks for the inspiration
YoungHouseLove says
Oh yes- I think it’ll look great!
xo,
s
Alison says
Love the stripes! I’m in the process of striping an accent wall in my baby girl Clara’s room…then I realized that you also have a baby girl named Clara. Love the house and the name! Thanks for the instructions on how to measure.
YoungHouseLove says
Too funny! Good luck with it!
xo,
s
Jen says
I love this!
How did you keep the tape from causing the already-painted parts of the wall to peel up when you took it off?
YoungHouseLove says
We just didn’t have that issue! Hope it helps!
xo,
s
Lucy says
loves this so much its lush cant wait to try this :)
Heidi says
Thanks so much for the great tutorial! It was a huge help in painting a nursery last weekend. I linked back to this page in my blog post:
http://heidischatze.blogspot.com/2012/03/isaacs-crib-he-got-striped.html
Thanks for all your great work, sharing, and pumping us up!
Amy C says
This is project is literally causing a code red meltdown in my house as I type this… we can’t get the lines to line up and just took the tape off to re-measure and tape and took part of my base coat with it. Literally crying…
YoungHouseLove says
Oh Amy I’m so sorry!! I’ve totally been there when DIY implodes and you want to cry, but I promise if you stick with it 9 times out of 10 it’s all ok! And everything is less disastrous in the morning. Crossing my fingers for you!
xo,
s
Amy C says
Just wanted to report that after I had a good cry, pulled up my socks and when back at it sans laser level and used a good ol’ level and my eyes… turned out beautifully! So glad that we battled through because it was totally worth it!
YoungHouseLove says
So glad!! Congrats!
xo,
s
Stephanie S says
Love your stripes, thanks for the inspiration and making it seem not so scarey!
I am dying to know where your glass/metal framed coffee table in the living room is from?
I am looking for a replacement for ours and absolutely love yours!
Thanks!
YoungHouseLove says
We found that at a thrift store! But we’ve seen a similar one on sale at Pottery Barn I think!
xo,
s
Anita says
I love the look of stripes in the bathroom! What is the other color used besides the Valspar Honeymilk?
YoungHouseLove says
That was Wishes by Glidden. Hope it helps!
xo,
s
Katy says
Do you think having only 9 stripes is too few? Our walls are 93″ and in order to avoid extra painting/taping I wanted stripes of at least 10 inches. How much of a difference in the overall look does that extra inch and change make?
YoungHouseLove says
I would do nine stripes – it’ll look great!
xo,
s
Hersha says
I love it and want to do this in a tiny room I have, but I have a question: did you paint the wall one color entirely first and then fill in with the stripes? And if so, did you paint the wall all the dark color or the light color first? I am new to YHL and really love you guys! You are so inspirational :)
YoungHouseLove says
Yes, we painted the whole wall Wishes (the darker color) and later added the stripes. Hope it helps!
xo,
s
Gillian says
This looks so fabulous! I have been looking for inspiration for my bathroom for a few weeks and I have finally found it. I’m painting my bathroom like this today!
Claire says
My husband and I are considering a two-tone paint job for our office. Friends of ours insist that we need to use caulk in addition to painters tape to get clean lines. Doesn’t look like you used it on this one. What’re your thoughts?
YoungHouseLove says
Nah we didn’t need it. If your walls are flat (not textured) and you use frog tape you should be great! Rip the tape down when the paint is still wet for the cleanest lines (after the last coat of course, not between).
xo,
s
Leah Kerbs says
Hi! I just bought the paint to do this in my bathroom!! I’m so excited…thanks for the inspiration! :)
mildred says
Your bathroom is awesome. I like the 2 tone color you have chosen and the instructions was great. I would like to know exactly the colors you used the brand of paint youve use
Because I was going to use your idea and try it on my bathroom too. I appreciate your help. And again your house is beautiful and thank you for inspiring me as well.