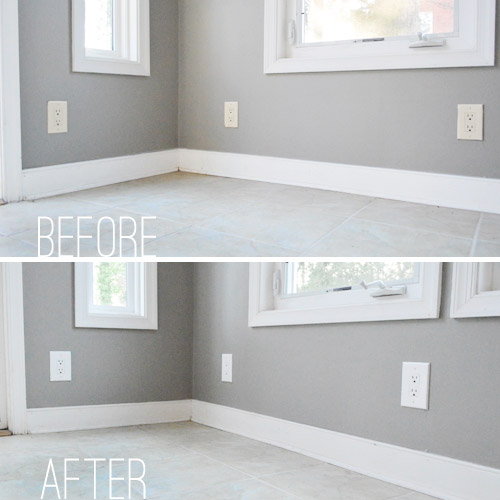
While our sunroom mojo was still running on high from accomplishing our most daring painting task to date, I quickly followed up with two small electrical updates to the room. The first is seemingly minor, but to us makes a world of difference in making a room feel new: updating outlets. It’s something that was especially helpful in a room like our sunroom where the off-white outlets just look dirty against the white trim.
A basic new outlet and cover plate can run you as little as $2-3 so it’s not a pricey update – even for an outlet-riddled room like ours (there were nine in here). And the task of replacing them is pretty straightforward too. Maybe a bit tedious, but certainly not backbreaking. So I actually put together a little graphic tutorial for easy reference if anyone else wanted to update some outlets in their home. I’m not a trained as electrician in Perth, so I can’t say this is an expert how-to or that it’ll work for every home out there, but so far it has served us quite well.
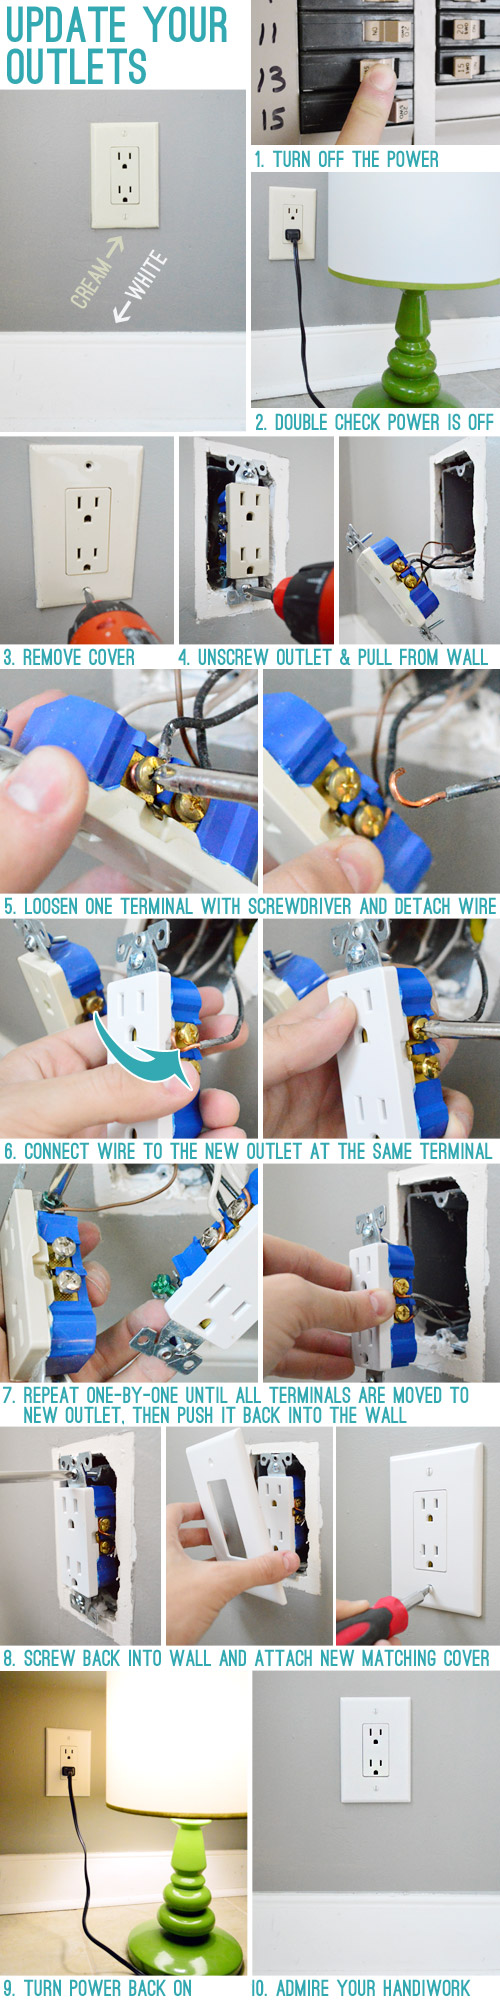
Switching out all 9 outlets – plus two switches – took me a little over an hour. But it made the room feel a couple decades newer to our eyes (we’ve heard of folks who spray paint their outlet covers but you can’t spray the actual outlets so in our world it was worth the $25 that we spent to update all of the covers and the outlets themselves in one long-lasting fell swoop). Oh and for anyone looking to sell, this is one of those things that’s pretty straightforward and inexpensive but is actually good for resale (it makes the whole room feel updated and even more crisp when it’s combined with fresh paint on the walls).
Now on to my less successful electrical project in the room: adding a light to the ceiling fan.
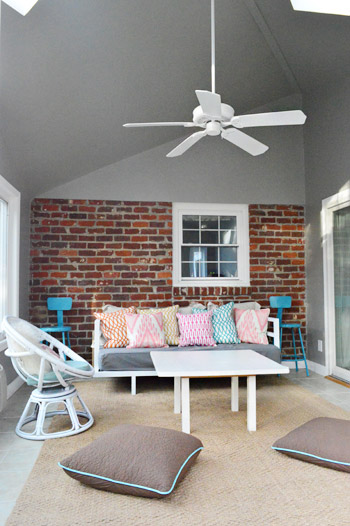
This room has no lights in it. So just as it’s sun-filled during the day, it’s pitch dark at night. So when my mom enlightened me that they sell kits to add lights to existing ceiling fans we immediately had our game plan in mind (which included this vintage-ish Ceiling Fan Light Kit found at Home Depot).
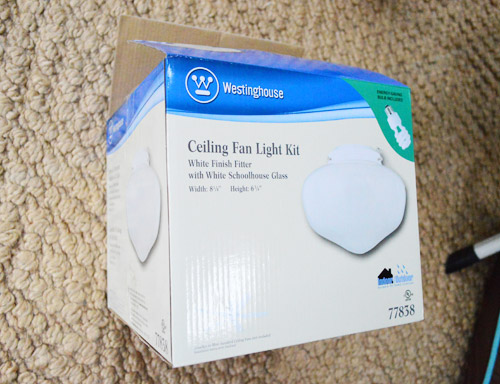
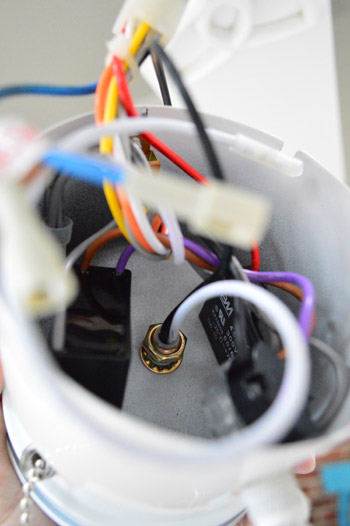
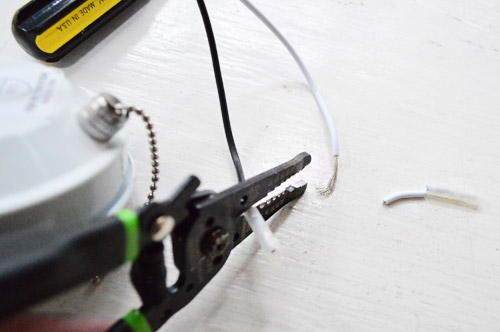
I was pretty stoked about the price of the add-on light fixture ($20) and the schoolhouse style was pretty decent too. So in my excitement I kinda sorta might’ve skipped over the directions and started taking the fan apart to see how it connected (after turning the power off to the room). It was quickly apparent that this colorful mess of wires didn’t match up with the simple black and white wires that the light kit came with.
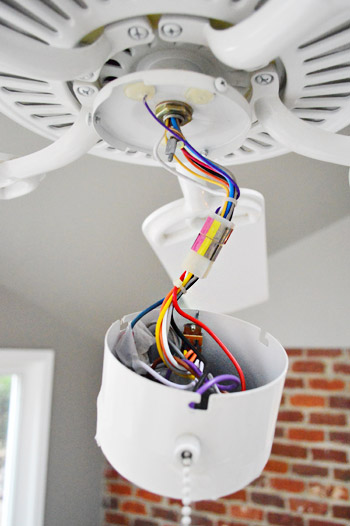
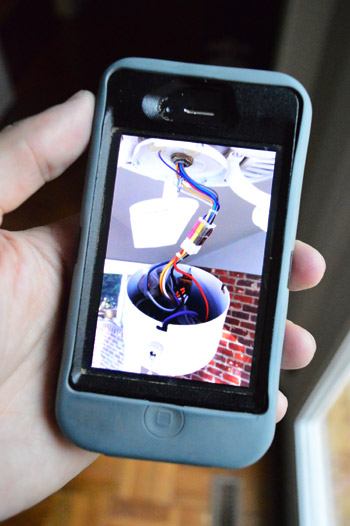
Convinced I had purchased the wrong kind of light kit, I returned it to the store and brought a picture of my wire situation to show the lighting lady at the store in hopes that she could point me in the direction of a kit that worked for my fan.
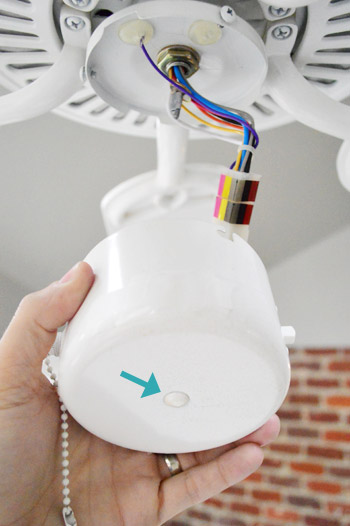
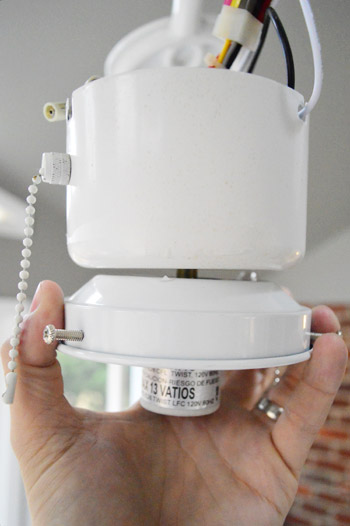
Well, after a short discussion (that uncomfortably involved the word “nipple” a lot) she informed that I did in fact have the right kit, I just wasn’t following instructions correctly (oops). Apparently I was supposed to pop out the small cover on the bottom of the fan (see below)…
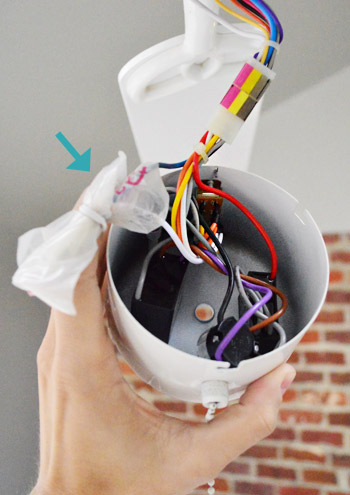
…and connect the black and white wires on the kit to the two corresponding wires in the fan. I just had missed them because they were wrapped up in a plastic bag which, had I looked more closely, was labeled “for light.” Duh.
With renewed confidence I started piecing the light and fan together. I started by screwing the light fixture’s, um, nipple into the fan cover…
…and securing it in place with a nut.
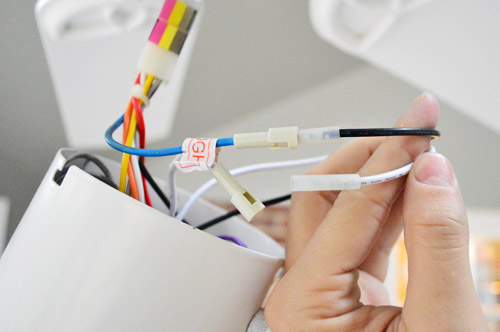
Then – in what promised to be the easiest electrical connection I’d ever done – I simply plugged the wires from the light into the ones on the fan (blue into black was correct according to the instruction I had finally cracked open).
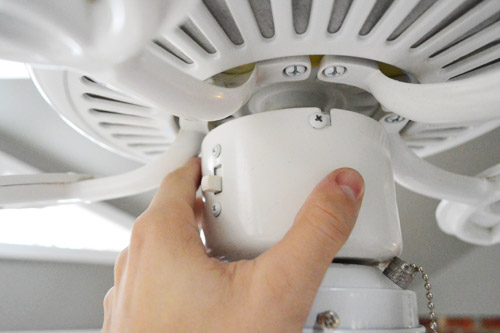
Certain I had done things right this time, I twisted the fan cover back into place and flipped the power back on.
And nothing happened. The fan would turn on, but not the light. I pulled the chain a few times to make sure it had switched on. I flipped the switch at the wall back and forth. I disconnected and reconnected the wires a couple of times.
Nothing.
After some Googling I found a few other things to try. First was buying another kit from the store, just in case the one I had gotten was a bum one. Nope, still didn’t work. Then I saw somewhere that I should try hardwiring it by exposing the wires (i.e. cutting off the provided plugs) but that didn’t make it any better.
So after all those attempts (and a couple of extra trips to the home improvement store) I’ve determined that the issue is not with my light or with my fan – it’s at my ceiling. I must be one of the lucky homeowners where the original fan installer opted not to connect the wires for the light up there, figuring they weren’t going to be used since he was just installing a fan without a light kit.
![]()
So this is where Sherry and I officially called the project a bust. Sure I could buy a taller ladder or rent a scaffold to help me access the wiring that’s 12 feet up in the air, but that seemed a bit extreme for what we assumed would be a quick and easy (and inexpensive) project. So for now, here’s our solution:
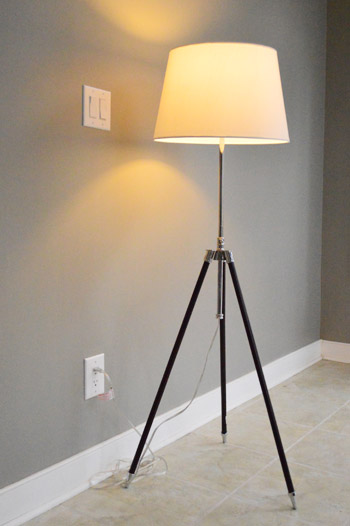
Yup, it’s a floor lamp stolen from the bedroom (since we noticed that we never turn it on in there thanks to an overhead light along with two bedside lamps). Not quite as elegant of a fix as true overhead light would have been – and who knows if we’ll properly wire things down the line – but for now it works.
What sort of electrical adventures have you guys been up to lately? Did anything go super easily (cough-outlets-cough)? Or did something turn out so hot (cough-stupidfan-cough)?

Leave a Reply