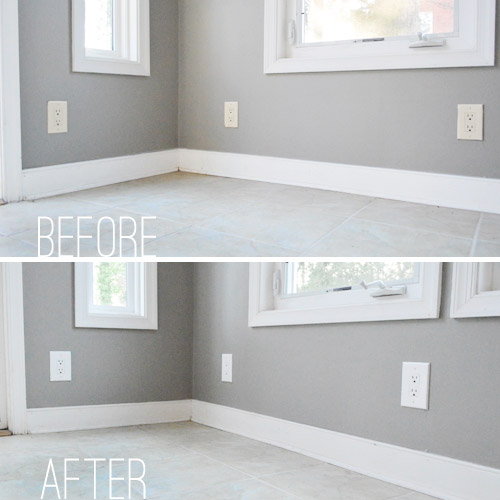
While our sunroom mojo was still running on high from accomplishing our most daring painting task to date, I quickly followed up with two small electrical updates to the room. The first is seemingly minor, but to us makes a world of difference in making a room feel new: updating outlets. It’s something that was especially helpful in a room like our sunroom where the off-white outlets just look dirty against the white trim.
A basic new outlet and cover plate can run you as little as $2-3 so it’s not a pricey update – even for an outlet-riddled room like ours (there were nine in here). And the task of replacing them is pretty straightforward too. Maybe a bit tedious, but certainly not backbreaking. So I actually put together a little graphic tutorial for easy reference if anyone else wanted to update some outlets in their home. I’m not a trained as electrician in Perth, so I can’t say this is an expert how-to or that it’ll work for every home out there, but so far it has served us quite well.
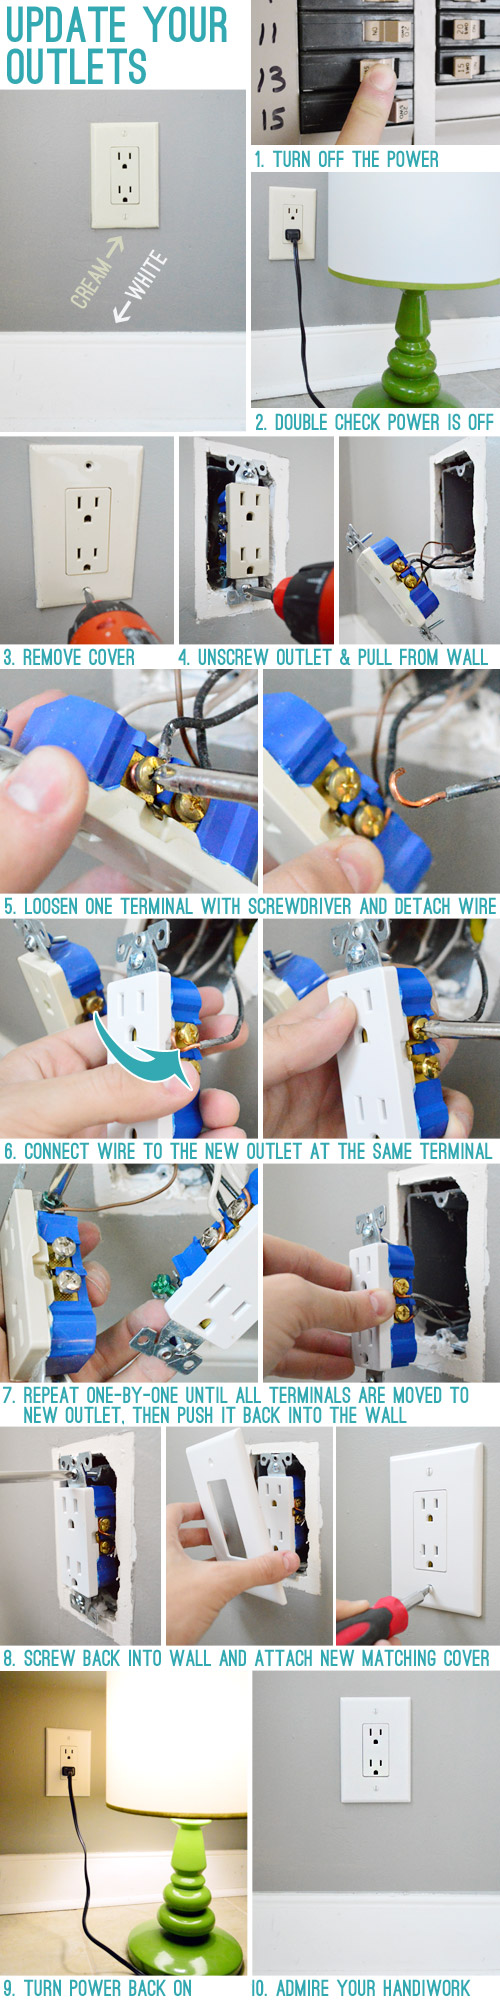
Switching out all 9 outlets – plus two switches – took me a little over an hour. But it made the room feel a couple decades newer to our eyes (we’ve heard of folks who spray paint their outlet covers but you can’t spray the actual outlets so in our world it was worth the $25 that we spent to update all of the covers and the outlets themselves in one long-lasting fell swoop). Oh and for anyone looking to sell, this is one of those things that’s pretty straightforward and inexpensive but is actually good for resale (it makes the whole room feel updated and even more crisp when it’s combined with fresh paint on the walls).
Now on to my less successful electrical project in the room: adding a light to the ceiling fan.
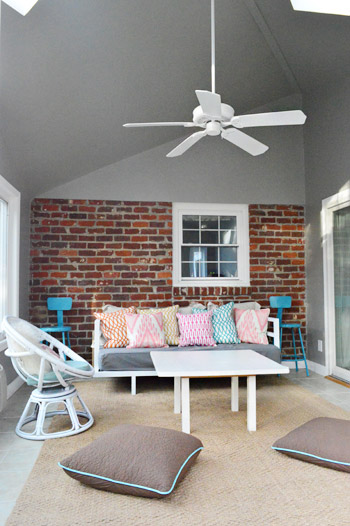
This room has no lights in it. So just as it’s sun-filled during the day, it’s pitch dark at night. So when my mom enlightened me that they sell kits to add lights to existing ceiling fans we immediately had our game plan in mind (which included this vintage-ish Ceiling Fan Light Kit found at Home Depot).
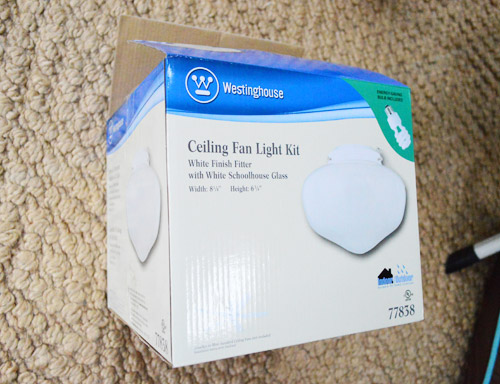
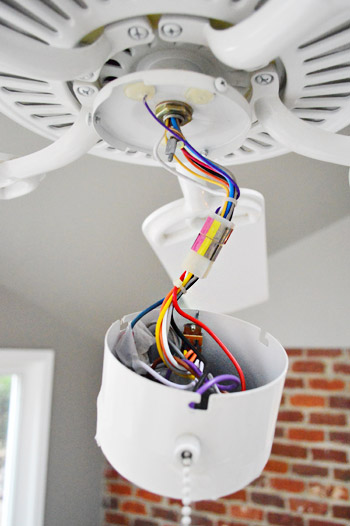
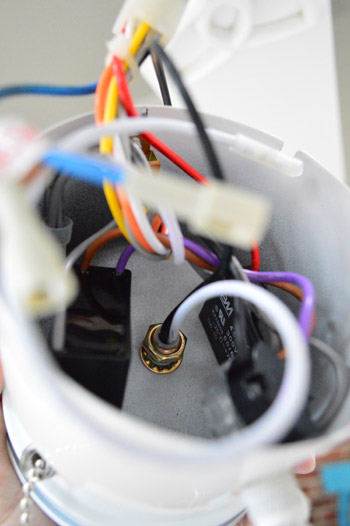
I was pretty stoked about the price of the add-on light fixture ($20) and the schoolhouse style was pretty decent too. So in my excitement I kinda sorta might’ve skipped over the directions and started taking the fan apart to see how it connected (after turning the power off to the room). It was quickly apparent that this colorful mess of wires didn’t match up with the simple black and white wires that the light kit came with.
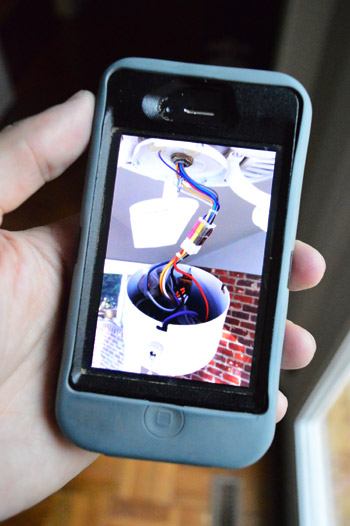
Convinced I had purchased the wrong kind of light kit, I returned it to the store and brought a picture of my wire situation to show the lighting lady at the store in hopes that she could point me in the direction of a kit that worked for my fan.
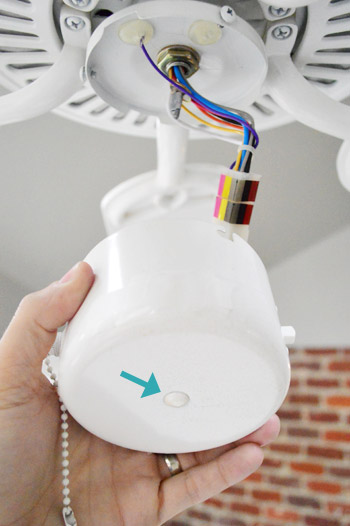
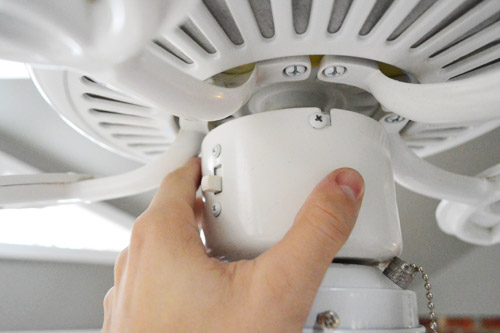
Well, after a short discussion (that uncomfortably involved the word “nipple” a lot) she informed that I did in fact have the right kit, I just wasn’t following instructions correctly (oops). Apparently I was supposed to pop out the small cover on the bottom of the fan (see below)…
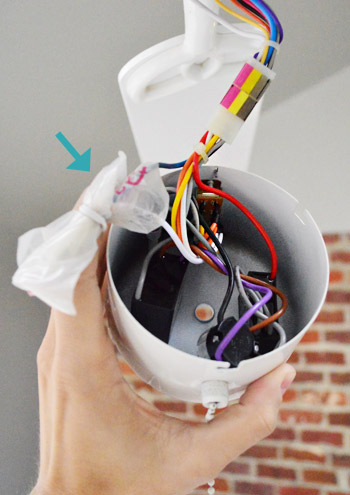
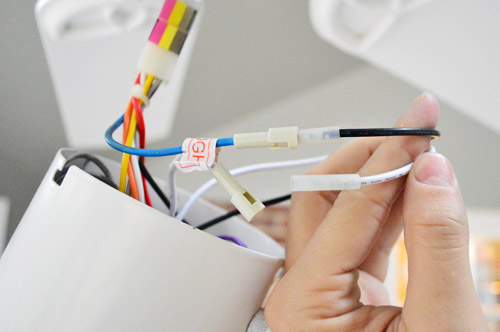
…and connect the black and white wires on the kit to the two corresponding wires in the fan. I just had missed them because they were wrapped up in a plastic bag which, had I looked more closely, was labeled “for light.” Duh.
With renewed confidence I started piecing the light and fan together. I started by screwing the light fixture’s, um, nipple into the fan cover…
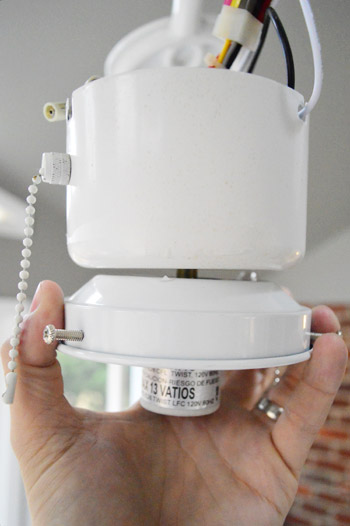
…and securing it in place with a nut.
Then – in what promised to be the easiest electrical connection I’d ever done – I simply plugged the wires from the light into the ones on the fan (blue into black was correct according to the instruction I had finally cracked open).
Certain I had done things right this time, I twisted the fan cover back into place and flipped the power back on.
And nothing happened. The fan would turn on, but not the light. I pulled the chain a few times to make sure it had switched on. I flipped the switch at the wall back and forth. I disconnected and reconnected the wires a couple of times.
Nothing.
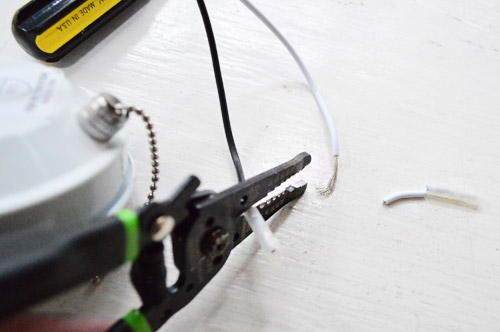
After some Googling I found a few other things to try. First was buying another kit from the store, just in case the one I had gotten was a bum one. Nope, still didn’t work. Then I saw somewhere that I should try hardwiring it by exposing the wires (i.e. cutting off the provided plugs) but that didn’t make it any better.
So after all those attempts (and a couple of extra trips to the home improvement store) I’ve determined that the issue is not with my light or with my fan – it’s at my ceiling. I must be one of the lucky homeowners where the original fan installer opted not to connect the wires for the light up there, figuring they weren’t going to be used since he was just installing a fan without a light kit.
![]()
So this is where Sherry and I officially called the project a bust. Sure I could buy a taller ladder or rent a scaffold to help me access the wiring that’s 12 feet up in the air, but that seemed a bit extreme for what we assumed would be a quick and easy (and inexpensive) project. So for now, here’s our solution:
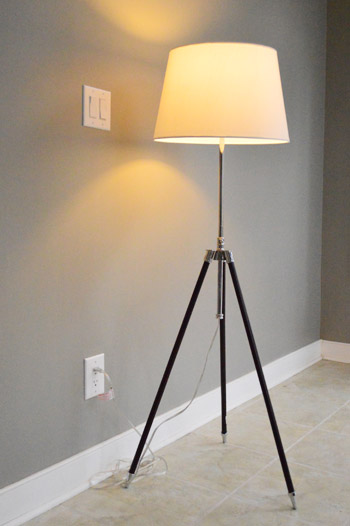
Yup, it’s a floor lamp stolen from the bedroom (since we noticed that we never turn it on in there thanks to an overhead light along with two bedside lamps). Not quite as elegant of a fix as true overhead light would have been – and who knows if we’ll properly wire things down the line – but for now it works.
What sort of electrical adventures have you guys been up to lately? Did anything go super easily (cough-outlets-cough)? Or did something turn out so hot (cough-stupidfan-cough)?

Amy says
I just had a dining room light switched out last week. The old light (probably original to my 1911 house) only operated by a little knob of the fixture, so I had to have an electrician out to run wiring and install a wall switch. It’s so nice not to have to stand on a chair to turn on the dining room light!
I have some outlets that need to be changed out soon too! For some reason all the kitchen outlets are a chocolatey brown and the cover plates are cream colored.
Brittany aka Pretty Handy Girl says
Bummer on the light kit. I had to add a light kit to our master bedroom fan. Lucky for us, I was able to crawl into the attic above the room and actually run a second power line for the light kit (being in the same boat as you were with only one set of electrical wires feeding the fan.
I do like your lamp though ;-).
Leslie says
I am sure you will come up with the perfect solution to the brick wall and there are so many comments I am not sure if someone already said this, but anyway, another alternative to painting the brick…
despite the weird drywall lip action, the drywall above the brick might be the perfect place to try out some stained wood/pallet wall type treatment. the two textures might minimize the different depths of the wall, as well as bring some brown tones into the room which tie back to your table and potential tv stanhd in the living room. just a thought…
YoungHouseLove says
Oh yes, that could work if we wanted to emphasize the ceiling! Sadly that wall is wonky (it leans wayyyy to the right at the top) so we think it’ll look skewed so we like downplaying that with the paint. Hope that makes sense!
xo
s
Kasey Befeler says
While I painted for my sister this weekend, my handy hubby added light kits to all of her existing/mostly not wired to the switch/ceiling fans. (Didn’t tackle the 20′ one in the great room yet though!) Over the years he’s learned electrical through books, trial and error, and watching professionals wire and asking questions. He even took an electrical test with the city so he could wire our house when we gutted/renovated/rebuilt it – saved us tons. Sometimes he gets exasperated, especially when someone else has wired something crazy-wrong (or not wired it at all), but it’s so rewarding when he can figure it out.
Cassie says
We closed in a cut out on one side of a wall and added a door to the other to make it a closet so we didn’t waste the space (the cut out was in a really weird spot in the family room and didn’t work with the set up we wanted). But the light switch on the wall where we put the door wouldn’t fit (it has 3 switches on it and the wall isn’t very big, door is 18in) and the wiring was a total wreck and there was no way we could make it a 2 switch plate with a 1 switch plate above it so instead, our light switches are sideways. I don’t love it, but I love the closet so for now that’s how it will be!
Whoa. Hope that makes sense.
p.s. glad the book is back on amazon!!
YoungHouseLove says
The closet sounds awesome!
xo
s
CampDallas says
I think you wrote this post for me. We just (okay, July, but it still looks like we ‘just’) moved into a 1990 ranch that has 2300 square feet of beige galore. Beige walls, beige carpet, beige countertops, beige showers, beige toilets….you get the drift. We are in the process of painting the (beige) trim bright white and the outlets are next. You’ve just inspired me to skip having our handyman do it! Let’s see what my husband, who has a rule of thumb about avoiding electrical projects, thinks!
YoungHouseLove says
Haha, good luck!
xo
s
Jasmine says
I wondered if you guys ever ran into electrical issues like this, not to be mean but it makes me feel a little better knowing that we’re not the only people who bought a house with electrical issues. When we bought our home all four bedrooms had fans (none matching) that did not turn on with the light switch. When we tried to replace them with overhead lighting (no fan) it still did not work because the previous owner had rigged the electric. Now we have no fan or light and are trying to get estimates to re-run the electrical in all rooms. Arghhhhh what a headache! We’re also stuck with using lamps in all rooms and it’s a major pain.
Titus Contracting says
Love the outlet tutorial. Sorry the ceiling light turned out to be a bust.
Amelia R. says
Erm, you checked to make sure there were bulbs in the light, right?
YoungHouseLove says
Haha, yes!
xo
s
MarieRoxanne says
I took an electrician course and I still don’t like going on a ladder… I don’t feel safe while my hands are busy over my head and my feet feel very unstable. So I do everything while my feet are on the ground and somebody else can do the high stuff!
Jennifer Cooper says
The ceiling fan incident is usually how our DIY projects end at our house. Nice to know the “pros” have those days too.
Jessica says
Way to call quits on this project. At about this point I start hearing knocking on the ceiling and a muffled voice from the rafters asking how close he is!!
Caitlin Skoda says
Where did you guys get the lamp that became your solution? :) I didn’t see it on the Where We Got It page :)
YoungHouseLove says
That was either from HomeGoods or TJ Max about a year ago. It was during book shoots I think so my brain is mush! Haha!
xo
s
Tori says
Hello from a new reader in the UK! I know someone else got close, but you couldn’t go the whole hog and actually put ‘securing it in place with the nipple nut’ – seriously, that would have made my day! Nipple nut…… I sense random fits of giggles in my future….
YoungHouseLove says
Haha!
xo,
s
EngineerMom says
Before selling our old house, we updated several light fixtures (thankfully, the previous owner had already updated the outlets!). We thought it was a little odd that they’d done the outlets, but not the light fixtures.
Then we discovered why – nothing was “modern” standard, as the house had been built in 1952 and then worked on by several iterations of owners. We ended up leaving most of the fixtures, but hiring an electrician to do the one at the top of the stairs on the second floor. It was low enough that my 6′ hubby had to be careful not to hit his head, so in the interest of not turning off a potential buyer, we swapped it out with a more streamlined fixture that didn’t hang so low. The wiring in the wall was just wacky, and the switch itself had sparked shortly before we decided to replace the whole thing, so I felt a lot safer calling in a professional!
julia says
thank you for the outlet tutorial! we have a few in our bedroom that need replacing & i’m so happy you made it look easy!
xo julesinflats.com
leigh wingo says
Where did u get the rug? Ive been looking everywhere for one like it.:-)
YoungHouseLove says
That was from Pottery Barn on sale a while back (we waited for a rug sale there). Hope it helps!
xo
s
Mjumbe says
OMG! This is exactly what happened to me THIS EVENING. I was helping my brother install a new light for his fan, and nothing we tried would make it work. So, after hours, we gave up, and I went home. When I got back, my partner showed me your post, and it was like reading an account of our last few hours. And now I know what’s wrong! Thanks for sharing!
Karen says
Wow here in Brisbane, Australia this type of wiring job, even seemingly small, must be done by law by a licensed electrician. The change to white looks awesome!