A newly tiled floor in a new room of the house is almost enough to give me jazz hands (a York peppermint patty is enough to give Sherry jazz hands, so clearly we have different thresholds).
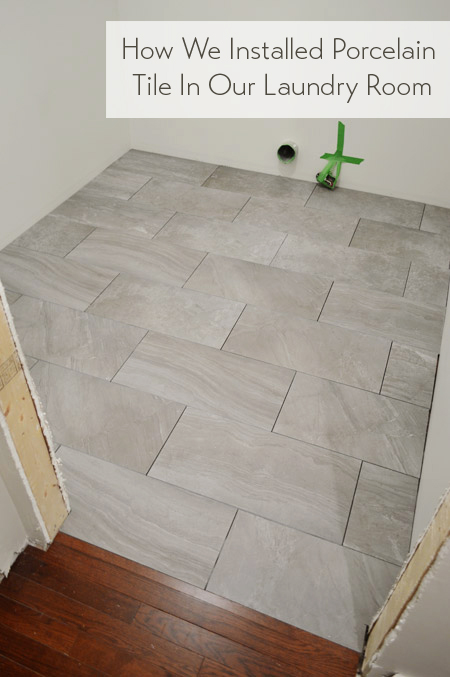
We’re completely enamored with this floor – and there’s a budding romance that involves a saw – so let’s cover the laundry room tile installation, from floor prep to grouting & sealing.
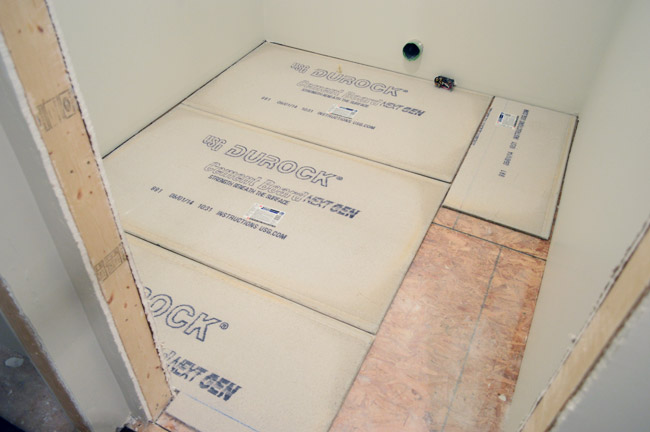
Before any tile could get installed, the subfloor needed to be prepped with some cement board, which is a preferred surface for tile installation. They come in 3ft x 5ft sheets, so I was able to fit two full pieces plus a few strips in the room. I cut them all by just scoring them with my utility knife and then breaking them along that line.
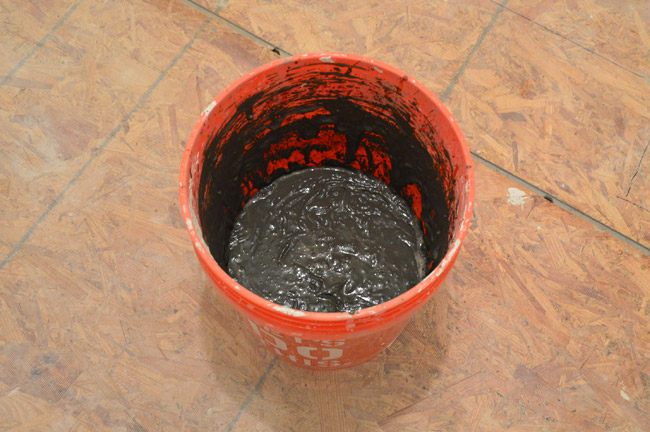
Once I had “dry fit” all of my pieces, it was time to actually adhere them with thinset. The layer of thinset between them and the wood subfloor will help keep them from shifting, grinding or flexing against one another. I used the same thinset I would later use for my tile install, mixed with water (just by following the directions on the bag) and my drill’s mixing paddle. I’ll get into more details about the whole mixing-of-the-thinset process in a second.
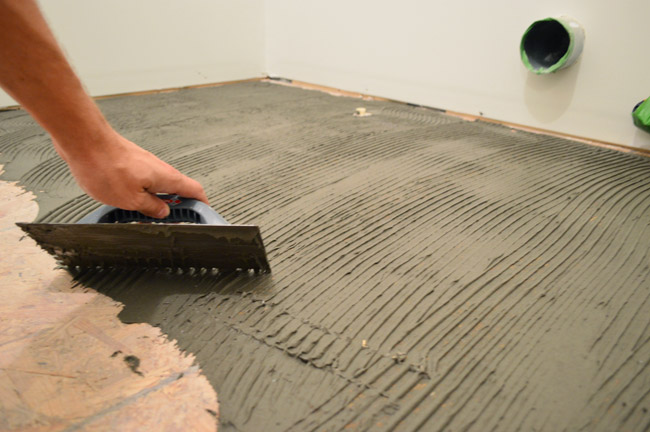
I spread the thinset using a 1/4″ notched trowel – coating the surface with the flat side of the trowel (doing one cement board area at a time) and then scraping grooves into it using the notched side, just like you do when you install tile.
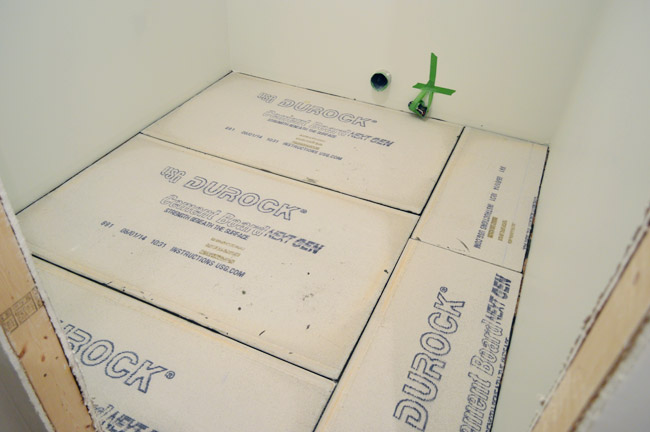
Then I was able to press the cement board pieces in firmly and move right along. Here are all of the sheets down, with about an 1/8″ gap between them and the wall.
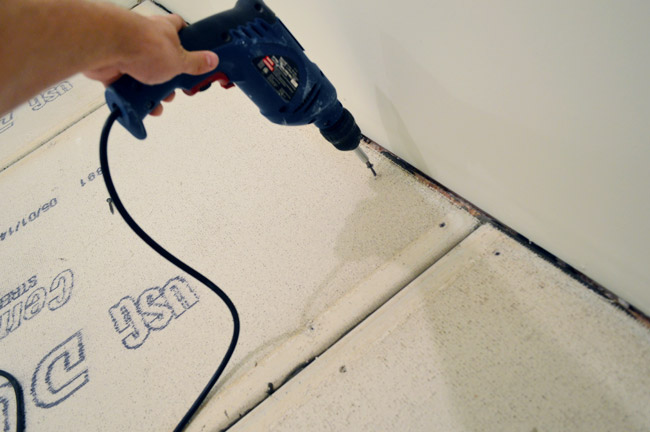
To help pull them securely towards the floor during drying (and to further stabilize them for the long term) I screwed down the edges (about every 6-10″) using special cement board screws. And I threw a few in the middle too – about every 12 to 16 inches.
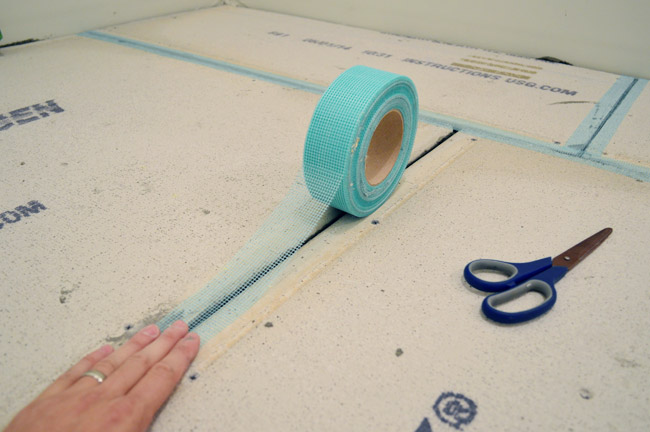
Many tutorials have you tape and mud (with thinset) all of the seams and screw holes next, just like with drywall. I’ve found it easier to just apply the mesh tape on the seams now and then apply the thinset during the tiling process. For me, it keeps me from accidentally creating any high ridges at the seams or screw hole bumps that the extra layer of thinset might create.
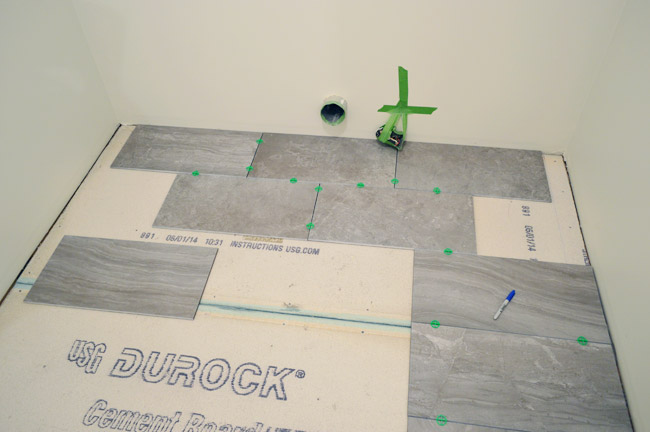
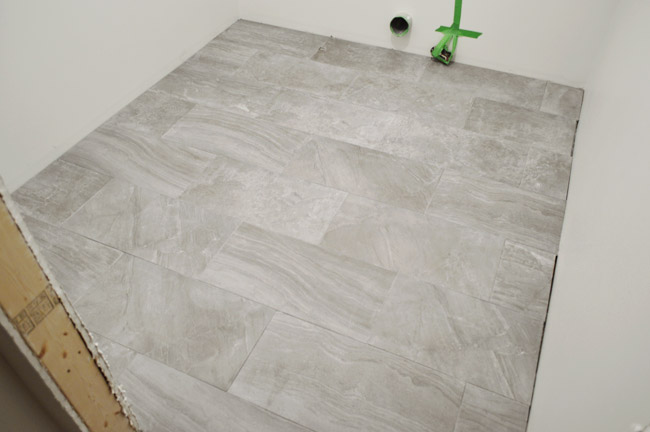
After mesh taping all the seams, we could start dry fitting our tiles, just to figure out the best way to situate the brick-pattern we were going for. We started off by centering the pattern, but we weren’t crazy about the thin slivers of tile it would have left on either side of the room. Note: Just look at the back two rows here (the closer tiles are just randomly placed).
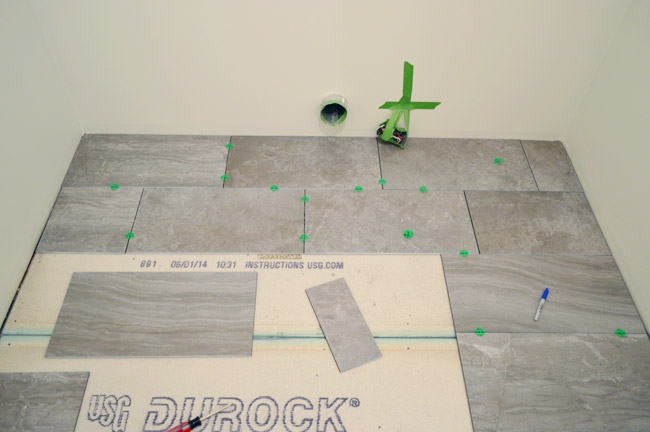
After a decent amount of experimenting, we opted to shift the pattern slightly towards the left wall, which meant we could use a full tile on the left side, and also left room for a bigger piece of tile on the right end (no more tiny slivers). The washer and dryer will be offset to the left side of the room anyway, so we think it’ll feel nicer this way (especially since those few smaller cuts of tile on the right side will mostly be hidden by a base cabinet in that back corner and the door to the room, which will swing to rest along that side. Note: Once again, just the two back rows of tile are placed in their intended positions here.
Cutting the tiles was super easy. Why? Because we finally bought a full-size wet saw. After nearly five years of using our old $99 hand-me-down tabletop wet saw to tile our first house’s bathroom, our second house’s patio, and the sunroom floor in this house, I finally dropped $277 on this one at Home Depot thanks to a $20 off coupon (that’s not an affiliate link). The difference was incredible. I love this thing so much, I want to take it out to dinner.
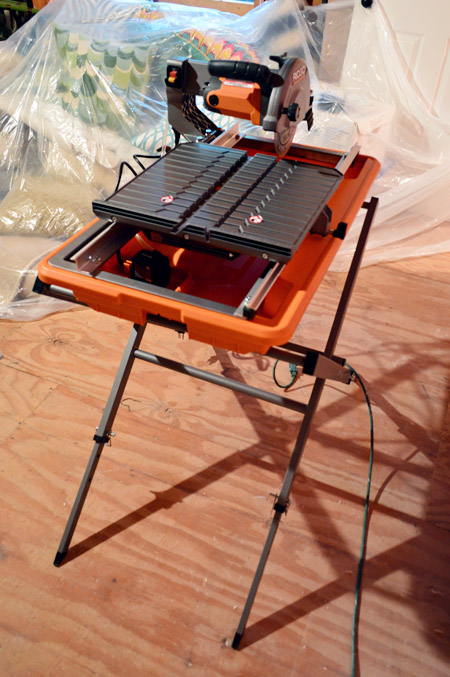
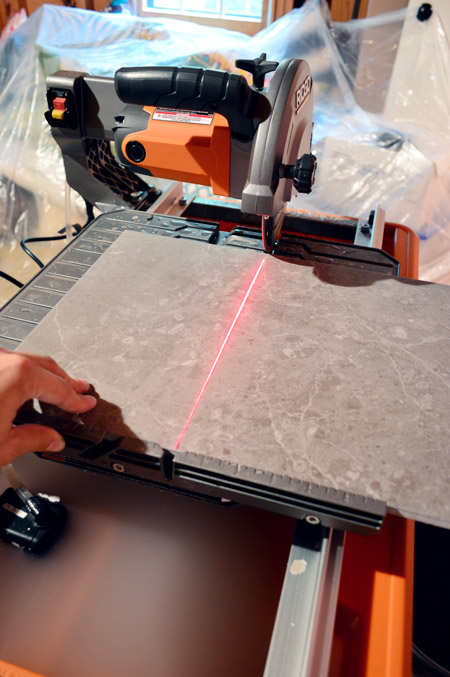
I’ve yet to decide my favorite part. Could it be the stand that allows you to work at regular height instead of crouching on the floor? The big water tray that means you don’t have to stop to replace/de-sludge the water all the time? The laser to help keep cuts nice and straight? All contenders. But probably my favorite feature is the rolling tray that I can just set my tile on and slide through the blade. It’s not only a lot faster, it also helped me keep all of my cuts super straight.
Anyways, let’s get back to the tiling process before I sound like someone trying to sell you a Super Shammy (“this will solve all of your problems and change your life!”).
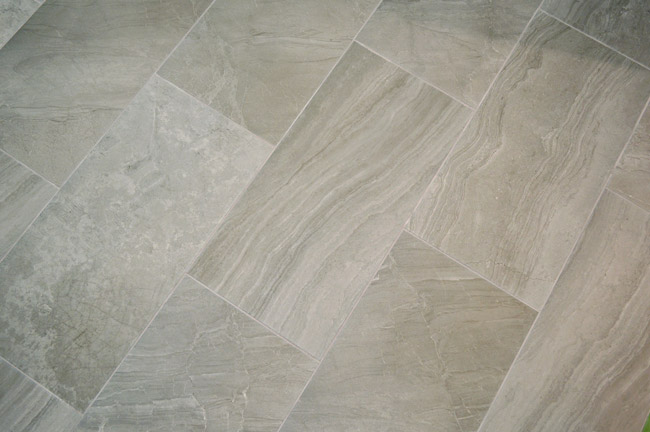
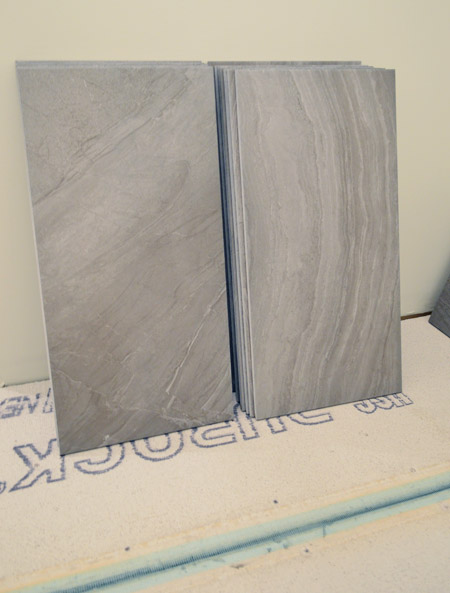
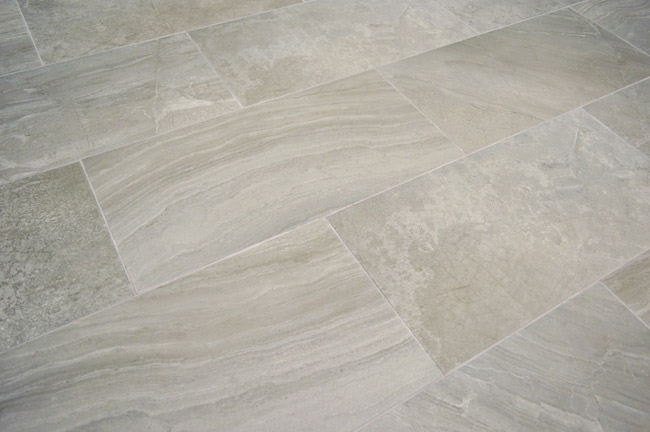
After getting some of the first few cuts done for our dry fit, Sherry and I went through all of our tile boxes to take inventory on the ones we liked best. We love the movement and veining in the tiles, so we wanted to be sure the best ones ended up in highly visible spots in the room (no sense hiding our favorites under the washer & dryer). So we sorted through them and pulled out favorites (which we’d be sure to position in the middle of the room), regulars (not amazing, but not bad either – ones we could use near the door or along the wall), and a third pile we affectionately dubbed “the not-as-nicers” (not pictured). They were more spotty than veiny, so we reserved most of them for the where the appliances would go.
Here’s the gist of my supplies for actually laying the tile (wet saw excluded, obviously).
- Bucket for mixing thinset (using water & the mixer attachment for my drill)
- Margin trowel for scooping thinset out (when I wasn’t just dumping it out directly from the bucket)
- Notched trowel for spreading thinset
- Square and pencil for marking cuts
- Spacers for keeping tiles spaced equally (we used 1/16th spacers)
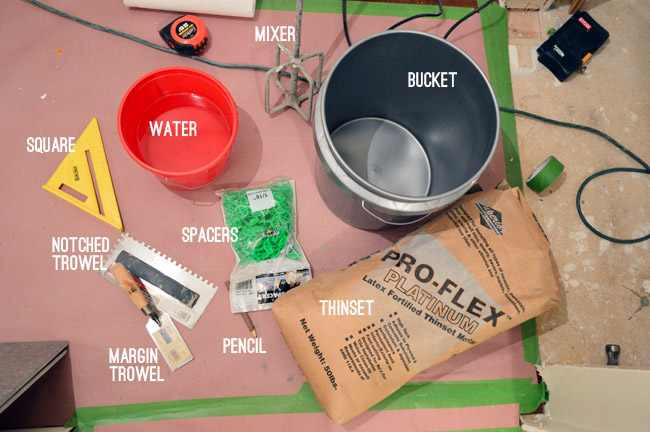
I have a tendency to mix my thinset too thick, so I made a conscious effort to use a bit more water this time. They often say it should be like pancake batter and I like my pancakes thick, so I should’ve realized this about myself a while ago.
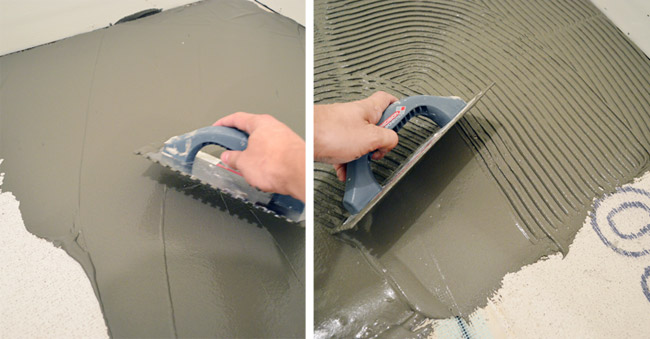
I worked about two rows at a time, doing my cuts as I went. It helps to have a nice long level on hand to check that none of your tiles are sticking up oddly for a smooth, level result.
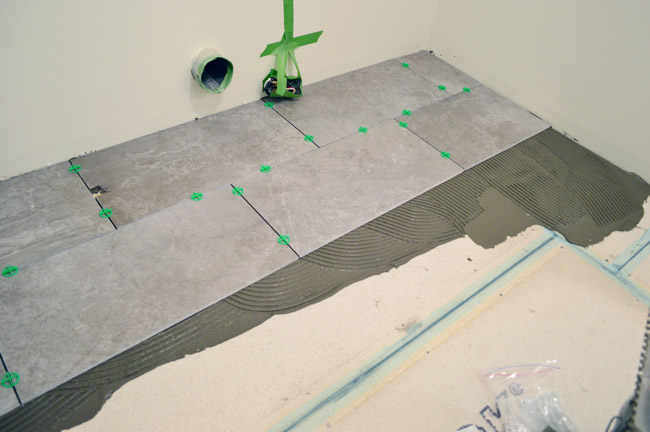
These sorts of cuts were very straightforward. I started at the end with the full tile (or the 12″ half-cut tile) so once I got to the other side I just held up a full tile and marked where it needed to be sliced. Who knows how I ended up with this weird wooden tree pencil.
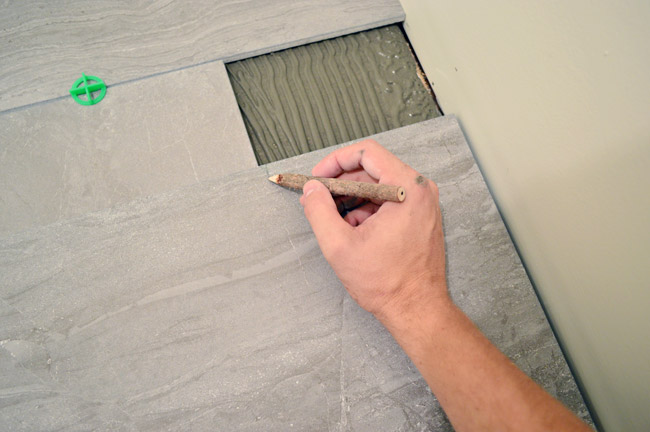
It took me less than two hours to get the whole thing down once I started actually placing tile, so it was definitely one of my faster tile jobs.
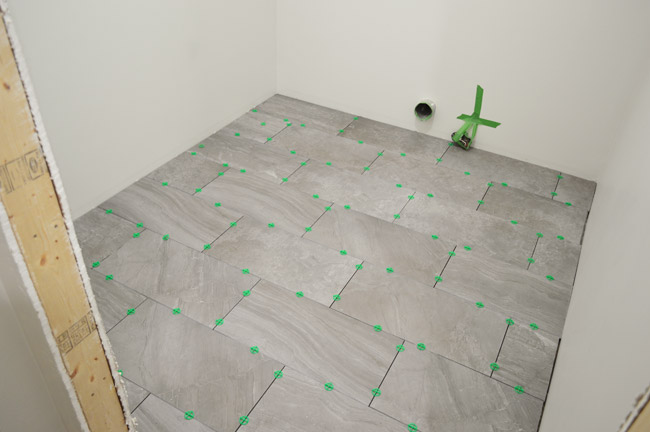
I left everything dry about a day and a half before pulling out my spacers (I opted to keep my painters tape contraption around the dryer plug through grouting).
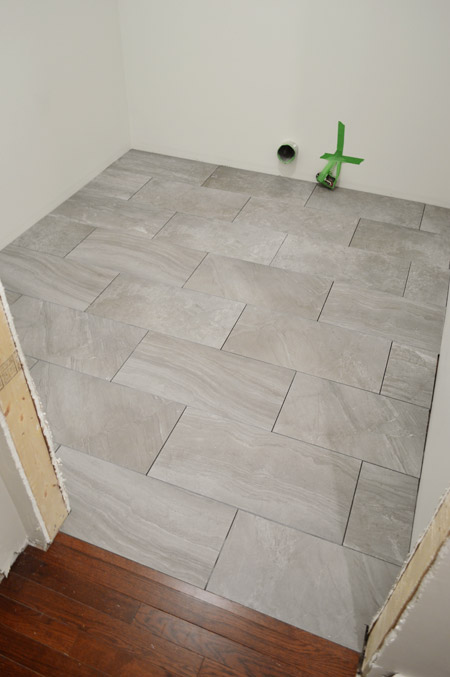
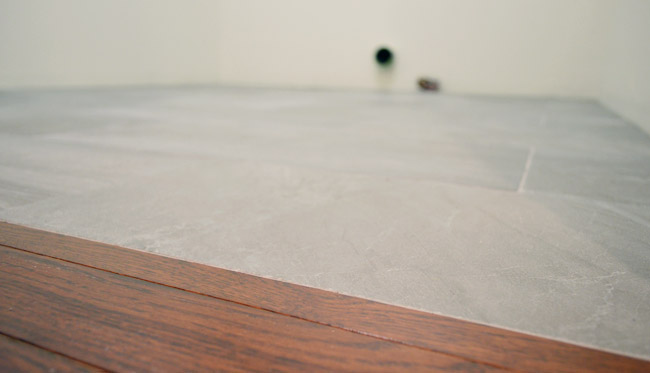
One of the parts I’m most proud of in this project is the transition, which Sherry and I decided we should attempt to make, well, transition-less. I had originally planned that we’d have some sort of transition piece (you know that slopes up a little to connect two different flooring types), but we’ve always liked the two transition-free tile-to-wood doorways downstairs (it’s perfectly flush where the tiled foyer meets the wood-floored office and dining room) so we opted to give it a go here too.
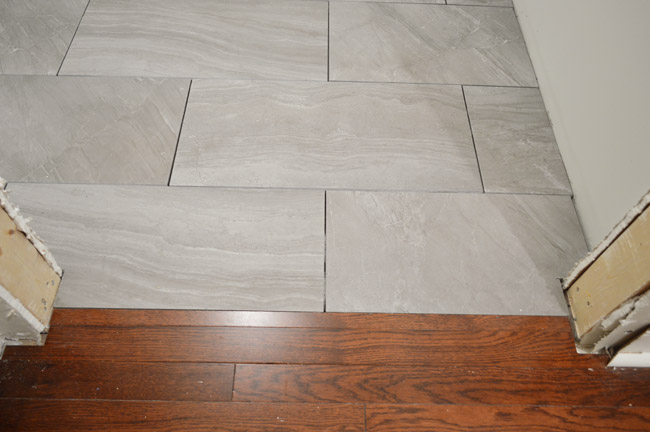
It required adding back two pieces of wood first (to bring the hardwoods about halfway into the middle of the doorway) and thankfully my planning with the subfloor height paid off: the floors are EXACTLY the same height. I still can’t believe it. Here they are all grouted and complete just so you can see what I mean:
Speaking of grouting, after letting the thinset cure for 48 hours, it was time to grout. The material list was somewhat similar:
- Small bucket for mixing grout, using the margin trowel
- Non-sanded grout (since our joints are smaller than 1/8″) – we went with a color called Dolorean Gray from Home Depot
- Water for mixing with grout powder, and for wiping clean
- Float for applying grout
- Sponge for wiping it off
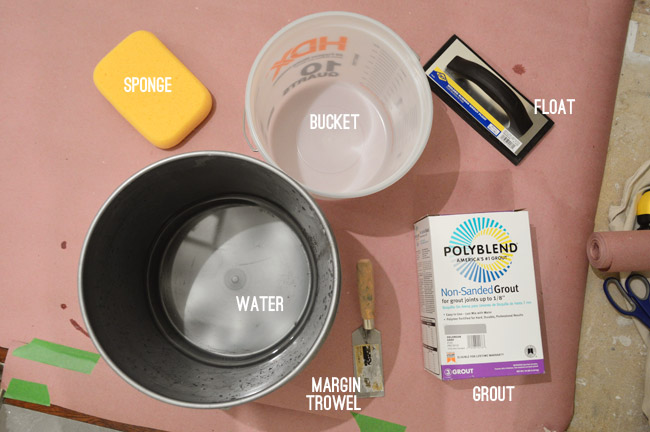
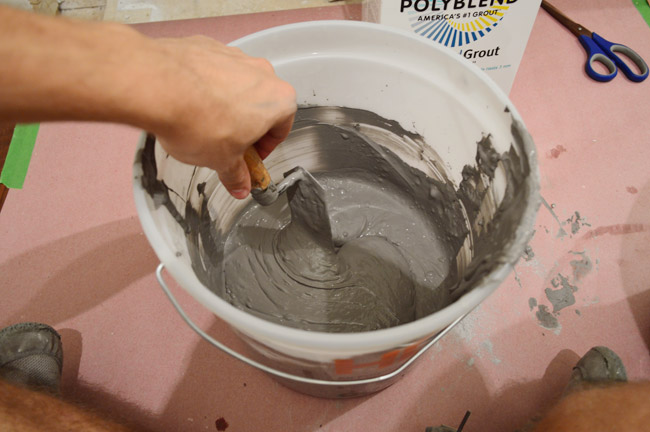
You add the water to the bucket first, then the grout powder. I started with a crazy amount of water for some reason, so I ended up mixing up a ridiculously large batch of grout for such a small room with so few joints.
Grouting is pretty easy, especially when you’re working with big tiles, since it’s quick to cover all of the joints. Using the rubber float you press grout between the tiles, then at an angle you wipe off the excess.
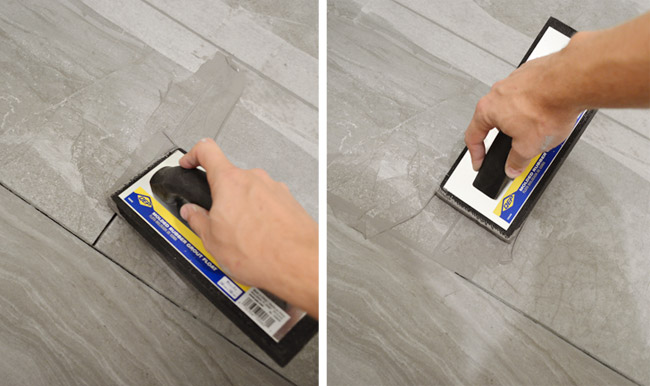
I was able to grout the whole room in about 20 minutes, and you can see how it starts to dry lighter – indicating that it’s time to start wiping it off.
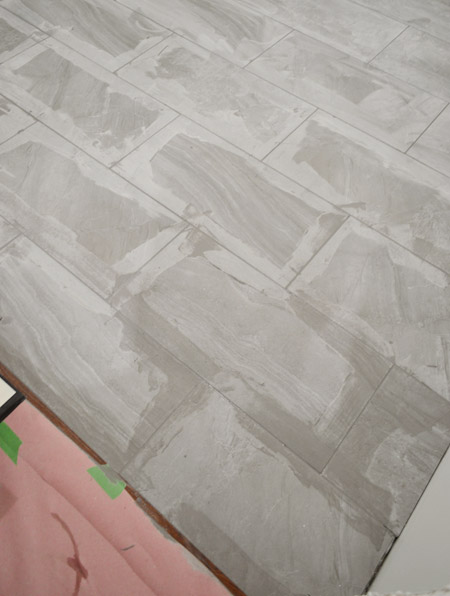
I made the mistake of using too much water when grouting the sunroom (which we think caused the grout to dry lighter than we had intended) so I was really careful to make my sponge only slighty damp when wiping off the excess this time.
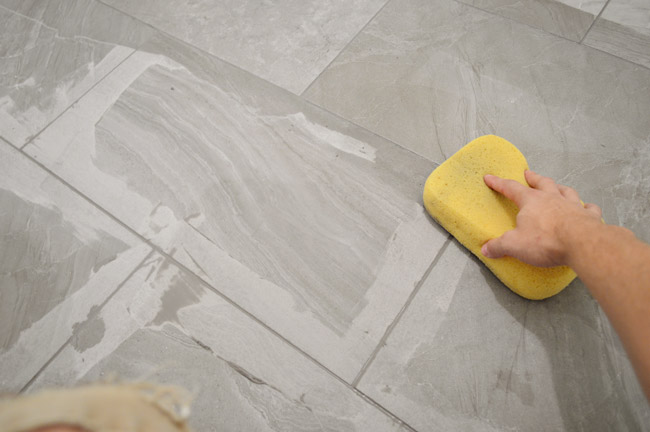
After a couple of passes with my barely-wet sponge, it still looked extremely hazy (this is the point where I think I panicked in the sunroom and got water crazy).
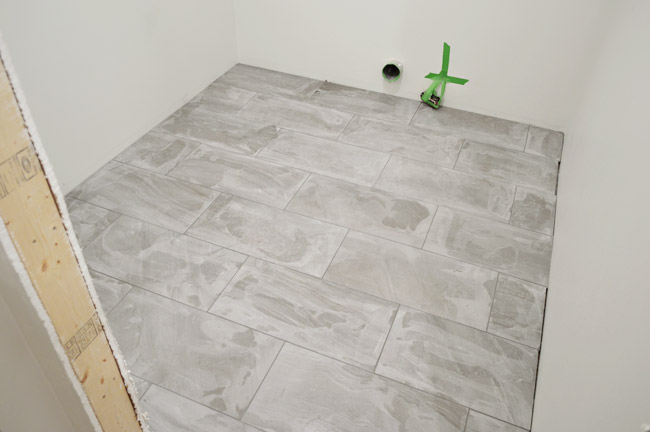
But this time around I let it dry another 90-minutes and then came back with a completely dry microfiber cloth (they recommend cheese-cloth, but I didn’t have any handy). The microfiber cloth seemed to do the trick just as well, and some light scrubbing buffed off a lot more of the haze.
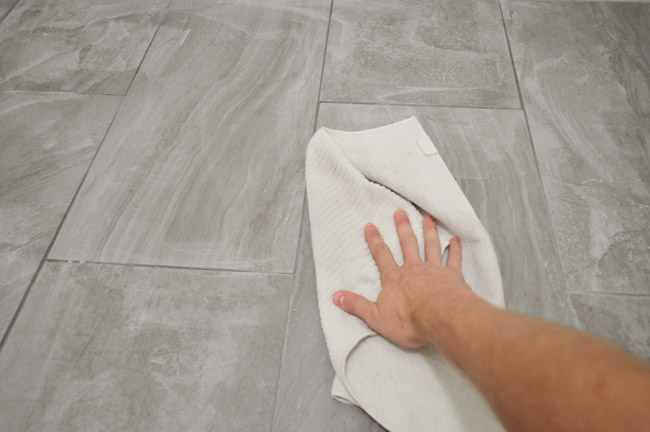
Here’s the floor post-buffing. MUCH better. Phew.
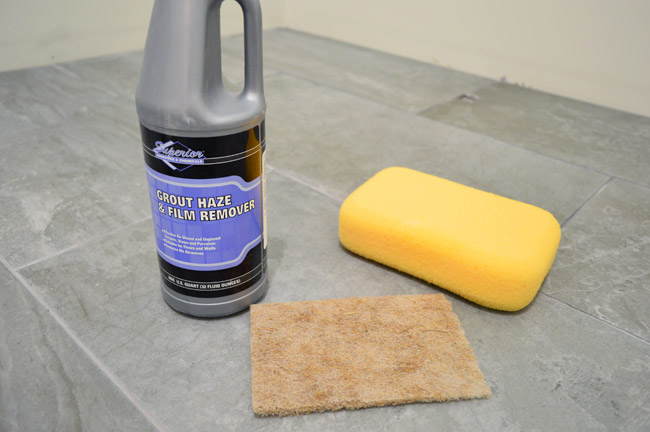
We let the grout dry for 3 day, per the instructions. Things were still looking a little hazy in there, so Sherry busted out some grout hazer remove that we had leftover from the sunroom project. You basically spread it on liberally with a sponge, let it sit for a few minutes, then wipe it off with a scrub pad. Then she wiped the room down with clean water a couple of times to get all of the haze remover off.
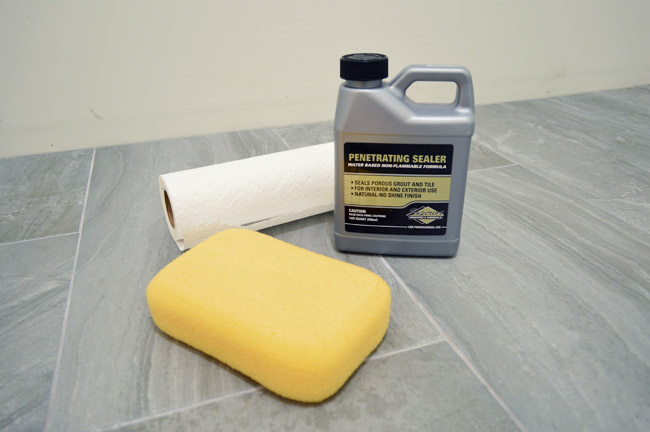
Then we waited for that to dry out for around 12 hours before applying a sealer on both the tile and the grout to help protect it from staining. It too is pretty easy to do – just wipe it on with a sponge, let it soak in for a few moments, and then wipe any excess off with paper towels.
Those two steps definitely brought the tile to life a bit more, which is why we recommend not skipping over the haze remover step.
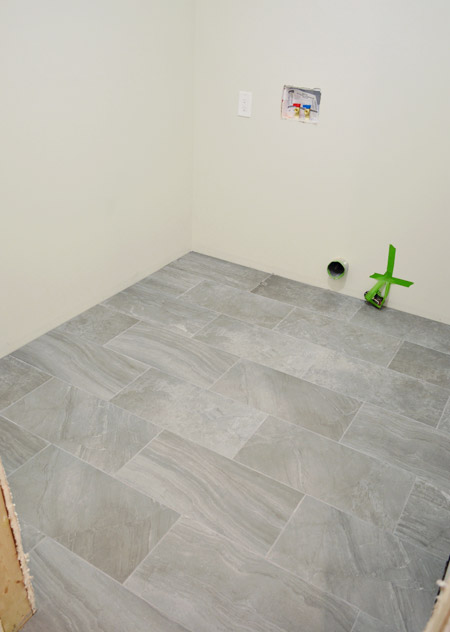
Sometimes you don’t realize the film leftover from the grouting process until it’s gone.
Here’s the cost breakdown for the floor tile project:
- Cement board & screws from Home Depot:$48
- Blast Anthracite 12 x 24″ tiles from The Tile Shop: $353
- Thinset from The Tile Shop: $29
- Grout in Dolorean Gray from Home Depot: $13
- Buckets, sponges, trowels, spacers, float: $8 (since we already owned most of them, but add $25 or so if you don’t)
- Superior Haze Remover: $0 (we had some leftover, but it’s $9 at The Tile Shop)
- Superior Penetrating Sealer: $0 (we had some leftover, but it’s $13 at The Tile Shop)
- TOTAL: $451
So it was pretty much $350 in tile and $100 in supplies. I’m excluding our new wet saw since it’s not a cost specific to this one project, and I don’t want someone to think that $277 must be incurred on a project like this, but after seeing what a difference it made, if you’re working with a cheap old tile saw I highly recommend the upgrade. I’m actually mad that I did our giant sunroom without my new tiling toy.
Wrapping up this tile job means we can actually start putting this room together. Which is especially exciting because we bought our cabinets at Ikea on Friday (ignore the random pillows in that basket, they were for a cousin we met up with on the same trip).

We’re thinking we’ll get at least the upper cabinets hung before we bring the washer & dryer in, since dropping cabinets on expensive appliances is not a risk we want to take. But once those are in, we may finally be back in business to wash our clothes at home again. High five! Anyone? High five? Are you leaving me hanging because I smell like a guy that just tiled without a washing machine?

Emily says
I’m jealous of your project dedication! We’ve been meaning to tile our laundry room for the last 6 months. We’ve made it so far as going to three different stores and picking out a tile that we like. We agreed on something very similar to yours but we haven’t even buy it yet.
Now, after this post, I really just want to go out and buy that saw!
Liz Harvatine says
We have dolorean gray grout in our kitchen! I’m not saying I chose it because of the name but that WAS a bonus.
The floor looks great, can’t wait to see the rest of the room!
KathyL says
Beautiful. I love how detailed your posts are, like you are reading my question asking mind. I do want to add: when I put glass mosaic tiles in my kitchen, the gal at Home Depot told me to use Clorox wipes for a final clean up when grouting. That did a great job too, I didn’t have to use the haze remover. But also thinking on it, mine were glass and your tiles looked a tad more porous so the wipes might not have been enough. Have a good Monday!
YoungHouseLove says
Smart!
xo
s
SherryB says
SO GORGEOUS! The extra time you took in planning out the tile placement is why you RULE THE TILE SCHOOL! Your family members and friends are totally going to call you for tile favors now.
Kristin M says
Looks great! Question: when I was reading this just now, my mom was looking over my shoulder, and told me she LOVES your choice of tile. She’s wondering what type/kind/brand it is? I looked back through your other laundry room posts and I couldn’t seem to find that info. Thanks!
YoungHouseLove says
Thanks Kristin! We bought it at The Tile Shop and it’s called Blast Anthracite.
xo
s
Kristin M says
Oh my god, upon further inspection, I see that it’s RIGHT in this post. What a goober. Sorry about that!
YoungHouseLove says
No worries!
xo
s
Jenn says
Love it! The tile is gorgeous! I’ve done several tile projects with my wet saw (table top) and not had many complaints, but you STILL sold me on this one.
We just moved to a new house last week, and I know I’ll be doing tile projects for years to come. Better to invest now than wonder why I didn’t buy it earlier down the road, I guess!
I am in the process of moving our laundry from our kitchen PANTRY (read: closet so small that ONLY a stackable, skinny washer & dryer fit in it and nothing else) to the basement. I have a room down there with nothing in it but a furnace and old canning shelves. I’m really hoping to make it a beautiful, finished space. Lots of ideas. Wish me luck!
YoungHouseLove says
Lots of luck!
xo
s
Meredith says
Love the transistions without the threshold piece!! We built a home with pulte and the model had it done just like yours, without that extra piece addes between. I loved it. (Laundry room tile to wood in hall, master bathroom tile to wood in bedroom). When they layed our flooring tho, they put in those stupid threshold pieces. i was so bugged. I talked to the superintendant and insistend they redo it. “But they will have to rip out some tiles.” Yup. “They will have to rip up some wood and redo it.” Yup. “But it may shift with settling and will split and you won’t be happy.” I will take my chances. One of the only things I made them tweak and I am so happy I did. 2.5 years later and it sitll looks great.
YoungHouseLove says
So glad it still looks great!
xo
s
Teresa says
Hi there,
I’m wondering if you guys have heard of a tool library near you. There are more of them popping up in different cities letting people borrow tools for a super cheap membership fee. This means no one has to buy a $200 tool they’ll only use once (unlike dynamic DIYers like yourselves), but they can take on that tiling job they’ve been thinking of. Here’s the one in my hometown.
http://www.torontotoollibrary.com
Great work guys!
YoungHouseLove says
SO SMART!
xo
s
Diane says
John and Sherry,
Just a thank you for all of your house tutorials! My husband has fallen in love with a house that is going to require some work and after reading your blog for the past couple years, I have faith that we can make it our dream. Thanks for giving me a weekly dose of house ambition so I don’t rain on his dream home parade.
Wishing your family all the best.
YoungHouseLove says
Thanks so much Diane! All the best with the house!
xo
s
Vanessa says
High Five! This looks awesome. I heart your tile!
Quick question – looks like everything is level…prob something you made sure of? What would you do differently if the floor was not level or is there a degree of levelness (is that a word?) before you need to worry.
Fantastic!
YoungHouseLove says
Yes, our floor was level going into this, and I used a level to check as I laid the tiles down to make sure nothing stuck up above anything else – but if your floors weren’t level you might need to use self leveling concrete first (I’d consult someone at The Tile Shop or Home Depot to see what they’d recommend).
-John
Jill says
You might consider buying more of this same tile for your foyer/kitchen for when you redo that floor. It’d be nice continuity for the house to have the same tile in several utilitarian places, and this tile with its large size and subtle pattern would look nice over a larger area.
Also, you might want to add checking the floor for levelness/how to level it to your tutorial here. Very important detail that is easy to forget. And how you keep your tiles so flush with each other. That is hard.
YoungHouseLove says
Thanks Jill! Will add that in!
-John
Jeanna says
Love the tile, so pretty! Love the tip about sorting through the tile to find the ones to showcase, and that transition between floor is a beautiful thing :) I’m pinning this so I can find it when I am ready to tile.
Sapphira says
Delorean Gray. Nice.
The room is looking amazing, you guys! So excited to see how it all comes together!
Eilene says
Looks so easy (and terrific), but I know if I set out to do this it would take weeks and be a big disaster. I do wonder though.. If one would like to take on tiling for the first time would a small floor or wall be easier?
YoungHouseLove says
A backsplash or small floor would probably be easiest. Tiling seems a lot harder than it is. You can do it!
-John
Carla says
You did a great job on the tile pattern. I would have panicked and my perfectionism would have taken a huge ding in not knowing what to do. It actually looks really great the way you did it.
About microfiber, it scratches. Maybe not as obvious on dull tile surfaces, but I have scratched many kinds of surfaces just wiping them down. If you use microfiber to rub repeatedly in one spot on a laminate counter and kneel down and view that spot from a different angle, you’ll see what I mean.
I’ve scratched mirrors and a wood table top badly in long swooping swirls after a few months of using microfiber to polish it.
Lesson learned the hard way. I only use soft cotton anymore, and it feels much better on my hands.
YoungHouseLove says
Wow, thanks for the tip Carla! Never would have guessed!
xo
s
Michelle Kersey says
HIGH FIVE!!!
qs777 says
Love the tile (obviously, because I had picked it also)! ;) Looks perfect in there!
I was just looking at that same tile saw since we have one from my husband’s dad from back when he used to tile for a living. It is becoming an electrical hazard and it is SO heavy. I had no idea this one came with a stand and laser. No more having to see a pencil mark in the water. The only thing we thought was it may not cut as fast as our older, bigger saw. Did you notice a difference? I also must tell you that, for some reason, the picture of the saw alone just made me laugh. Hopefully, Sherry isn’t the jealous type. haha
YoungHouseLove says
Ha! I laughed out loud at that saw picture. John was all “HUBBA HUBBA, that’s a centerfold.” As for speed, this one was so much faster since the tile could be rolled through on a tray in one smooth motion (instead of slowly pushing it through against a guide rail like we did with the old one).
xo
s
Diana says
Looks great! I’m loving Monday updates on the laundry room :)
Also, I spy teal bundles of fabric in the car. Curtains for the office, maybe? ;)
YoungHouseLove says
Yes! They have a new colorway for their Sanela panels, so I thought I’d try them to see what we think!
xo
s
BamaCarol says
Are all the rest of the items on the list something that you guys will be handling or do you have to get any contractors back in to finish up? This is looking wonderful by the way. We also grouted between the tile in our master bath and the hardwood of the bedroom and it is holding up well so good luck. I cannot stand transitions so we have avoided them throughout the house.
YoungHouseLove says
So glad to know it’s holding up well there for you! As for more contractors, it should be all us from here on out!
xo
s
Tanya says
Gorgeous! High five! :)
Elizabeth says
So since you have a tile saw now, does that mean there are more tiling projects in your future? :) I’m thinking bathrooms, kitchen floor, etc, I hope?
YoungHouseLove says
YES! We have three bathrooms and a kitchen to renovate!
xo
s
kristin says
gorgeous!
Jessica @ RunYourMuttOff says
I’m a big Honey Boo Boo fan, so I’m giving you a big High Six for that tiling job!!
Kristen says
I see you didn’t use an anti fracture/waterproof membrane under the tile, what made you decide to use thin set on the cement board vs. using the membrane?
Thanks!
Kristen
P.S. The tile does look awesome though.
YoungHouseLove says
Thanks Kristen! Our understanding is that it’s standard to use a membrane in a shower where water soaks/sits, but on actual floors in a laundry room, kitchen, or bathroom this method is recommended (it’s the same one we used for laying our first house’s bathroom floor tile). We do have an overflow drain under the washer to divert any potential leaks away from the room, so that’s a nice added security step as well.
-John
Katharina says
High five? High ten for this job!
Christine says
Gorgeous!! I have a question: what if the flooring didn’t match up exactly with the wood floor at the threshold? You said you felt like you got lucky, and I’m absolutely positive I wouldn’t be as lucky, so what would have been your plan B?
YoungHouseLove says
Instead of adding back two pieces of wood to meet the tile in the doorway, we would have left out the one closest to the tile (and that slot would be where a drop-in transition could be added).
-John
Maria says
Love this look! Can you just screw the sub-floor in without adhering it with the thin set?
YoungHouseLove says
The more I researched it the more the Thinset step seemed to be recommended (just to reinforce things) so it made us the most comfortable to go that route.
-John
Lindsay says
Love the new tile!! I can’t wait to see the rest of the room. Looks like you guys are making good use of your new Highlander! :)
Nandini says
Hi Five John,
The tiling is looking great !!! can’t wait to see the laundry room in all its splendor !!!! You guys are awesome !!!
Cheers,
Nandini
Lynn says
Love the floor tile (and the tutorial)…can’t wait to see the finished project!
Laura B. says
Great job, love the tile!
Not related to tile: I was wondering if you would be interested in doing a post on some of your favorite artists. My husband and I now feel ready to invest in some art, and I’d love to hear some of your current favorites (either on Etsy, local, or just through word-of-mouth). I know you’ve featured Lindsey Cowles, Lesli DeVito (I hope I didn’t butcher the spelling of those two), and your anniversary painting. Any other favorites you’re pining over?
YoungHouseLove says
That would be a fun post!
xo
s
Kaija says
Swooon! Love that tile! And thank you for all the detailed tips on the process and products! I may start to consider considering a tiling project.
jbhat says
Totally high five!
jbhat
Tamara @ Provident Home Design says
We just took a bunch of tile out to replace with hardwood and we were SO happy the tile had been installed correctly on a cement board because then we were able to take out the whole board instead of having to deal with trying to get tile adhesive off the subfloor. I love the tile you guys chose so I’m sure you won’t ever be pulling it out but using a cement board under tile is good protocol. Love the cute pic of you, Sherry, sticking your head out from behind the backseat supplies.:-)
Jennifer says
Also impressed by your lack of transition piece! I am still trying to figure out how I can transition my new kitchen floor to wood floor… none of the transitions are steep enough for my transition. I am going to have to have something made and try to stain it the same color of my wood floor.
Emily @ Life on Food says
I know you go into so much detail about this project the pros and the cons but I still think it seems so easy when you post about it. The floors look great.
Jess says
I tried to see if someone else had asked this already but didn’t find it – why is the tile so much lighter than in your previous post with a photo of it next to your lovely herringbone backsplash?
YoungHouseLove says
It’s just the lighting playing tricks I think (things can look darker on a board from the side in a store vs. on the floor with light hitting it from above in a house) – but it’s the same tile :)
xo
s
Sarah says
Great call on the tile! It’s gonna look fab!
Haley says
The tile looks great! i love the grains of the tiles you picked.
Nancy says
I love it! It’s going to be a great laundry room! I just finished mine and posted it over the weekend. Grout sealer is so important. FYI…if you are without haze remover, I have used slightly dilluted vinegar and it does the same thing. It takes all of that haze off and is all natural. I can’t wait to see the finished project.
YoungHouseLove says
Great tip!
xo
s
Aisha says
Seriously??? You guys are my HEROES! That looks fantastic! I love that deliberate way that y’all attack your design dilemmas. (and I’m more than a teensy bit in awe of your eye for putting ordinary things together to make a cohesive and gorgeous end result)
Justin Cabin says
So impressed by the perfect transition, can you share what thickness you estimate the thinset layers took up?
I am working on a similar project, carving out a storage closet, and trying to tile up to existing hardwood flooring.
YoungHouseLove says
We estimated them at about an eighth of an inch total. Hope it helps!
-John
Justin Cabin says
Big Thanks! That helps a bunch.
Dani says
Everything is looking great! I am totally jealous of the space you have! I am currently mid reno on a laundry closet. I am in the market for some type of wall cabinet. We have craftmaid in our kitchen and I honestly don’t love them. I am looking into Ikea ones. What made you go with Ikea instead of Lowes or Home Depot? Once your cabinet is assembled and installed will you give us your opinions on the whole thing? I am looking for unbiased review before I take the plunge ;)
YoungHouseLove says
Thanks Dani! We’ve heard awesome things about Ikea cabinets but we have never tried them yet, so we thought this was a good place to test them out! We bought Kraftmaid cabinets from Home Depot for our first kitchen and really liked them, as well as using secondhand cabinets from the ReStore in our second house’s kitchen and office built-ins. We’ll definitely let you know what we think about these!
xo
s
Ashley says
Oh Lawd, that’s some pretty tile!
Kristin H. says
You guys!!!! It looks AMAZING!! I’m sure you guys did this, but I just wanted to share a tip that I learned too late after I had already completed my own tile job, just in case it may help anyone that might be reading… Apparently it’s super important to use “alkali resistant” mesh tape for the cement board seams instead of regular drywall mesh tape. The Portland cement that’s in thinset will break down a regular mesh tape over time, which could lead to cracks in the grout or tile due to the natural movement of the wood underneath. From what I learned, the mesh tape breaking down could cause each separate cement board to move as individual “islands” instead of one large piece, potentially causing cracks, probably years or more down the road.. But still no fun!! Just thought this might be helpful to someone since in all the tutorials I read, I never saw a mention of the alkali resistant tape until it was too late! (So I then contacted 2 pros who explained to me the dangers of regular mesh tape) anyway, I don’t mean to butt my nose in/offer unsolicited advice, but it was crazy to me how something seemingly so minor could possibly leave me in tears over my pride and joy bathroom tile in a few years!! Ho hum.. No going back now, but thought I’d just throw it out there if it could possibly help anyone else :)
YoungHouseLove says
Great tip Kristin! Thanks so much for sharing!
xo
s
Joy says
Beautiful!
Nancy says
Thanks. By the way, my laundry room features one of your great hooks from the Target line. I love it! So cute.
YoungHouseLove says
Aw thanks Nancy!
xo
s
Heidi says
Oh. My. Goodness!!!!!!! I love that tile!!!! I would be doing jazz hands and happy dances for days or maybe even weeks if that was in my house! Excellent choice.
Laura Burdwood says
Hello! Ii’m sure you will do a whole post on it, but do you have a link to the cabinets you bought at ikea? We’re in the middle of our laundry room project right now. Ours is right off our kitchen and we recently added a pantry (can’t believe I ever survived without a proper pantry!!) and cabinets would add even more storage.
Thanks!
Laura Burdwood says
Btw the tile is beautiful. I’m impressed with your seams and transition :)
YoungHouseLove says
Thanks Laura! We’ll have to dig up those links and all that info later this week! Can’t wait to get them up!
xo
s
Nicole B. says
Our next project is going to be redoing our bathroom floor. I love the tile that you choose. We are thinking of doing something similar in color but with the wood grain look. Our only issue is that we just ripped up the old linoleum in the bathroom to find some mildew on the plywood where the shower had leaked on the floor and the previous owner not wiping the floor down after being wet. Any suggestions on how to take care of this?
YoungHouseLove says
Hmm, has anyone else encountered this with tips for Nicole? I would make sure it’s not black mold, which can be dangerous (I think there are mold tests at Home Depot) but otherwise I have seen people use bleach to get rid of mildew I think. If the wood is too rotten it’ll need to be replaced though. We cut out the old rotten wood subflooring near our tub in the first bathroom gut-job we did, so here’s that post if it helps.
xo
s