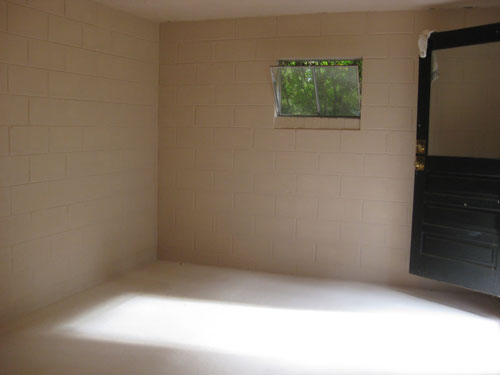
Ok, we’re back on speaking terms with the basement. After it gave us quite a hard time when we began our Dryloking-interrupted-by-oh-no-is-that-mildew adventure (read all about that right here), we’re feeling victorious after conquering the first step towards turning our cinder block insect shelter into clean and functional storage space.
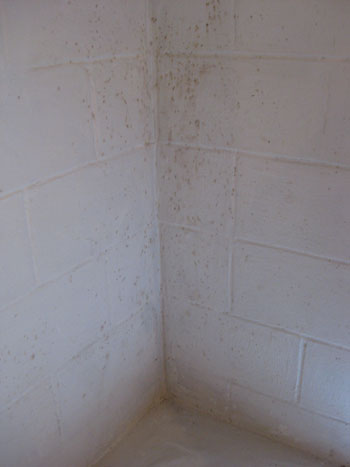
If you recall, we had already faced the grueling disappointment of mildew spots making their way through our first coat of white latex-based Drylok (which is like painting with Elmer’s glue, btw)…
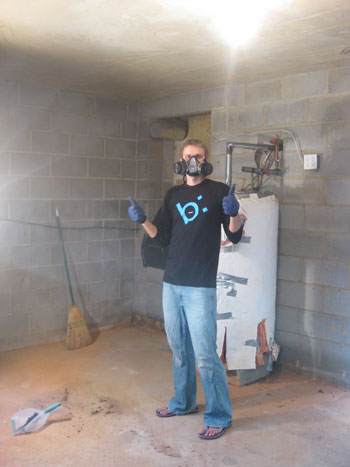
So with our second round of bleach-treatment having tamed the mildew a bit more, we crossed our fingers as we broke out the powerhouse oil-based Drylok (as recommended by the experts at True Value for being even more protective and durable).Talk about stinky. Sheesh. Thank goodness for our professional grade gas masks (we’ve read about people passing out without them when it comes to the oil-based formula). When it came to the consistency, it was like we had traded Elmer’s glue for natural peanut butter (you know, the kind that you have to stir to mix the oil in?). But we furiously trudged ahead as quickly as possible while October graced us with a convenient little “heat wave” last week (Drylok has to be applied at 50+ degrees so last week’s highs in the 70’s were a blessing to our otherwise unheated basement).
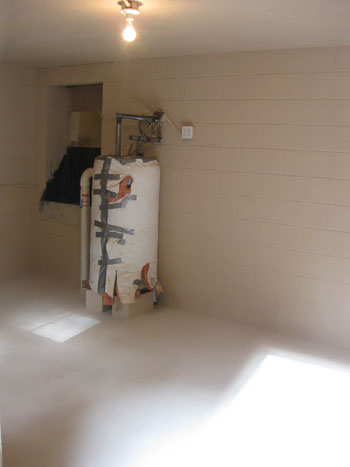
After two 5-hour days and eight additional gallons of Drylok (yes, eight!) we finally finished slathering a second coat on the walls and floor plus two complete coats on the ceiling. And with that we officially sealed our beige box of a basement (yup, that’s 13 gallons all together, totaling 325 beans- thank goodness for our True Value gift card!). And a few hundred bucks is still a small price to pay for a weatherproofed basement that can now serve as usable storage forevermore (in fact after the first coat we had about a week of rain and nary a drop of moisture seeped through, so the second coat convinced us even further that our basement was completely waterproofed for the long haul). And despite the premixed tan Drylok color being a little fleshy for our tastes (they offer it in white, tan, gray and blue- we went with tan to make it feel a bit less stark down there), it actually looks pretty good- especially compared to the raw cinder block “before.”
But the best part by far is no mildew (!!!) – even now, a week and at least two rainstorms later. Zero. Zilch. Nada. I guess the guys at True Value were right… that oil-based stuff is way better than the latex version.*
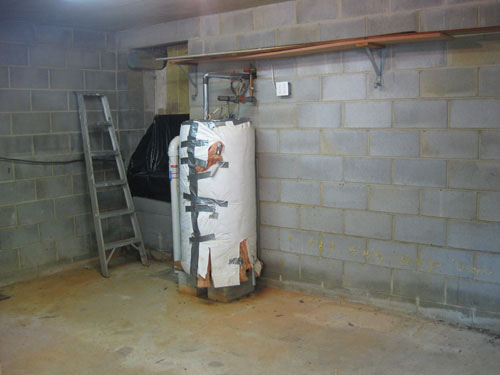
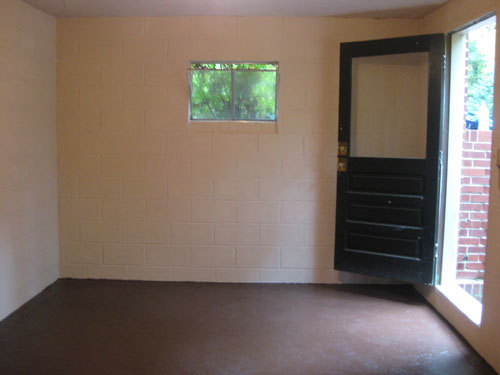
So with our Drylok finally packed away, this weekend we took care of the last bit of painting prep: the floor. See, we opted to use tan Drylok everywhere instead of painting with tan latex paint over white Drylok because painted Drylok can’t be re-Dryloked, which is recommended every 15+ years or so. But we wanted to bring some color to the floors to break up the big beige box of a basement (all of our moisture problems stemmed from the porous cinder block walls, not the concrete floor, so we’re confident in painting over it without worry that we’ll need to re-Drylok the floor in a decade or two).
And in the spirit of being cheap using what we have, we broke out some leftover chocolate brown porch and floor paint from our sunroom floor-painting project (Valspar’s Oil-Based Porch & Floor Paint in “Brownstone” in case you’re wondering), slapped on one thick coat, and called it a day. We love that the dark color will hide dirt and outdoor footprints (since it’s a separate entry basement that’s always a plus because we’ll always be trudging in from outside) and we also appreciate that the rich tone works with the rest of our home’s mocha flooring to make it feel like a part of our casa, even if it is a bit disconnected.

But of course this is all still just the beginning of the big basement overhaul. Once that floor paint has a few days to dry, we’ll be back in there planning how to minimize eyesores like the big water heater in the middle of the room, brainstorming some storage solutions, tidying up a few more areas – including the access to our crawl space – and hopefully finishing this basement makeover before the whole lack-of-heating-down-there thing really makes this project uncomfortable.
Oh and while we’re on the subject, tell us what you guys use your basements for. Are they storage only? Completely abandoned? Livable square footage with extra bedrooms and bathrooms? Man caves? Rooms where monsters live like in Home Alone? Spill it.
*I also mentioned our basement project to my very-expert-in-construction friend last weekend (at his wedding – I know, great “you just got married, but let’s talk about Drylok” conversation skills on my part). First question he asked was “you used oil-based, right?” I quickly responded “of course,” too embarrassed to admit our first coat mistake. Lesson learned.

Stefani says
Wow, amazing! I have been looking forward to seeing your basement renovations, and I’m amazed at the difference just from painting – looks great so far!
Sarah Jones says
Our basement is technically livable with hvac and a full bath, but it’s ugly! It’s our personal storage facility!
Sharon says
Even at $325 look at all the extra valuable real estate you uncovered. It looks amazing … clean and water tight.
I live in Canada … we have full basements. Mine is finished with a bedroom, a media room and a storage/laundry room. It is all really storage to me … I’m not a basement person. Not really a good thing … I means I can just store more ‘stuff’.
Oonafey says
Amazing what (a ton) of paint can do. It looks phenomenal! Way to go guys – I am always impressed by how hard you work.
kristy says
We store our two kiddos in the basement! Well, kinda.
Our basement is about 80% finished, with two bedrooms, a bathroom, family room and playroom. There’s also a shop (the 20% unfinished part) where I hope to frame in a room someday where I can send all the Legos in our house to die.
It’s a walkout basement, so there’s also access to our backyard.
Karyn says
Our basement is liveable.It has our laundryroom, half bathroom, and playroom/family room. It was finished when we moved in, so it was a godsend.
Erin says
I wish we’d known about Drylok years ago. The house I grew up in had a perpetually leaky basement. I don’t have a basement now but here in Oklahoma a basement is particularly useful as a tornado shelter.
Keep up the good work Sherry and John!
Magchunk says
As you prob know by now, we rent, but we DO have a basement where the laundry is (only accessible from the outside, but it’s a covered stairway luckily). We’ve only been there a month but I’m already wondering how we can make it a little more welcoming. The floor is clean (we have some rubber bins with seasonal stuff down there now), but the ceiling beams are exposed and full of icky cobwebs. It’s like a freaking scene out of Arachniphobia (at least the few scenes I got through before nightmares set in). Totally creeped out by that, but I guess there’s nothing to do but tackle it with a vacuum (and full body armor?) I’m a huge wimp with spiders. Yuck.
carrie @ brick city love says
Our basement is actually zoned as a separate apartment, which we plan on fixing up & renting out. The renovations are only about halfway done though. Part of me wishes we had it just for storage because it would free up valuable real estate in our home. But then I think about the potential rental income and think about de-cluttering our living space.
Bailey says
Love it!! You guys are amazing because you can make a basement turn into something stylish and warm. Go you!
I have a piece of basement related advice that I learned the hard way :(
I recently had to help replace a water heather that leaked a surprising amount of liquid in a very short amount of time (bummer).
One thing we learned is to slip a pan (looks like a big circular cake pan) under the water heater with one of those moisture sensors that sounds an alarm if moisture is detected. You can use just the sensor if you can’t put the pan underneath the tank because it is too heavy.
So far we have had one pinhole leak from not sealing a joint properly, and we learned it FAST with the new sensor, so it has paid off already!
Best of luck with your basement!!!
Rich says
Don’t mean to rain on your parade, but… the area where wall meets floor will most likely shift…and you might get a crack in the drylock in a few years…then water will once again come through. :( Did you look into a french drain? I am keeping my fingers crossed that the wall/floor doesn’t shift.
YoungHouseLove says
Hey Rich,
We actually have exterior drainage precautions already in place (thankfully they were there when we moved in) so we knew that we were only dealing with only small absorption of water since our cinder blocks weren’t sealed (and not major water issues- all of the areas around the basement are graded away from the foundation and all the water coming down the gutters is diverted at least 20 feet away from the base of the house). This is why after weeks of rain we only had small spots of moisture that we clearly saw “sweating” in from the walls and not a monsoon of rain in our basement. Whew! As for the floor shifting, the basement has been poured and in place for around 30 years and it hasn’t shifted yet so we’re hoping that it’s firmly in place for the long haul. Of course if it ever did shift we’d cross that bridge when we get there. Fingers crossed we’re good for a while though!
xo,
Sherry
kristin says
Thanks for the info Sherry! Thx too for posting the BM nos along with the paint chip names. You rawk girl.
ell.uu says
we live in colorado where basements are built in almost all modern homes and are often used as part of the living space. we had ours finished earlier this year and we’re in love with it…best investment ever. it’s 800 square feet, with a family/play room (where we watch tv and play with our daughter), guest room, and 3/4 bath.
Eileen says
Your blog is so fun to follow. I think you hooked me with that incredible daybed in the sunroom, plus the brilliant enlargement of typography for wall art! It’s also nice when you cite low-cost sources for stuff.
The problems you face mirror our own little brick house, i.e., drain clogs and basement issues.
I call our small basement The Dungeon, although it’s fairly well lit. It’s not pretty, but it’s a safe place to hang out when tornadoes are near.
The Dungeon has been known to host sock hockey, Ping Pong, and a young rock band. It’s major function, however, is storage and laundry.
The Dungeon has a wall of original built-in cabinets, which we use to store luggage, Christmas decor, and more. Our washer & dryer sit near a 6-foot, bright yellow, wooden counter. We’ve deduced that the counter sat upstairs (in the kitchen) before previous owners modernized the kitchen. In like 1950…
Austin says
What a timely post. I live in Richmond too, and with the recent rain I’ve had a soggy basement (about a quarter inch of rain that seeps through the walls). Since my washer/dryer, water heater, and lots of storage boxes are in the basement, I’m in desperate need of a waterproofing solution… but don’t want to pay B-Dry thousands of dollars just to treat an unfinished concrete/cinderblock basement!
I think Drylok is the way to go. I guess it’s available at Pleasants or Lowe’s? I’ll look forward to re-reading your articles on how to apply it, and would appreciate any other tips you have in the meantime.
Thanks for the blog post.
Austin
YoungHouseLove says
Hey Austin,
Yup, Drylok is pretty much available at any hardware store just remember to get the oil-based kind and to apply at least two thick and even coats to properly seal your space. It also helps if you don’t paint over it so you can reseal things in a decade or two if they need additional protection. Hope it helps! Happy Dryloking!
xo,
s
Katie says
We’re in the process of finishing out our storage area in our garage. Was your concrete floor already pretty smooth before you Dryloked and painted? Ours has some rough patches and I’m not sure how to handle them! Any advice?
YoungHouseLove says
Hey Katie,
Hmm, our floor was pretty smooth but our cinder block walls definitely were textured and rough pretty much all over. The Drylok really seeps into every crack after two thick coats, but it doesn’t fill things in or smooth anything that’s rough so you might want to check with your local home improvement store to see if they have any “self leveling concrete” or something else that you can pour over the rough spots of your floor to smooth them out before Dryloking. Hope it helps!
xo,
s
Becky Duncan says
Great Job! We are in the basement/Man-Room conversion…Tore off the paneling and fake brick; but now have to deal with the walls. Our plaster is coming off the concrete so need to go and get some expert advice. Drylock is great stuff! Good luck on the rest of the re-model.
Julie says
Can I ask what you used to paint with? A brush or roller? And what kind/brand? Seriously considering giving the Drylock a go on our icky basement but it seems hard to deal with since it’s so thick.
Thanks for the inspiration! Our laundry and extra freezer is in our basement and we store a lot of stuff down there, but it’s in SERIOUS need of sprucing up so it’s not so creepy.
And it’s so cold in winter….anything you did for that? You said yours isn’t heated, right?
Thanks!
Julie
YoungHouseLove says
Hey Julie,
Drylock recommends a first coat by brush to ensure it’s thick, and then you can go back over it with a nappy roller (to help get inside the cracks and crevices). We did some of our first coat with a roller and it ended up being fine, but it definitely required a brush to really get in the small spaces. Any brand will do on the roller, just make sure it’s a long nap for rough surfaces.
Oh, and ours isn’t heated either, but they say you shouldn’t apply Drylock when temperatures will drop under 40 degrees because it won’t dry properly, which is why we scrambled to get ours done before winter set in. But now that it’s all dry, temperature doesn’t matter since it’s just a storage space, not a living area.
Hope that helps – good luck!
-John
kat says
You may have already answered this, but I can’t seem to find it. Do you think it’s better to use latex based floor paint on raw concrete, or oil based? I know you said you used oil based since yours was previously stained. But I hear that oil based is stinky and takes a loooong time to dry. So I would like to avoid it if possible.
YoungHouseLove says
There are pros and cons to each. As you mentioned, oil-based floor paint is smellier and takes longer to cure, but it’s more durable and long lasting as well as regarded as “expert grade” so it’s a higher quality of paint (and specifically made to hold up to high traffic areas like floors). Latex paint is essentially water-based, so it’s not nearly as durable or long-lasting but it does dry faster and smell less (although for the long term you might need to keep repainting it more often with water-based, so waiting for the oil-based paint to dry once actually be a short cut). Hope it helps!
xo,
s
Dawn says
ok so if I do this in our bungalow, and have kiddos do you recommend us leaving the house for awhile due to the fumes? I don’t think I can get my 2 year old to keep a face mask. haha
YoungHouseLove says
If you don’t have a separate entry basement like we did (which kept the smell from the rest of the house) then we would definitely recommend clearing out for a few days or even a week to let things cure. You’ll definitely need to leave fans running and windows open to allow the smell to dissipate though, otherwise you’ll come back and it’ll be just as stinky if the fumes have nowhere to go. Hope it helps!
xo,
s
Janelle says
We had to run a dehumidifier all summer in our basement and unfortunately had about 3 inches of water in it last Friday. We think we know where a great deal of the water came in and we need to fix that spot. Would you recommend dry locking the entire basement as well since we do have a mold problem which we discovered when we ripped down the paneling? It’s actually black mold I believe! Yikes! My husband doesn’t seem to think we have to since he thinks the water just comes in at that one spot and if we fix it it should be okay? What are your thoughts? We also have linoleum on the floor now (70’s style none the less) that needs to be taken up. I just want our basement to be cozy and I have no idea how to achieve this. Any thoughts? Thanks!
YoungHouseLove says
Hmm, black mold isn’t something we’ve tackled so we’d recommend calling around for info from friends who might have had the same problem or visiting Lowe’s or Home Depot to ask around. Oh and there’s always google! Good luck!
xo,
s
Dani @ computer repair Ventura says
Ew! Mildew, that infectious spore… WONDERFUL repair to the basement, absolutely beautiful job.
Vera Canard says
I think camp rock is the best film in the worl and i love the jonas brothers <3……….
JW says
I know this is an old post. I really hope you get this comment (well, question)!
How did you get the basement floor clean enough to paint? It seems like the basement of my house has a never-ending supply of dust/dirt and part of the basement is a finished laundry room, so I can’t pressure wash it or anything.
YoungHouseLove says
We just did lots and lots of scrubbing with a stiff brush and mild soap. I don’t recall it being perfectly clean at the end of it all, but it was sufficient enough to go ahead and use the dry-lock. It definitely wasn’t the most enjoyable of tasks, but it got the job done!
-John
Nicole says
Looks awesome! Are you still waterproof down there after a few years? Any problems? We are in the process of purchasing a 1950 ranch with an unfinished basement. Living in PA, moister is a big problem. I had never heard of drylok before. Do you think it still can be used in a basement that has no door or windows that open? I worry about ventilation while painting. I love your blog! It makes me believe I can fix up this ranch, carpeted bathroom and carpeted blue kitchen and all.
YoungHouseLove says
We moved 15 months ago, but were waterproof the entire time we lived there before we moved out! I believe it only works in spaces that don’t need major water help (exL if you need french drains, it won’t help, but if you just have moisture seeping in slowly because things aren’t sealed it can help. As for ventilation, that stuff is nasty! I would definitely wear a gas mask type contraption from Home Depot (they’re like 20-30 bucks and well worth it to not get fumed out!). Good luck!
xo,
s
Carol Greenwood says
Wow! Are you “for hire?” I have a small unfinished area in the basement (cinder blocks and cement floor) which badly needs sealing to treat musty smell.I would also like to paint it to make it presentable. So…you would not paint the Drylok? Glad I ran across this.
Araceli says
I have been following your projects for a while. You have truly been an inspiration in my own renovations. I have big plans ahead for my little cape cod. I love my home and the way it’s turning out. The size of the rooms are okay but in some ways it is small. It lacks utility storage, there is a small room in my sub-basement that only holds the water heater. It’s one of those ugly bulky water heaters that obviously take up space I can use for storage. I want to get rid of it and have a tankless water heater installed. I just know I will have trouble finding the right person for the job. I have heard that many do poor installations and among them was a well-known company. This is why I feel a little nervous about going through with it but we’ll see what happens.
Adrianne says
I love what you did to this basement! We are in the process of doing something similar. I know this was a while back, but how did you clean the floor to prep it for painting? Thank you!
YoungHouseLove says
Gosh, that was years ago, but I think we used TSP to scrub it! Hope it helps.
xo
s