We named the rug in the sunroom Stinky. We were feeling literal, and it was damp in the corners from moisture seeping into the sunroom from bad seals in the old sliders and some wood rot. The previous owners knew there was a moisture issue (along with a serious smell issue) in there, which definitely came into play when they set the low-enough-to-be-in-our-range listing price, so although this rug sounds like a curse, we actually consider it to be a blessing (heck, if we can take care of something that might turn off other buyers and it helps us afford a house that we LOVE, we’re all about it).
So here’s how we got that rug up and outta there along with the glued down rug pad underneath – and some pretty serious nails and staples that were lurking below. First we yanked up the rug in the corner using a small crowbar to free it up from some of the nails in the tack strips around the perimeter of the room that were holding it in place.
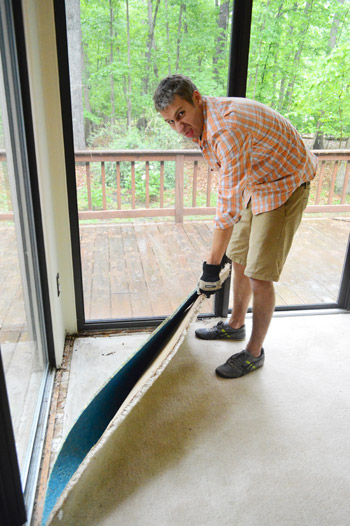
After we got the rug free from the tack strips around the edges of the room, we rolled each side like a scroll, towards the midpoint of the room. Once we got them there in the middle, we used a box cutter to slice the rug in half so it was easier to carry out of there (you can cut a rug before you roll it, but we found that the extra slack that it gained after it was rolled made cutting it easier once it was in this position). Then we carried each section away while trying not to inhale or think about how much of our body it was touching.
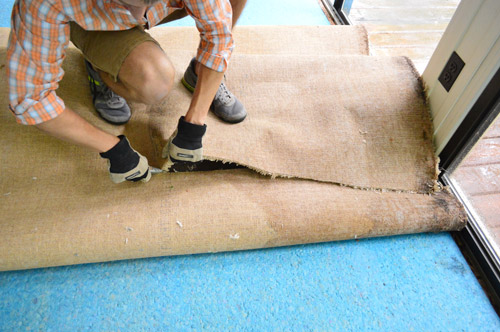
Next we attacked the rug pad, which sadly was glued all over the place (we hoped it was just a floating pad so the concrete under it wouldn’t have glue stains out the wazoo). Soon enough… we hit glue. Boo, glue, boo. And suddenly this post is an ode to Dr Seuss.
Oh well, still had to get it outta there, glue stains and all. We yanked up as much as we could with our hands and for the areas that were super stuck to the glue, we used the same $25 floor scraper from Home Depot that had come in handy when we removed the carpet in the upstairs bedrooms. It has a pretty sharp and smooth blade at the end of it, so just like you’d use a razor to get paint off glass, you run it across the floor with some force and it basically slices the glue right off so the floor is smooth and flush again.
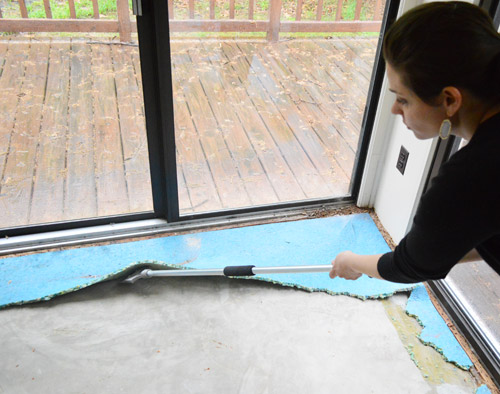
So glad the glue bumps could be removed, even if the glue stains were still there (I’ll show you those a little closer in a second).
While I was slicing my way around with the floor scraper (yes, with my dangly earrings on because I’m cool like dat) John got to work on busting the tack strips out from around the perimeter of the room. They were basically spindly old wood strips with nails sticking up that had held the carpet in place, and they were a pain to get up since they were so brittle (they kept splintering and breaking instead of coming up all as one strip – even when John worked the prybar under them every few inches to pry them away from the floor). It probably took a good hour and a half just to get the rug pad, excess glue, and tack strips up after spending about ten minutes pulling up the carpet itself.
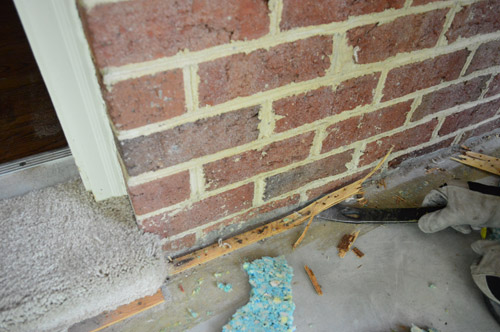
Once all the tack strips, random nails, and glue spots were up it was time for the shop vac. First I picked out the longer shards of wood to bag and dispose of separately (no sense in trying to suck up a foot-long shard of wood with the shop vac) but all of the small splinters of wood, nails, balls of glue, and tufts of old carpet got swept into piles and vacuumed up.
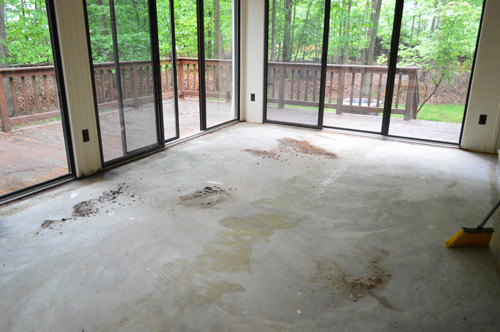
And with that, the room turned a corner. The raw concrete, even with the glue stains that it has, is definitely an improvement on the swampy old carpet.
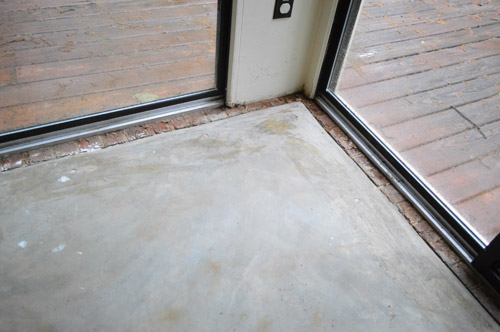
And thanks to my little scraper action, the entire floor is flush and smooth now, even with those frustrating glue stains that have soaked into the concrete (at least they no longer bump out along with a slew of nails and staples).
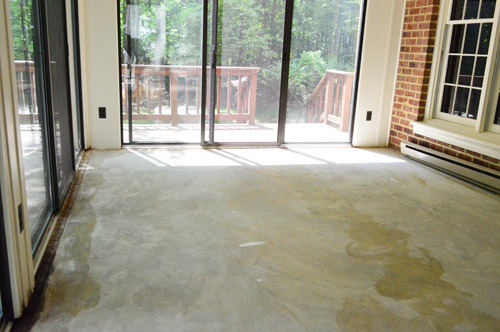
So we think a good cleaning followed by a coat of stain & odor blocking primer (just to be sure the stink is really gone) along with some porch and floor paint will cover up those stains, seal in any lingering smells (so they won’t waft out to greet us on a hot day), and we’ll have a room that’s approximately 98% more pleasant to be in.
And down the line we have big plans for this room. So beyond this little carpet’s-gotta-go first step, we’d love to…
Rip up old stinky carpet and padding- Scrub the concrete and seal in the smell somehow (so it doesn’t leech odor forever)
- Stain or paint the concrete floor as part of Phase 1*
- Permanently remove the half-broken base heater
- Eventually retile the floor with outdoor-safe stone to upgrade the old concrete floors (down the line for Phase 2)
- Convert sunroom to an open covered porch with new columns and no more sliders (many of the sliders are bad and the posts are rotten) – we’re envisioning something like this
- Possibly build a brick outdoor fireplace off of the sunroom after we open it up? Kind of like this, but different…
- Add beadboard to the ceiling and paint it soft blue?
* This is just a first-thought brain dump, so if we learn that painting the floor won’t allow us to tile it down the road, we’ll course correct and share the new plan as we go
So glad to have that old carpet gone. Even though we had to carry it out to the garage ourselves (which sends a shiver up my spine every time I think about it) it was totally worth it to have it outta there.
Psst- Clara’s having more conversations over on Young House Life. Number 5 made us laugh until we cried.

Leave a Reply