It’s no secret that we love ourselves a big linen drum shade, so imagine how excited we were to see Ashley’s tutorial for the one that she made from scratch… to the tune of just $18. Seriously. Here’s her letter:
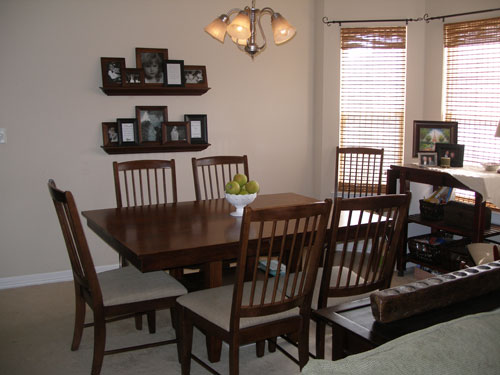
Okay, you have got to quit doing cute things in your house because I’m always wanting to do something else. My project list goes on and on. Ha! The latest thing you inspired was a drum pendant light. I decided to try to do something similar above our dining room table. Although I would love to redo the lighting altogether, I can’t take that on right now. I decided to try to use the current fixture and just build around it to save some money.
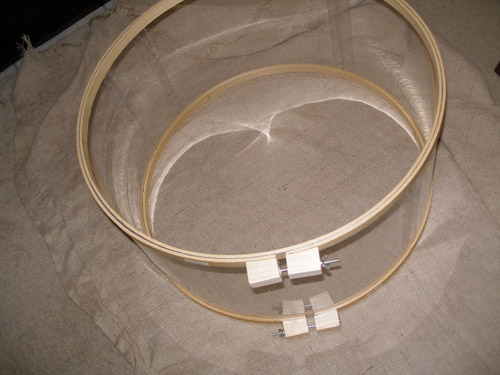
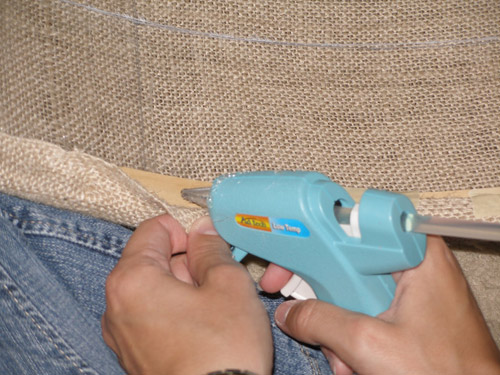
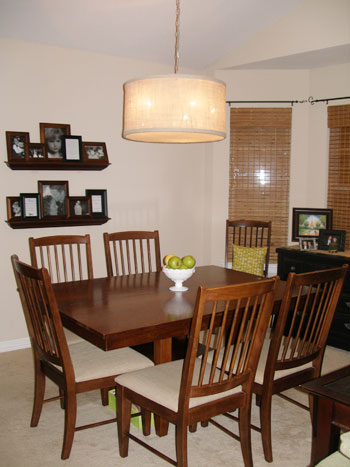
I used some cross stitching hoops, plexiglass, burlap, and a hot glue gun to make my own drum pendant light that would go over my current fixture and I did it for $18! I love it! There’s a post I did on my blog if you want to read the full tutorial.
Thank you for always inspiring and making “on the cheap” fashionable!!! -Ashley
Who knew some cross stitching hoops, plexiglass, fabric, and a good ol’ hot glue gun could produce such a beauty? We love the result and we still can’t believe Ashley made it happen for under twenty buckaroos. Plus her tutorial is super helpful for anyone who wants to tackle it themselves. Any takers?
Psssssst- Don’t forget to check out our weekly post over on BabyCenter. This week we’re elaborating on some baby documenting projects and some decor ideas when it comes to displaying those memorable monthly (or weekly) moments!

Rachael @ Mrs-Adventure says
Wow way to go Ashley it looks great! I did a pottery barn lamp shade tutorial on my blog not too long ago, but I never thought of actually making the shade!
Christin says
Fantastic. : )
Angie says
Wow, what a great idea. I love the look of the drum lampshades but I can’t afford them on a budget. I would have never thought to use cross stitching hoops. I will definitely be borrowing this idea in some form.
Cait @ Hernando House says
That looks awesome! If I had anywhere else to hang a pendant light I’d be all over that!
And also: I had no idea they actually make embroidery hoops that big!
Karen J says
Who would have thought…. I’ve been looking for an inexpensive one myself and haven’t had any luck. I’m going to try Ashley’s tutorial. Thanks!
Jessica @ How Sweet says
Wow – very cool!
Chris says
Looks great but I’m curious how the reader dealt with the joins for the embroidery hoops.
Jocelyn Stott says
I am impressed. Looks great!
Kristen says
WOW that is great! I am going to have to try this. Thank you Ashley for this wonderful idea and thank you Sherry and John for sharing this with us!
wendy says
What a fabulous idea! Love it.
Sheryl J says
I would have never pick that rug, but that’s because I have no vision! It looks wonderful in this space.
My latest hunt was for a vanity desk to match (color/height) my one nightstand which was expresso. After weeks of looking, I came to the realization that my computer desk (Target’s Carson Anywhere Desk $99) matched is perfectly! I was also able to find a replacement for the computer desk on Craigslist for $25 but in black… the same day! It was a very cool day ;) Now, hunting for the perfect vanity stool.
Sheryl J says
Realized I posted my comment on the wrong blog post… silly me
laura says
that is AHHmazing! thank you for sharing!!!!!
Suzie @ cupcake monkey says
Ok seriously, I have got to do this in my house. We have the most hideous light fixture above our table. I hate it. It isn’t really that bad-looking, but the light it produces, just isn’t what I want. Since I NEVER have it on, I have pretty much forgotten about it, but sheesh…seeing how easy this is, I need to convince my husband that we need to do it.
They did great work!
Amy @ Renovation Innovation says
This ia great idea – I’m wondering how the loop fasteners were covered/removed? I checked out Ashley’s blog for morew details, but she doesn’t mention it. Any ideas?
YoungHouseLove says
Here’s hoping Ashley drops in with that info soon!
xo,
s
Jen says
Love it! I have a client that’s looking for a shade like this one…we may just have to try it out:)
Ashley says
This is amazing!
Kelly says
OMG! That is such a great idea for such a great price!
http://www.kellyloves.wordpress.com
Aimee@ the Functional Space says
Nice job! I’d really be interested in how she handled the loop fasteners too.
anna see says
Ashley, what an inspired re-do! Seriously, this thing is going to make waves all over the blogosphere. Great job!
heidi @ wonder woman wannabe says
I’ve totally eaten at that table! :) – It looks just as FAB in person! Way to go Ashley!
~Heidi
K (Barking BabyMama) says
That is so impressive! It looks beautiful and very finished.
Amanda Ray says
I’M FRESH!
I live in Central Florida, so the only way to freshen up is take several showers a day!
Bethany G says
I love this! I have been trying to think of a way to cover a chandelier in my new place. Thanks!
hi-d says
What a great idea! This turned out beautifully!
Heather says
I made a baby mobile for my friend and used the cross stitch hoops for my base. I just used the inner part of the hoop which doesn’t have fasteners… not sure that’s what Ashley did, but it sure worked great for the baby mobile!
Jasmine @ Eat Move Write says
I’m a huge fan of drum shades. That looks so easy to make, and it looks fantastic in that room!
Brittany says
Lovely! I need to try this!
Connie says
It’s the night before school starts, I’m just finishing the last touches for plans for my students. I decided to stop by your blog b/c I have not had the chance to read it since orientation week. Just when I do, I get a pleasant surprise. I was looking for a DIY project just like this. OH thank you, thank you, thank you!
Kellie Dobbie says
This is great! This gives me an idea, I could actually use this shade for a table lamp!
Cait @ Hernando House says
Popping back in to say I might have to try this with Rachael @ Mrs-Adventure’s knock off PB shade tutorial for a lamp in our library that currently has a sad, sad shade.
Tara says
What an amazing transformation – looks great and at an unbeatable price too! I had an unrelated question though about the bamboo shades on her windows: I was hoping she could share where she picked those up. I’ve been looking for narrow ones like those for our upstairs windows.
Whitney says
This is awesome! I will definitely be trying this!
Cheryl says
If you’re on a tight budget, here’s another suggestion. I just created my own shade from leftover heavy cardboard, which is less rigid than hoops, but super inexpensive!
Check it out, http://rightathelm.tumblr.com/post/1545364907/diy-chandelier-makeover-part-ii#usernotes
Monica says
What did you do to work around the clasps on the stitching hoops? It seems like they would be awkward?
YoungHouseLove says
Hope she drops in with that info for ya :)
xo
s