We did it! We DIYed an awesomely oversized light fixture for the office and we only spent… wait for it… $32 from soup to nuts. Which is pretty darn exciting considering it reminds us a lot of this pricey $412 version. Gotta love saving $380 with a homemade solution. Here she is in all of her glowing glory:
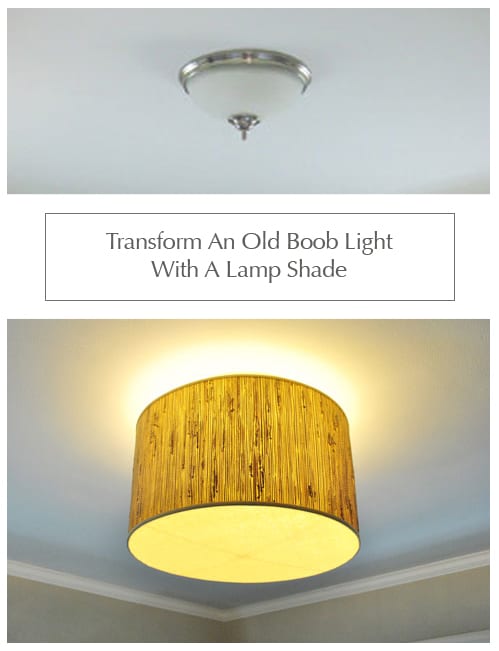
But let’s back up. Here’s the basic fixture that we started with to serve as something of a before shot (although you all know there’s no longer a bed in there since we upgraded to a sleeper sofa and built a DIY desk).
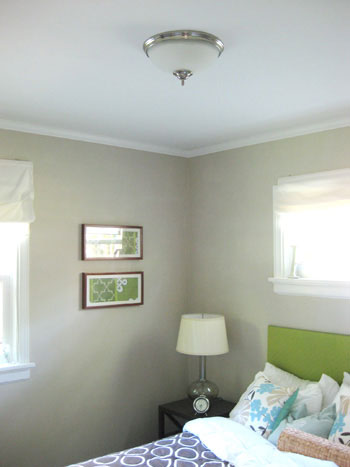
And now that we’ve easily been spending over 40 hours a week in this ever-evolving office/guest-bedroom/playroom, it’s probably understandable that we wanted something a little more inspiring and interesting hanging overhead to complement our things-they-are-a-changin’ surroundings.
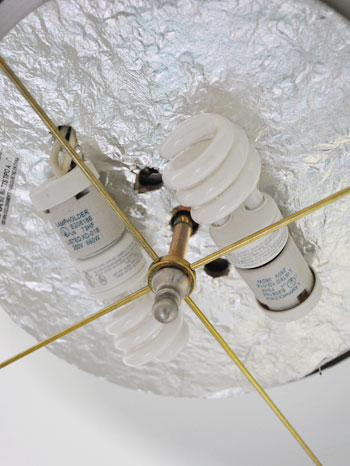
So we hit up one of our favorite local lighting spots (The Decorating Outlet here in Richmond) and came home with this amazing – and amazingly huuuuge – 20″ lamp shade for just $29. It was actually on clearance since it was labeled as “dented” but we studied every inch of it and couldn’t find so much as a tiny flaw. Maybe it had been squished but the indentation later popped back out? Either way we were sold! We knew we’d need to figure out how to create a diffuser for the bottom of it, and we also assumed we’d need to buy a lighting kit at a hardware store to hang it, but we figured those things would probably only run us another thirty-five bucks total (which still meant we’d end up with a polished looking pendant for just over $65). Not bad. Then we caught our first break when we removed the glass hemisphere from our old light fixture and realized that there was already an existing rod that might work for hanging our new pendant…

And sure enough, there was no lighting kit necessary…

… we just slipped the shade onto the rod protruding from the ceiling and used the finial (leftover from the previous light fixture) to hold it in place.
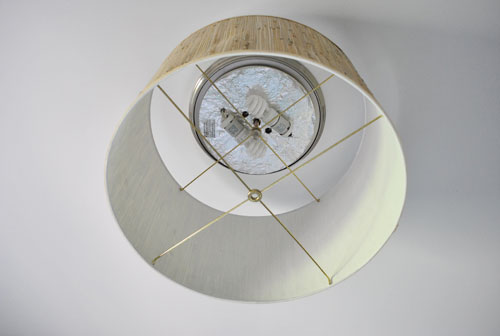
Here’s a closer look for all you detail oriented people:
Of course the view from the bottom left a lot to be desired. So with our how-will-we-hang-this-lamp-shade-from-the-ceiling question answered, it was time to figure out how to create a diffuser to block the ugliness without blocking too much of the light. I should mention that we’ve never tackled diffuser-making before, but we just did what we do for so many other projects: attempted to figure things out as we went along. First we pondered materials that we could use to create this much-needed diffuser. We could get a piece of plexiglass cut to size and spray it with frosting spray to obscure those ugly ceiling bulbs. Or we could get some sort of thick acetate (or another weighty paper product) and try to work with that. It was around this point in our brainstorming exercise that we decided to pad into the dining room and check out the diffuser situation on the pendant light hanging above our very own dining table. Lo and behold it was just some basic cream colored fabric. Genius!
Now here’s the safety warning: you obviously don’t want to use paper or fabric as a diffuser if your bulbs will be very close to it or if there’s no room for the heat that may build up inside the lampshade to escape. Luckily by hanging our shade from the ceiling on the already-existing rod from our old fixture there was about 4″ of space above the shade (since the entire top of the shade was open and was not mounted flush against the ceiling) for any built-up heat to escape. Plus we use compact florescent bulbs, which are known to burn a lot cooler, so there’s even less of a heat issue. Not to mention that the bulbs are over 18″ from the base of the lamp, where we added our little fabric diffuser, so they’re definitely not in too much of a close proximity.
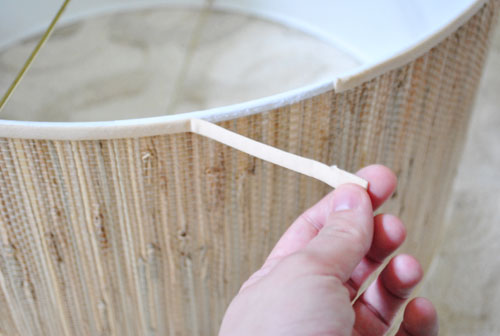
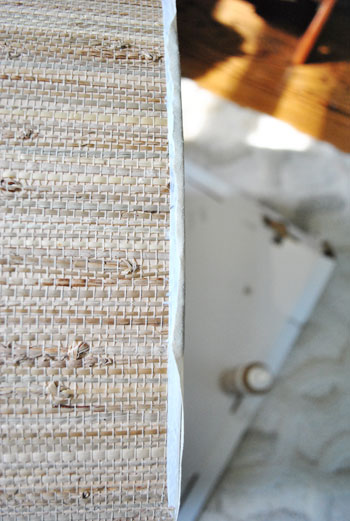
But back to the DIY process. First we removed the fabric band that was glued around one edge of the drum shade.
Then we draped our cream colored fabric (scored for under $2 at Joanne Fabrics) over the shade so we could see where to cut it to create the beginning of our diffuser panel.
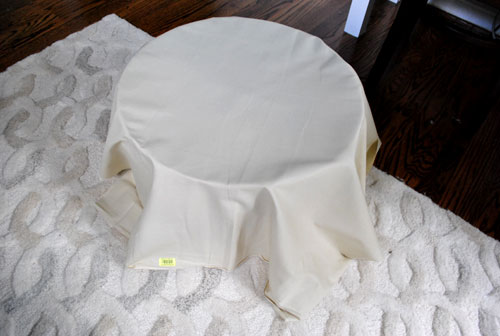
Then we just held the draped fabric in place and used a scissors to cut around the rim of the shade, leaving about a quarter-inch of fabric hanging over the edge.
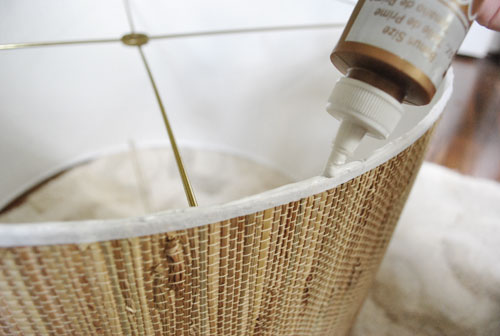
Next we used some Aleene’s Tacky Glue (some cheap already-on-hand craft glue) to coat the rim where I’d be sticking that round panel of fabric. Note: be sure to do this on the rim where you removed the fabric band and not the other side.
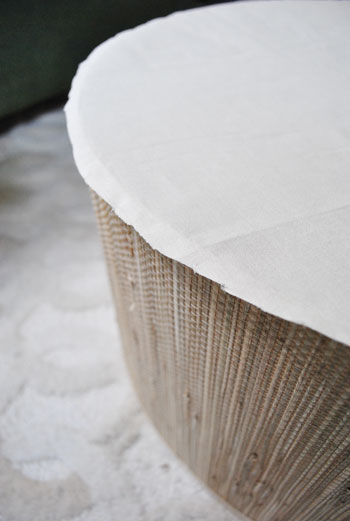
Then we simply flipped the shade over, so it was facing down, and placed it directly onto the fabric circle that we had cut out (with that quarter-inch of fabric hanging over the edge on all sides) so the glue would bond the shade and the fabric. Oh and it’s smart to iron your little fabric round before the gluing process if there are any creases in it.
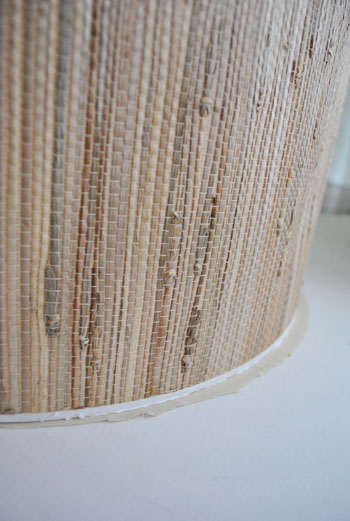
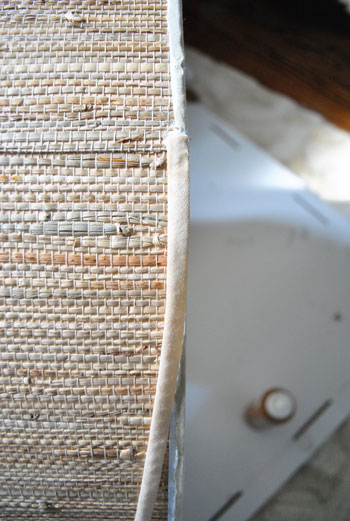
Then we just had to use a little more glue to secure the smidge of fabric overhang around the outside rim of the shade. Note: you don’t want your fabric to overhang too much or it’ll protrude past the fabric band once you re-glue that in place around the base of the shade. So trim your extra fabric if it’s any longer than ours is in the photo below:
Then we just waited about ten minutes for that to dry and re-glueed the fabric band in place. You know, the one that we removed at the beginning of the project? Easy peasy. In fact, speaking of easy, the entire process took less than 15 minutes of actual work (and about 40 minutes if you count the breaks for glue-drying).
And voila…
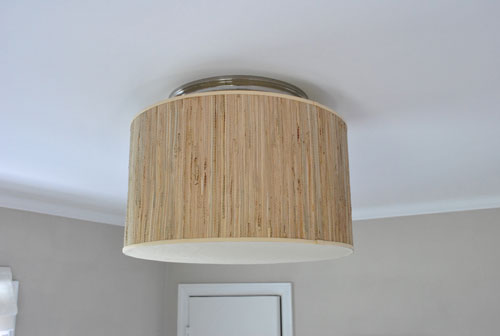
… a light with texture, charm, and loads of presence thanks to the oversized proportion. We just love giant shades in small rooms (like this 12 x 12.5′ space) to give them more of an elevated and polished look. Plus we’re of the school of thought that bigger items in small rooms actually make it feel larger and more luxe (whereas a bunch of small-scale pieces in a modestly sized room can make it feel smaller and more cluttered).
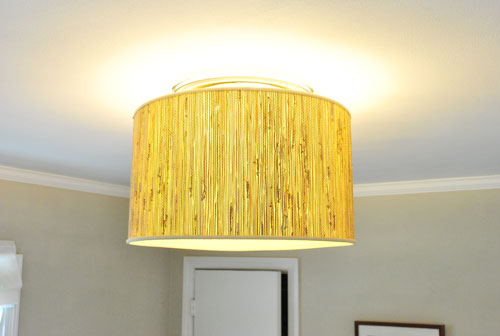
But back to our DIY light. We’re thrilled to no end now that we can no longer see those ugly bulbs from below. Plus the smidge of silver that peeks out over the top makes it look like a pricey flush mounted pendant (as opposed to a cheap-o lampshade that we retrofitted onto an old $10 fixture’s frame). And the fact that we only dished out $32 for the big office lighting upgrade – especially when we initially estimated that we’d spend around $65 retrofitting things – is the icing on the cake. Or should we say it’s the diffuser on the shade? Nope, we’ll stick with the icing on the cake.

Oh and changing the bulbs is simple since we can easily remove the shade from above (that gap between the pendant and the ceiling is key) so even though you can’t see the bulbs from below they’re not quarantined forever behind the fabric diffuser. So that’s the latest office news here at Casa Petersik. What have you guys been up to this week? Did anyone else tackle a lighting makeover or another office upgrade that made their room a little more interesting, stylish, or functional? Spill the beans.
Wanna follow the entire office/guest bedroom/playroom makeover? Click here for the intro post, here to read about the big sleeper sofa hunt, and here for the DIY desk play-by-play.
Update – Wanna know where we got something in our house or what paint colors we used? Just click on this button:


Nicole says
Alecia – I would definitely go with #2. The first one (brown) looks off bsucaee you don’t have any of those tones anywhere except in the shingles, which are lighter anyway. #2 brings out the mortar color in the stone you have on the front. I’m new to your blog, and you might have already covered this, but have you thought about an actual pop of color for your door? Nothing too wild (neighbors) but something that actually draws attention to your front door rather than making it blend in with the rest of the house?The yellowish light coming through your garage door windows made me think that a nice *mellow* yellow door would be really nice against the gray, but I realize that’s pretty daring. Maybe a rust/brick red? Or even a really deep (almost gray) plum color? Just an idea. :)October 19, 2011 11:34 am