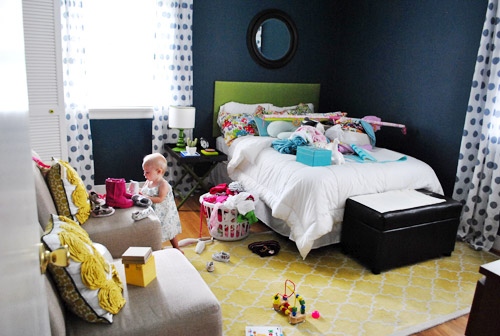
Nothing like a little weekend chaos. Guess what we did this weekend? Here’s a hint:
And another hint:
And another hint:
And one last hint:
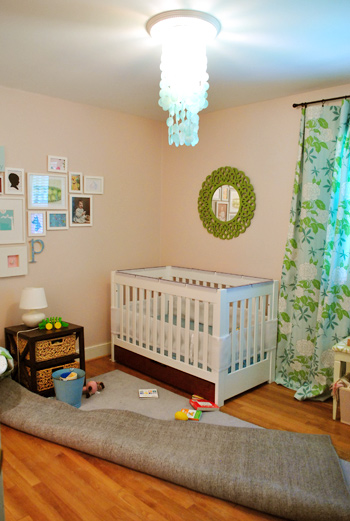
Um yeah, all that house insanity was for this:
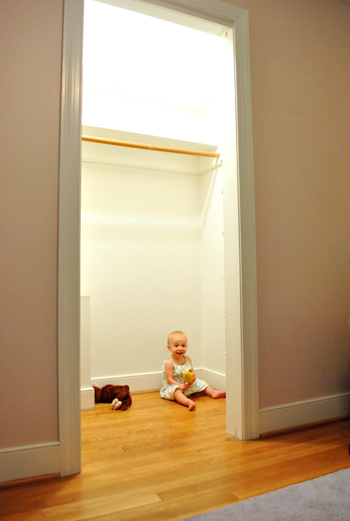
Specifically, to paint Clara’s closet.

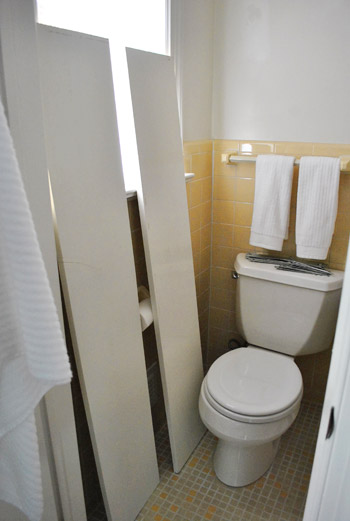
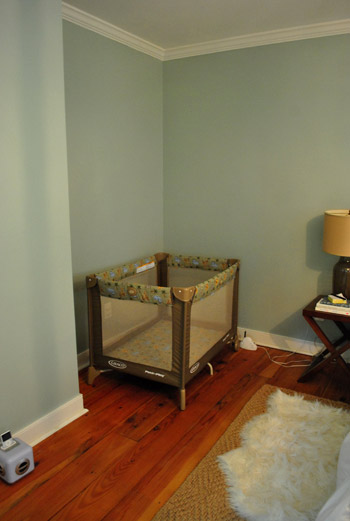
See, whilst standing on a chair in there hanging the little ribbon chandelier that I made last week (you know, right before John asked me how it was hanging), I decided it was high time we painted that little future-reading nook for the bean (we envision a big cushy beanbag and a ton of books in there for her to dive into). Isn’t it funny how one small project can snowball? One minute you’re standing on a chair hanging a ring o’ ribbons and the next minute you’re tossing a ton of stuff into the guest room, stashing shelves in the guest bathroom, setting up a pack & play in your bedroom (to allow for painting while Clara naps in there), and rolling back the ol’ nursery rug to keep it paint-free.
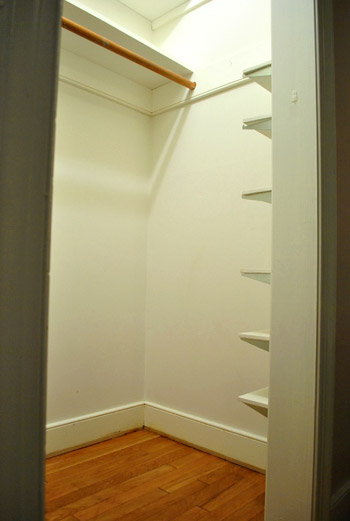
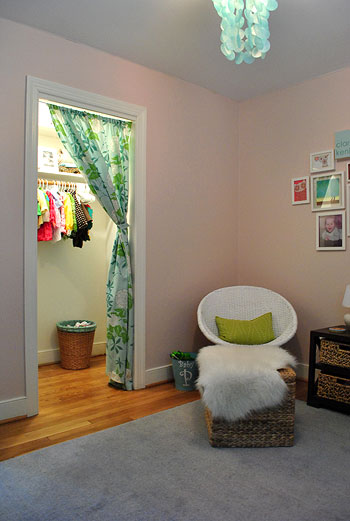
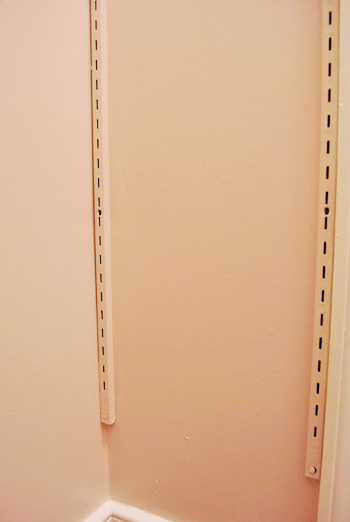
As you can see in the picture above and below, there are already some pretty sweet adjustable shelves for books and toys and all that hoopla when we turn this closet into a closet slash reading nook (Clara’s nursery was the former owners’ office, so the shelves were used for all of their paper and file storage- but it definitely works for board books and blocks too):
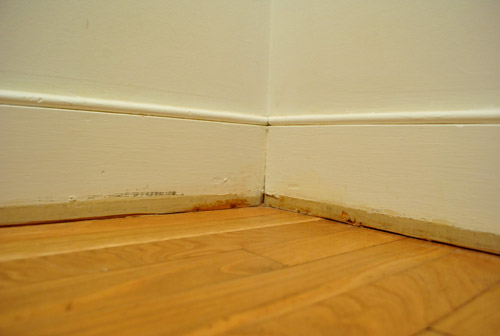
But it could definitely use some freshening up. Check out the grody baseboards:
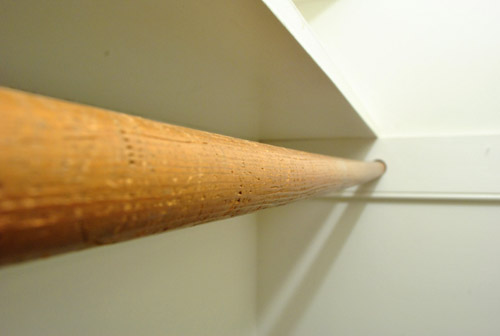
And the hanging bar that appears to be gnawed on:
So out came those already white shelves with the silver brackets (and into the guest bathroom they went)…
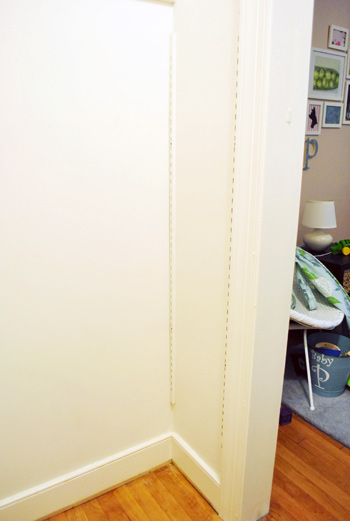

… so I could paint all the trim and that hanging bar with some slick semi-gloss white paint (Olympic No-VOC paint in off-the-shelf-white).
It was already a huuuge improvement. John and I went back and forth about what color we should paint the inside of the closet. In our first house’s nursery, the walls were soft pear and the closet was a fun light aqua color along with the ceiling. And we loved that. But since we went with a soft gray-pink in this room we didn’t want to do the same blue closet and ceiling thing all over again. So we decided that we should try something with texture instead of a new color. Like a pink tone-on-tone stencil. That way it’ll feel connected to the nursery while having a little somethin’ extra in the pattern department – maybe even something subtly metallic. But nothing too loud or crazy since there’s a bright floral curtain that hangs at the closet entry as well as on the windows across the room.
You know that fine line you walk between fun & playful and crazy & chaotic? Yeah, we figure if we have plans to add crown molding along with paint and possibly a stencil to the nursery ceiling we shouldn’t go too nutso on the closet – especially if it’s for quiet book reading/baby chillaxing. So for zero dollars and zero cents we opted to paint the closet the same soft gray-pink tone as the nursery walls (Proposal by Benjamin Moore color matched to Olympic No-VOC paint). Thankfully we still had some left from painting those walls back in December (<– cutest Clara pic ever in that post, bee tee dubs). But back to the painted closet. It’s a nice clean start.

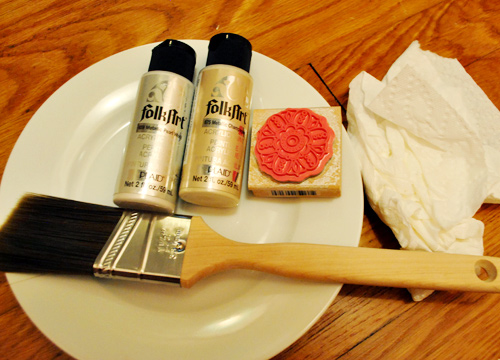
Even before it was dry I got into one of those moods (you know, when $herdog comes out and she decides to fly by the seat of her saggy gangsta pants). So I dragged the whole family to Ben Franklin (weekend family time = clearing rooms to paint, painting while the bean sleeps in a pack and play in your bedroom, hitting up the craft store) where I grabbed some 99 cent water-based metallic craft paint in pearl white and champagne (all the metallic paint at the paint store is $20+ and not quite VOC free yet- but this stuff should hold/wear as well as latex paint unless Clara takes a pressure washer or some sandpaper to it – and it’s a lot less fumey). I also grabbed a cute little $1 rubber stamper with a girlie medallion on it.
Do you see where this is going?
I decided it might be cool to apply some sort of hand-stamped pattern to the wall with that rubber stamper instead of a traditional stencil so it looked kind of irregular and imperfect like handmade wallpaper. And I loved the idea of layering the soft champagne color over the light pink walls so it would be subtle enough not to take over the whole nursery or anything (I also grabbed the pearl white paint in case the champagne was a bust). I envisioned it being this little glittering magical world for Clara to duck into and get lost in a book.
So instead of focusing on how long hand stamping the entire closet would take I thought about how much Clara would love it. And crossed my fingers that it would work. Oh and it bears mentioning that John predicted that it would not work at all because rubber stampers are for paper & ink and not walls & craft paint. Who brought the killjoy to the craft store? I did. But I also had the inspiration with me (El Beano). So I walked out semi-confident in my spur-of-the-moment idea.
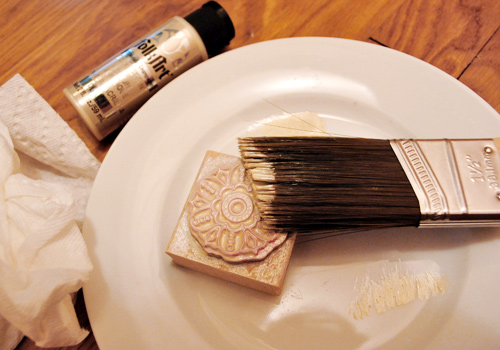
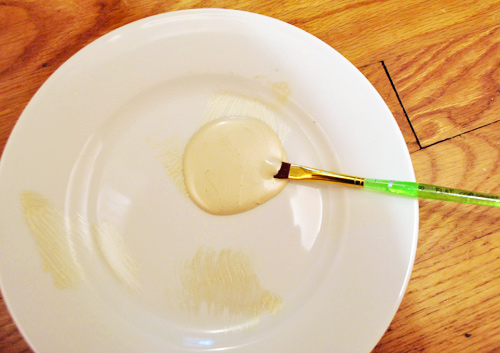
As for application, I learned by experimenting with some paper first that the best way to get the paint applied nice and evenly (and not too gloppily) was to lightly brush it onto the stamper with a paintbrush. I used a completely out-of-the-way corner that can’t be seen from the doorway of the closet for experimentation (it would also be covered in shelving and could be repainted with pink paint if all h-e-double-hockey-sticks broke loose and my little stamp method was a bust).
Behold, tiny champagne medallions:
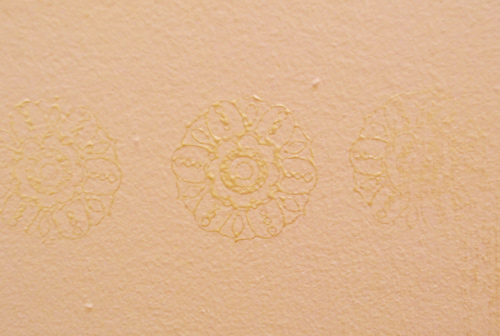
I loved them but they were way too subtle and finely-detailed in person. It almost looked like someone with gold lipstick kissed the wall since you couldn’t quite make out the medallion shape (and from the side they looked kind of bumpy and odd). They actually photograph a lot better than they “read” in real life, which is a shame because I didn’t want John to be right. But alas, it wasn’t the right answer for the closet. So it was back to the drawing board. Literally.
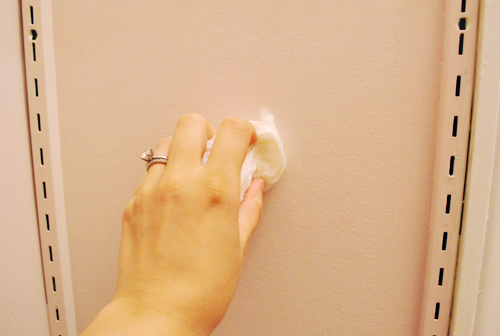
That’s right, in a serendipitous turn of events I tried wiping down the still-wet paint with a wet paper towel and it lifted right out. Well, not right out. I had to put some muscle into it and really scrub, but it came out with a little elbow grease so I could start over. And I was mighty impressed with my painted-earlier-that-day wall for holding up to all the manhandling going on so soon after the paint went up.
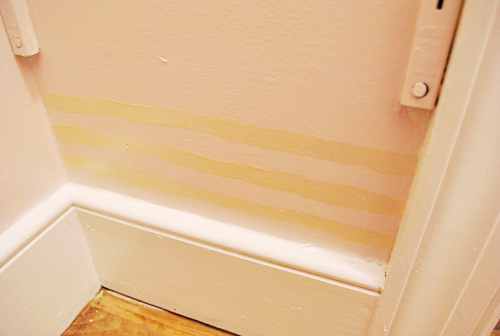
And yes I did say “so I could start over” a few sentences back. That’s right. I wasn’t done with my crazy craft paint yet. This time I was wondering if I could freehand some sort of fun painted pattern with the same champagne paint (using a wider brush than the rubber stamp so it would hopefully be easier to make out and less detailed/muddled).
First I experimented with imperfect horizontal lines…
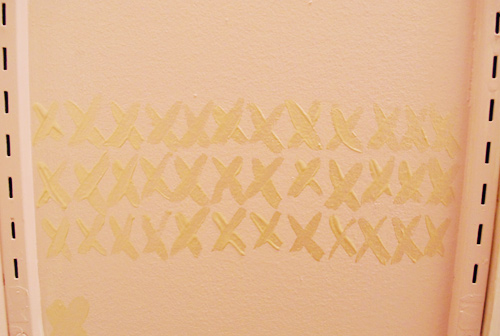
… then I moved onto a bunch of x’s in a row (kiss, kiss, kiss, kiss, kiss)…
… then I played around with some sweetly imperfect dots that I made by squishing the paint brush against the wall…
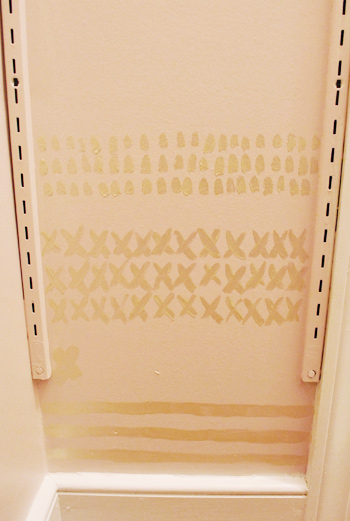
Before wiping anything away I called Killjoy John and Happy Happy Joy Joy Clara in for a consult. Clara wanted to kiss the x’s (I kid you not – I think the girl’s smarter than a fifth grader) and John and I both liked the horizontal stripes best. But we weren’t sold enough to slap them all over the walls quite yet. Sometimes holding back is hard for me, but it’s easier for John. He pointed out that we never regret thinking things through just a little bit before rushing in and doing something we might not love as much as something else in the long run. Especially when said project could potentially take five days and make you see stripes when you close your eyes for three more days after that. Bah, voice of reason = annoying, but right. Point taken.
So because I was incapable of getting off the stamped/painted/stenciled train, to the internet my fingers flew, where I found this cute stamp that I love. John is also (miraculously) down with it – maybe because I joked that it looked like wi-fi to him.
It reminds me of the scalloped fish-scale-like piñata that I made for the bean’s birthday. And since Royal Design Studio offers 10% off to YHLers (including us, haha) with the code YHL10, we’re definitely considering springing for this guy. Especially since we didn’t have to pay for wall paint since it was already on hand and we found metallic paint for $1 a tube at the craft store. I haven’t ordered the stencil just yet, but I’m definitely thinking about it. And now that the ribbon chandelier snowballed into a closet painting project, I guess I should mention that I’m also thinking about:
- sewing a beanbag for the whole reading nook thing
- papering or painting the shelves for a little more “happy surprise!” when Clara sneaks in there
- maybe even finding a rug to soften up the floor?
Oh and speaking of the ribbon chandelier, I still haven’t ironed that guy (girl?) yet. Maybe I should add that to my bulleted list so I’m inspired to get ‘er done (you know I love to cross things off). Or not. Oddly enough, the windblown look is still doing it for me. I know, I’m a strange and mysterious creature.
Speaking of which, we only have one True Blood Season 3 DVD left (with two episodes on it) and we’re sad and excited all at the same time. Since I had fun with the Sookie sidechat on Friday I thought we could discuss teams. I’m Team Eric. Is anyone on the Bill trolley? What about that Alcide guy? I’d get on that before the Bill boat for sure, but Eric is definitely mah man. Oh and I forgot about Jason Stackhouse. He might be above Alcide for me. Hmm. Anyone else painting or stenciling a room? A closet? Let’s chat about home stuff or tv or something else entirely. Anything. Does that sound desperate? Sorry. I’m just a chatty lady who has been stuck in a closet all weekend…

alg says
OK, don’t know if my comment posted or not b/c I included a URL in the text body…
Anyhoo — I have a stenciling project coming up VERY soon (I hope — it has to stop raining first b/c the project will be done outdoors) and I finally got that “update post” about my experiment with weed blocking fabric done as well. It’s up now, if you want to check it out. I know you guys just tried the fabric too & were wondering about its effectiveness…
YoungHouseLove says
Love it! Looks great!
xo,
s
MeaganC says
We just moved into our first home 2 weeks ago, and our first project was making an accent wall in our dining room using a stencil. I love how it turned out. We painted the lighter shade with a semi-gloss paint and the darker part with eggshell paint; the lighter shade actually stands out more and is slightly shimmery. This was my first time ever working with a stencil, it wasn’t hard at all, just a little time consuming but well worth it. Check it out below with some before and after pictures:
http://s76.photobucket.com/albums/j30/rockin_pickles/Our%20First%20Home/Our%20First%20Home/?albumview=slideshow
Thanks!
Meagan
YoungHouseLove says
GORGEOUS! I love it.
xo,
s
Ames says
The closet looks so nice!
I have had some problems with that folk art paint, and I wanted to give you a heads up about it. I make mosaics, and I always paint the back of my frame/board. I used some black folk art brand paint recently, and I put three coats on my board over the span of two weeks. I usually don’t let paint dry that long, but I was being lazy. When I picked up the board, the paint felt tacky and left fingerprints on the surface. Also, I noticed that if dust or dog hair touched it, it stuck. I called an artist I know, and she said with certain cheaper brands of acrylic it is a case of “too much mortar, not enough bricks” and that the components in the paint weren’t bonding together. She recommended blasting it with a hair dryer, but that didn’t work. I had to buy a matte finish spray and coat the whole thing, which did the trick.
Maybe it would not be the same for you, because you aren’t doing multiple coats, but I just wanted to let you know! It also might not matter because it is in the closet, but I know you don’t want dust sticking to it. If you left your test spots up in the closet, maybe press your finger against it and see how it feels!
YoungHouseLove says
Thanks so much for the tip! Coincidentally two other folks shared links to stenciling projects they did with the same paint- so maybe it’s a difference in thickness/coats like you said? Glad you figured things out with the matte finish spray!
xo
s
RMILLS says
I believe I figured it out. I think work blocked the site which your pictures are loaded from. . . boo!
YoungHouseLove says
Oh no. So sorry!
xo,
s
Kara says
Yes I’m attempting to stencil a dresser painted. I made one that looked great, but it didn’t paint well. I made another one out of cardboard that I’m gonna try this week! Oh, I’m team Eric!
Amanda says
If you have one, you can use a hair straightener to “iron” the ribbons. Just set it on the highest setting. I’ve done it lots of times. :)
Nicole says
I have been trying to figure out where I wanted to use my RDS stencil. Finally, yesterday, I decided it would be the hallway. It was great that another reader included the link to her stenciled hallway (and I think we have the same pattern!) in today’s posts. I am all gung-ho for this project now!!
As for True Blood, I think Alcide and Eric are statistically tied, then Lafayette, then Sam, then Terry (sweet, funny guy gets a soft place in my heart,) then just about everyone else, including Crystal’s hill people before Beeee-uhl. And Season 4 hasn’t improved his standings.
Kate says
Hey YHLers,
I’m an avid fan of both you and stenciling. Naturally, when the two of you came together, I had to say something!
Couple of watchouts since I just recently stenciled an entire room (pictures on changeofsceneries.blogspot.com coming soon)…
1. Check the size of the stencil. If it’s too large, it could be super tough to try and fit it inside the small space – especially the corners
2. Make sure to get repositionable spray adhesive to hold it up while rolling on the paint. It will save your sanity ten-fold!
Feel free to drop me a line if you have any questions – I’ve used royal design studio stencils before and have no complaints!
YoungHouseLove says
Thanks for the tips Kate!
xo,
s
Trish says
Hey Sherry, Not sure if someone commented on this or if you happened to see this hint on Pinterest, but if you didn’t want to get out the iron and ironing board for that ribbon ring you could just use a hair straightner. Love your blog!
YoungHouseLove says
Love that tip! Thanks to everyone who’s passing it along!
xo,
s
Janae says
I’m loving the soft pink/champagne combo – the pink/brown thing has been overdone but the champagne color on pink I’m really digging!! And the ribbon chandelier has me motivated to do something similar in my daughter’s room -t hanks for the idea – hope you don’t mind me copying!!
I’m totally an Eric girl btw….but Alcide is a close second. My hubby is a Jessica guy – we are currently having computer background wars – he made Jess the background on the computer yesterday and I countered with Eric. Fun times.
YoungHouseLove says
Haha, that’s funny. I’m kind of in love with Jess too. Jessica and Eric would be nice together actually. Hmm…
xo,
s
Lea Lindsay says
See…I knew there was I reason I loved you guys…besides your mad decor skills and down-to-earth posts. I’m a sucker for champagne metallic paint and Eric Northman. Though I’m not into country music, every time I see that guy I hear Tim McGraw crooning “I may be a real bad boy/but baby I’m a real good man”. We don’t splurge much…but we do add HBO to the cable line up from June through September…just so I can get my Eric fix. I won’t spoil anything for you, but I will say Alan Ball and his team of writers get better and better every season. Ya’ ain’t seen nothing yet!
Jill says
Don’t have time to read all the comments, so this may be a repeat…but Dana over at dana-made-it.com sells a fantastic pattern for beanbags. I made them for my girls at Christmas and they are a hit. Plus, the outer cover is removable and washable! Gotta love that.
cassie {hi sugarplum} says
Clara will LOVE having a nook when she gets a little older. And I know you guys will choose the perfect treatment to her walls. How about papering both the tops and undersides of the shelves, so when she’s lounging on the floor looking up, she’ll see it? And I made some no-sew oversized pillows for my wee-ones nook (dog beds are a good option too), and one of your faux sheepskins would be a comfy/cozy rug!
YoungHouseLove says
Cute idea to paper both sides!
xo,
s
Reading (and chickens) says
I need to know where you get the energy to do all this. I’m so envious of your get-up-and-go (uh, that made me sound 80, didn’t it?).
YoungHouseLove says
I have no idea why we think clearing and painting closet walks and trim is a good time. We’re crazy. We sit on the couch and decide to relax but something happens and we’re suddenly throwing on our painting clothes. Haha.
xo,
s
Denise says
Totally Team Eric.
I started out Team Bill, but…ya…that I jumped ship to join the Nordic godliness of Eric.
Your ideas never fail to inspire me!
kristin says
I’ve been tempted to paint our closet rods but heard it doesn’t stand up well to wear. Looking forward to seeing how yours works out — thanks for trying so many things so we readers can be inspired and all the wiser!
YoungHouseLove says
We painted them in our old house and it was great! They got a little faded and worn but no peeling or anything crazy. A lot better than the old gnawed on brown rod look. Haha.
xo,
s
Melanie says
Is anyone still having trouble viewing photos? I downloaded Mozilla Firefox, and I’m still not able to view. Trying to figure this out so I can get my younghouselove on! I haven’t been able to view since the Room Gallery post.
Let me know if there’s any other troubleshooting I can do.
Thanks!
YoungHouseLove says
If you scroll back someone left an awesome detailed comment about realizing their anti-virus software was blocking them. So they made some changes and refreshed and all our pics are back! Hope that works for ya! More details back further in the comments of this post for ya. It could also be your office blocking them if you’re at work trying to view them (from time to time they adjust those restrictions).
xo,
s
Laura B says
Team Eric – I only wish the show followed the plot of the books, especially toward books 5-6. Alcide’s a close second.
Speaking of TV…did you happen to see the famous YHL napkin on Bobby Flay’s lap during last night’s episode of Food Network Star?
YoungHouseLove says
I didn’t see her but I heard about it! Holy cow Sue’s famous!
xo,
s
careen says
you should try the Sookie Stackhouse novels. they are an easy and fun read and different from the show to some extent. i plowed through them all!
YoungHouseLove says
We both read the first two but we were borrowing them from a friend who lost book three or four. So sad. Maybe we’ll have to hunt them down some other way…
xo,
s
BonnieJean says
Oh my goodness, {not to be a spoiler} but if you are team Eric BEFORE season 4, you are going to become a die-hard fan just an episode or two in! :) LOVE that show!! :)
Megan says
Sherri,
I’ve sent you to this website before, but Dana at http://www.dana-made-it.com, has a rolly Polly pattern for your beanbag chair. http://www.dana-made-it.com/2008/07/looking-for-hours-of-entertainment-meet.html
She’s amazing and will totally help if you get stuck anywhere with the patten.
YoungHouseLove says
Love it! Already pinned that sucker. So enamored!
xo,
s
Amyshka @ Kiwi Chic says
The wi-fi pattern is perfect. I also love the idea of painting or papering the shelves… kids rooms are awesome because you can get away with so much fun colourful stuff.
p.s the ribbon light shade – I love it not ironed!!!!!!! Looks perfect.
Or “perfectly imperfect” which is even better. :)
Lindsey says
Saw this today and thought it might inspire:
http://www.almost40yearoldintern.com/2011/07/drum-roll-please.html
YoungHouseLove says
I’m so in love with that project! Especially since we love bees and it’s hive-like!
xo,
s
Emily says
Hi,
I’m sure this probably goes without saying (as in, you’ve already thought of it, or maybe it’s been mentioned in the ~300 earlier comments) but I just have to put my 2 cents in ;P regarding the shelves!
Did you think about maybe putting some fun, patterned paper (or even fabric, if that would work, like the scraps from the weekly/monthly photo project?) on the underside of each shelf, then either painting or papering & sealing the top of each shelf? Any kind of combo should work quite well, I would have thought? (ie-paint top/fabric bottom, or paper top/fabric or fabric/paper, even?
If you wanted a very cohesive look, that wouldn’t be too loud/distracting, you could use the same patterned fabric/paper/paint/whatever for all of the undersides, and something else complementary/contrasting for all of the top sides?
Finally, you know those vertical shelf edges (sorry, don’t know the technical term! :P) could be covered with some kind of ribbon, (braided for a 3D look, or flat to match in with the new light shade?) which would not only make it look even prettier, but could also hide the edges of the paper/fabric that you might have used on the top or bottom.
Does that make sense? I can kind of picture it, so I hope you can too!
YoungHouseLove says
Oh yeah- that could be really fun!
xo,
s
Erin says
I think i’m team all of them! But, to my fiance’s dismay, I comment the most when Alcide has his shirt off! I saw on another blog where someone had knitted a beanbag. I don’t have the patience but I thought it was cool. I also saw where someone built a bench seat in a closet so toys could be stored underneath and kids could cozy up on the padded seat. That could be fun :)
toni from says
$her-paints-a-lot,
After reading all of these comment, I think I need to catch up on True Blood. I no longer have extended cable and have only seen seasons 1 and 2. I will have to rent/ borrow/ steal (lol) season 3 from somewhere and catch up. The men on that show are so good looking, and who doesn’t love a good vampire show?
Also I can’t wait to see what becomes of the stencil project. It made me laugh so hard when I saw the entire house torn up. That is so me! Once I saw all of the rooms in a state of disarray I guessed that you had painted the nursery again, but when I discovered it was the closet I lost it and fell off of my chair laughing. I do stuff like that all the time. Glad it isn’t just me.
Toni
Nicole says
ever think about making the bean bag out of her weekly fabrics?
YoungHouseLove says
It’s definitely a possibility! Some of them are a bit hacked up from the birthday banner and quilt so I’ll have to see what I have!
xo,
s
Michelle N says
If you have a flat iron use that on the ribbons. It’s a lot easier than fussing with big iron. Plus you can iron while it’s hanging. Can’t wait to see what you guys come up with for Clara’s closet. I have been in need of a few ideas for my daughter, thanks for the inspiration.
Bethany says
Just want to say thanks! You’ve inspired me to do a few of my own DIY projects around our house and I’ve been really happy with them so far! Here’s one I’m pretty proud of – although I admit I’m still very much a beginner!!
http://tipton-cermak.blogspot.com/2011/07/when-dress-meets-cork-board.html
YoungHouseLove says
So cool! Love it.
xo
s
onecraftyblonde says
I was sharing in your stencil mania all weekend but mostly in ponder mode as I scanned through all the stencils on Royal Design Studios to take advantage of the 10% discount. Trying to decide on whether to stencil an allover moroccish quatrefoil pattern under a chair rail in my dining room…hmm. Ultimately, I drifted into another project and decided on a stencil with a monogram and frenchy vibe for my sunroom rug…after reading your post…I am reminded that I need to get back to my original quest…(sigh) too many projects on the brain = reading your blog and my energy(and memory) is restored. Thanks YHL.
Flo says
I’m remodeling my dollhouse (yep, you read correctly) using FolkArt paint and pretty pleased with the results so far. I was even wondering if it could be used on an actual wall so this post has been quite helpful in answering my question!
Marian Schembari says
Um… DUDE. Eric all the way. No contest.
Bridgette says
Since I am not painting anywalls right now I can only comment on another love….TRUE BLOOD. I have read all the books and love them. I actually have to look at the show and books as two different versions of one world. The show strays too far from the book. I am all over the Eric train!!! He is fiesty and strong. Wait till you start Season Four!! Ahhh! You start to see a whole new side to him. Playful and very very sweet. I do love the look of Alcide but the show has not given us enough of him yet and based on the book…he is too weak for me. Emotionally and mentally, compared to the other people in the series for sure. I also love, LOVE the Sam from the books. He had a good childhood and is still just the rock he is in the show. I love Sam second to Eric. Have fun watching the next episodes…last few are quite emotional!
Shannon Collins says
This past weekend, we gave our hideous kitchen floor a checkerboard look thanks to your inspiring post about peel and stick vinyl tiles!
http://youwannatalkjive.com/before-after-revamping-the-kitchen-floor/
We definitely have you guys to thank for giving us the motivation to put some fire under our arses and get things done, after having only lived here for a little over a month. All of your hard work looks fabulous as usual!
Oh, and I’m on team Eric. I especially enjoyed his reaction when Sookie told him not to step on the rug. Runner up: Team Lafayette!
YoungHouseLove says
So charming! Wow- what a difference.
xo,
s
Angela says
Just saw you on Emily Henderson’s blog and I’m dying! Looooove the video with Emily and Katie! Hilarious!!
melissa says
I really loved that medellion look too! Too bad it didn’t really work. I will definately be checking out that website where you found the scallop design.
Donna Borgerding says
Love this post. I have a daughter, she’s 18, who would have loved a reading nook like this!
A fluffy rug would be fun, maybe?
I love the stencil idea too.
Natalie C says
Love the stencil… that would look really cute but I’m guessing would also be quite time consuming! What a great idea to make a reading nook in her closet, you two always have such creative ideas.
Now as for True Blood… I am definitely team Eric with Alcide as a close second. Just you wait until season 4 (it gets craaazy and may make you even more team Eric)
Abby says
As far as who I want Sookie to end up with, I do not know. But Alcide is most definitely the most attractive of the bunch. I was just watching last Sunday’s episode with my bf (don’t worry – no spoilers here!) and there were some nice shirtless moments. My bf actually said, “Wow. That guy is seriously in shape.” And he NEVER comments on other guys. I figured it was permission for me to drool.
Kristen says
Team Alcide all the way! (Maybe thats because I remember loving him on One Tree Hill) Bill would be my last choice. We just finished that disk last night and boy oh boy was I shocked at how the season ended.
Lizzie Ren says
You can make a SUPER size stamp using foam playmate tiles. Use two tiles. Cut your design all the way through tile #1, then glue tile #2 onto the back to use to hold and push the pattern into place. They are really easy to cut through susing an exacto!
YoungHouseLove says
Sounds like another fun option!
xo,
s
Jackie says
Sherry have you thought about using the celery idea from the DIY section of your pinterest to make little gold flowers?
YoungHouseLove says
Yes! It’s on my “to try” list. I hope to come back and share a bunch of other options and the one we decided to go with!
xo,
s
amy g says
HI- WHERE DID YOU GET THE YELLOW/WHITE RUG??? I WANT ONE JUST LIKE IT.
THANK YOU!!!
YoungHouseLove says
That’s from Pottery Barn a while back (called the Moorish Tile Rug). Maybe try ebay?
xo,
s
Sarah says
Totally Team Eric. So hot. I even dreamt about him last night. I wish Bill would just go away, he annoys me to no end.
I love the nursery color, so dreamy! And the reading nook will be so adorbs, I can’t wait to see it finished! (Also, I might totally steal it someday, once we have kids).
Kathleen says
Team Eric all the way! I’m borrowing the books from my aunt and the DVD’s from a friend. Jason is nice eye candy though :)
Suzanne says
What happened to +1… or did I dream that? ;)
YoungHouseLove says
It should still be there at the bottom of the post, but only when you click into the post (not on our front page). Hope it helps!
xo,
s
Bonnie says
Hi Sherry,
I’ve been thinking about your stamp vs. stencil situation on Clara’s closet walls. I used a foam stamp of a sailboat on my son’s nursery walls (9 years ago now!). The paint applied very easily with excellent, crisp images on the wall. I found a tutorial on making your own stamp using a mouse pad. Maybe you could try this? Happy decorating!
http://www.wallmurals123.com/wall-stamps.html
YoungHouseLove says
Thanks so much! I was actually debating the idea of making a stamp out of things like foam and even a potato so we’ll have to see how it goes!
xo,
s
Brandy says
OMG! OMG! OMG!
Seen this room, (The wall) and thought of your little lady baby! Then the last pick of the rugs, the wall, OMG! Had to chare with you! What do you think?
http://www.roomzaar.com/rate-my-space/Nurseries/Neutral-Bird-Themed-Nursery/detail.esi?oid=24724004
YoungHouseLove says
Very pretty indeed!
xo,
s
Rebekah from SoCal says
In regards to a reading nook for Clara, have you heard about the Klinko frog chair/desk furniture? A friend of mine was in China and her friends started this business green, practical, multi-use kids furniture. It’s a little quirky, but then, so are ya’ll… j/k, mostly…
http://www.klinkokids.com/
YoungHouseLove says
Aw that’s really cute! I think we’re just going to drop a homemade beanbag in the corner but it’s really fun stuff! And of course we love that it’s green.
xo,
s
martha says
When my kids were little and I was doing something ‘different’ in their rooms, after I painted the walls, I had them ‘add’ their hand prints, in a coordinating color. I LOVED it, we only did it in a few places, like around the light switch and door facing. It was so cute and I still smile when I think about it….even though ‘my kids’ are grown up with kids of their own!! No, we don’t still live in that house….we were an Air Force family, so we have moved many times since then! So….maybe some hand prints or finger prints from your ‘beano’?? ….or those cute little animals that you make out of finger prints??? :)
YoungHouseLove says
That’s another cute idea!
xo,
s