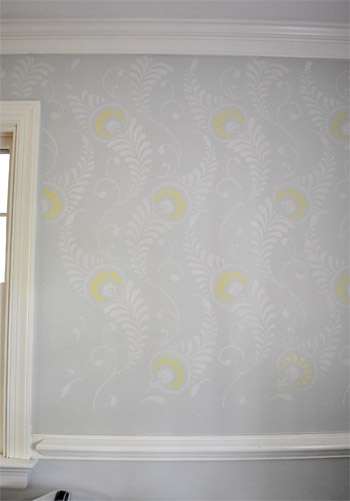
All week I imagined a big office stencil reveal post here. Sadly, it’s not done yet. Oh DIY, why do you take such pleasure in toying with my emotions? Quit playing games with my heart, home improvement. But regardless of the fact that it’s not exactly a quick project, it’s looking awesome and totally going to be worth the blood, sweat, and tears (all three of which have occurred, incidentally). So hopefully by this weekend I’ll be doing some celebratory Rocky laps around the house (yes, with music blaring and fists in the air) and I can share photos & deets of the whole shebang on Monday. Woot! Until then, here’s a still-needs-to-be-finished wall (the bottom edge above the chair rail is still on the agenda):
In the meantime, how about a bloodless-sweatless-and-tearless project in the “quick, easy, and free” vein? See, John had this genius idea that we should try to get an ombre effect on paper (that we could then frame) using food coloring. Namely soaking it in food-colored water and waiting for it to travel up the page and potentially upping the intensity by adding more color to the water and letting it soak a bit less for a two-toned effect.

Yeah… that didn’t work at all. Zero travel-age back up the paper. Just wetness. Haha. So…
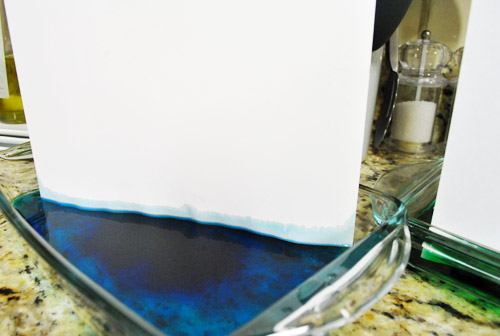
… fail!
But we had some fun messing around with drips and drops, just to see what we liked. First I made an ode to Dexter with a few drops of red food coloring.
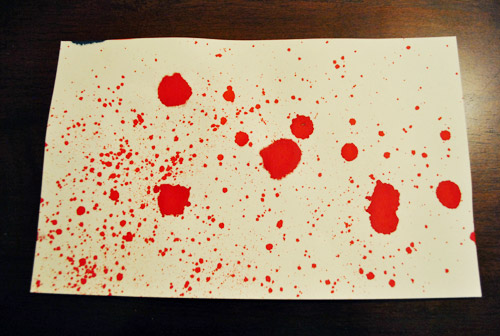
How fun would stuff like this look framed all over the house for a Halloween party? You could even take regular family photos and splash “blood” (aka: red food coloring spatters) over them to weird the observant people out at your little shindig (or use a red sharpie to create the effect on clear transparency paper and place it over them so as not to ruin the original prints/photos).
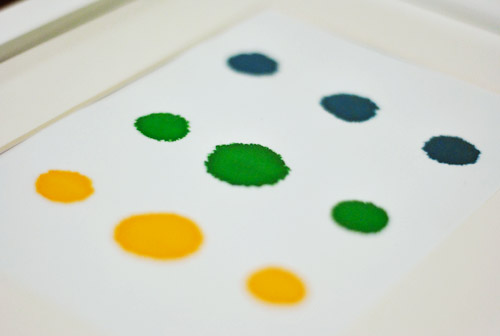
Anyway, then we started messing around with drips down the page but we really fell in love when we hit on this simple collection of dots (we were using regular old card stock by the way):
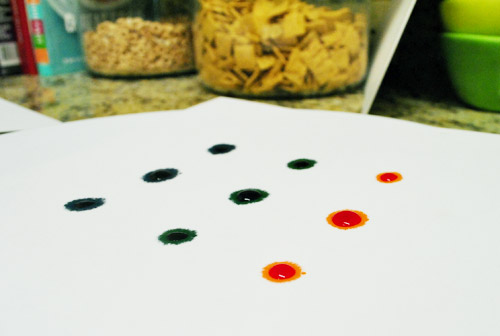
All we did was make three dots of each color next to each other (squeezing a bit harder on the middle one so it was a wee bit larger). Then we just waited for it to dry…
… and framed it…
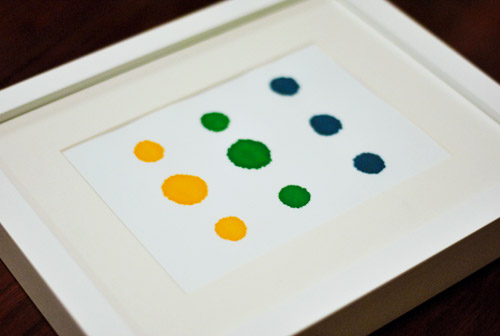
Bam, an instant zero dolla (holla!) “food coloring masterpiece” for our always-changing gallery frame wall:
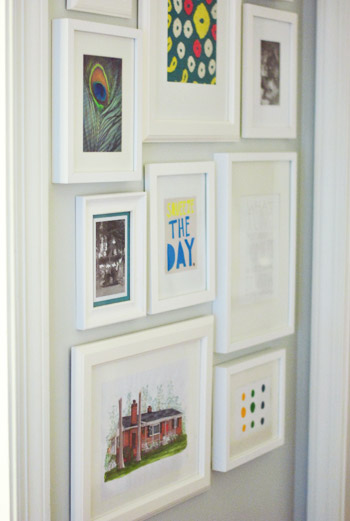
I actually love how it picks up on the circles in the fabric that we framed a few feet up (in the middle). And it’s so fun to tell people who come over (and just stand in front of that wall for twenty minutes) that it’s just drops of food coloring. I can’t really explain why, but it looks kind of exotic and collector-ish. So it’s always fun to see the look on their faces when they realize it was done in five minutes with cupcake baking supplies.
Anyone else going to try their hand at some food coloring art? Or throw a Dexter-themed Halloween party? If so, I would LOVE to see pics of any and all faux blood spatter that you use as decor! Geek for life.
In other news, that might be the shortest post I’ve written in about a year. Hootie hoo for trying to meet some recently mentioned goals. We’ve definitely had our share of long beefy posts this week, so sometimes a quickie here or there feels nice too. Wait, that didn’t come out right.

kayrae says
i suggest soaking the entire sheet of paper in regular non-coloured water…. then hanging it over the coloured water.. it should give it some ooomph to travel upwards… a high grade watercolour paper might be in order though… or else it will shrivel up and go all wonky… not very pretty to frame.
thanks! love your work :)
YoungHouseLove says
Thanks guys! Great tips!
xo,
s
mandi says
For the ombre paper project…. if you wet the paper first, then dip it, the color should bleed up into the wet paper.
You could try that out…
Maureen @ The Parkland Project says
Do you do all your own mat work as well? I bought a mat cutter for a project a couple of years ago and it did not go as well as I had planned.
YoungHouseLove says
We just usually buy frames at Ikea (or Target on clearance) with mats. But I used to make my own mats back in art school. Suuuper annoying but cheaper than buying them separately (I still like to find $5 frames at Ikea that already have them when I can- haha).
xo,
s
Fiona says
First off, I love checking this blog every morning, even though I’m usually too shy to comment (Except on give-away posts because, let’s face it, free stuff, amiright?). Anyway, today I decided I would brave the comment box because I have a question that relates to this super-cute project.
I see you use a lot of IKEA frames, how on earth do you get the little tab things back in the slots? I bought some adorable postcards printed with WWII posters when I was in England this summer and I want to frame them, but I can’t get the tabs to stay in the frames and I’m constantly afraid they’re going to all fall out and then the picture will be a disaster. :( I’ve tried shoving them back in with needle nose pliers, gently tapping them with a tiny hammer, anything I could think of, but they don’t want to do as they’re told.
Any tips?
YoungHouseLove says
I usually use a flat head screwdriver to pull them up (to put stuff in the frames) and then usually use the same thing to flatten them back down (a flat head screwdriver). But on our versions they don’t have slots to go into, they just lay flat and hold the art in place (as opposed to popping open to let new art in). Hope it helps!
xo,
s
HeatherM says
Try using the paper from coffee filters instead of regular white filter paper. That should give you the visual effect you are looking for. You can also draw some black marker on the end of the filter that you will be dipping in water, and it will separate out the black ink into the entire rainbow of colors. The paper will need to be suspended with just a little bit of the end of the paper for some time- probably at least 45 min or so. We used to do this as an art project at my favorite science museum growing up, so it’s been quite a few years since I’ve done this. Looking up chromatography might give you some more inspiration too.
Jennifer says
Will you even be able to raise your arms to pump those fists for your victory run? :) Seriously, I can’t wait to see it! I also love all your DIY art projects. Very inspiring!
YoungHouseLove says
I might have to tape them to my head for stability! Haha.
xo,
s
Naomi says
Someone already mentioned the coffee filter – I did this with 5th graders during a chemistry unit because markers will bleed at different degrees, making neat little rainbows of blue and black marker drawings.
Another cool and kid friendly art project with food coloring is to get thick paperstock, cover it in shaving cream (get unscented) and drop a few color on top. Then mix with fingers or popsicle sticks. Finally, scrape off the cream and you get beautiful paper to use for cards or just frame.
YoungHouseLove says
Fun!
xo
s
April Hickman says
Hey Young Lovers…speaking of food – I wanted to let you know that the wooden fruit (Melissa & Doug) you have been “digging” are featured on Zulily today. Just FYI…
YoungHouseLove says
Thanks!!!
xo,
s
Molly says
LOOOOOOVE this! and I saw this today and thought you all may enjoy :)
http://lifestyle.msn.com/your-home/bold-new-you/staticslideshowcl.aspx?cp-documentid=30364749>1=32002
YoungHouseLove says
LOVE THAT!
xo,
s
Peyton says
Where did you find the pretty white frames?
YoungHouseLove says
Ikea! So cheap! And yard sales. And sometimes on sale at Target.
xo,
s
Julie says
Hi there! More or less our homes have the same color scheme (blue, green, yellow…).
My question is…are you guys decorating for fall? I’m trying to figure out a way to decorating our home for this season but I’m afraid the orange, mustard yellow and other autumn colors won’t go with the existing vibrant blue, greens and yellows I have now. I’d like to see how you’d do it =)
YoungHouseLove says
Oh yes! We hope to do some fun Halloween stuff followed by fall/Thanksgiving stuff! I already have a few ideas… can’t wait!
xo,
s
Lori Wojciechowski says
You need chromatography paper for it to work. I bet Almost Doctor Dan could hook you up!
YoungHouseLove says
Haha, might have to put in a call!
xo,
s
alg says
That’s so funny (funny weird, not funny ha-ha.)
I was just pondering the vastly under-explored DIY potential of food coloring, like 2 or 3 days ago.
I guess great minds DO think alike!
(See how I got a compliment for both of us in there? Eh? Eh?)
YoungHouseLove says
Haha, nice.
xo,
s
Andrea B says
What a wonderful idea! I just might steal this. :)
Deborah says
Yes, try using watercolor papers, and soaking the paper first.
Also, watercolorists are excruciatingly careful NOT to damage by denting or scraping their paper before or during painting on it, because the damaged area will change the intensity of the watercolor. SOOOO! You could experiment by deliberately making marks—indentations—on the wet paper before setting it up to wick the colored water. You could “hammer” it, let Burger walk on it, comb over it—well just let your imagination run wild.
The more coarse the paper, the easier it will be to manipulate. Smoother watercolor papers are tighter. Watercolor paper is not cheap, but perhaps can buy some paper that is already damaged, which otherwise would not sell.
The DOTS are nicely whimsical :) Deborah
YoungHouseLove says
Fun ideas! Thanks!
xo,
s
Meredith says
This reminds me of an episode of Sarah 101 I saw this weekend. Check out her button art!
http://cherishtoronto.blogspot.com/2011/03/sarah-101-episode-12-fresh-laundry.html
It’s the last picture… great minds think alike :)
YoungHouseLove says
So cute!!
xo,
s
cas says
what if you would have taken the paper with the dots ( by far the best idea) and placed it in a container of water,started with wet paper or sprayed it with a water bottle or something – maybe it would have dispersed more to get the original effect
YoungHouseLove says
That would have been fun too!
xo,
s
Sabrina says
Even if I could turn back time…..Thanks for putting that song in my head lol I am in the midst of making a collage wall. Trying to find as many frames as possible. I just framed ( and cut down, bad mommy) some of my daughter’s artwork and a cute little footprint of my baby boy
Erin says
I teach preschool and the kids love doing “Tissue Spray” at the easel. They use a plastic spray bottle to spray a little water on a piece of paper, put a piece/scrap of tissue paper on top of the water, spray again and remove the tissue paper. The color drips down the page and they can keep adding more tissue, overlapping, etc…they love it! :) Your food coloring art makes me want to do my own Tissue Spray art!!
YoungHouseLove says
Fun!! Do it, do it, do it!
xo,
s
Sam says
Can’t tell from the pic what kind of paper you used for your try at food color art but if it was just regular ol’ printer paper you might try again with watercolor paper. Might take the food color/water mixture a little better. Just an idea. Love your blog:)
YoungHouseLove says
Yeah that would probably be better than the card stock we used!
xo,
s
Ashlene M says
What kind of paper did you use for the dots? I tried last night and it didn’t work very well, probably using the wrong kind of paper.
Ashlene M says
Nevermind questions my question from above!
Britiney says
Okay, I have to ask because I noticed it in your pictures. I bought some IKEA frames recently for my family room. Does it bug you at all that the mats aren’t as white as the frames? Cuz it’s bugging me (on mine) and I’m trying to decide if I need to be medicated.
YoungHouseLove says
Haha, oddly enough I don’t mind at all! We have the original mats in all of our halkway frames and even the grid above the sofa!
xo,
s
Heidi P. says
So cool!
Jessi says
Cute dot art. I love the inspiration you get for your ever changing gallery wall. We will be doing one in our new house. BTW, did anyone else start singing “Quit Playing Games With My Heart” by BSB when they saw that written in the first paragraph? Just me? Nevermind then.
Sophia C. says
One way to get the ombre-ish-like effect would be to drop drops of food coloring one the bottom of the page and use some isopropyl alcohol or any rubbing alcohol in the bottom of a dish/pitcher and lean the paper in and watch as the different bands of color separate as the alcohol travels up the paper. It’s called paper chromatography. Once you let it dry, it should be great for framing. You can check out this video that explains things pretty well:
http://www.youtube.com/watch?v=08YMBGS1pYU&feature=related
Kierston says
Love this idea…I am in desperate need of DIY wall art that requires no artistic abilities :)
Claire @ Claire K Creations says
That is brilliant! I think I’m meant to make one myself. I have a frame just like that on our frame wall that is the last empty frame. Not for long!
Brittany says
My hubby had a wonderful 3rd grade art project idea for you guys that involved that lovely food dye you were using. He said to basically use either food dye or water colors and toss some of those bigish salt crystals on the paper and the salt will soak up some of the color. When the salt is removed you are left with a colorful starburst effect. I haven’t tried it, but he says it’s really cool! Haha!
YoungHouseLove says
Sounds like so much fun!
xo,
s
Stephanie says
Love the idea of using food colored paper as art! As kids, we always used to take shaving cream and pour it on a baking sheet and then put food coloring on top of it and swirl it around to make it tye-dyeish. Then we could take our paper and press it on the shaving cream mixture and wipe it off and have pretty colored paper to write on. Plus it smells great too!
Alana says
Where are all your white frames from? Were the mats standard with them?
YoungHouseLove says
Ikea! Yup, the mats came with them and most of then are under $5.
xo,
s
S @ Ess and Jae V2.0 says
Love it – cool idea. Where are the frames from again? (I’m sure you’ve mentioned it……) I’m inspired – I have a wall that’s calling out. Happy Saturday.
YoungHouseLove says
Most of the frames are from Ikea (a few are from Target on clearance and yard sales). Hope it helps!
xo,
s
Emily Rae says
I dropped blue food coloring and blackberry juice into a pyrex pan, then swirled and photographed it. That image is the background of our wedding invites!
Kami Buchanan says
So, I am a big blog stalker and never comment but I just wanted to say first LOVE everything you do and second reading you comments are always entertaining. My question, does Bob always comment and is it always negative (in a sarcastic kind of way)? Is there a story behind Bob? I think he loves to see your response.
Love you guys!
YoungHouseLove says
Bob is a wild card! He probably comments once or twice a week. And sometimes he’s very sweet and other times he’s… not. Haha. But to each his own!
xo,
s
Ashley says
Hi,
I love your blog! I have a quick question: Where did you have your drawing of your first house done? I thought it would be a great gift for my parents.
You may have already said this somewhere (I searched the archives and found the water coloring painting, but I couldn’t find the drawing…maybe i’m not searching for the right terms…)
Thanks so much!!
YoungHouseLove says
Here’s the portrait we had of our house (it’s pen and ink with prisma markers): https://www.younghouselove.com/2011/06/daddy-daughter-a-deal-or-two/
xo,
s
Sarah says
I am absolutely in LOVE with your blog. You two are quite possibly the cutest couple EVER!!
So my question is…I’m 33 and buying my very first house. The closing is 11/11/11. I am trying to get helpful tricks to decorate but I am just NOT creative. For now I’m leaving the paint as is in the new house. It’s a beige-ish tan-ish color. The curtains (that came with the house) are red. I was leaning towards adding a black/espresso feel to it to tie it all together…but I LOVE the white frames…which is weird since I’ve always been one for black frames. Okay…I’m getting to the point now. Do you think white frames would be okay with those color choices, or not so much???
And I’m totally doing the food coloring dot framing thing. :)
Keep up the amazing work, you two. You’re truly such an inspiration!!
YoungHouseLove says
Totally! Just layer stuff in there and see what you think! You can always spray paint frames and change up accessories if you change your mind down the line- but we just do the whole trial and error thing to end up with something we love. Good luck!
xo,
s
Heather says
Found your blog not that long ago and I started at the very beginning. I know this is 2+ years late but I have actually done a food coloring/paper project with my mom that I thought you may still enjoy hearing about. You spray a layer of shaving cream onto a cookie sheet. Add random dots of food coloring then swirl with a fork or dry spaghetti. Place paper over top and wipe off extra shaving cream when you remove it. Should be a really pretty (and durable) desgin left. Keep up the great ideas!
YoungHouseLove says
That sounds like lots of fun! Thanks for sharing Heather!
xo
s