Installing drywall doesn’t have to be intimidating and, in fact, you can do it all by yourself! I was able to do our entire laundry room (including the ceiling) in one day AND without an extra set of hands. So today I’ll show you how and the secret weapon that made it all possible.
Drywall Installation Tools & Materials
Here’s what you’ll want to have on hand if, some of it is optional depending on the difficulty of your job:
- Drywall, we used 4 x 8′ UltraLight Sheetrock
- Drywall lift (we rented ours for $40!)
- An electric drill, in hindsight I wish I’d gotten a drywall screw gun
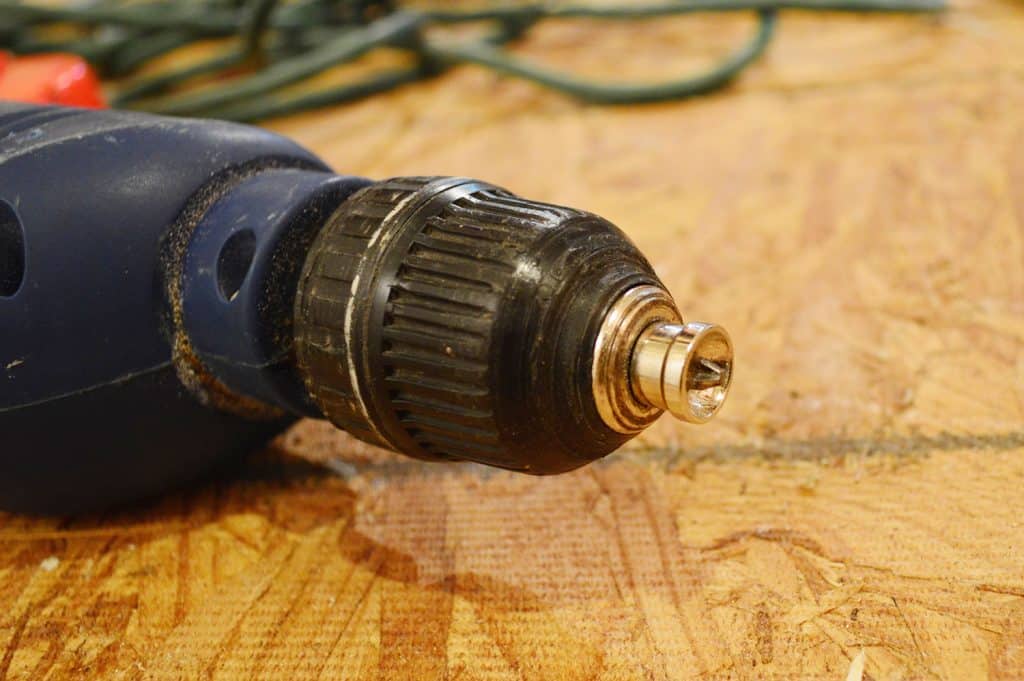
- Drywall setting drill bit (to countersink heads into the drywall)
- Coarse-thread drywall screws (I did 2″ on the ceiling, 1 5/8″ on the walls)
- Measuring tape
- Chalk line
- Utility knife
- Straight edge like a metal yardstick
- Drywall saw
- Hole saw drill bit (optional)
- Pencil or marker
- Step ladder
As you saw in our last post, I picked up the drywall along with my other big supplies when I rented the $19 Home Depot truck. I got fourteen 4 x 8′ sheets of UltraLight Sheetrock since the whole “ultra light” thing sounded helpful and it was well-reviewed.
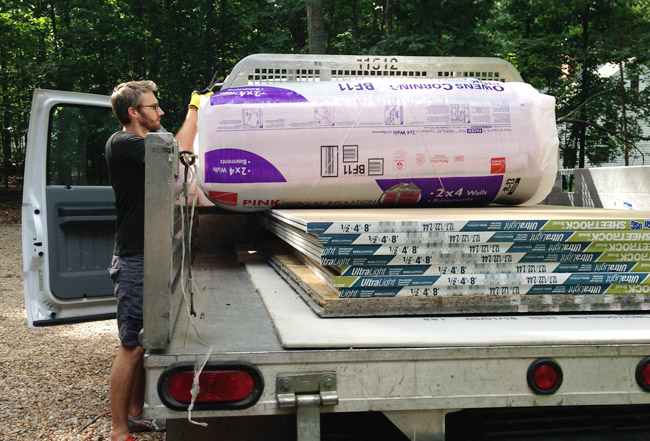
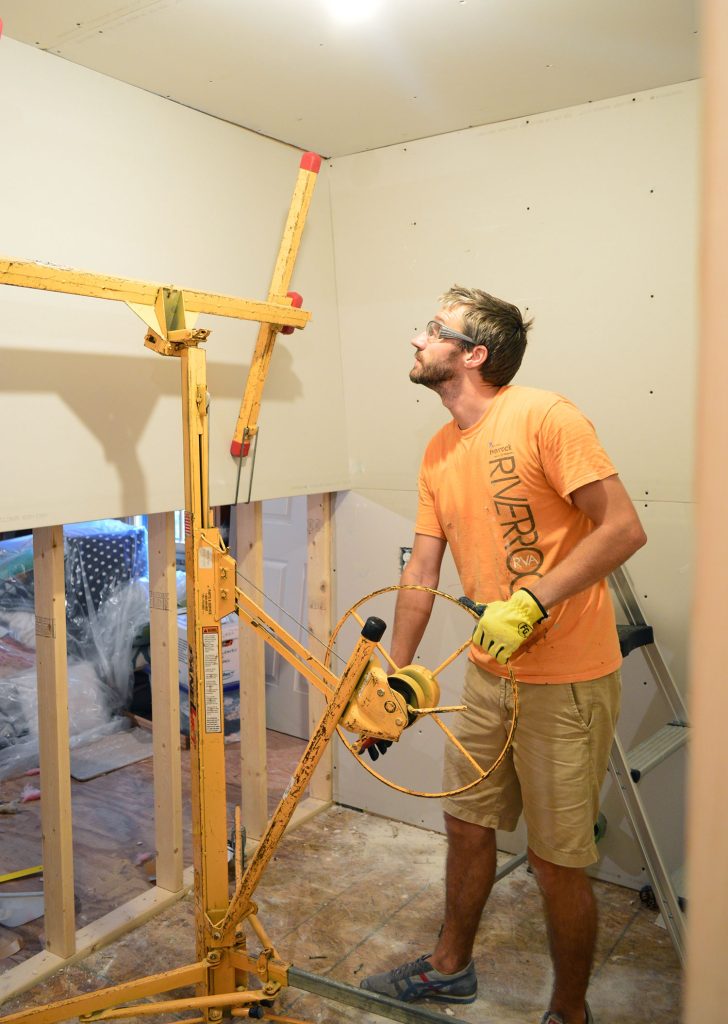
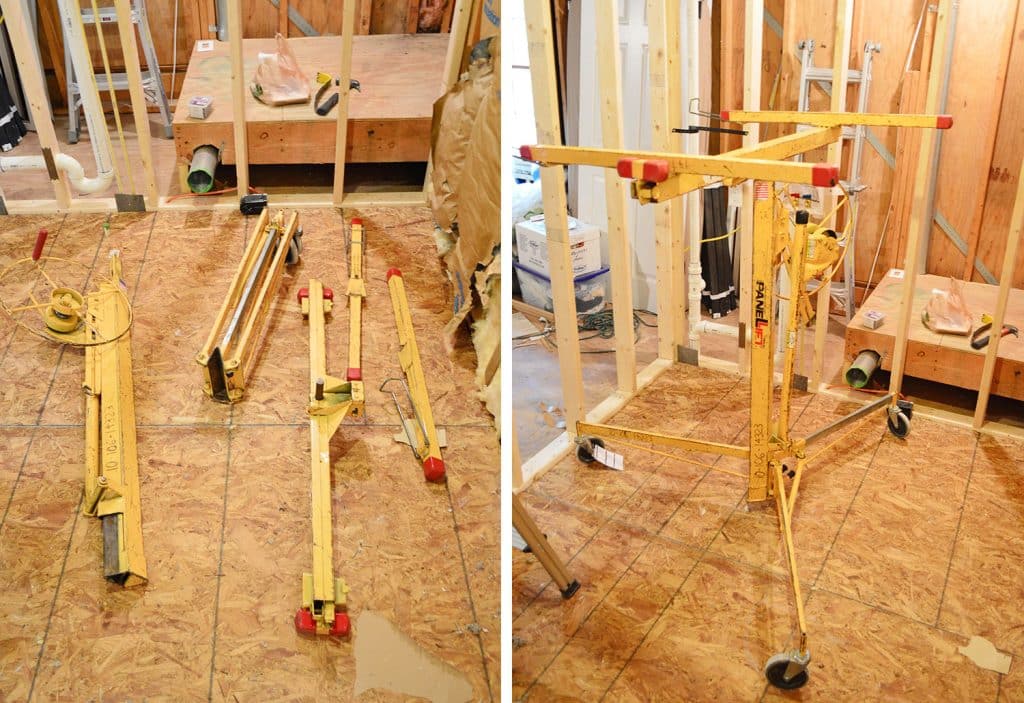
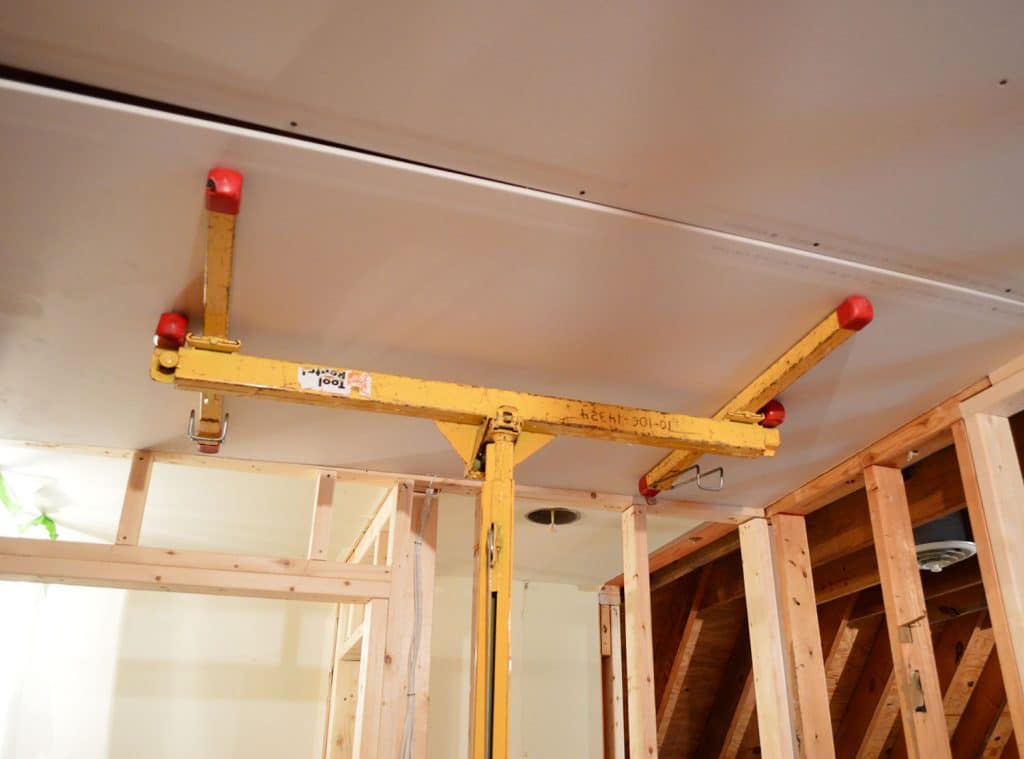
The lightweight thing was a bit of an over-promise. It’s lighter than traditional stuff, but still not something you can hold in place with one hand while the other screws it into the studs. So I rented this drywall lift from Home Depot to help with the job. It was $40 for 24 hours and the pieces easily fit in our car.
Hanging Drywall On The Ceiling
The drywall lift was a total lifesaver (and a backsaver). I could place a piece of drywall on it (once it was cut to size) and then crank it up into place with the spin of a wheel.
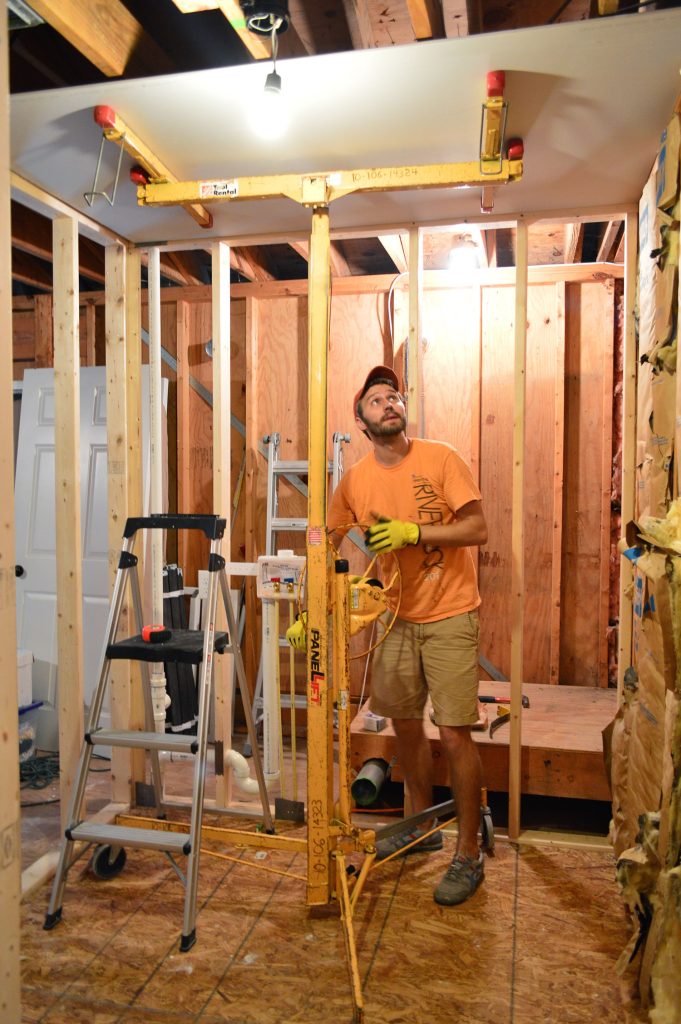
Then with the lift holding it in place, I was free to screw it into the wall studs or ceiling joists without having to worry about my arms (or a human helper’s arms) getting tired.
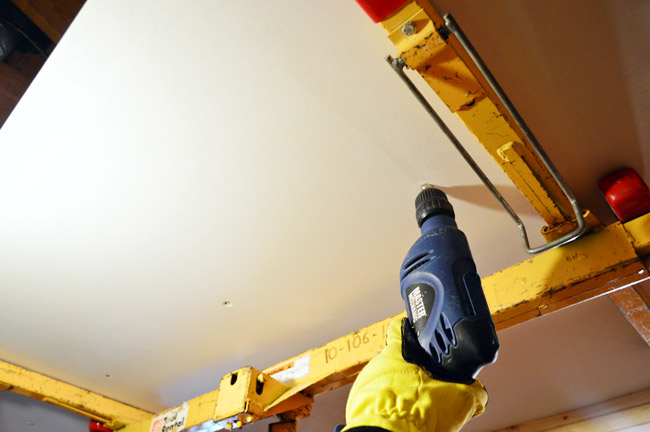
I used coarse-thread drywall screws (2″ on the ceiling, 1 5/8″ on the walls) and a special drywall setting drill bit, which makes sure the head of the screw gets counter-sunk into the drywall. In hindsight, I kinda wish I had splurged on a drywall screw gun because this step would have gone a lot faster.
The hanging process wasn’t really all that complicated – cut it to fit the pre-measured area, carry it upstairs, use the lift to get it into place, and screw it in.
Cutting The Drywall Sheets To Size
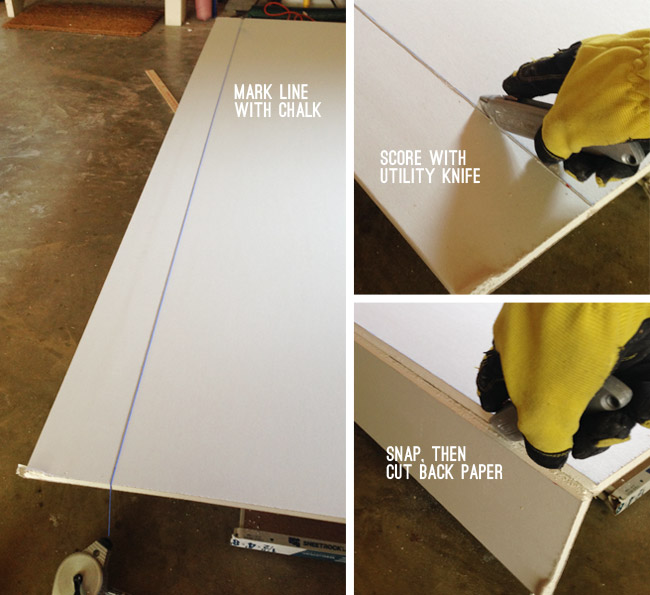
When a full sheet didn’t fit in a particular spot, I’d use a utility knife to score and break the drywall to size. Once I took my measurement, I marked my cut with a chalk line and then used a straight edge to score the line with my utility knife. Once you’re through the top layer of paper, you can run your knife along that ridge again without the straight edge, and it’s pretty easy to snap the piece along your line. Then you just have to cut the back layer of paper.
We also had to cut around various obstacles like light switches, vents, etc. For those I relied on a variety of tricks to ensure perfect hole placement.
Cutting Holes For Vents And Outlet Boxes
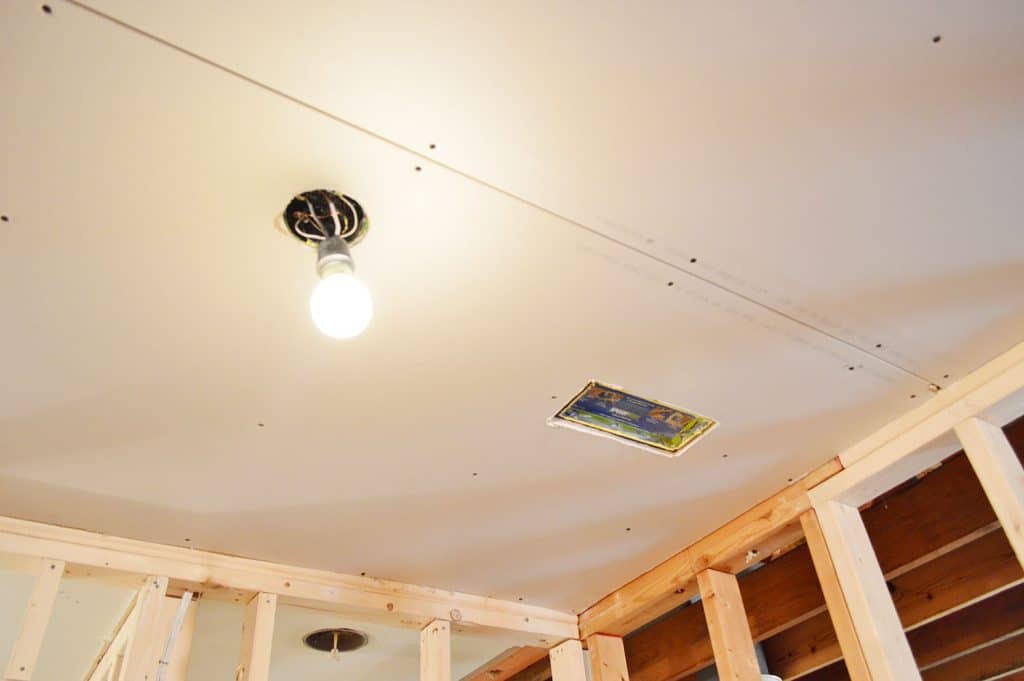
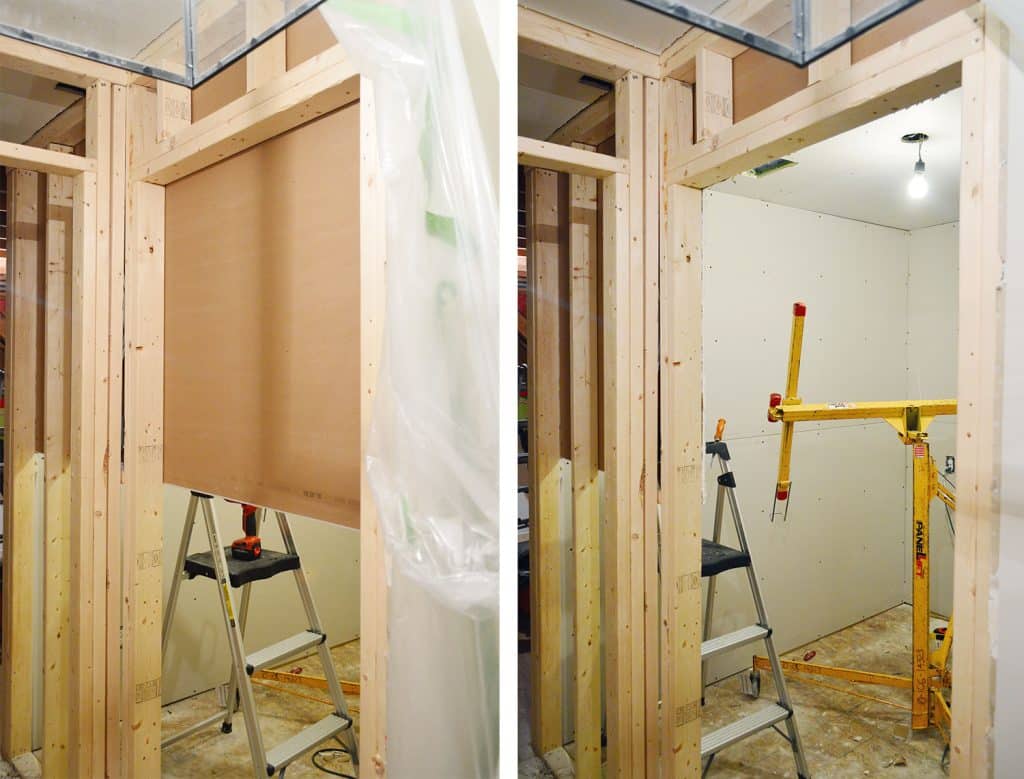
Since I had started with the ceiling, one of my first obstacles was the electrical box for our ceiling light. To mark its location, I dabbed some spare paint on the edge…
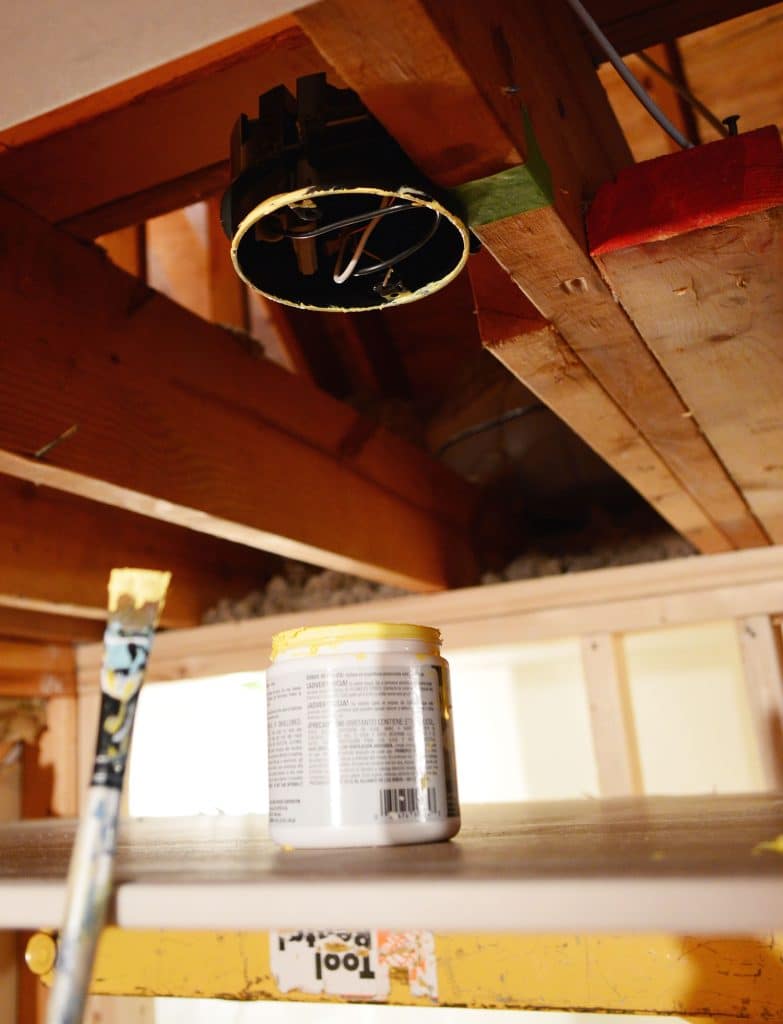
…then I pressed the sheet to the ceiling with the lift to transfer some of the paint to the drywall.
Then I could cut a perfectly placed hole using a hole saw drill bit.
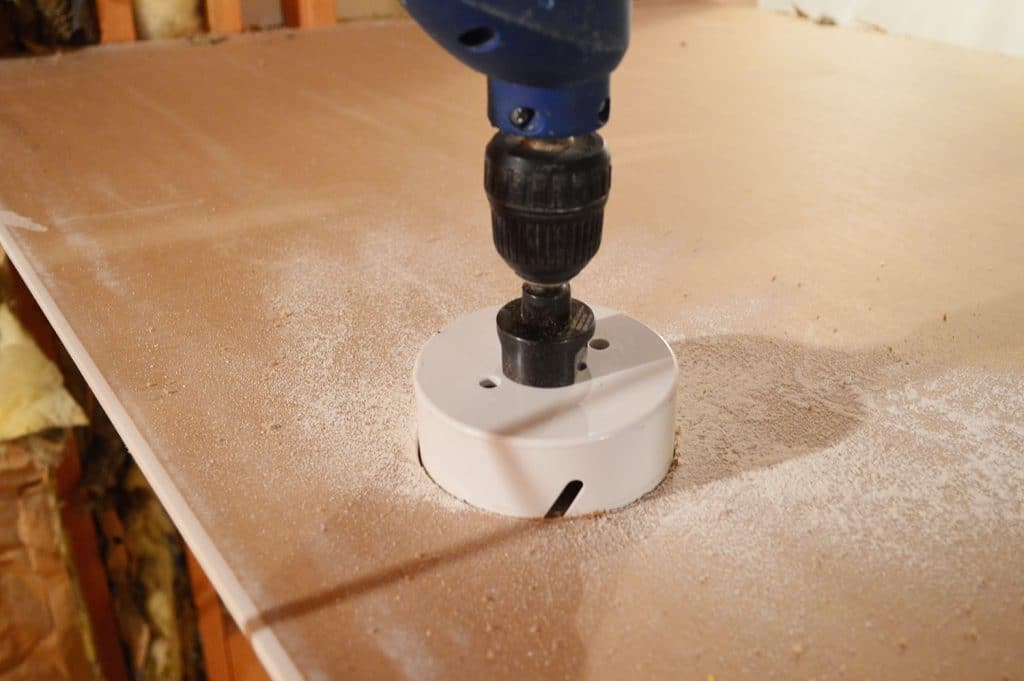
I used the same paint trick to mark the HVAC vent hole too, as you can see below.
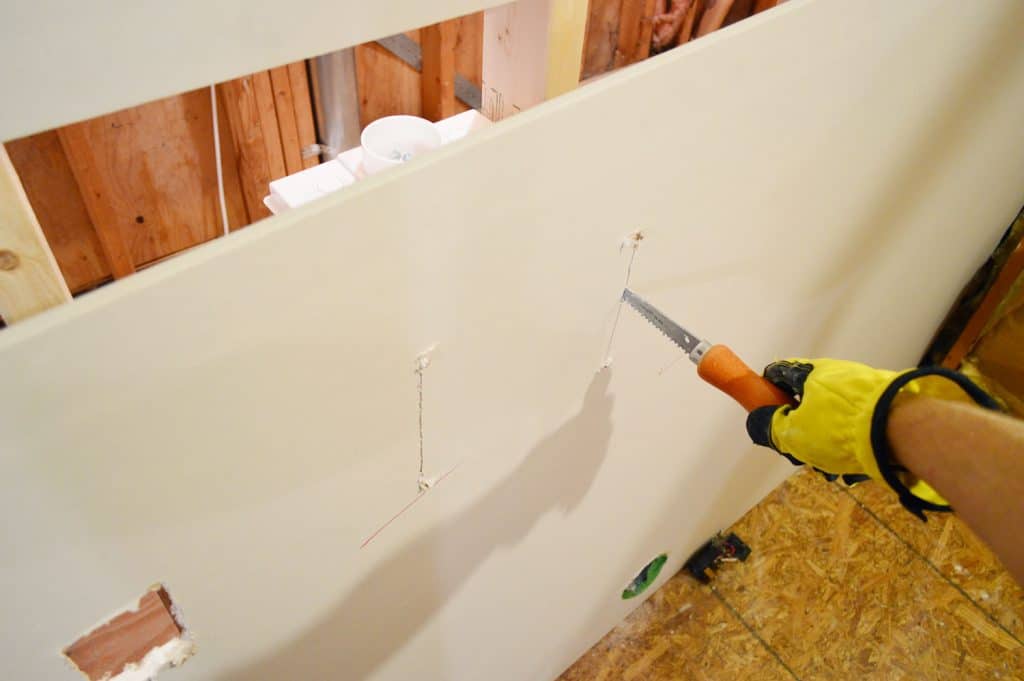
For all the non-round holes, we used the drywall / keyhole / jab saw to cut out the appropriate sized holes. Whenever possible, we liked to cut from the front of the drywall because it kept the hole a bit cleaner on the inside.
Hanging Drywall On The Walls
The lift also pivots to help you hang a sheet of drywall on the wall. The room ended up being nearly 8′ deep and 7′ wide, so each wall required just two sheets of 8′ drywall that were cut a little shorter length-wise.

NOTE: It’s typically recommended that you hang your sheets horizontally across your studs. It creates fewer seams overall, hides bowing better, and gives you a stronger wall that’s less likely to sag.
As straightforward as the process was, it still took quite a bit of time. Between measuring & marking things, making our cuts, hauling things upstairs, using the lift to get them into place, cutting around additional obstructions, and screwing the drywall into place – I think we averaged about one board every 45 minutes. But because it’s not a large room, we were still able to knock out the room in a day.
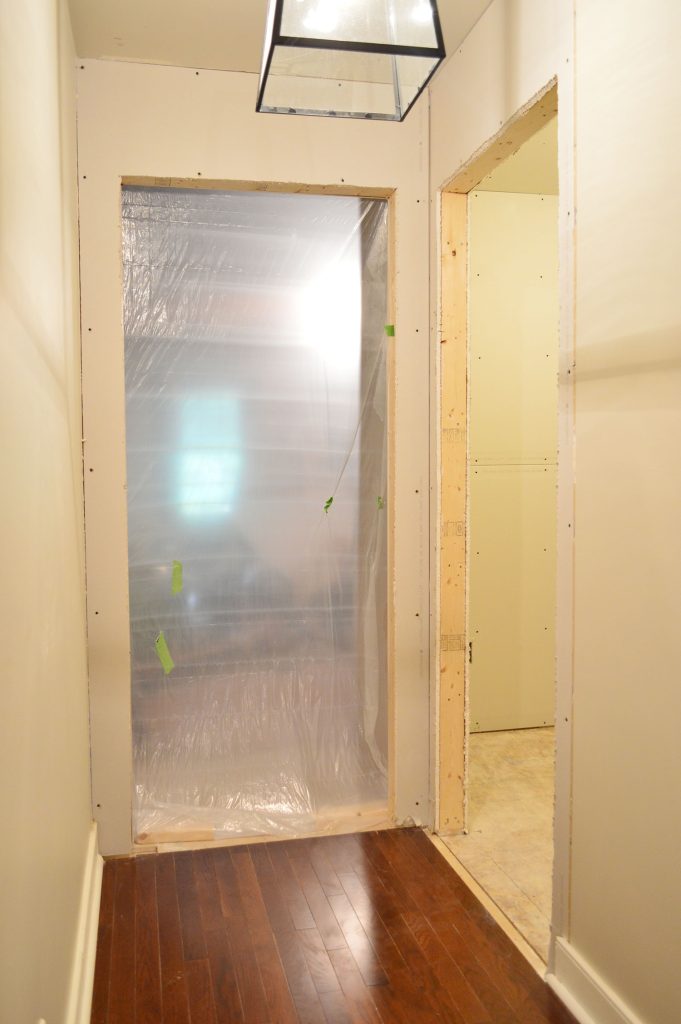
Cutting Around The Doorways
Cutting around the doorway was easy. We literally hung the sheets (one at a time) over the door opening and then cut out whatever covered the door opening with my drywall saw. This was a pretty foolproof way of doing it, but I think had I bought a spiral saw it would’ve been significantly faster.
Since we had four total doorway holes to cut (two doors with two sides each), we appreciated how foolproof this process was.
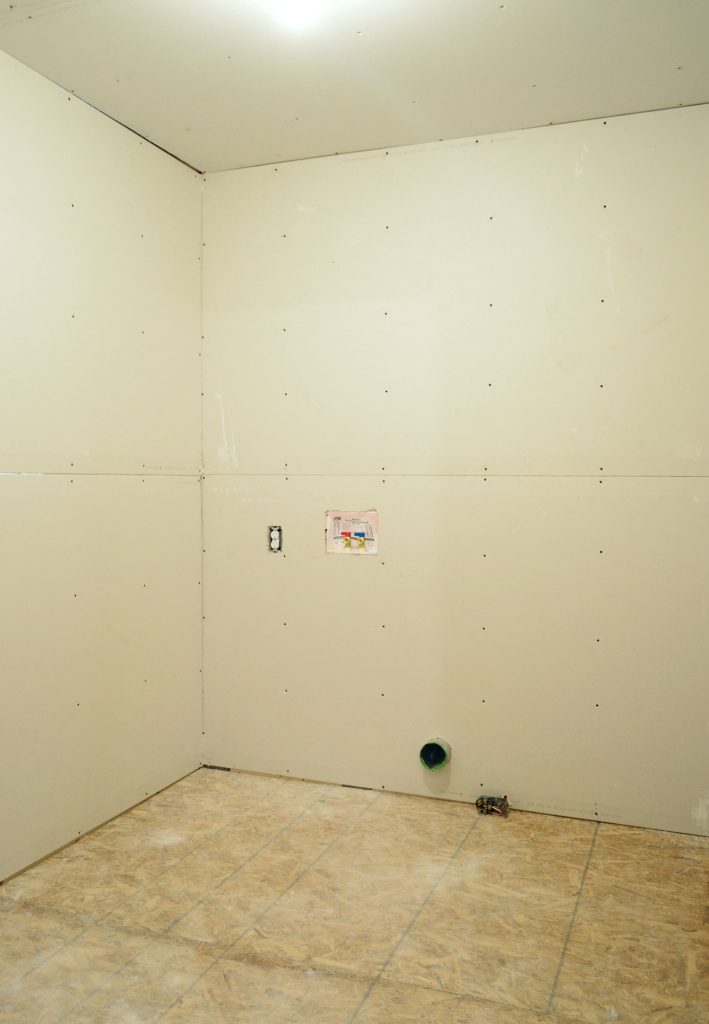
Eventually I got all 14 pieces in place (10 in the room, 2 in the hall, 2 in the storage room vestibule) and the space was really starting to take shape. This is where we started, as seen from the adjacent attic space…
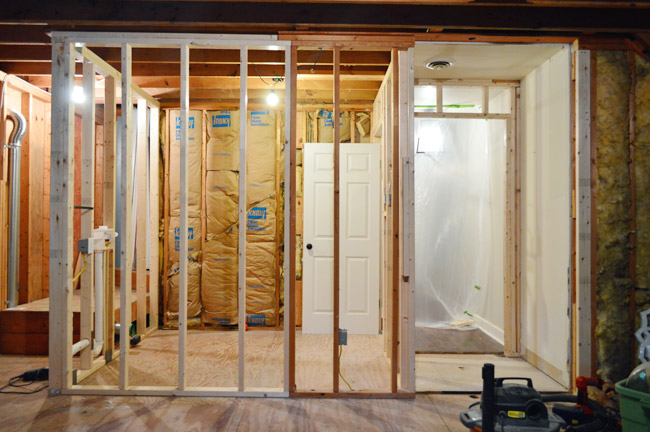
And this is where we ended up. Again, this is looking at the laundry room from the attic, which is why you still see exposed framing.
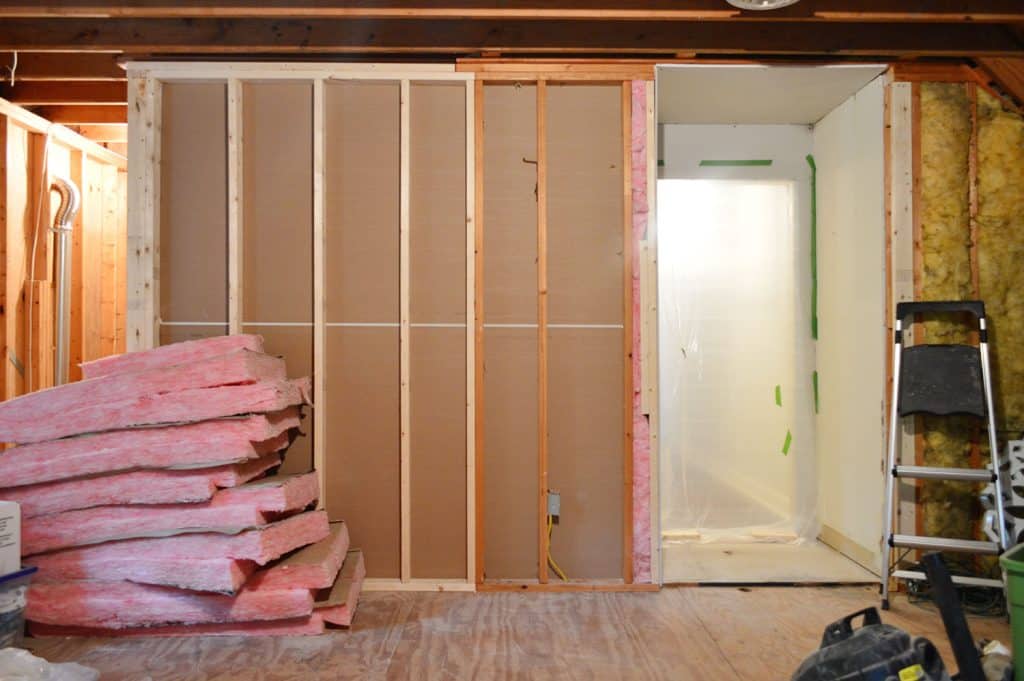
The inside of the laundry room isn’t looking very exciting. You can see that our drywall hanging isn’t 100% perfect (I had a slightly angled cut up in that top corner) but we’re still proud to have completed the task on our own. As many of you mentioned, the hanging part is a lot easier than the art of mudding and taping, so we tried to buoy our spirits with that info as we inched along.
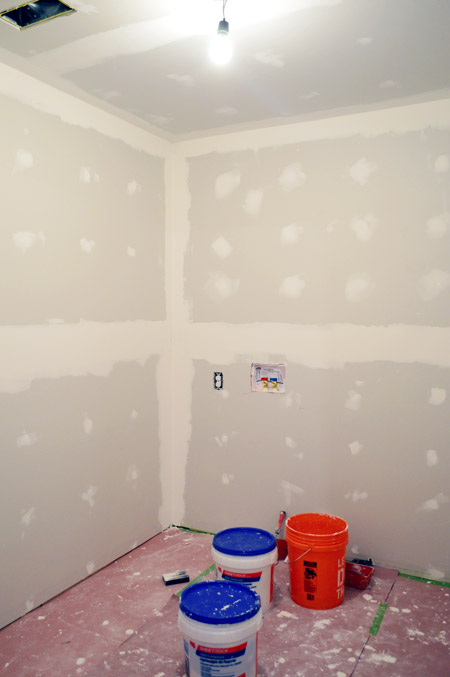
How To Mud & Tape Your Drywall Seams
Speaking of mudding and taping the joints, we’ve officially started in on that, and it’s definitely the more challenging part of this process – especially since we’ve got lots of corners.
UPDATE: We found a trick for making this process easier. So if you want to jump to the next step in this project, check out how we taped, mudded, and sanded the drywall (including a video)!
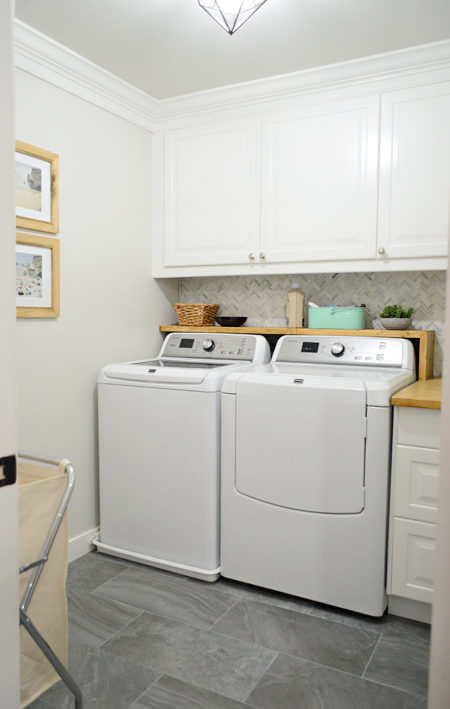
And if you really want to jump ahead, you can see how the final room turned out in this laundry room reveal post.

Amelia says
It’s good to see that the lift tilts. We have some drywall to add to the ceiling of my backyard studio, and we’ve been putting it off FOREVER because it seemed complicated at best, and dangerous at worst. Thanks for the photos, and nice work on the drywall!
Marlena says
I am so impressed! Wow – you two are really doing it! BTW – a co-worker just bought her house by herself and I sent her a ton of links to your blog – painting cabinets, etc. She printed them out to figure out how to best paint her kitchen and cabinets :)
YoungHouseLove says
That’s so sweet! All the best to her!
xo
s
Rosie S says
Oh, I am literally smacking my head saying “why didn’t we think of that??”… putting paint on the edge of vents, etc. What a time saver that would have been. We will never dry wall again, a solemn oath was taken(!), but admire people who do! It is such a tough job. One more suggestion (although, you probably know this, but just in case….)…plug up the bottom of the doorway when sanding, it is amazing how much dust escapes from the littlest cracks! Great job guys!!!
YoungHouseLove says
Thanks Rosie! We are planning to make plastic dropcloth barriers to try to keep it contained!
xo
s
Drew Carson says
Nice work! Looking forward to see how the tape and mud goes. I’ve had trouble with that in the past. Also interested to see your plans for texturing the walls. Lookin good so far!
Sarah says
Amazing! I am in the middle of a similar project but am thinking about hiring out the drywall since I’m working solo (and they would do a better job and be faster). Do you remember roughly how much that line item would have cost you guys to hire?
YoungHouseLove says
We’ll share more line item costs in the next post, but drywall was one of the priciest ones. The range of estimates was around $1200-1800 for just this small room (materials, hanging, mudding, and taping).
xo
s
Melanie says
Sarah, we just finished up our drywall project — the materials aren’t so bad, it’s the labor that’s killer. If you can hang your own drywall and buy your own materials, most of the estimates we received were for roughly $1.75/ft of wall space.
Radka says
I’m so thankful for this post. We do the kitchen re-do and we have nearly 2 years old girl rushing around trying to help. I am glad to know we are not crazy ;)
Amanda Bolan says
We have a team effort when sanding drywall: my husband sands away while i hold the shop vac right under to catch all the dust. Works like a charm, but takes two people.
YoungHouseLove says
Love that tip!
xo
s
Caroline says
I am loving the posts on the laundry room updates! Very inspiring to get me motivated on my own projects. I did not know about the dry wall hanging tool. That is very handy and looks like it allowed the project to go smoother!
Kristy Daley says
I find these posts extremely helpful! I am envious of your skills (and ability to renovate areas without a chaotic mess).
Jeanie De Melo says
Why didn’t you guys use the Dremel Ultrasaw for the cuts? After seeing it here, I got it for my husband this past Father’s Day – he LOVES it!
YoungHouseLove says
Didn’t even think of trying that. Have you used it on drywall? Did it work well?
-John
Jeanie De Melo says
We haven’t used it on drywall yet – but we’ve had great results with wood and tile cuts!
YoungHouseLove says
That’s awesome!
xo
s
Jeanna says
I thought you guys were going to pull the trigger and just hire out the mudding and sanding?! Now you’re doing it?
YoungHouseLove says
Yup, we mentioned we were considering hiring it out, along with looking into techniques to make it easier since we also were debating doing it ourselves. After getting bids for that part alone (assuming we did the hanging part in an effort to save money), it didn’t save us much at all (most of the time/effort is mudding and taping for the pros I guess?). More on that in the next post!
xo
s
Diana says
Of the whole drywall process, hanging it is definitely my favorite (or least dreaded) part. We just finished our 3rd drywall project and I’m still not a fan of the never ending mudding and sanding. At least we have gotten much better at it. Good luck!
sally says
You used some left over paint to mark the ceiling light – I’ve used lipstick in the past to make the same sort of mark.
YoungHouseLove says
Smart!
xo
s
Pat S says
I love watching you guys tackle all this stuff. You are amazing.
Steph Reiner says
The mudding is my favorite part! My husband and I had to do 2 new walls in our kitchen/living room and I thought the mudding was the best. But then again, I didn’t help with the hanging – he had his dad help with that. Plus we’re both super artsy fartsy and it was textured over to match the house so didn’t have to be perfect.
YoungHouseLove says
Oh man, I wish we had your attitude! We dreaded this part and it’s the pits! Haha!
xo
s
Olivia says
I had no idea something like the drywall lift existed. That’s really good to know.
I cannot wait to see the finished product.
Amanda E says
Hi Sherry!!!
I have the most random request for you, and I figured this was the only way I could get it to you in sort-of secret.
I am doing a scavenger hunt called GISHWES, and one of the items is to get a NY Times Best Selling Author to do a short (less than 30 seconds) dramatic reading from this section of the California Driver’s Handbook:
http://apps.dmv.ca.gov/pubs/hdbk/right_of_way.htm
Since you are the coolest, most awesome best selling author I could contact, I thought you might be willing to do this. I would be willing to make a donation to a charity of your choice as well in exchange. Please let me know! :D :D
YoungHouseLove says
Sounds like fun! I’ll email you the clip later, assuming the kiddos fall asleep sometime this afternoon and I have 30 seconds of breathing time!
xo
s
Carrie says
Just a quick tip, to fill the large drywall gaps between boards, use spray foam then shave it down. Then you can tape your joint.
YoungHouseLove says
Thanks Carrie!
xo
s
barbara says
Sherry: I’m begging. Please send John to my house!
YoungHouseLove says
Ha! He’ll be right there!
xo
s
Mags says
I love that last week and this week you’re back to real diy! This feels much more like your posts in the firs house- which was why I started reading so long ago.
How do you plan to combat humidity in the space? Especially with such a long vent to outside, and doors that will close on the small space- are you installing a fan or another method to stop the mildew?
YoungHouseLove says
Thanks Mags! We hope humidity won’t be an issue thanks to having a heating/cooling vent in the laundry room (the temp will be regulated so it doesn’t get too steamy). In RVA bathrooms typically have vents to draw out the steam from hot showers, but laundry rooms seem to do ok without any added systems for venting. Will keep you posted if we have to add anything though – you never know!
xo
s
Barb says
John,
You the man!
Nice job!!!
Looks big!
Bet you can’t wait to wash clothes.
Keep up the good work….
B.
Kristin F says
I can’t wait to see if you have any great tips for taping and mudding. We attempted this ourselves in a small room and failed. Miserably. Ended up hiring some guy to come in and finish it. Now that my “let’s see what’s behind the tile” bathroom escapade has exploded into a.)new subfloor, b.) a new breaker box for the whole house, c.) new drywall, and possibly d.) a pocket door (if I can figure out how to do without removing plaster walls on one side), I really need some DIY relief!
Cassondra Wiebe says
We’re drywalling our kitchen and living room this week and have been lucky enough to have 2 6′ 7″ friends that do drywall for a living…it took them about an hour to do our bathroom and guest room lol it’s crazy they just hold it above their heads and screw it in with one hand. Very ambitious doing it yourself and definitely made me feel more confident to give it a try sometime! Seeing them do it is like a blur of crazy drywalling skills so it feels like if it takes long you’re doing something wrong, but this definitely made me feel better.
YoungHouseLove says
That. Is. Amazing.
We need friends like that stat!
xo
s
Heather MacFeather says
Wow, looks awesome! My least favourite part of my reno was mudding followed by sanding. My favourite is painting which makes me want to rush to that part.
I love that you share with us. Thanks so much.
Melody says
This is awesome! Maybe it’s silly to be excited by this type of update, but I was, and it was great to see the lift used and it looks like wonderful progress. Can’t wait to see the finished room!
Alyssa says
How funny! My husband is actually hanging drywall in our basement bathroom right now! We finished our basement a little over a year ago and due to a plumber who didn’t exactly know what he was doing we put the bathroom on hold and finished the rest since. We needed more living space, not necessarily more bathrooms (we already have two). I never heard of the drywall lift before we did the basement, but my step-father-in-law knew all about it and since he was the person who did the dry walling and taping, we rented one for him to use and it works perfectly! We also picked up one of those handles for carrying drywall. Those make it possible for one guys to lift the heavy, awkward pieces alone. Your laundry room is coming along nicely!
YoungHouseLove says
Love the drywall handle tip!
xo
s
Margaret says
I have always put the bottom piece on the wall first. Then I slide the top piece up the wall until it slips in to place. The “ledge” of the bottom piece helps hold it up. If you wear your screw gun and screws in a belt, cut the sheet correctly and the stars align it works pretty well. I have done full sheets myself sometimes. Obviously it never goes that well!
YoungHouseLove says
Thanks Margaret!
xo
s
Christine Duffy says
I’ve heard this tip too! Thanks for the reminder!
Heather MacFeather says
That tip rocks. For shorter ceilings (less than 8′), a piece of 2×4 screwed horizontally on the wall (and 4 feet down) works well for the top piece to rest on. That allows for a factory edge at the ceiling. Just unscrew it before putting the bottom piece in. I guess cutting the bottom piece to the right height and installing first would work too. Sigh…wishing I had thought of that.
Jennifer T says
I have been loving following along with your laundry room! I was just wondering if you had to get any permits, etc to do this. I know every county is totally different, but how do you know if you need permits or not? We are about to embark on a kitchen gut/remodel and my husband wants to act as the general contractor, which I am fine with, but the whole permit thing worries me!
YoungHouseLove says
Oh yes, permits are necessary for this type of work! Thankfully when you use subs you can negotiate who pulls them, so we had our licensed and insured electricians, framers, and plumbers pull the permits they needed. Some sub-contractors are more likely to make you do all the permit work (which really isn’t too bad, we did them ourselves when John built the deck). You can usually check your county’s website for a list of things that require permits and give them a call if you have any questions.
xo
s
Liz says
I remember that lift from last time you guys drywalled, and I’m crazy jealous. When my friend and I did my bathroom ceiling, we used our hands and HEADS to hold the sheets up! NEver mind that a lift wouldn’t fit in my 5’x6′ bathroom avec clawfoot tub and two humans…I almost think I would be able to squeeze it in there with sheer willpower.
YoungHouseLove says
So crazy!
xo
s
Nat says
It’s really coming along quickly. You’ll be decorating and doing washing in no time.
Those lifters are definately worth the investment. I remember I had a piece of drywall last on my head when I was helping Hubby plaster our ceiling.
Milky says
When you finish your TV/bunk room, make sure to leave a big blank white wall somewhere so you can get a projector (we got a 3D one – awesome) to watch big-screen movies :)
YoungHouseLove says
Sounds fun!
xo
s
Kacey W. says
Oohoh, so that’s what a drywall lift looks like! We need to find one of those to finish our garage after a pipe burst this winter. Will check Home Depot!
Amanda says
I’m currently in the process of refinishing our bathroom walls (the old lead paint was cracking and chipping… boo!)
I am curious, will you be adding a texture to the walls in your bathroom? If so, are you DIY-ing or paying a pro? And if you are texturing, will you be breaking that down in future posts?
:D – Amanda
YoungHouseLove says
We don’t have textured walls here (they’re all smooth, and have been in our past two houses as well) so we won’t be texturing. If anyone has tips for Amanda, please share them :)
xo
s
Anne says
The room looks great! It always amazes me on how much work goes into building a well insulated and well structured room. I was reading an earlier comment and I was curious what was the first thing that made you think I want to start doing DIY projects?
YoungHouseLove says
I think when we bought our first house we very slowly got excited by fixing it up (pruning back trees was actually fun! Painting rooms made such a difference!) and we were hooked from there. It didn’t always go smoothly, but we loved the feeling of accomplishment when we inched our way through the DIY process.
xo
s
Kristen says
Are you guys using the stick-on drywall webbing joint tape (or whatever you call it)? As the resident mudder/tapper/sander/painter of the two of us, finding that on our second round of drywalling was a lifesaver and I would never use anything else. It made the whole process go so much faster. It’s definitely the worst step, but just because it’s so boring and tedious.
YoungHouseLove says
We’re not using the sticky mesh kind since we watched a bunch of tutorials and most of them were with the dry tape that you stick on with mud. It’s definitely messy and not as easy, but we hope it’ll make the sanding part less of a headache (we worry less a sanding too much and getting that crosshatched texture coming through). Here’s hoping it works…
xo
s
Avone says
I’ve used both kinds a few times each, and I find the stick on to be easier in the short-run, but require a few more passes of mudding and sanding (a pain in the butt!)in the end to avoid the cross hatching.
I think the stick-on mesh is best for repairing holes, but you probably don’t want all that extra work for all the seams of new walls.
YoungHouseLove says
Interesting!
xo
s
Lea says
Ambitious project, ya’ll. Drywall has always been one of my least favorite DIY jobs, but keeping some of the benjamins in the bank account makes it easier to tolerate. I purchased a filter for our shop vac especially designed to catch the dust that comes from all the needed sanding and a drywall sanding head that attaches to the vac via a long hose. It didn’t catch everything but it got 95% of it and made clean up much much easier. I am wondering why you’re putting insulation in the interior walls. Is it because of the dryer heat or for sound proofing or another reason? In my ignorance I thought interior walls didn’t require it. I’m a long time fan of your blog and always look forward to dropping in to see what ya’ll are up to.
YoungHouseLove says
So smart with the shop vac! Thanks for the tip! As for adding the insulation, we thought it would make the washer & dryer even more quiet, so doing laundry while kids watch TV in the future media room doesn’t mean they have to crank the TV super loud. Here’s hoping!
xo
s
Karen Ann says
Wow, John,
I am jealous of all your tools. Of course you actually know how to USE them…I envision that one day you will be the next This Old House host–and Norm the carpenter rolled into one.
Karen Ann says
As a parent of two college students, let me tell you another reason why you’ll be glad you’re installing a door with a window into the TV room– when your kids are middle- and high schoolers, and they bring their friends up there with them, you’re going to want to keep an eye on what’s going on. When mine were in high school, our house was the teen gathering place for lots of kids (I became everyone’s “Mom” and trusted advisor–I love teenagers). We have a split level so we could see into the den easily from the kitchen and foyer, and even a little from the dining room and library. All that came in handy. I bet you and John will find lots of reasons to “do laundry” while extra teens are around. I love teens but they need LOTS of supervision. It keeps them safe, which they need!
Julianne says
Awesome! Yet again, you taught me another tidbit about the drywall hanging helper. Thanks for the great, informative post! Looking fantastic :O)
Tammie says
I am so excited to see that your laundry room is the SAME size as the one my husband just drywalled for me! It is 8×7, windowless, and the door is in the same corner. However, we won’t be taping and mudding for about 6 more weeks since it is currently a cozy room for our litter of puppies that were born July 25. Looking forward to seeing your finished space and getting some ideas!
YoungHouseLove says
Aw that’s so sweet. Give those pups a cuddle for me!
xo
s
Lisa s says
How much value does a laundry room like this add to a house? I know it would be very functional…mine are in the garage. I fold wherever the kids are playing.
YoungHouseLove says
I would love to know that too! Someone recommended getting the house appraised after it’s done, so we’re thinking about doing that just to see!
xo
s
Amanda says
This has me looking forward to the numbers round up post!
Belinda says
My first thought was…WHAT they don’t own a truck? They had to rent one? With all the house redo’s it just got me a little tickled! lol And happy to know I can rent one for $20.00!! Great job on the room.. can’t wait to see more!!
Sophie says
I find it so interesting how you guys put up walls. Here in the UK most houses will have solid walls with bricks and plaster, even on the inside. I’ve watched my dad re-plaster walls many times in my life and I find this whole framing and drywall thing very fascinating.
YoungHouseLove says
So interesting! Here homes had plaster walls until the 50s/60s I think (our first house had them) and then it switched to drywall!
xo
s
Charlotte says
Hubby and his cousin drywalled the kitchen this past weekend (I was on kid duty) and started mudding it. They are *nearly* done. I’m dreading the sanding of the mud due to my allergies, but reading about the wet t-shirt option, I might look into that :)
Sassafras says
ARE YOU STOKED OR WHAT?????
What is Sherry putting in your Wheaties John???? Some of us NEED to put it in our hubs cereal bowl. Sherry birthed a Teddy and you’ve birthed a ROOM!!!! Ha!!! Labor intensive but both projects so worth it!
Congrats. Looking great!
YoungHouseLove says
Haha! Our babies and our house are a labor of love ;)
xo
s
Christine Duffy says
Thank you, Thank you, Thank you!!! I’m forever thankful to you guys for doing this post – you’re boosting my confidence in the ability to do this. We have a large bedroom we have to do this with in September/October and FOR SURE I am adding that drywall lift to my list of supplies. I read the book “Drywall: Professional Techniques for Great Results” by Myron R. Ferguson, cover to cover and I feel much better prepared to handle it, but it’ll be awesome to see your taping/mudding tips. Thank you so much, guys! PS – Saw Sherry in HGTV Mag the other day! :) Congrats!
YoungHouseLove says
Aw thanks Christine! Good luck with everything!
xo
s
Charlotte @ Ciburbanity says
This whole thing is crazy town to me! My only ‘dabble’ in drywall was when I had to cut a hole in the wall of our NYC apartment to fit a larger dryer exhaust. I hadn’t the foggiest idea how to patch it back so I’m pretty sure I used a scientific combo of chewing gum and masking tape and maybe some Lee press-on nails. Thankfully the dryer covered it all, but someone’s in for a treat if they ever pull back the appliances… This is looking great, guys! xxCharlotte
YoungHouseLove says
Hahaha! Oh yes, it’s the Lee press-on nails that really hold everything in place.
xo
s
Laura B says
I’m 37yr old SAHM who managed to use the same sheet rocks to Sheetrock 4 walls in my family room. All by myself. No fancy lifts. It can be done. And I muddled and taped too. It’s really rather simple. Awkward at times. And I had to halve the boards some times but I did it.
YoungHouseLove says
That’s amazing! I bow to you!
xo
s
Karen says
My husband has done many drywall jobs over the past 30 years. He said using a pole sander with a heavy grid (looks like a thick type or screen) works well. Very dusty though.
Also, have you thought of using soundproofing insulation instead of the pink kind? It’s kind of tan in color but cuts the same as regular stuff. We had a master bedroom bath and closet added to our house with the laundry room in the bathroom. With the door closed, we can’t hear the machines running.
YoungHouseLove says
Sounds awesome! We’ve already done most of the insulating, but would love to try that tan stuff sometime.
xo
s