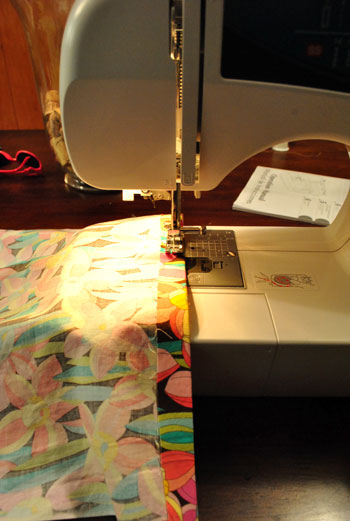
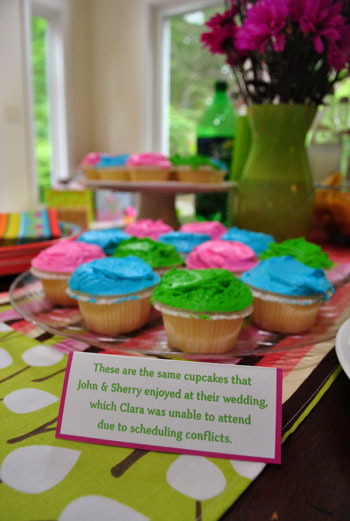
I’m not a runner, but I can make one. I used to run track and cross country in middle school and high school. I actually ran a 5:09 mile once (with the help of some downhill portions of a course and the fact that I was like 80 lbs). It happened once and never again (I usually clocked in between 6:20 and 7:10). But those days are gone (due partially to an ankle injury but mostly to laziness). Now I only run when I’m being chased. Or when I lose track of the baby. But making a runner? That I can do. You guys actually got a sneak peek of my recent runner creation in this picture from Clara’s party:

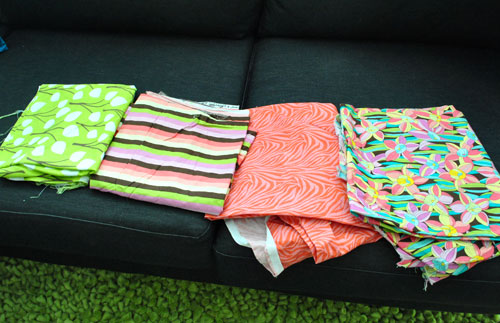
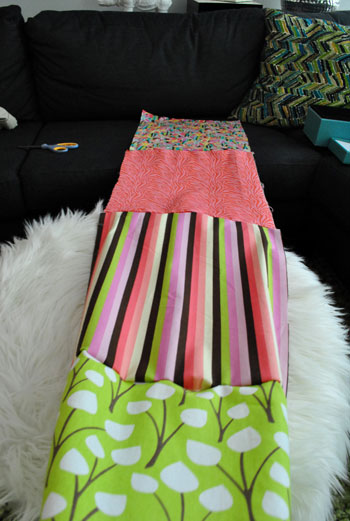
And let me tell you, it was child’s play compared to my big quilt project (nothing like a little confidence-building quick & easy sewing project to get your sew-mentum up). Yes, I just made a sewing pun for my mom. Happy birthday Momma (it’s tomorrow)! Anyway, here’s how it went. First I sorted through all of the leftover fabrics from Clara’s weekly photo project and picked four that I liked together (for a sort of cheerful and happy-go-lucky mixed & matched effect).
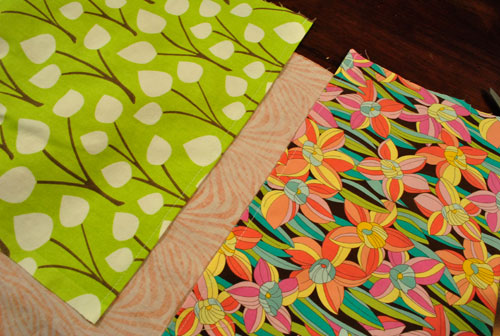
Then I found a runner that I already owned (from Target a while back) and folded it into quarters so I would have an idea of the size of each of the four squares of fabric that I should cut out (so that when sewn together they would equal the approximate width and length of the runner that I already had). I left about an inch of overhang on all sides to account for seams, so it looked a little something like this:

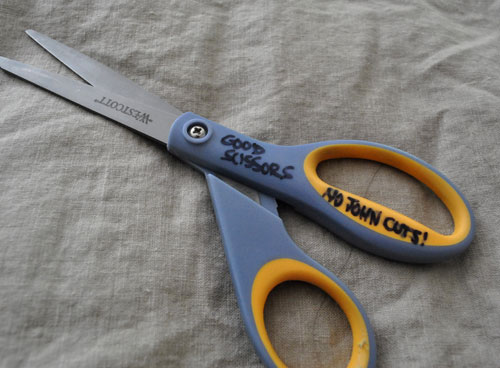
And for some reason I like to over-share, so I’ll point out how insane I am about my “good scissors.” I actually wrote this message on them with Sharpie because I was sick of John using the good sharp ones to do something crazy like trim a thick branch outside or slice open some crazy-thick plastic package. Do you like how it specifically says “no John cuts”? I think it’s hilarious. That’s like Kate Gosselin level micro-managing right there. But it works. John won’t touch these scissors anymore. And I love you for that babe.
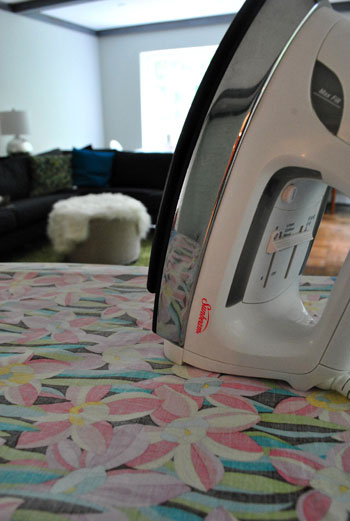
Anyway, next I ironed all of my four fabric rectangles so they weren’t all junky and wrinkled looking (they were already washed, btw, which is important to combat shrinkage – because nobody likes shrinkage).
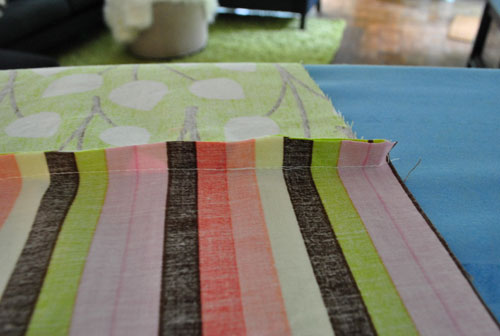
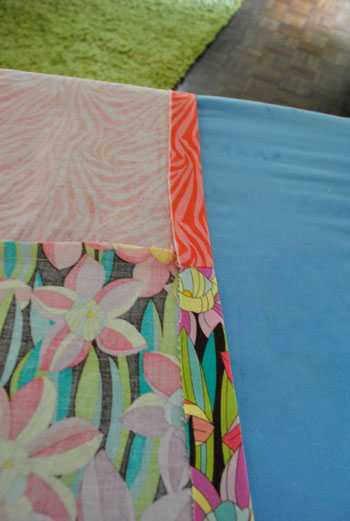
Then I pinned each section together with the bad side facing out (which would create invisible seams – which are my favorite since they’re harder to mess up). Oh and to all of those who gave me the tip about pinning it perpendicular- I love it. I just somehow forgot so I’ll have to try that next time.
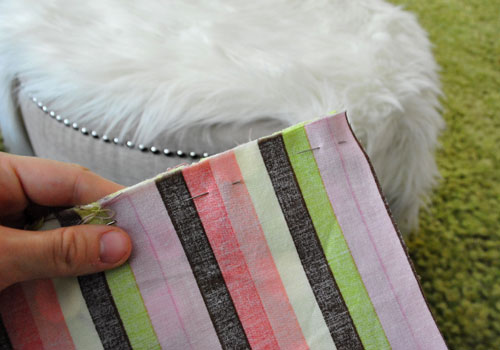

With it all pinned together it looked a little questionable for a while, but I (surprisingly) had faith that when I ironed and sewed those seams they’d look a lot less ganked up then they looked at the pinning stage of the game:
And sure enough, after a little bit of sewing things were looking a lot more promising. Who ever would have thought that me + sewing machine = something looking better than it did before. I’m telling you, this is serious growth for me as a person. I would have defined my relationship with sewing machines as tumultuous before this month. But times they are a changing. I might even have a tiny crush on Oh Brother.
Anyway, then it was time to iron down those seams from the back so they would lay nice and flat and look good from the front (as opposed to looking all bunched from the front like a big ol’ runner wedgie going on under the surface).
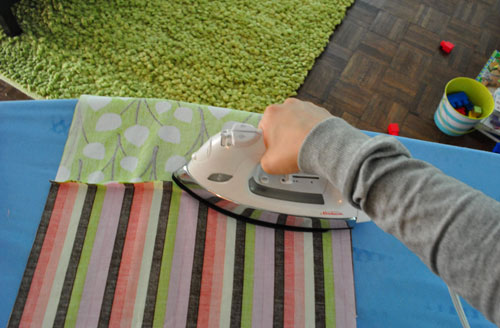
Then I ironed the outside seams on each end of the runner down to create the finished seams that would be seen from the front. I went straight to ironing because I was feeling gutsy (and didn’t feel like pinning the entire outside edge since the baby was about to wake up from her nap any minute and I was feeling all jumpy and why-the-heck-not about it)…
… and then sewed those two seams (these seams would show, which still kind of scares me but it wasn’t a big deal in the end- I just tried to go slow and steady and keep things nice and straight).
In about five minutes I had a nice tailored looking seam on both ends of my runner (without any pin usage – saweet). Then I had to deal with the unhemmed sides of the whole thing.
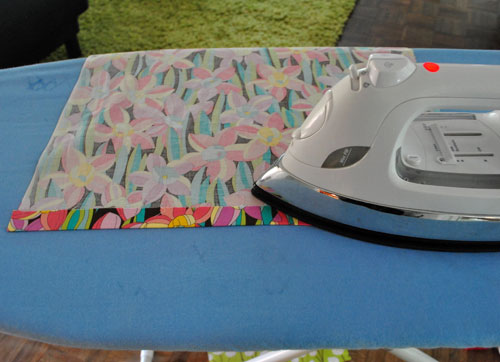
So I ironed them down too. I have to admit that not pinning felt good. Like I found some sort of shortcut to the next level in the video game of sewing.
Then I just slowly and carefully stitched around my ironed edges to create a nice neat hem around the outside of the rest of the runner. Aside from my bobbin running out halfway through (which pisses me off every time, I’m not gonna lie), it wasn’t annoying or frustrating. I was almost – dare I say it? – enjoying the process.
Cue the collective gasp.
Anyway, after making out with turning off my sewing machine and removing my freshly completed runner, I just ironed the whole thing again, just to make sure it was nice and tailored looking. Houston, we have a runner:
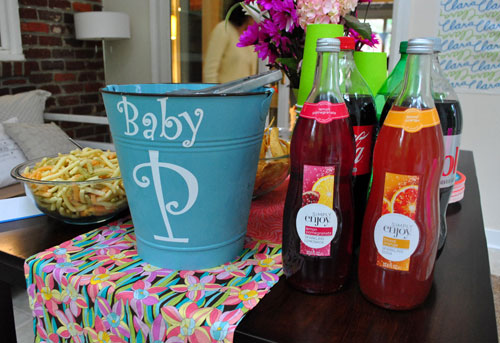
I hope to use it at lots of Clara parties to come. And probably for a bunch of other parties too- it’s just really happy and festive. It even looks kind of Easter-ish so it could work for a fun little egg dying party or something. Oh and the total cost = zero bucks (thanks to already having the fabric on hand). As for how long it took, I knocked it out in about 45 minutes to an hour. So it’s perfect for any beginners out there who want to kill me because they think I’m getting good at sewing. I’m not. I’m not even junior varsity. I’m the water boy of sewing. I don’t know the right terms for things, I make tons of mistakes as I go, but I’m telling you – just messing around until you end up with something you like is a surprisingly effective approach thus far. So take it as a sign that if a cursed sewing-machines-revolt-in-my-presence person like me can tackle some simple projects, you can do it too. Probably much better than I can.
Psst- Our baby-proofing adventures continue over on BabyCenter today. Can you handle the excitement?

WI Gal says
Congrats on another successful sewing project!
Since you are a novice … Do you know about the seam gauge? It is a little ruler with a red plastic piece that slides so you can quickly ensure that when ironing your measurements end up the same size (no more need for eyeballing). You might also want to get a magnetic pin carrier. It is great for making sure all the pins stay put and don’t fall into little hands!
My three-year-old has just started helping me sew. She and I made a pillow together a few weeks ago. She pushed the pedal on the machine and (carefully) took out all the pins. By the time Clara is old enough to help you, you’ll have graduated to varsity!
YoungHouseLove says
Never heard of it but I’ll have to check it out! And it’s AMAZING that your daughter is helping you sew. I have fantasies about sewing with Beansie when she’s old enough!
xo,
s
Katrina says
I love this image! I just finished 80 blocks for a quilt and my two year old daughter spent an hour “arranging” them this weekend. If I kept the squares the way she laid them out it would be one really long, skinny quilt, but she had a ball playing with them.
Carolyn says
I see that several people have recommended putting the pins perpendicular so that you can sew over them, and I’d just like to say that while it is better to place them that way I wouldn’t sew over them.
I’d put them perpendicular with a bit of the head sticking over the edge and then it’s easier to pull them out as you come to them. I’ve broken my sewing machine needle trying to sew over pins. While you might be ok 90% of the time, all it takes is for the stitch to line up just right for the needle to hit the pin straight on and the tip will break off.
I get really mad when the bobbin runs out too. :)
YoungHouseLove says
Thanks for all the tips everyone! Always so helpful. I wasn’t even craving any sewing projects after posting this but now I am thanks to all these tips and ideas. Haha.
xo,
s
Kelsey says
I can completely relate to not sharing scissors with the hubby:) I am going to mark mine!
Crystal says
I haven’t opened my sewing machine in years but my “good scissors” are hidden in a box under my bed!
Allie says
As a kid, I thought my mom was nuts for constantly screaming, “who took *my* scissors!” As soon as I started sewing and my good Friskars went missing, I knew exactly how she felt!
fd says
Wow your mile was impressive (your runner too! and the quilt, love the quilt!).
Sherry, if ever you feel like you want to get back into running and need some help, I can highly highly recommend http://www.upandrunningonline.org . I’ve been doing a women’s only 5k course (graduate this Sunday, woohoo, I even get a certificate) for the past 8 weeks and it has been a blast of online fun and sweat and the occasional tear(mostly of joy!).
YoungHouseLove says
Sadly I have a janky ankle that even swells up after we walk 10Ks. Booo! But it didn’t stop me and John and Clara from walking our first family 10K this past weekend. Lots o’ fun! And no running required.
xo,
s
fd says
sorry to hear that Sherry! I’ve busted one or other ankle a grand total of 9 times in the past 15 years, so I feel your pain. Finally I found a physical/manual therapist who sorted me out and got me up and running again :-)
10k family walk sounds brilliant!
YoungHouseLove says
Woah- nine times is tough! So glad you’re up and running again!
xo,
s
Jess says
I agree with Victoria R. In fact, that’s what I kept thinking the entire post. I think that it’s standard to iron the seams open – just be careful that you don’t over iron! I never sew over pins. I just know that the pin will break and come flying into my eye! The horror! Good luck on your future sewing projects. Maybe a cute summer beach bag?
Paige says
I love that you’re tackling the sewing machine! Mine is still misbehaving and I’ve rekindled my affair with Liquid Stitch. Have you ever used it? Magical.
YoungHouseLove says
Never! But it sounds like something I might love. I’ll have to check it out…
xo,
s
linny says
Your sewing trials have are an inspiration to me. I’ve had an unused sewing machine sitting idly since I got it in December. My first sewing class begins tomorrow, which makes me think I really need a better iron!
My iron is a $9 cheapo that spits water everywhere. Do you love yours for crisp clean seams?
YoungHouseLove says
Ours isn’t anything amazing but it works! It doesn’t spit water anywhere unless I overfill it. Hope it helps! Anyone have iron recommendations for Linny?
xo,
s
Brooke says
I too get seriously pissy when my bobbin runs out! Mostly because even though I’ve had my sewing machine for 3 years, it still feels like I’m threading the bobbin for the first time… EVERY TIME I have to do it! I have a bizarre mentail block when it comes to bobbin threading! :)
Kelsey says
OK…so as a former collegiate runner, I have to say, that mile time would be amazing for a Jr. High kid…as in the winner of the women’s mile at the NCAA national championship was 4:35 this year…Are you sure it wasn’t 6:09?? Otherwise, you really should take up running!
YoungHouseLove says
Yup, I’m sure. All of my coaches made a big deal out of it. But it only happened once. My usual time was around 6:30. Not sure what got into me (I did have a crush on a runner boy who qualified for states…).
xo,
s
Jen @ The Decor Scene says
Sherry I love how this runner came out. And it looks like it was pretty easy to do. You are inspiring me to sew curtains instead of using the hem tape to make a hem. But we will see. I don’t have a sewing machine, but my Mom does. But either way you have inspired me more to go and buy that material for those curtains, that I have wanted to get up for months, oh heck years at this point. Thanks for the inspiration.
Are you going to try to sew curtains for the LR or DR when you get to that point or will you still use the hem tape to make it easier?
YoungHouseLove says
If we can find fabric that’s not super expensive I’d looove to make living room and dining room curtains for sure!
xo,
s
heather says
Ahhg! I hadn’t seen Catfish but I read about it. Real or not – the fact is you really don’t know people and it creeps me to bits. Part of the reason I don’t use my fiance’s name on my blog – or our last names. Just a little too cautious because I’m way too trusting.
Re sewing: A super easy way to make your runner a double sided, dual use runner? Cut another piece of fabric the same length as your current runner (plus an inch or so wider on all sides). With right sides facing each other stitch around all sides leaving one side open. Flip right side out. Fold in your open side and top stitch it shut, and continue to top stitch around the whole thing. You’ll end up with a professional, reversible, table runner. I was actually going to do a blog post on one of these soon since I need to make some up for my wedding on Saturday!
YoungHouseLove says
Love it!
xo,
s
r8chel says
Sherry, I think it’s so cute to read about the adventures of someone who is just learning to sew. Your terms might not all be correct, but we probably all understand what you mean. :)
This whole bobbin thing has me a bit confounded. Why does it become empty so often? I thought you’ve only sewn a few projects so far. Are you only putting a little bit of thread on the bobbin? Fill ‘er up! It doesn’t take long at all to fill a bobbin. (Wait — you’re not filling it by hand or anything, right?!) :) And regardless of what kind of bobbin your machine uses, you should have a bunch of bobbins on hand. I have bobbins that I’ve filled with all the different colors of thread that I’ve used. They’re cheap. Buy a bunch. :) And maybe fill a couple of them with white thread or whatever you use most.
Also, seams should typically be ironed open so that there are only two layers of fabric on each side of the pressed seam, rather than three on one side and one on the other. (There are times when you should press the whole seam in one direction, but it’s less common.) Just stick the tip of the iron at one end of the seam in between the two short pieces of fabric sticking up, and as you move the iron forward, the seam will just open up and lay flat. I can’t imagine pressing a seam three times like some people are recommending!
Have fun! I’m enjoying reading about your sewing projects. :)
YoungHouseLove says
I’m filling it up pretty well- but I guess I should just load more on there! I just used a lot of thread on my quilt I think. So when I sat down to make my runner it was pretty depleted to start with. As for the ironing tip- thanks so much! Don’t know why I never thought about that!
xo,
s
Megan says
Sherry–your sewing is great! I am loving these posts. You are ready for some baby clothes! These are two GREAT blogs:
http://www.prudentbaby.com (check out the diaper cover tutorial here
http://www.prudentbaby.com/2010/06/diy-diaper-cover-tutorial-with-free.html)
And MADE ( http://www.dana-made-it.com/) for easy skirts!
I started by just buying a bunch of cheap muslin to practice on. I dare you to try! (I love a good dare;)
YoungHouseLove says
Thanks for the links! Someday I’d love to do some clothes for C. Just worried about buttons and zippers and elastic- but I’ll get there someday I hope!
xo,
s
Jessy says
My mother’s sewing scissors say “Do not use or I will cut off your fingers!” Never stopped us though, lol. I actually took them with me when I moved out, just because. I’m surprised she still loves me.
YoungHouseLove says
Haha- I totally wish I wrote that.
xo,
s
Ruth says
I have another sewing tip for ya (are you tired of these yet?) Always use the best presser foot for a project, your machine probably came with several and you can change ’em with the push of a lever. (Right behind the foot, kind of on the stem that holds it, black pushy lever)
Your sewing machine should have come with an extra presser foot that looks really funny with a stick on a spring coming out the side, something like this:
http://www.sewdevine.co.uk/images/brother%20blind%20stitch%20foot%20f018n.jpg
Well, that little spring thing is an adjustable guide. You can use that for things like the hems, and the little side piece rides against the edge of the fabric to keep things lined up for a nice straight seam.
Good luck!
YoungHouseLove says
Love it! Off to check if I got one of those!
xo,
s
Katrina says
The runner is super cute!! Sherry you’ve been officially bitten by the sewing bug, welcome to the club! :)
Amanda Wells says
Love that you wrote that on there. Totally something I wouldn’t hesitate for a second to do. Haha!
http://www.amandadovewells.com/?p=542
Blair says
I love the runner and all the sewing jokes! My mother when I was younger, had her own sewing scissors and would flip out if we ever touched them. (Small children think its perfectly fine to use them to cut cardstock paper, oops!) Now that I am older, I can definitely appreciate a good pair of scissors.
~Blair
Ashley @ DesignBuildLove.co says
LOVE the runner! Very fun and playful! (and I see you are continuing your sewing projects!) :)
Liz Jorgensen says
My mom’s scissors just said “For Fabric Only” in black sharpie, but with 8 kids I’m not sure it did much good. Haha! Cute runner. I LOVE easy little DIY that I’m not afraid to tackle! Also, happy birthday to your mom tomorrow…and to me!
Elisa says
I was going to comment on the post but then I read Jo’s comment above about rock-paper-scissors and I’m laughing over here :)
ANYWAY actually I was gonna say I love the part of the post where Sherry mentions making out with the sewing machine. Haha! I love that your blog has so much personality infused now.
OH AND ALSO! I noticed there was another commenter whose name is “Elisa” and I was like, “Yayy!! Someone else has my weird name!” But then I noticed she commented to say she doesn’t like your horses. Now I am sad that the-one-who-shares-my-name is unkind :(
I am the Elisa with the stick figure icon. And I am nice. And I love your blog. And I say that if you like horses then you can tattoo them on your face if you want and I would only be HAPPY for you :) :) :)
YoungHouseLove says
Haha, we don’t mind when people don’t like everything that we do to our house. We figure that’s what makes the world go round! We can’t all love the same thing. Haha. But I do love the name Elisa. Don’t tell anyone, but it was actually a contender when it came to naming Clara (but Clara has a cousin named Elsa so we thought it might be too close to that). Love the name! Love you! Love the other Elisa! Love my horse art! Oh and it came. And it’s amazing. More as soon as they’re both hung!
xo,
s
Marla says
haha! I have the same scissors – came in a pack of three different sizes. They are the best scissors I’ve ever owned! Love your idea of your marking your territory on them :)
jbhat says
I think this is amazing. I haven’t sewn a stitch since my eight grade home-ec class–in which I somehow cobbled together a pair of pink sweatpants–eek! Sewing was a terrifying unit, and all I remember was waiting humbly off to the side while my skillful friend always dealt with my naughty bobbin and tangles of thread. I could never figure out how it all worked, and am truly amazed that I made anything resembling anything.
jbhat
Amanda says
http://worldofsmith.blogspot.com/2011/05/big-party-party-details.html
I just wanted to share with you my friend Lindsay’s blog. She held a party for her daughter and her sister made these amazing streamers. Sherry, I can see you zipping these out on your new sewing machine.
YoungHouseLove says
Love those so much!
xo,
s
Elise says
My parents gave me a sewing machine for my birthday (in April) – I learned to sew in Home Ec. in middle school (my big project? a “locker keeper” woot woot) but really couldn’t remember anything. But I came across this awesome blog that totally inspired me to learn to sew again: http://www.dana-made-it.com. She has tons of super easy tutorials – everything from little kid clothes to home decor. And because she does things step by step and takes pictures of them I’ve already made 3 scarves and 2 skirts for myself. Such an awesome, cheap way to expand your wardrobe! Definitely check out her blog – I check it every day after I check yours!
YoungHouseLove says
Thanks for the tip! I’d love to check it out!
xo,
s
katie o. says
So, what you’re saying is, I shouldn’t throw my sewing machine against a brick wall?
YoungHouseLove says
Haha, that’s exactly what I’m saying. Just calmly stand up, walk quietly into the bedroom, and scream into a pillow.
That’s what I do!
xo,
s
Kristi @ Addicted 2 Decorating says
That turned out great! I’m glad to see you getting your feet wet when it comes to sewing. No sew projects are good, but actually sewing them is far better. I try to convince people all the time that sewing really isn’t that difficult! Most who have never tried it don’t believe me. But seriously, if you can sew a straight line, you can make things like lined pinch pleated draperies. Seriously…just straight lines.
Jillian says
“sew-mentum”. Ha ha! Love it! Great job on your cute runner. I’m working up the courage to make the Simple Skirt on MADE for my little girls.
Barbara says
I love it! Can’t wait to see what else you do (:
Cecelia says
You outdid yourself with the party decorations!
The colors were like the inside of a candy store. Yummy beautiful!
The sunroom windows are yummy beautiful too!
Melanie says
My mom always had good scissors growing up too, a little one for threads, and a larger one for fabric. I hid my good scissors from my hubby in my sewing maching storage box, but I like your idea too. I caught myself cutting a cardboard box with my kitchen “herb” scissors and it killed me, but I couldn’t stop it. Just too conveniant. :)
I can’t tell by the photo, but I think you are just pressing your seams down and not open, do you press them open? If not, you might want to use it for more complicated projects where you need all the seams to lay very flat. And it’s kinda satisfying to do with the iron.
I noticed your runner in your previous pics and was envious of your go-get-em to sew up a bunch of things for the party.
YoungHouseLove says
Yeah, I just learned today from all of you sweet folks that I’m ironing wrong. And your way makes a lot more sense!
xo,
s
Bee says
Oh, Sherry, you give me hope. I’m not even a waterboy, I’m like the fat, acne-ridden boy whose parents dragged him to the game sulking in the bleachers. I just inherited an old sewing machine though, so I’m hoping to advance into almost-beginner status sometime soon!
Van says
Congratz on your progresses… in no time you’ll be a pro making halloween costumes for Clara… ^^
Amanda K. says
Sherry, I hate to do this, but I have to ask about your mile time. Are you SURE you ran a 5:09? In MIDDLE SCHOOL? Do you know that time would have ranked you nationally among middle schoolers?
Even for high school girls, that’s a VHSL State Championship qualifying time.
YoungHouseLove says
Yup, all the coaches made a big deal about it. It was a cross country course so of course the mileage could have been a smidge off (and there were downhill portions) so I didn’t even make states or anything. I was an alternate. Haha. I never did it again either. My average times were more like 6:30. Don’t know how it happened that one time other than it was a really sweet course (we were visiting another school). Seriously, lightning struck once, but never again.
xo,
s
Gina Lee says
First of all, I had to LOL when I was reading through your comments, because I used the term “brain fart” today too! (and that’s so not my phrase, but I did say it today about myself… :)
Anyhow, I have an important question for you about your party decorations pictured. I love the tissue pompons you made for Clara’s party, and I did look at the Martha Stewart website for the instructions… but I’m wondering if you used more than 8 sheets for your pompons… yours look fuller than the one we tried with 8 sheets, and even fuller than Martha’s… I like yours better!
Any tips?
This is for my diy wedding on Saturday, btw. :)
Gina Lee says
I’m the person who sent you the link to the Map Tights on Pinterest… :)
YoungHouseLove says
I used ten sheets! Just because I had them on hand and I’m a rebel like that. Haha.
xo,
s
bryce says
Wow. 5:09 mile? That’s super fast. Are you sure about that time? I’m also a runner and I know that this mile time would have put you like in the top 10 in the state (high school at least). So there were downhill portions? That means you didn’t run it on a track? Track times are always faster than course times….so i’m having a hard time believing that you ran a 5:09
YoungHouseLove says
Yup, it was on a cross country course (the first mile was mostly downhill and when they shouted times out at the first mile marker I was at 5:09 and my dad was flipping out). Of course the mileage could have been slightly off since it wasn’t on a track, but all the coaches made a big deal out of it, even though gravity was on my side. I even got considered for states but ended up being an alternate because I never repeated it. Not even close. It just happened once (my usual time was around 6:20-7:10) so I’m still waiting for that inner athlete to come out. Haha.
xo,
s
MarT says
Several things that will revolutionize your sewing life:
–medium/light gray thread on your go-to bobbin. A lot of times unless the fabric is super light-colored, you can use a medium to light gray thread on both bobbin and top thread for seams and not see a thing.
And I am not affiliated with Dritz in any way, but their products have helped me sew better and faster:
–Dritz Magnetic Seam Guide…snap it on the metal plate along the seam allowance you want…take out the pins and you can buzz right through with nice even seams. For small pieces, I don’t even pin, I just hold the fabric together firmly and run your stuff right through.
http://www.joann.com/joann/catalog/productdetail.jsp?CATID=cat3281&PRODID=prd13157
–Dritz EZ Hem. Great for ironing a perfectly measured hem. A Flat piece of metal with all the correctly measured lines you need.
http://www.dritz.com/brands/showcase/details.php?ITEM_NUM=617
–And its big sister, the Dritz Home Drapery Hem Gauge
Great for ironing off an even curtain hem once the hem size has been determined (I am a purist who likes to hem by hand).Or just for turning up the edge on a longer project.
http://www.joann.com/joann/catalog/productdetail.jsp?pageName=search&flag=true&PRODID=xprd140410
–Dritz Prym Dual Purpose Twin Marking Pen
One tip is air soluble, the other water soluble. Awesome for all kinds of designs and measurements.
http://www.dritz.com/brands/showcase/details.php?ITEM_NUM=11080
Jen @ chicagobungalov says
Love it! I didn’t notice on the earlier post it was made from different swatches. So glad you posted this one. I will have to try making this for my house.
Jen @ chicagobunglov
Jami says
You have a huge jump on me and the whole sewing thing! I had a major breakdown and it’s since sat unloved, man I had big plans for us! I do still have the same type of scissors, my husband even tried to use them since I’ve sworn off sewing to get a swift “I may become a sewer one day!” It looks great! Good job!!!
Erin says
My mom was physco about her sewing scissors too so I get what you mean. Love the runner!
On another topic, I drank the kool aid and joined Pinterest. I really like the concept of it and i really want to like it but i’m having the worst time with the site freezing on me. I thought maybe it was the new iphone/ipad app that had some kinks in it but i logged on with my desktop this morning to clean up some of my boards and i’m still getting error messages and really slow load times. Any suggestions? Anyone else have this problem?
YoungHouseLove says
Oh no! I haven’t had that issue but I do most of my trolling at around 11pm (so maybe less people are on it then?). Anyone have advice or ideas for Erin?
xo,
s
Kate says
You’re looking good for a “waterboy”! I love the runner. My niece is about Clara’s age, and I made her the following little stuffed toy. Minimal sewing skills required!
http://bread-n-chocolate.blogspot.com/2011/02/sew-sew-saturday.html
YoungHouseLove says
That’s so cute! I love it!
xo,
s
Christa says
bahahaha!!!! lol at the runner wedgie!!! that’s awesome:) great job on the runner! I’m impressed. I’m also impressed that you iron before you sew. haha – you can tell I’m not a seamstress. I despise ironing, so I try to make sure all my crafty things involve wrinkled fabric…or some such notion. ;P
Monika says
I’m so glad your sew-mentum is going strong! I’m hardcore about my sewing scissors too, I keep them in the box with all the rest of my sewing stuff so they aren’t sitting around waiting to be misused.
If you get brave and decide to tackle clothing for Clara, you could start with making her a pillowcase dress:
http://www.freshlypickedblog.com/2011/03/how-to-make-childs-summer-dress.html
I’m really looking forward to seeing the horse artwork framed/canvased up!
YoungHouseLove says
Yesss! It’s perfect! I love all the pics and the fact that there aren’t scary zippers! I might start with this guy for sure!
xo,
s
Monika says
The dress is pinned on Pinterest already! Love it! :)
YoungHouseLove says
It was me! Haha.
xo,
s
Leigh says
They have stolen your idea! Page 9 of “taste of home” June & July issue. I saw their runner and thought “Sherry’s is so much cuter.”
YoungHouseLove says
I’ll have to check it out! If anything we stole theirs since I’m sure it was shot months ago. Haha.
xo,
s
SamiJ says
You can sharped your scissors with Tin Foil.
YoungHouseLove says
Never heard of that. Might have to practice with the bad scissors- just in case. Haha. I’m so neurotic.
xo,
s
mybe says
I can’t stop cracking up about the scissors- I thought it was just my little “thing” that I inherited from my own mother. I forwarded this to the hubby immediately and said- SEE it’s not just me. ;)
YoungHouseLove says
Haha – you’re definitely not alone!
xo,
s
Jennifer says
I write on my fabric scissors too, you’re not alone :o)
Suzanne says
At the risk of sounding like a spambot…Hang on to your hat, this is going to change your life! I’ve been sewing for nearly 20 years now. Pillows, curtains, simple things, Halloween costumes, an occasional toddler dress. Last week I discovered this: http://www.amazon.com/Brother-SA127-5mm-Narrow-Foot/dp/B00291003A It’s a rolled hem foot. You feed your un-rolled fabric through the foot and it rolls it neatly and sews it up for you. It’s genius! Check out some of the videos on YouTube for “rolled hem foot” or “hemming foot” and be amazed!
I made my daughter a dress using it last week and couldn’t believe how perfectly it worked!
YoungHouseLove says
Woah- it sounds fun! Off to check it out…
xo,
s