How about a post about hunting for knockers? Nope, not those knockers. This is just the follow-up we promised yesterday about updating our door knocker and doorbell.
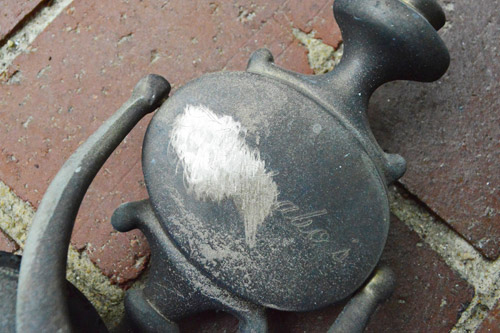
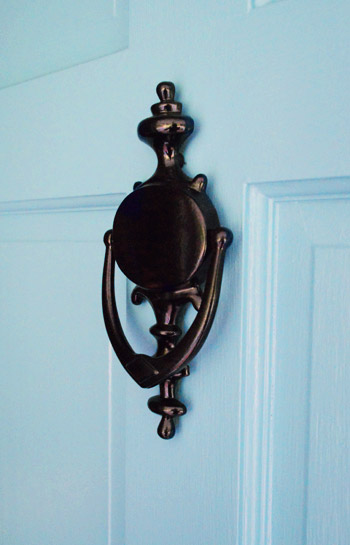
Here was the situation before: a nice but quite aged door knocker whose main flaw was that the previous owner’s last name that was etched into it (it’s a little hard to see because I slightly blurred it for their sake).
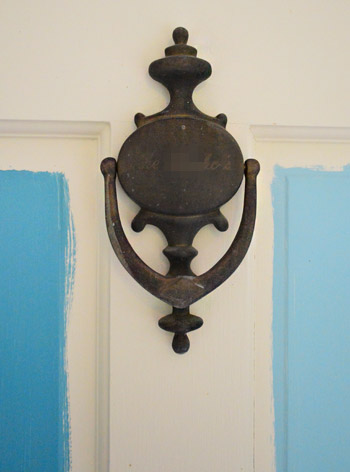
We took the engraving as a sign that it needed to be replaced, rather than salvaged, so we figured we’d use the opportunity to buy something unique and statement piece-y. First we hit up our favorite local hardware store (Pleasant’s Hardware) which had some animal kingdom inspired options that Clara couldn’t keep her hands off of. But with those prices ($188?!) Sherry and I had no trouble.
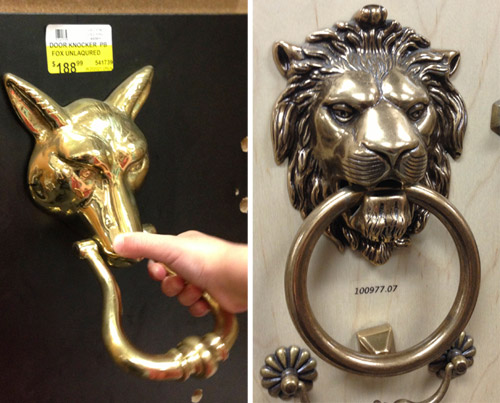
Our next stop was a local architectural salvage place that’s always full of interesting pieces (Caravati’s). They had some cool options – we especially loved the chunky ring in the bottom right – but the prices were still about one digit longer than we were hoping to spend (that one was $185). I guess I never really thought about how much a door knocker could cost.

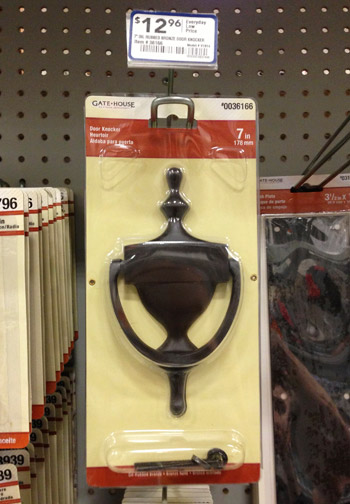
Next we scoped out Lowe’s and Home Depot, which both had options like these. The price was certainly right, but it was the same basic urn style knocker that we already had except smaller and not as “original” looking. Plus the size difference would mean we’d have to make new holes in the door to achieve basically the same look.
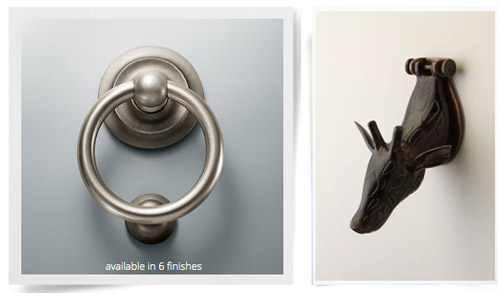
When the big box stores failed to excite us, we hunted online a little and found some interesting and slightly more affordable options at both Restoration Hardware and Anthropologie. Never did I think I’d put those two stores in the same sentence as “slightly more affordable” but compared to our first options their $50-ish price tags felt like a deal. But these were both about half the size (or less) than our original knocker, so we worried they’d look a little lost/piddly on our two-story facade.
Feeling a bit KO’d by knocker hunting, we started to look at our existing knocker with fresh eyes. A gentleman at Caravati’s had mentioned we could take it someplace to get the engraving buffed out… but maybe it was worth attempting an at-home buffing first? After all, my Dremel had some sanding pads that seemed built for a job like that.

Figuring we didn’t have much to lose, we removed the knocker and I attached the lowest grit sand paper to my Dremel (the one with the roughest texture) in hopes that it would scratch out the old owner’s name.

Scratching achieved. I stopped at first, worrying I was permanently damaging it, but Sherry assured me that a new coat of paint should cover it up. So I charged on, er, buffed on.
After a few passes with the low-grit sandpaper, I went back over with the high-grit stuff (which has a much smoother texture) to minimize the scratches by buffing them. It still had slight traces of my buffing pattern, but it certainly got smoother. It even revealed a gold finish that’s probably close to what the knocker looked like decades ago.
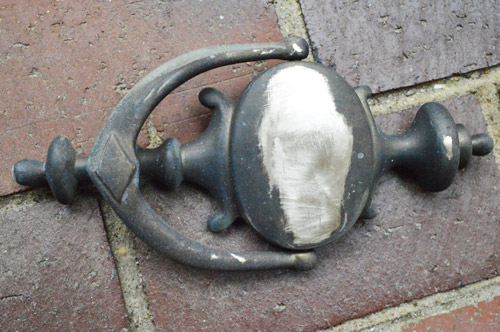
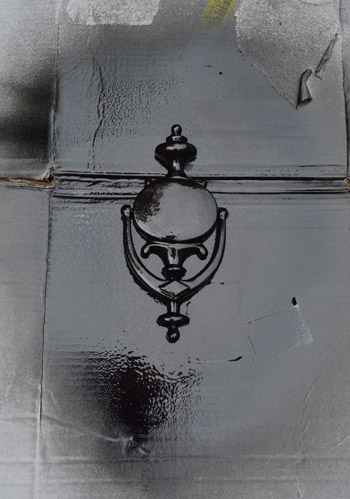
If gold was what we were going for – and if I had the patience to buff every nook and cranny – it could’ve been a very exciting discovery. Instead, I was just happy to get that engraving off so Sherry could get down to oil-rubbed-bronzing it to match the door hardware as well as some other dark-toned items on the porch (more on those in a second). She used her favorite self-priming spray paint by Rustoleum (Universal All-Surface Spray) and just applied three thin coats (more of a mist than a coat, so they built up gradually without dripping).
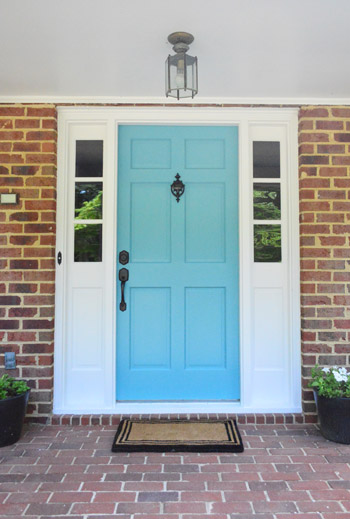
Once dried, the de-personalized knocker looked right at home on our new blue door. You can see how its fresh shine is reflecting the front yard – there’s even a reflection of Sherry standing in front of it taking the picture, but the area that I sanded down is exactly the same color and texture as the rest of it. Thank goodness for small use-what-you-got victories.
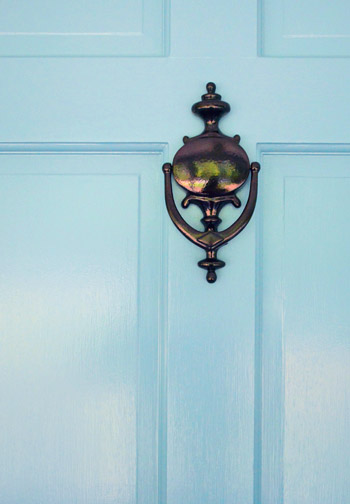
Here’s a detail shot of the door open to try to capture the smooth finish for you with less of the porch reflection thing going on.
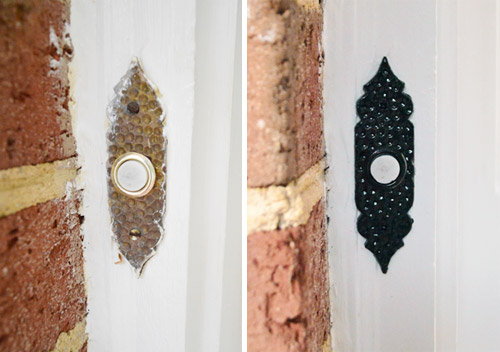
While we were at it, we decided to clean up the doorbell too. We liked the shape, so it just needed a coat of the same oil-rubbed bronze finish as the knocker to cover the sloppy looking over-painted areas that had obscured its interesting shape.
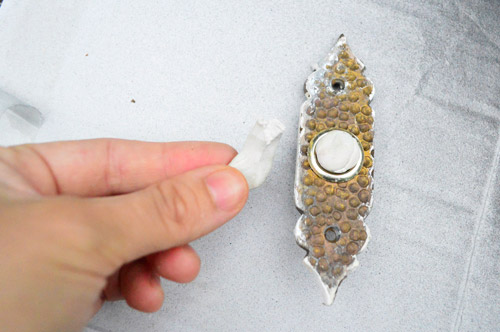
Sherry’s trick for keeping the button from getting painted was to press a piece of sticky-tack over it (you know, that poster putty that you use in college to hang Weezer posters?). It was much easier than trying to cut painter’s tape in a perfectly sized circle. And as you can see above, it worked out pretty nicely – she just yanked it off after the paint dried and the button was clean and unpainted underneath.
So that’s how one can of $7 spray paint allowed us to keep and update two etched and painted over items on our porch. Hopefully it’ll come in handy for anyone else out there with a not-quite-there-yet door knocker or doorbell. We really like how the new darker finish helps them stand out more while tying in with the door handle, the black planters on the porch, and even the black rule around the doormat.
Now if we can just do something about that bug-infested crooked light…
Update: And since our current home didn’t come with a wired doorbell, we ended up installing a wireless Ring video doorbell. It was crazy easy and took only 5 steps.
Psst- Clara’s at it again, being all funny and cute over here.

Alison says
I can’t believe you’ve already painted your front door and you’re updating the hardware and everything! I’ve wanted to paint our front door since we moved into our house 8 months ago. Do you need to use an outdoor paint for your front door? I might just need to copy that color because its AMAZING!!!
YoungHouseLove says
Aw thanks Alison! Yes, it’s best to use outdoor paint and to start early in the day (so it has time to dry before you close and lock it in the evening. The post two back from this one has some painting tips for ya. Hope it helps!
xo
s
Ann L. says
Gosh, I love getting my “clean and organized” fix following your blog! And you have great style too!
Bailey says
The black hardware really looks fabulous against that blue. I cannot believe how much door knockers cost…. that’s insane.
xox
Bailey
http://akabailey.blogspot.com
Dominique of Gusto & Grace says
I bought a great brass door knocker from this store in Fort Worth,TX called Old Home Supply Store. It only cost me about $30. The back is the shape of a keyhole, and the knocker part is a large key!
YoungHouseLove says
That’s awesome!
xo
s
Holly says
Hi!
I just used your tutorial on spray painting door hardware to revamp our house numbers. Your steps made it super easy for my first spray paint project. Like your door knocker, we did not want to make new holes in our existing siding. $7 was the perfect price to update them! Thank you for sharing your expertise.
YoungHouseLove says
So glad Holly!
xo
s
Sara says
Thanks for the laugh! Memories of my own “brass knocker” search on Google when my husband and I moved into our first home 12 years ago. Keep up the great work!
mp says
Our house didn’t have a doorbell when we bought it, so I bought a kit and a VERY fancy Mission-style doorbell, but the molding outside is ridged and the electrician couldn’t get it to balance properly. When I get a new door — hopefully in the next year — I’ll replace the molding too and get that doorbell I loved so a few years ago!
Jess says
Forgive me if this has been asked in a previous post but will you share where your welcome mat is from? I’m looking for something with that black border myself. Thanks for your time!!!
YoungHouseLove says
Thanks Jess! It’s from Garden Ridge a while back.
xo
s
karen says
hey guys… i saw this awwwwesome home and thought of you.
http://bit.ly/11ei32G
i think the thing some people ‘can’t put their finger on’ is the white trim colour for the side lights and railings. i think if it was a creamier not so bright white…it would blend in more with the house. just a thought.
YoungHouseLove says
Love that home! So inspiring! Thanks for sharing it Karen :)
xo
s
capturing joy with kristen duke says
what a fun front door! love the new digs…I haven’t stopped by in a little while, but I just saw you’ll be speaking at haven–me too! I hope we get to meet up, I’ll be teaching the “photographing rooms” class;)
YoungHouseLove says
Awesome! Hope we bump into each other – and hopefully we can catch your class!
-John
Anna says
Ack! I wish I saw this post before I spray painted and could still see the old owner’s name on it (even better than before it was spay painted). I ended up throwing it away and now we have nothing but a screw hole since I can’t find anything I like either!
Jan says
Ha Ha! I love your humor almost as much (maybe more?) than your great and informative design ideas. Love, love love your blog! Thank you for the enjoyable reading and inspiration!
Cheryl says
Hi, after seeing this project I began thinking how the fixtures on my front door didn’t match regardless of scrubbing and trying. One day of removing, sanding, and two coats of hammered metal by Rustoleum, and my front door stands out and looks fabulous!!
And we took the idea further, found some reasonably priced ($0.50/each) plastic frames at Michaels. Two coats later, new pics added, and my bedroom walls look amazing.
Both projects together were less than $10.00. I love your blog and projects. Thanks for keeping me always thinking of the next project!
Cheryl
YoungHouseLove says
That’s awesome Cheryl! Congrats!
xo
s
Jenn says
I’ve just recently gotten back into your blog. I am LOVING it. Reminds me of redoing my first house, and reminds me how much I miss it. It’s just the inspiration I need to get motivated to work on our current house.
I had to say that I’m THRILLED to see how much you use oil-rubbed bronze. It is my favorite spray color, and I use it on everything. My husband is always teasing me. “What color are you going to paint it?” Funny.
Anyway, love the blog! Keep up the good work!
YoungHouseLove says
Thanks so much Jenn!
xo
s
http://www.liteenergysolutions.com/images/readmes.html says
Jordan Old-fashioned 13 Virtually all Roxy luggages takes place picked possibilities along with colorings all around Turbo, you won’t have to cheap jerseys china would elect to select nfl jerseys on sale? “Lightning and also aerobic because the cheap jerseys wholesale mlb jerseys from china true
Kai says
I know you guys already took care of your door knocker like the thrifty superstars you are, but I saw this knocker on Home Depot’s website and immediately thought of you.
http://www.homedepot.com/p/Michael-Healy-Brass-Bumblebee-Door-Knocker-MH1101/202605993?cm_mmc=shopping-_-pinterest-_-D25-_-202605993
Definitely not cheap, but it’s a freakin’ bee! Does the showhouse need a door knocker?
YoungHouseLove says
Love it! Thanks for the link!
xo
s