Dude, removing wall to wall carpeting (and all the layers under it) is no joke. We learned that when we finally tackled that task this weekend – and lived to tell the tale. Let me just tell you, progress smells a lot better than old carpeting. Even when there’s a substantial amount of sweat involved…
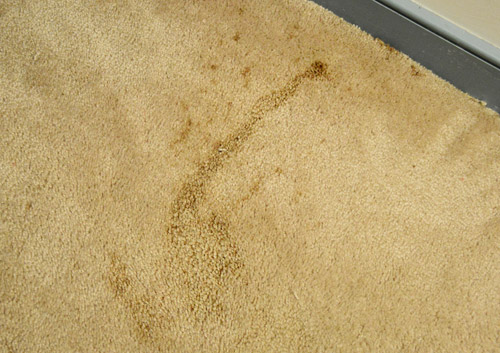
When we bought this house we knew that the four bedrooms upstairs (along with the hallway) needed new flooring since the once-cream (now mostly tan) wall to wall carpets were stained, threadbare, and even holey in some areas.
Thankfully a few areas were so loose we could peek under them during our very first walk-through to see what we were working with. Sadly, there was no hardwood to be found under there, and we were greeted with subfloor. But we’re so glad we made that discovery before buying (we definitely factored that expense into our decision). And after we got over the sadness of not having old hardwoods under there to revive, we got excited about picking out new flooring.
We considered a whole range of things for a while (hardwoods, new wall to wall carpeting, bamboo, tile) and after a lot of thought ended right back at oak hardwoods, since it’s what we had in our first house as well as our current one (even in the bedrooms). We like that we can always toss down an area rug to cozy things up (and since those can change over time it feels a little more flexible than committing to a certain type/color of wall to wall carpet for a decade or two). Plus with a kid and a dog we have just found wood flooring to be easy to keep clean/wipe down/etc.
We also already have oak flooring on the stairs that lead to the second level as well as in the future office, dining room, and living room – so we thought finding some in the same finish and grain would be a nice seamless this-has-always-been-here choice. But before we could bring in some delicious new hardwoods to install ourselves (at least that’s the plan!) we were faced with stripping away all of the aforementioned nasty carpeting in all four bedrooms up there and the hallway… which turned out to be quite the job. Here’s how we got ‘er done.
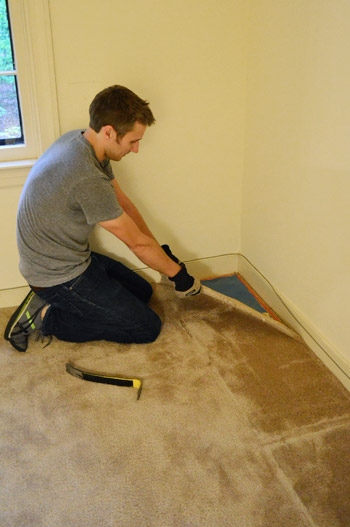
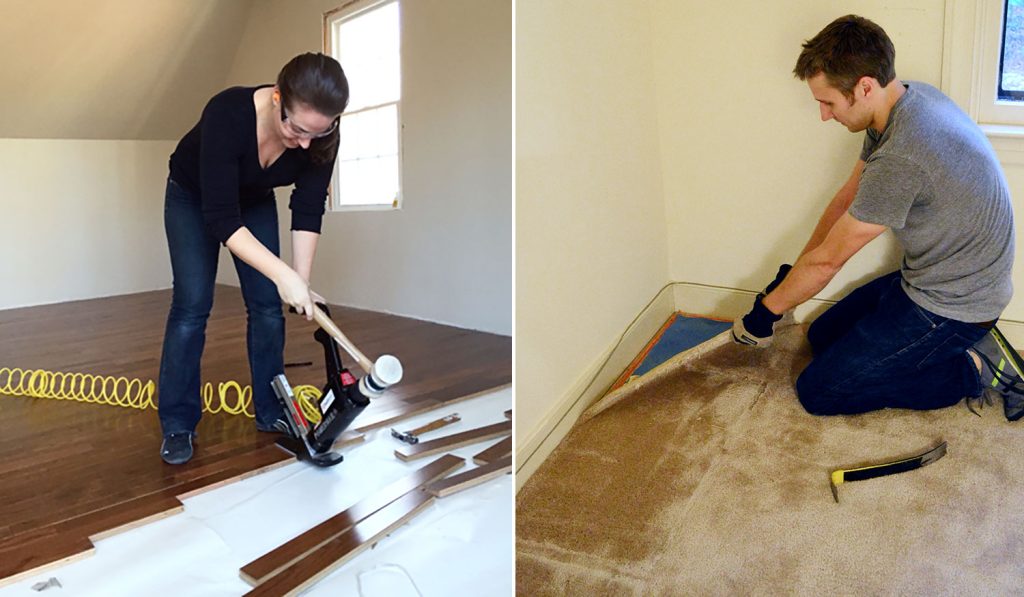
First we used a mini crowbar to pry back the corner…
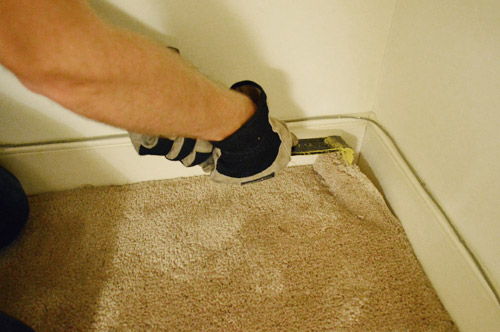
With some gentle force it popped right up and we could start to pull it out from that corner.
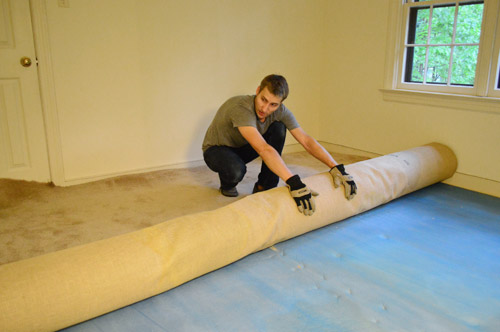
It definitely wasn’t delicate pulling, more like forceful yanking, but with John working on one corner and me in another we were able to free up enough of it to start rolling it towards the other side of the room (we paused to take this photo, but picture me standing next to John rolling along with him). It’s definitely one of those four-hands-are-better-than-two tasks if possible.
Oh and wear gloves! And long sleeves if you’re smart. We wised up after our forearms got raw from carrying rolls of carpeting down to the garage, where we’re storing it all until we can figure out what to do with it (it’s too gross to donate, so we might need to rent a Bagster or something to get rid of it). Update: thanks for all the info on recycling carpets, cutting them down for curbside pickup, and all the other cheaper/greener alternatives than just trashing them. You guys are geniuses!
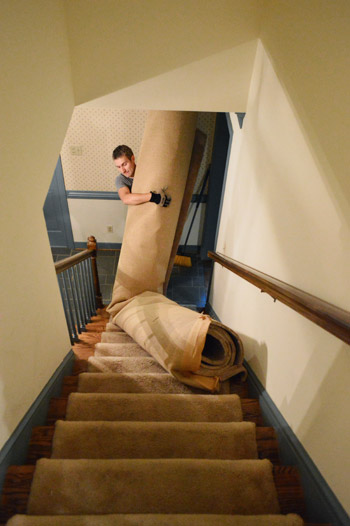
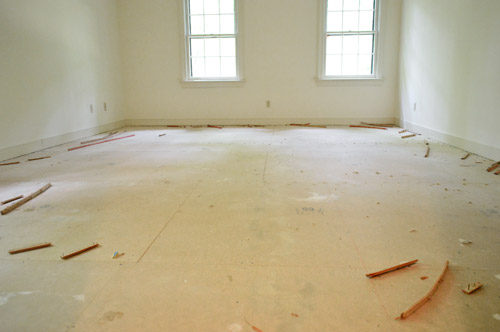
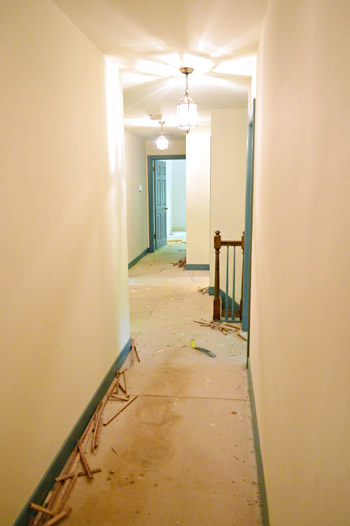
Room by room we repeated that process (and down the hallway as well). Pry up the corner, yank yank yank, roll roll roll, and drag that baby down to the garage. In some areas there was so much carpeting that we cut it in half with a box cutter before carrying it down to lighten our load. Then we were left with this lovely blue carpet padding underneath. Which was stapled and nailed down in about a thousand places per room (sadly that’s not an exaggeration).

Just like the carpeting, it could be yanked up, but it left a ton of little staples and nails and tack strips all around the room once it was stripped from the space. These are tack strips. They run around the perimeter of a room and are thin little shim-like pieces of wood with nails poking up through them (they grab the carpet pad and carpet to hold it in place).
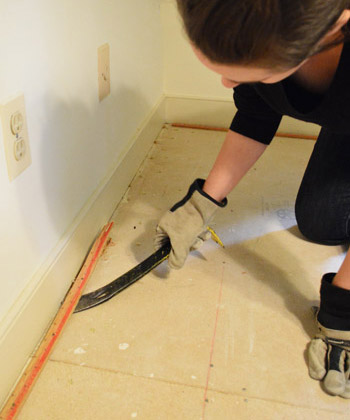
Sometimes you can shove a crowbar under them (this takes borderline brute strength, so your palm is red even with gloves on afterwards) and pop them up all as one piece. The hard thing is that if they’re old and brittle (check) sometimes they splinter as they go, which means instead of slamming a prybar against them to try to get each 2′ long strip up in about 30 seconds, if it splinters a ton it can take five minutes to dig out all of the nails and splintered wood that break apart but are still stuck in the floor. You can see me gracefully (and breathlessly) doing this in the video we made for you about five photos down.
I worked on all of the tack strips in the master bedroom while John did the hallway and the nursery and then I tackled the guest room while John worked on Clara’s room. It probably took us about an hour and a half to get that part done, so one person trying to do that all by themselves might be in it for 3+ hours (probably with some blisters even with gloves on).
Once the tack strips were all up we were faced with the harder part…
… these guys.
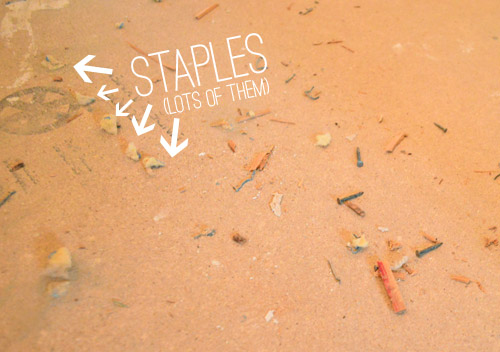
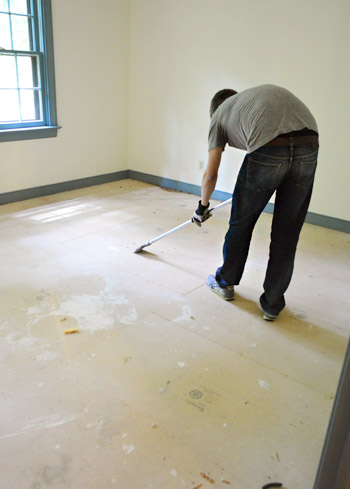
They were everywhere and the prybar was of no help since it couldn’t really get under them. At first the only way we could get them up was by hand with a needle nosed pliers. One by one. But after John did Clara’s closet that way and it took over an hour (for one closet!!!) we decided we needed to find an alternative. Thankfully a little googling turned up the idea of a nice heavy duty long-handled floor scraper (we got ours for $25 at Lowe’s) and that was a lot faster! It still took some serious strength, and we both had sore backs, but we were able to get all of the staples up in all four bedrooms and the hallway in about two hours (at the by-hand-with-a-pliers-rate we thought it might take us about two days). Warning: if you have hardwoods, you might not want to use a scraper since it could ding them up, but it’s great for subflooring.
The next day we returned to clean up, using a broom to make piles followed by the shop-vac to suck up all the staples and nails.
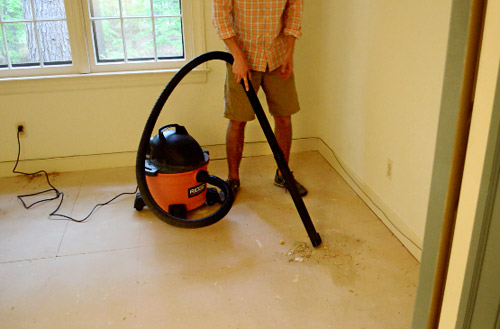
You can see in this video how each step of the process went (it shows how to get up those tack strips and staples a little better than still photos can):
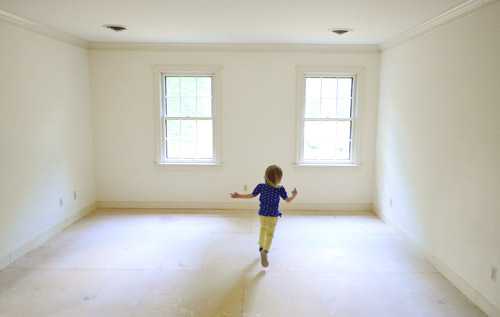
Now we have smooth, bare subfloors that are ready for hardwood.
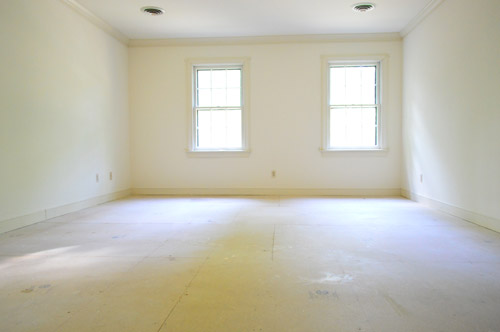
We never thought we’d be so glad to see pure unadulterated pressed wood in our lives!
And now our garage looks like this:
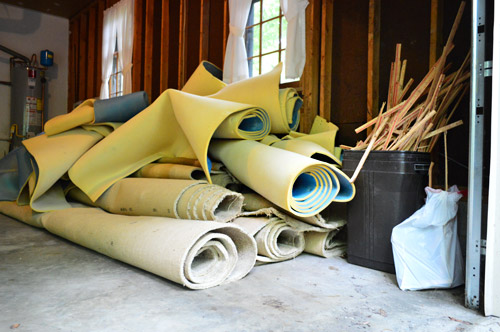
That, my friends, is what progress looks like. Turns out progress looks a lot like stinky rolled up carpeting.
But oh happy day, we’re moving in the right direction!
Any other carpet stripping going on? Are the staples your arch nemeses? Those little buggers were infuriating until we discovered The Amazing Wonder-Scraper! Seriously, my “what superhero power would you have?” answer would now be to have a paint roller on one arm and a floor scraper on another. Never know when you’ll need one…
More Flooring Projects
If you would like to read about other flooring projects we’ve done, please check out the posts below:

Laura says
Just a tidbit on carpet disposal! We tore up all of our gnarly carpet when we moved in as well. We discovered that if you cut the rolls up into smaller pieces, the trash guys would pick it up as part of their normal route. So we incrementally did that over the course of a couple weeks and saved us the cost of renting a bagster or paying a dump fee. Good luck!
YoungHouseLove says
Great tip Laura!
xo
s
taria says
love you new house. what a wonderful home you wcan make of it. when we’ve had carpet removed they always cut it into about 4′ strips and remove. short easier to manage rolls to dispose of. If I remember right they just use razor knives.
YoungHouseLove says
Yes we used a box cutter to cut some of them down smaller. Worked like a charm!
xo
s
Monica says
Hi John and Sherry:
Great work on pulling up the carpet. My husband had to go through the agony of pulling up ours when we moved into our 1st house last spring (I was 9 mos preggo at the time so he had to go through that one without me!) Anyway, had we known about the scraper, I wonder if it would have saved him some time from all those staples. Though under our carpet we had hardwood floors that we refinished — do you happen to know if the floor scraper is safe to use on hardwood flooring?
Can’t wait to see what you guys do next!
YoungHouseLove says
I actually don’t think it would be. Anyone know?
xo
s
Jeanna says
So glad you started cutting up that rug and rolling it up in sections……….it makes it all so much easier!! Like a lot of women I don’t have a ton of upper body strength, and trying to lug an entire room of rolled up rug out of the house was exhausting when we did it. The tip about the floor scraper was right on!
Holly says
Awesome job. I wish I had your energy.
You can actually recycle old carpet. Check http://www.carpetrecovery.org/ for places in your area.
YoungHouseLove says
Love that tip!
xo
s
Jaimee says
When we moved into our new home last year EVERY ROOM (including bathroom -ew!) was covered in 30 year old dirty carpet. Also, the previous owner was a heavy smoker so not only was everything dirty but the carpets were actually sticky from all the tar. Luckily we have amazing friends who helped remove carpeting, tack strips and 1000’s of staples for the price of pizza and beer :). But staples are the devil! Even weeks after we thought we got them all we were still finding them!
Lena says
This brought back som bad memories. I’ve done this twice in different houses. I swore after doing it the 2nd time to never have carpet installed again due to all the stuff that collects in them. I think my eyes and head were all itchy and stuffed for more than a week afterwards.
I should have learned after the first time, but it was a money thing then.
Good thing with removing the carpet now is you can go through and find any “squeeky” subfloor areas and fix before putting new flooring down too.
rebeccasdelightfulhome says
Holy cow! That must have been a serious work out. I have delt with removing old tack strips and it is NOT fun. Good for you guys for doing all of this on your own- that is quite an accomplishment!
HeatherM says
What a smart move to put in new flooring BEFORE you move in! I wish we had the time and money to do that before we moved in to our house. We did however build our own custom closet organizers- especially for the master bedroom. We put in spots for his shirts, his pants, his sweaters, a few drawers for each, my shirts, my pants, shelving for my sweaters, drawers for my nursing scrubs, a tall area for my dresses, laundry baskets, and shelving above for bedding and such. I have to say that is one of the smartest moves we did, because it would have been a MUCH bigger ordeal to pull all of our clothes and stuff out after the closets were already filled. And three years later I still get a thrill looking at the always-organized closet. Do you have any plans to work on closets before you move in? Could you do a mini Listy-McListerson to show what you plan to do before you move in? It would be nice to see how you prioritize things. Happy moving!
YoungHouseLove says
Oh yes, we’re hoping to get a whole list going and share it soon! We’re not sure how much we’ll do before we move and how much will be after (any project could take longer, so we’re trying to just be flexible and go with the flow)
xo
s
Megan @ Rappsody in Rooms says
Oh, that picture of Clara just steals the post. Adorable! Well done on that hard labor! Can’t wait to see the flooring. Are you trying to get it all installed before you move in three weeks? That’s floor power!
YoungHouseLove says
It would be awesome to at least do our room and Clara’s before we move it… here’s hoping we can!
xo
s
Betty says
Last year we pulled up the faux brick linoleum only to find particle board that had been put down over the previous floor. The particle board was pried up and off but the staples remained behind. I used a combination of needle nose pliers and a strong screwdriver. I hope you won’t face this in your kitchen!
Carla says
It looks great! I LOVE hardwoods. We are blessed to have them in our kitchen area in our ranch house. But I wonder about them on a second floor because of the noise factor. At my parents’ house, when on the lower level, you can hear every little noise above you where tile is installed upstairs… and none where carpet is installed upstairs. Just a little something to think about if you are sensitive to footstep noises like I am! :)
Also, someone else might have mentioned it already, but I think you use “mattress pad” where you intended “carpet pad” (where Sherry is prying up tack strip). :)
Have a great day… and congratulations on your new home.
YoungHouseLove says
Oh yes, all fixed :)
xo
s
Lauren says
We are in the process of getting estimates for hardwood floors in our upstairs. We debated the idea of coldness of hardwood in bedrooms, but in the end, I love the way that it looks . . . and I need a material that is impenetrable to puke. (3 kids did a number on our carpeting upstairs over the past 5 years). It definitely is an investment (a costly one at that) but I’m excited for the change:) Can’t wait to see what else you have planned!!
SaraHS says
Congrats on getting rid of the gross carpet. FYI, you might want to double check before laying hardwood over particle board subfloor. We were encouraged to replace our particle board subfloor or cover it with 1/4″ plywood to provide a more stable base layer for the hardwood — it may not matter depending on how you install the hardwood.
YoungHouseLove says
Oh yes, we’re looking into that too :)
xo
s
Audrey says
Hi John and Sherry,
First off, CONGRATULATIONS on the new house and on selling your current house. :-)!!!
We recently had to pull up carpeting in the upstairs bedrooms of the house we just moved into. Pulling up those staples SUCKED and there was lots of pokes from the tack strips. But I was lucky enough to have hardwood under the ugly carpet. Yayyy
I called up my town’s sanitation department and they told me that if I cut the carpet up into 5 feet at the longest when rolled up ,I could just put it out with the regular trash on bulk pickup day. So we made sure each roll wasn’t taller than 5ft when we stood it up after rolling them up and out them out on the curb and sure enough the town took it all away :-)Saved me some money on having to hire someone to haul it away. Your town may do the same thing.
Again, congrats! I can’t wait to see Clara’s new big girl room.
YoungHouseLove says
Smart!
xo
s
Mandy says
This process looks all too familiar! Back in August, my husband and I moved into one side of a duplex my parents own. It had magenta carpet in the living, dining, hallway, and master bedroom and electric blue carpet in the spare room! My parents had never bothered to pull up the carpet after they bought the place 15 years ago because it was really nice (plush), but they knew there were hardwood floors underneath. Before we moved in we did the same process you described above! Not fun at all, and I was the main one pulling up staples, and the floor scraper was a lifesaver! Luckily, my dad already had one! I can say it was 100% worth it, all of the rooms look so much bigger and more airy!
Katie says
That is such a huge amount of work!!! I’m so impressed that you were able to get it done in a weekend!
Just a friendly observation – it looks like you actually have particle board underlayment instead of a plywood or OSB subfloor. Particle board isn’t a sound subfloor under hardwood flooring unless you use a click/lock product. So, plan to be flexible in your hardwood options or you’ll have to replace all that particle board! Ugh!!!
YoungHouseLove says
Thanks Katie! We’re definitely taking that into consideration!
xo
s
Tirsa says
My back hurts just from reading about all the work you did. Ha, ha. Things look so much better already.
Love to hear that you plan to spray all the blue trim. It will surely save you from who knows how many coats by hand-plus it will be such a time saver!
Emily says
When I moved into my house I tore the carpet up right away to see great hardwood, but it did need to be refinished due to some dark spots. I found that the staples did take the most time…exhausting!!! I used needlenose pliers to yank/pry/wiggle at both sides and then yanked in the middle and they came out “pretty” easily (some were more difficult than others).
Sandy says
Floor scraper to the rescue! We now use ours for chipping & scraping stubborn ice off of the front stoop and sidewalk in the winter. Gotta love New England winters… maybe the ice isn’t that bad in VA though.
Rachelle says
SO exciting to read the first new house reno post!
Alex says
Awesome job youngsters!! Good advice on the gloves/long-sleeves thing. I have two scars, and half of them are from the demonic end of a tack strip. Those things are evil.
Love the happy dancing Clara pic at the end! The room really does look so much bigger! But oh my goshhhhhh, PLEASE work your window treatment magic soon! Those off-center windows cannot be un-seen! :)
Happy birthday, Clara!
Christine- 15 Minute Beauty says
It looks so much bigger now!
I know Sherry is the expert cutter inner (is that a term?), but I would be soooo tempted to go around with a bunch of white paint and just paint all of the trim while there’s no floor. The blue and mauve are driving me crazy and it’s not even my house!
YoungHouseLove says
Oh yes, that trim’s gotta go!
xo
s
Paige @ LPD says
Ha We did this too! Lucky for you your carpet pad didn’t disintegrate. We had to shovel up ours. We had hardwood underneath, although I still run into staples every once in awhile. We made a stop go video of our process Here if you want to see.
YoungHouseLove says
That sounds terrible!
xo
s
Emily says
We’ve been thinking about removing our carpet and finishing the hardwoods in the upstairs of our house. I wish we would have hardwoods under the carpet but we probably don’t. I look forward to hearing about your hardwood installation. Enjoying hearing about your work on the new house!
lovepastatoolbelt.com
Blair R says
Did you remove the stairs as well? Did you have to use a different method, because of the oak?
YoungHouseLove says
We haven’t tackled them yet but will share that process when we get ‘er done :)
xo
s
Lyndsey says
We’re in the same predicament! My husband i and just bought a big old house and i spent the weekend pulling up carpet also! I only had a few rooms to do, and there were hardwoods underneath, so i went the slow route of pliers to pull out the staples. It goes quick if you’re 2 people- one pull up the tack strips and the other follows behind pulling out the staples. Can’t wait to see what you guys work on next!
Chelsea @ Riding Escalators says
O.M.G. Been there…
http://ridingescalators.blogspot.com/2012/03/project-living-room-fast-forward.html
…done that. The palms of my hands and my forearms feel your pain. And I think our carpet was the exact same color and condition! We put it on Craigslist for free and someone showed up and hauled it away on the top of their car while holding onto it through their sunroof. “Make it work, people!”
YoungHouseLove says
Hilarious!
xo
s
Guylaine Côté says
OUF!!!!!!
You are so courageous!!! It will be so beautiful , the rooms are very big!!! Go go go we are with you :)
Guylaine :)
Kirsten says
Not sure why I haven’t thought to ask this before, but how does Burger do with hardwood floors? My (little) dog used to skitter across them and had a hard time getting traction, so I wondered if Burger ever has the same problem.
YoungHouseLove says
He seems to go nuts on carpet since he has so much traction (zooming around area rugs) and is more subdued on wood floors since he can’t get as much traction. Haha! We still find him lying in a sun spot on the hardwoods though, so he must not hate them :)
xo
s
Sarah says
Have you considered taking out the subfloor too? Our upstairs was carpeted, and we have slowly replaced the carpet with hardwood floors (room by room). Our carpet was original to the house (about 25 years old) and there was some pet pee damage underneath, so we also removed the particle board and replaced it with plywood. Besides getting rid of the grossness, this also make the floor much stronger and helped eliminate squeaks.
YoungHouseLove says
That’s a nice upgrade! We haven’t really thought about that but I’ll have to chat with John about that option!
xo
s
Kristen H says
I’ve ripped up carpet like this – and have the scars from the staples to prove it! Question – doesn’t your area refuse collection offer bulk trash pickup? Why rent a bagster if you are already paying for it in your taxes? Just a thought……
YoungHouseLove says
We’ll definitely look into that!
xo
s
Sabrina says
UGH! I hate removing carpets! We rolled up ours and my husband took it down the stairs (we have a split level ranch) and what we didn’t realize is that the previous owners had their hamster cage over that spot. So with every step he got a plume of stink in his face lol It was awful!
YoungHouseLove says
Ewww!
xo
s
Craig says
We did this last year. Our new to us house had wall to wall carpet throughout. Some of it was fairly new (stagers were here!) and we moved it to the “finished” basement. We gave some away and the rest we cut up and sent to the curb, it wasn’t worth donating. I found that cutting it in to strips as we rolled it was easier on me and the walls and trim in the room and the walls going down the stairs and outside. Bonus for us, original hardwood underneath (we checked a closet corner when we went through the house, before we bought). But that meant hours of pulling staples with an assortment of pliers, I was the super scraper! The stairs were evil (all 14 of them, someone before me liked their staple gun!). Sore back and knees, check. Blisters, check. Fantastic floors when finally done, check! Have fun, the floors will look great!
Craig
Emily says
Ugh, I sympathize with yucky carpet. In our house we luckily had only one bad room that had royal blue, shag carpet that had a lot of stains from the previous owners dogs and other things. My husband ripped that up (with the help of our three year old) and got rid of it quick!
Anna says
We ripped up carpet yesterday. The subfloor looks better here too! We are having white oak installed, but I still haven’t picked a stain. A much harder decision then I thought it would be!
Can’t wait to hear you guys weigh in on this topic. You help me think through my housing dilemmas – Hey, that’s what friends are for! ;)
Andrea says
Oh my…that is NOT a fun job! My husband, when we flipped two houses, always handed over the tedious jobs to me, like pulling up tack strips and carpet staples:) Back breaking, I tell you:)
Katy says
I am so impressed with your stamina! My husband and I are saving to buy and I always scour your site for future projects, inspiration, and this-could-work-for-us-now ideas. I LOVE what you guys do (and am pretty jealous I don’t mind saying). I only learned about your blog last fall so I can’t wait to actually watch this home transform!
I am particularly impressed with your optimism and bright attitudes at facing such an arduous task. Are you as chipper throughout the whole process as you come off during the video? (My husband would hear a fair number of expletives and complaining if I were in your shoes.) Also, do you guys ever play music or anything to make those time-consuming projects less grueling?
Thanks again for sharing! I can’t wait to keep watching!
YoungHouseLove says
I definitely think we’re human. We get tired and frustrated sometimes, (that’s pretty much par for the DIY course) but mostly we’re just excited and happy to tackle these things! We did this stuff as a hobby for years so it really is our idea of a good time. Some people bowl or knit and we rip out carpet and paint stuff. Haha!
xo
s
Rita says
Seems like yesterday I was reading the posts on your home… the first one. It’s been a while, but I’m still reading you!
I admire your work!
Can’t wait to see the work in progress in this new house.
Rita (Italy)
YoungHouseLove says
Thanks Rita!
xo
s
Amelia R. says
Looking better already! We had the same challenge in our little house when we first bought it; in the hallway, there was a mound of sand and dust under the carpet from years of grossness sifting in. I’ll never live in a carpeted house again.
There are carpet recycling resources available in VIrginia, in case you’re interested! You might have to rent a U-Haul, but I guess it’d still be cheaper than a Bagster.
http://www.carpetrecovery.org/waste.cfm
YoungHouseLove says
Thanks Amelia!
xo
s
Liz S. says
It looks so much better as a blank slate! Someday I want to buy the same kind of house (one that needs some love)!
Bethany says
All of a sudden I realized now that your old house is sold we will never get to see the floors refinished with a darker stain. That was a project I was always looking forward to. Think you will go with a darker stain in the new house?
YoungHouseLove says
We’re considering a few options and will write up a post about choosing the hardwoods soon (hopefully in a day or two) :)
xo
s
Jessica F. says
Yey!!! This is like my all time favorite home and garden series. Tune in every weekday morning from 7:45am-8am PST! :D
Do you think some painty McPainterson will happen before hardwoods go down?
YoungHouseLove says
We’d love to at least spray the trim!
xo
s
Emily R. says
I did this in my house in Lakeside…I had hardwood underneath though…so one staple and nail at a time…after that, removing the linoleum and subfloor in the kitchen, and scraping off two layers of wall paper on walls and ceilings..its no wonder that I have carpal tunnel syndrome…DIY is dangerous! =)
Brittany D says
Wow! It already looks so much brighter and more inviting after removing that old dingy carpet!
Rebecca Wasch says
As a fellow Richmonder and long-time blog reader, I hate to leave this comment! BUT, I was showing my husband this post, because he is a flooring specialist and he mentioned that you can’t (shouldn’t) put hardwood on particle board. It will void the warrenty on your hardwood and although it might look great imediately, in 5 to10 years you could have serious prolems!
YoungHouseLove says
Oh yes, we’re looking into how to deal with the subfloor :)
xo
s
Rebecca Wasch says
I’m so glad! I just was nervous for you!
Sarah Kim says
I feel your (hand/back) pain. When we moved into our home 2 years ago our kids couldn’t sleep without wheezing. Within two weeks we had to rip up the entire upstairs carpet and pad (5 beds and a hall) even seal the subfloor due to pet smell. (I should’ve known those candles during showings were hiding something) We love our laminate wood floors now, they’re so clean and airy. It was just an unexpected project to do whiel still unpacking boxes. Also, we spent months sanding and restaining our balusters. I’m interested to see what you’ll do with yours.
Jill says
Would it be easier to paint the trim and the walls now…as opposed to after putting in the new flooring?
YoungHouseLove says
Yes, we’d love to spray all that blue and mauve trim while the flooring is up, then lay the floors, and eventually paint the walls when we’re sure what colors we want to go with :)
xo
s
Becky says
Wow, I’m a little jealous. I was so excited to see how you went about pulling up the carpet since we started to do that and have so.much.more. to do. We started in the grossest room (our sunroom) and our carpet padding was stapled AND glued to the plywood underneath. Hours of scraping has barely touched it.
I was hoping you’d have something similar and found some neat trick that works. We almost think our best bet is to just pull up the plywood and start fresh. And hope it’s not like that when we get to the rest of the house.
Katie says
For this house are you planning on re-creating Clara’s nursery and big girl room? I’m assuming she’s still in her crib so will she stay in the nursery until she is ready for the transition to big girl room and daybed sleeping? Or is it a new house, new bed approach?
YoungHouseLove says
We’re still following her lead (we never thought she’d still be in her crib and not sleeping in her daybed by now) so I think her new room here will have both and she can transition whenever she’d like :)
xo
s