You guys know I like ceramic things. And miniature anything is 100% cuter than something that’s normal-sized (little sliders vs cheeseburgers for example). So it was only a matter of time before this happened. Let’s make a little Christmas village, shall we?
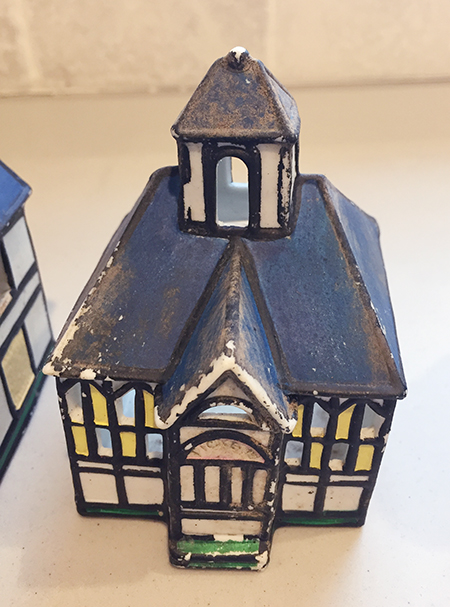
It all started with some secondhand tea light holders that are meant to glow if you put little candles inside (some just have tiny holes for a string of lights to poke through instead). I’ve always stopped to stare at these things at thrift stores, because how much fun does it sound to repaint the old tired and chipped ones and bring them back to life in the form of a happy little Christmas town?!
This past weekend I was trolling some buy/sell/trade boards on Facebook and behold: an entire tiny tea light village was listed for a mere five bucks! I basically ran to my car.

When I got there, they were in pretty rough shape, but that didn’t scare me. Nope. I just wanted to save them and love them and give them a home. Well, another home. For their homes to live within. You know what I mean.
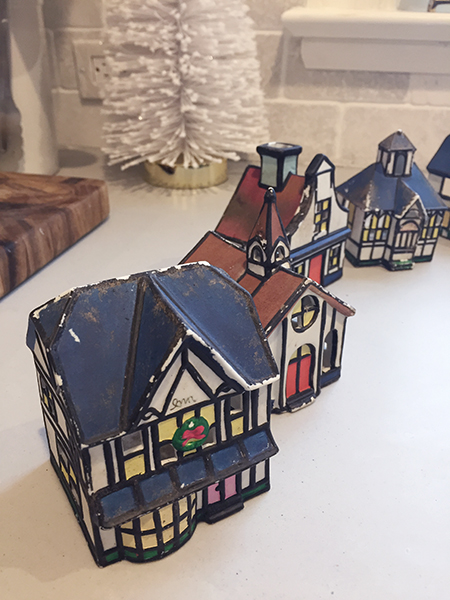
They definitely needed a good scrubbing, and some of the paint had left the building.
Just in case you’re wondering if these are heirloom pieces that I was about to ruin… well, this discovery was pretty hilarious.
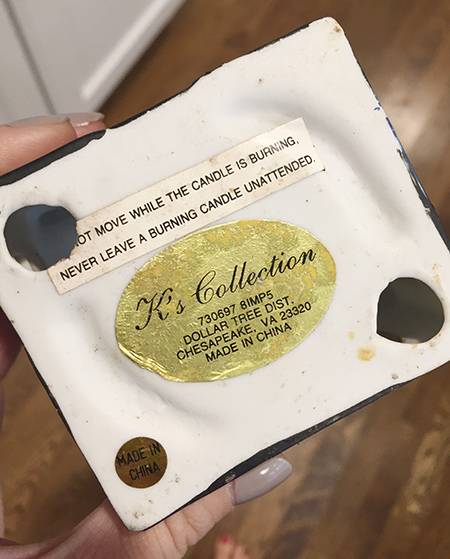
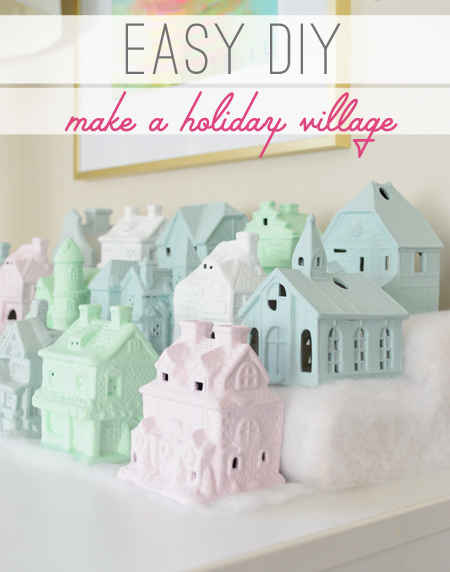
Yup, they hail from Dollar Tree. So I was feeling even more liberated and convinced that they needed some love in the form of a good scrubbing and a nice fresh paint job. Inspired by all of the fun beach house colors we’re considering, I went for a pastel palette using paint that I already had around: white, soft pink, mint green, and of course blue.
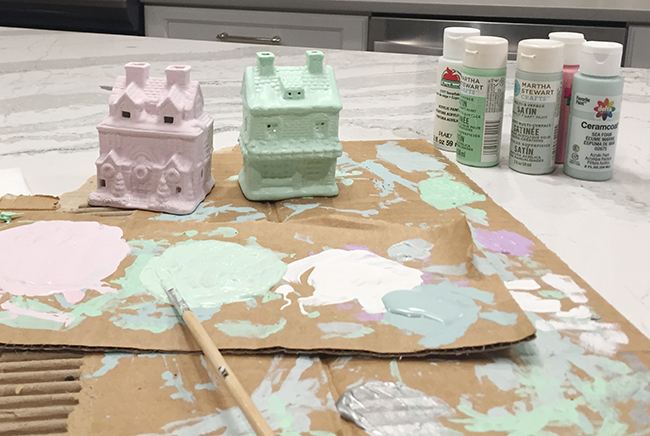
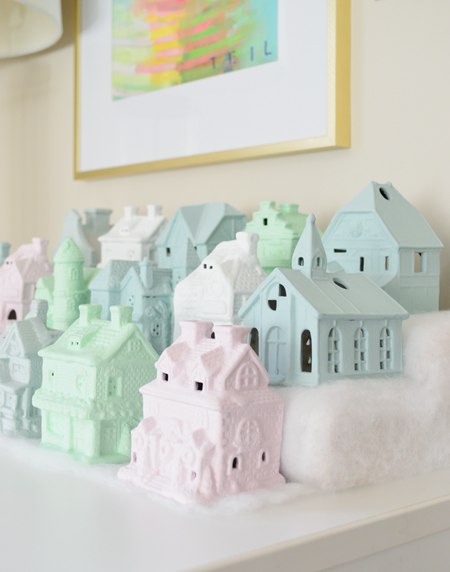
One thing I LOVED about this, which was just a happy accident, is that the paint is all a satin finish (as opposed to super glossy or shiny). It looks so much more convincingly matte and “ceramic” – like they’ve always been this way. But once I had them all painted and cute I had nowhere to line them all up in a long row (there are 16 of them!!!), so I decided it would be even sweeter to make a tiered little base for them to sit on.
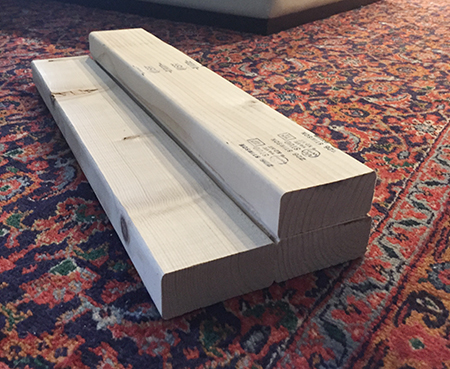
Added challenge: I was too lazy to go to the store, so I raided the scrap wood and my fabric stash to grab some leftover batting. I cut the 2 x 4″ boards into three pieces, all 22″ in length. Then I brought down my staple gun and laid out that leftover batting. I was around 80% sure this was gonna work (come to think of it, that’s pretty much my average percentage going into most things, except sewing stuff which rides much lower at an estimated 5% project-success expectation).
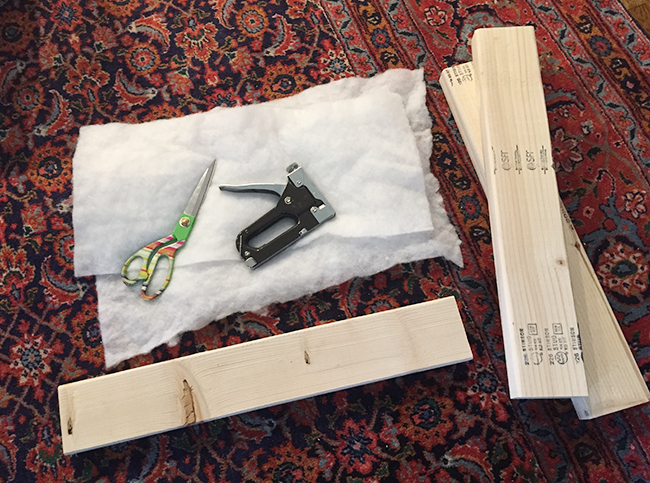
See why I wanted three boards of the same length? If you stack them like this, it creates a little tiered platform.
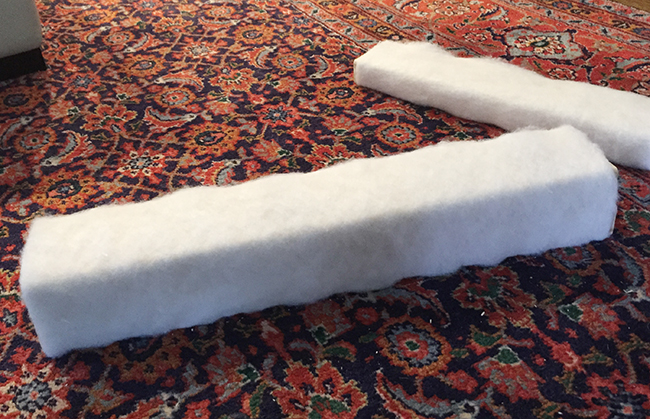
I just had to cover them with batting for the whole snow effect. I treated the stacked 2 x 4″ boards as one unit and wrapped them with batting (stapled in the back and along the bottom, both of which would be out of view).

I did the same thing with the smaller one and they ended up looking like this.
Around here my faith wavered to around 50% certainty this would be a flop. They were looking a little janky.
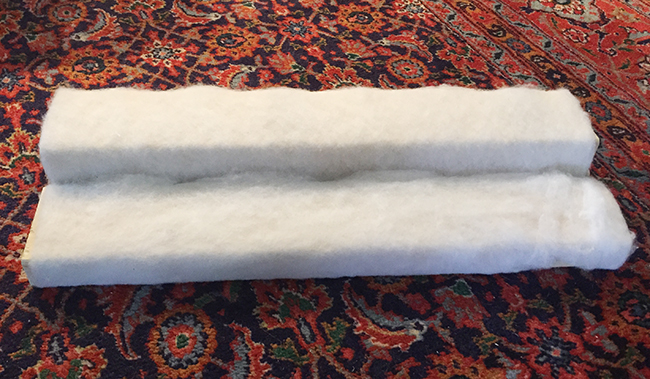
But I figured one more layer of batting over the entire thing could unify it for a smoother look. So I stapled another piece to the back, then added some staples in the crease and under the front piece to hold everything in place.
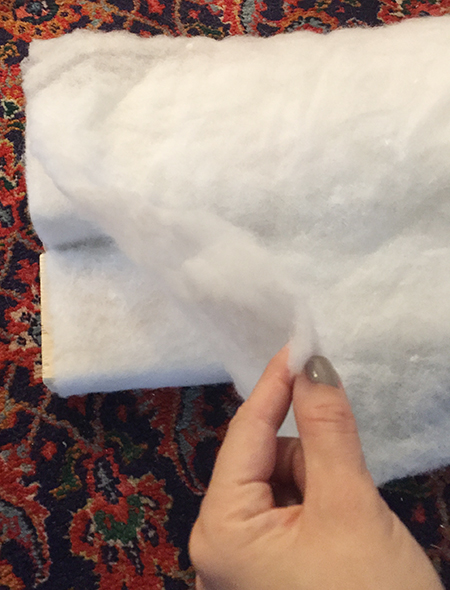
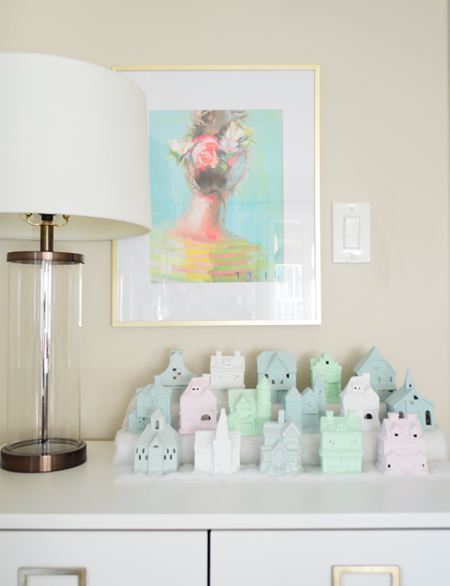
To cover the sides, I cut some L-shaped batting pieces and tucked them into the existing layers to make it look wrapped all the way around. I still had one small strip of batting left, so I just laid it right on the desk in front of my two-tiered structure and voila! I think it turned out pretty cute, especially since the entire village ran me $5 + some things we already had around the house.
So that’s the story of my little Christmas village, which I’m actually thinking will eventually become decorations for our beach house. Wouldn’t these be so cute living there full time? But then I might need to make another set for our house. BECAUSE I AM A CERAMIC OBJECT CONNOISSEUR. I can’t stop at just one village. I want an entire county! A tri-state area!
I bet there are plenty of other little ceramic houses out there (try eBay, craigslist, thrift shops, maybe even Dollar Tree apparently) so go give them the thrill of their life in the form of some paint. Then you too can be the mayor of PastelTown: population 40. Yes, that’s my self-elected position, and I landed on that number by estimating that each house has an average of 2.5 people living there. There are also 5 imaginary dogs in case you’re wondering.
Psst- Still some time for some last-minute gift shopping and some house shopping if you guys missed those posts. Our new bedroom chandelier came today so we have to hang it and share pics soon! And if you haven’t seen our 2016 Holiday House Tour, here ya go!
