Board and batten is one of our favorite, easy DIY projects. It’s completely beginner-friendly and it makes a big impact in any room, entry, or hallway. This is the 3rd house where we’ve installed this type of wainscoting, so we’ll show you our trick for making this project faster, easier, and less expensive than traditional board and batten!
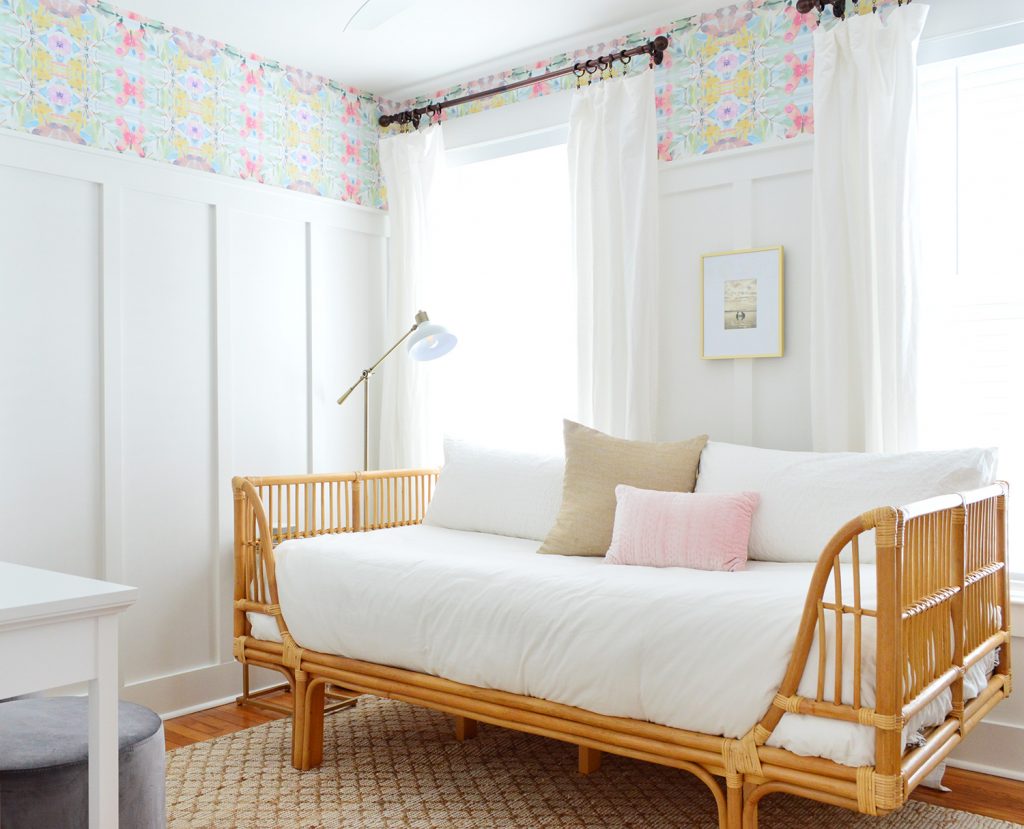
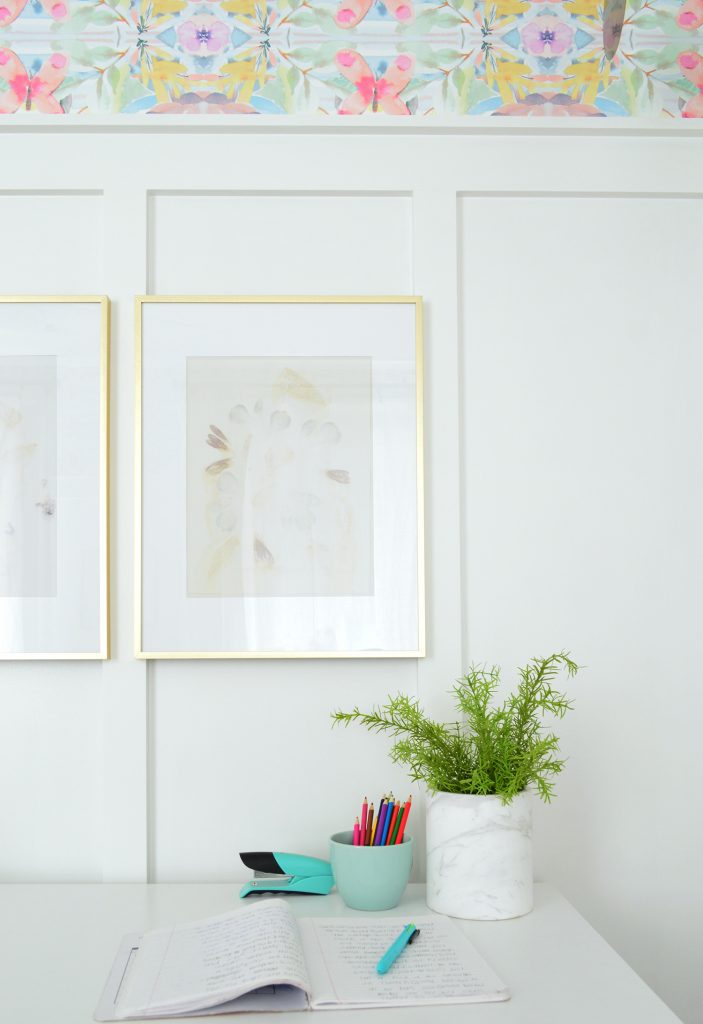
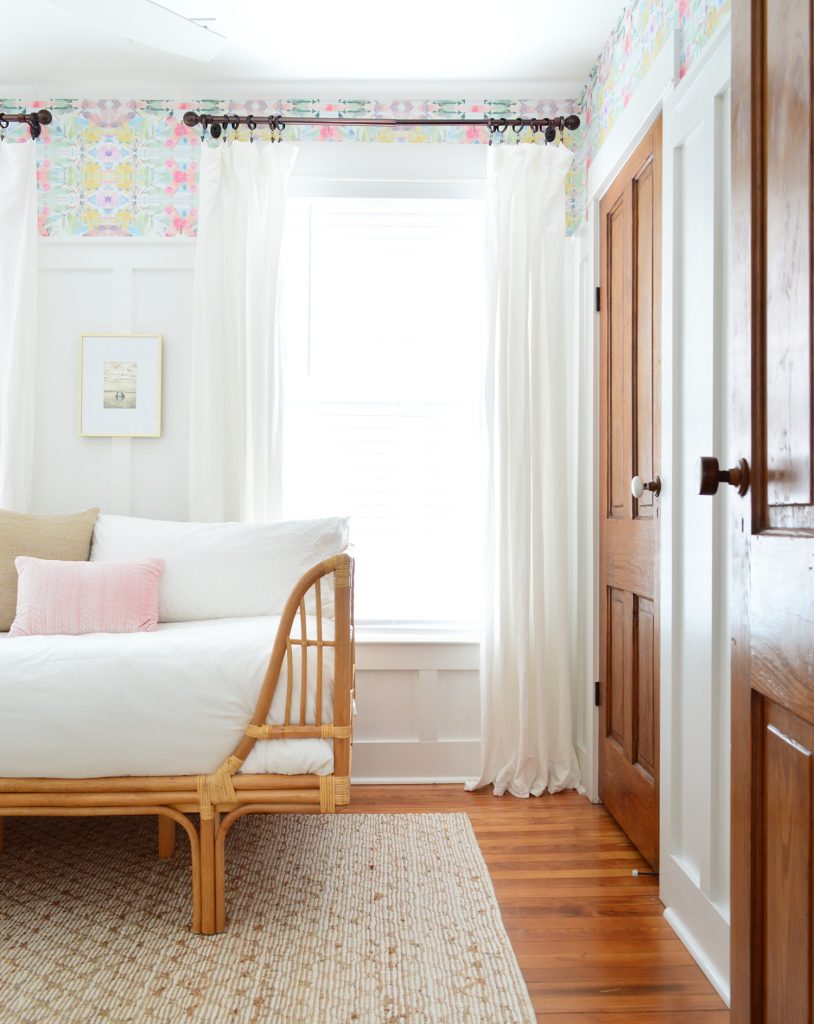
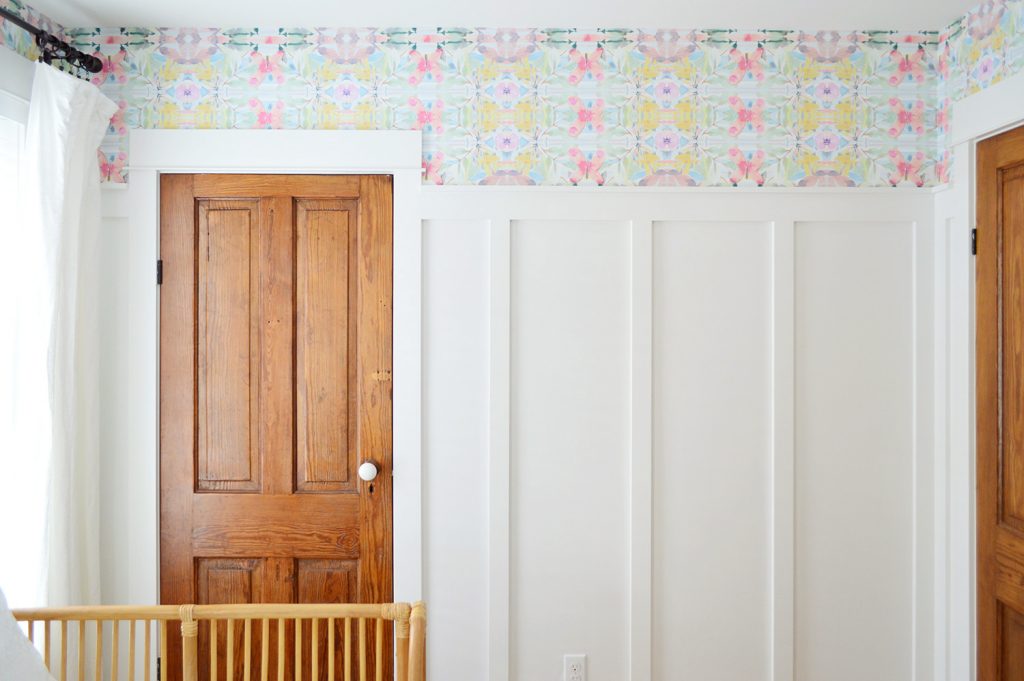
For this particular installation in our beach house, we did a higher board & batten and hung peel-and-stick wallpaper above it. It was exactly the mix of traditional & colorful that we were going for in this guest bedroom!
What is Board & Batten?
Board and batten originated as a style of exterior siding, but is also used as interior paneling. It describes a technique where thin strips of molding – or “battens” – are placed over the seams between larger, flat boards. It can be installed floor-to-ceiling or partway up a wall, and battens can be arranged vertically, horizontally, or even in boxes. It’s popular among designers and DIY-ers alike because of its versatility: it can look traditional & luxe, cottage & casual, and just about every style in between.
How Much Does Board & Batten Cost?
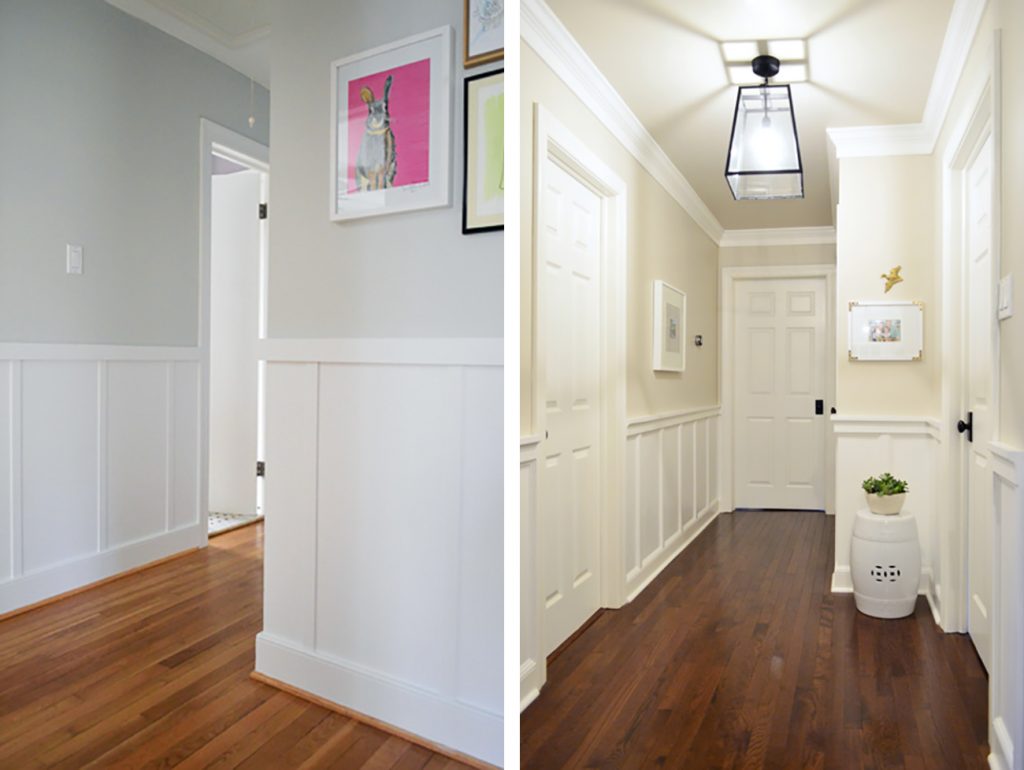
Our board & batten projects have cost us between about $50 – $650, but this greatly depends on the size of your space and your chosen materials. We once installed it for a little as $57 (below, left) because we reused our baseboards and picked simple lattice strips for our battens. We adapted that same technique in our next home but layered on additional moldings to give a more traditional look (below, right). That hallway was also twice as long, so it cost closer to $300.
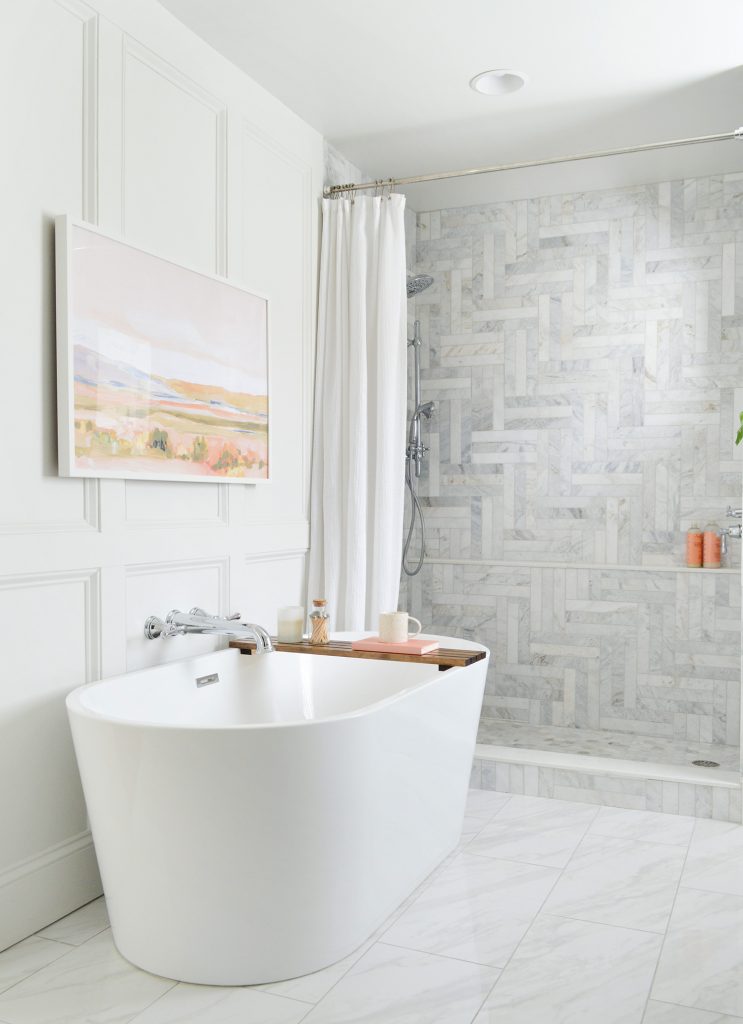
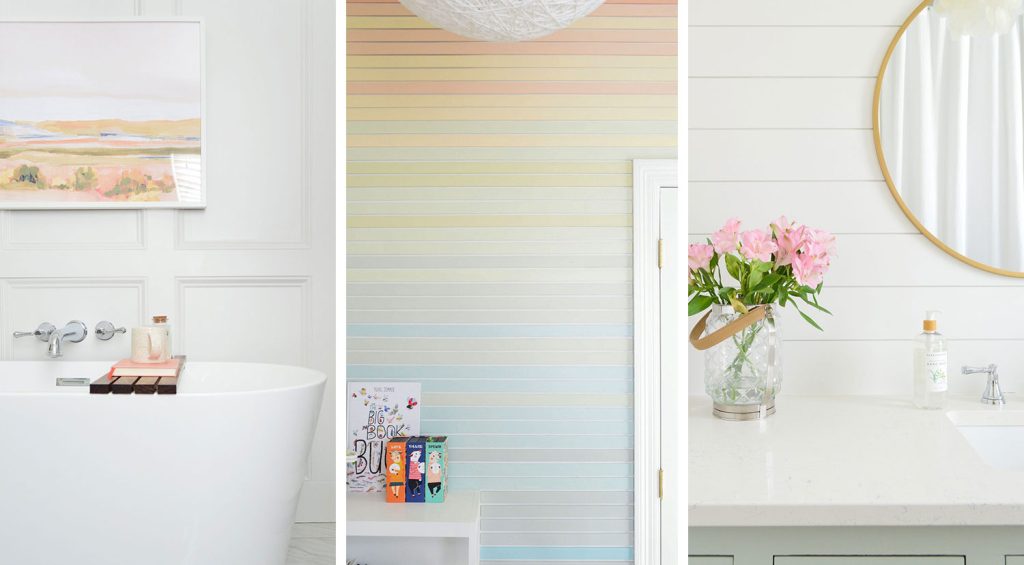
We also installed a floor-to-ceiling box-style board and batten in our last bathroom that, due to the amount of molding it required, cost almost $650. That was our priciest molding project, but it fit the high-end look we were aiming for.
The point being: board and batten can be an expensive project – but it doesn’t have to be! The project we’re showing you today was about $195. It might cost more if your room is bigger, but you can also keep the cost down by not going so high up the wall.
Tools & Materials
Ready for a secret? We’ve kept costs down for all of these projects by not installing the “board” part of our board & batten. Instead, we simply install battens against the drywall and paint everything to match. This saves time, labor, materials, and money while looking just as good.
- 1″ x 4″ x 8′ primed boards (these will be your top rail)
- 1″ x 3″ x 8′ primed boards (these will be your vertical battens)
- 1″ x 2″ x 8′ primed boards (these will be your top lip)
- Primer
- Paint (we used our existing trim paint, SW Pure White in semi-gloss)
- Spackle or wood filler (we love this 4-in-1 tool!)
- Caulk (this is our new fav!) and caulk gun
- Nail Gun
- Miter Saw
- 48″ Long Level
- Tape Measure
- Stud Finder
- Spackle Knife or Painter’s Tool
- High-grit sanding block
- Painter’s Tape
- Pen or Pencil
It only took us half a day to install ours, but because of various drying times between caulk, spackle, primer, and paint – it wasn’t completely done until the next day. But again, it’s not a super time-intensive project. Maybe six solid hours of work broken up across two days. So here are the basic steps.
Step 1: Plan Spacing
We cover our planning in more detail in this post, but the important thing here is to determine the HEIGHT of your top rail, and the SPACING of your battens. We used a measuring tape and blue painter’s tape to mock ours up in a few different ways to help us determine what our eyes liked best.
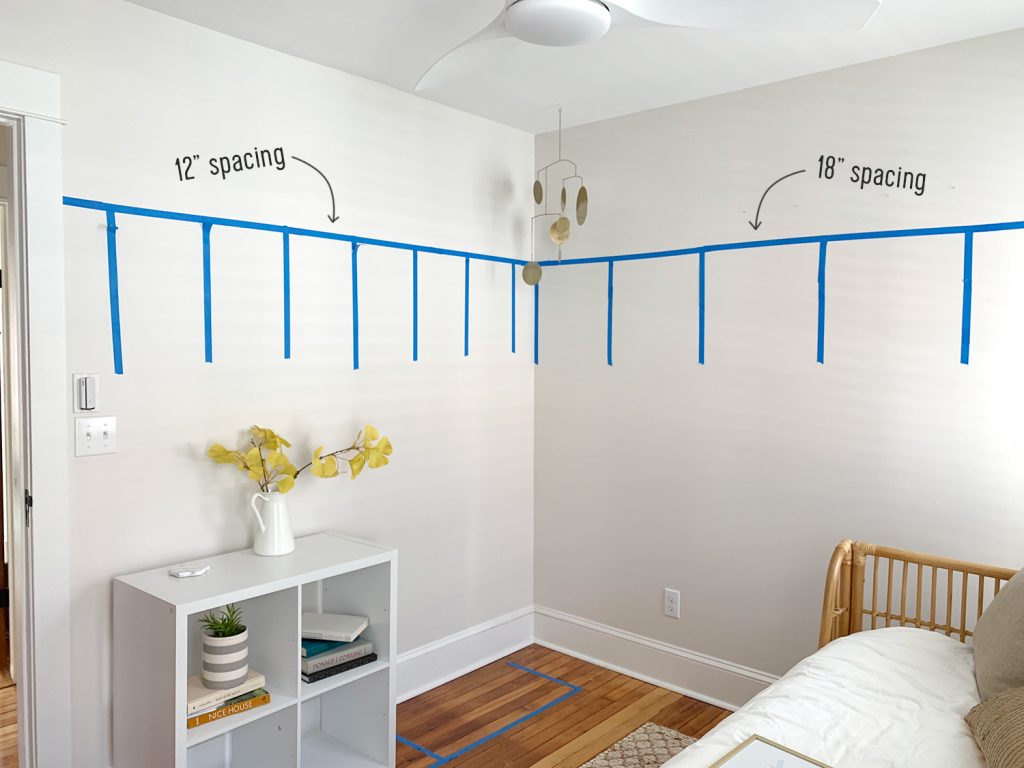
We selected the wider 18″ spacing of the battens, and aimed to place our top rail about 20″ down from the ceiling. We chose this height to minimize the amount of wallpaper needed. We were also mindful of where it intersected with our doors and windows, making sure that it looked intentionally lower than them.
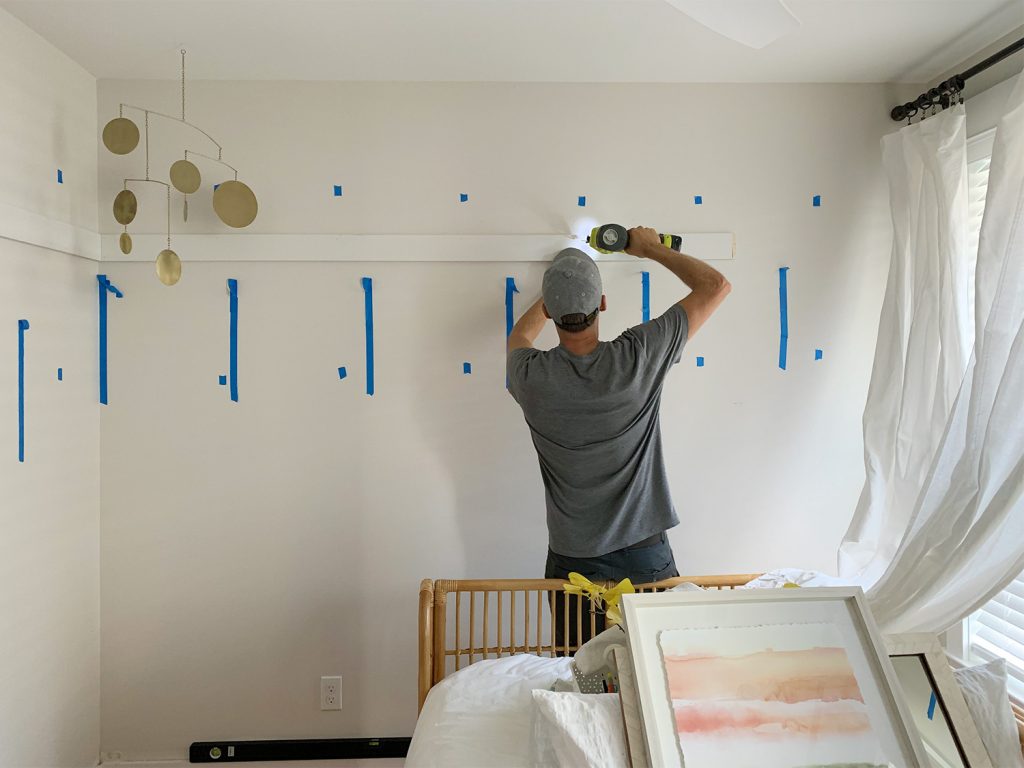
Step 2: Mark Studs
Next, use a stud finder to locate and mark the placement of your studs all around your room. We’ve fallen hard for this magnetic Stud Buddy because it’s very trustworthy. You sweep it across the wall until the strong magnet catches on the nails in your studs. Since it’s magnetized, it stays in place so you can mark things hands-free. Mark your studs with a pencil or use pieces of painter’s tape like I did. I put one high and one low, just to be safe.
This is important because you’ll want your top boards to be held securely into the wall and hitting a stud with your nail gun is the best way to do it.
Step 3: Prep Baseboards
This step depends on your current baseboard situation. In this room, the baseboards are just a 1 x 6″ board with a piece of decorative trim along the top. The 1 x 6″ provides the perfect bottom rail for our board and batten, so we just needed to remove the decorative piece so our battens could sit flush against it.
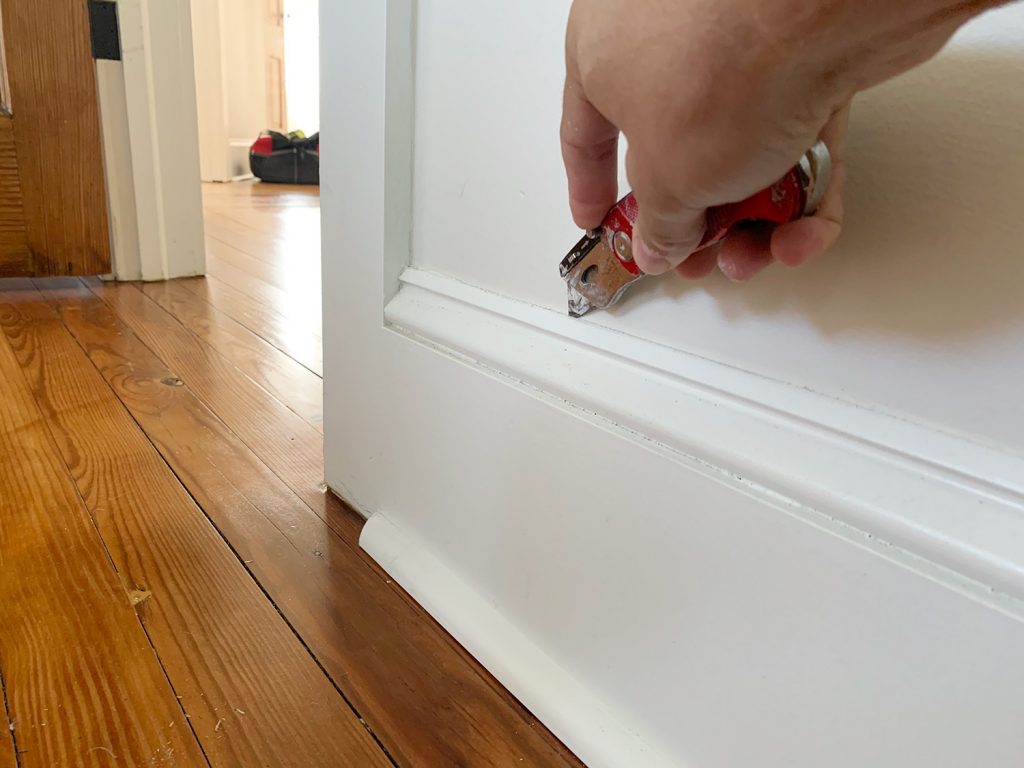
After scoring the top edge with a utility knife (you can also use the sharp corner of a spackle knife or painter’s tool) we pried off the small decorative piece on top. The scoring is helpful to minimize damage to the drywall behind it.
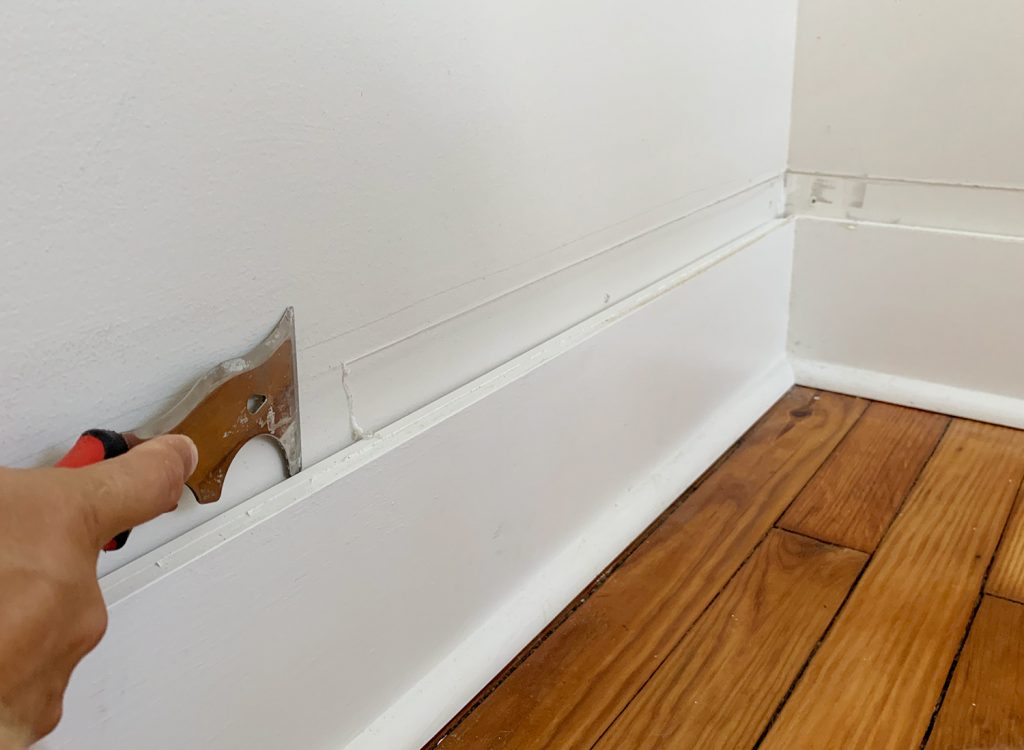
And speaking of damage, after removing this piece you may have some clean-up to do to make the wall as smooth as possible behind it. We had to scrape off some of the remaining caulk and even patch a few nail holes with spackle.
You also might consider replacing your existing baseboard with a 1 x 6″ board if you don’t already have a good bottom edge for your battens to sit against. In our previous hallway projects, we used thinner lattice strips as battens because they lined up well with our thinner baseboards. But having done it both ways, we prefer the more substantial baseboard & thicker battens seen here.
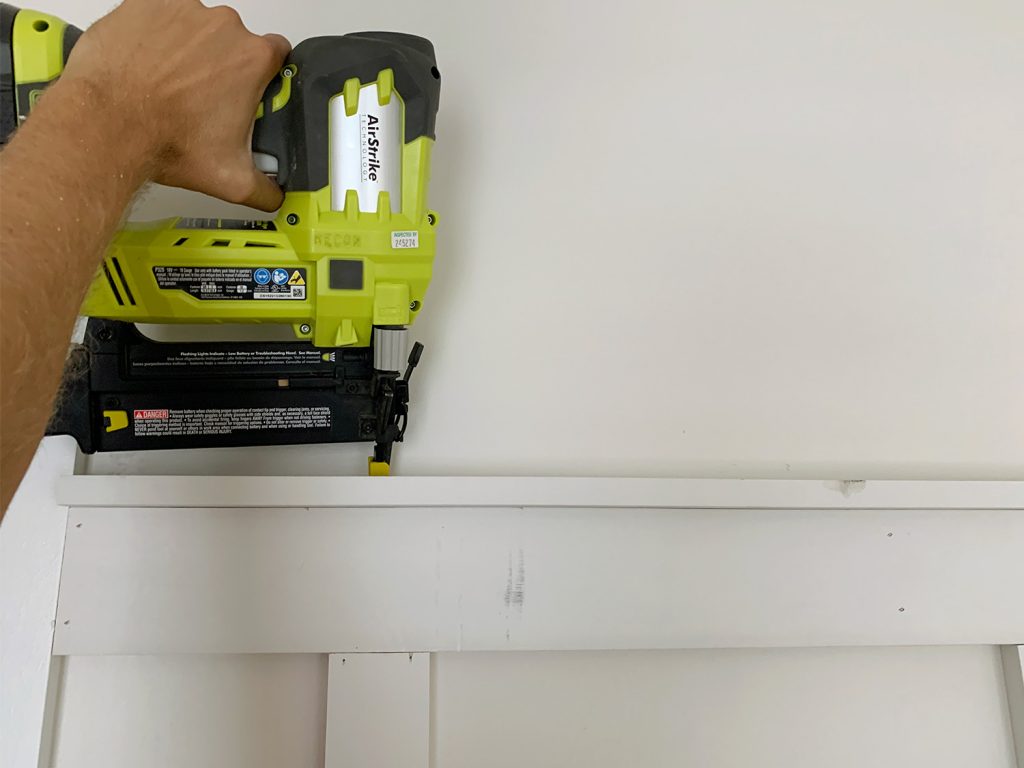
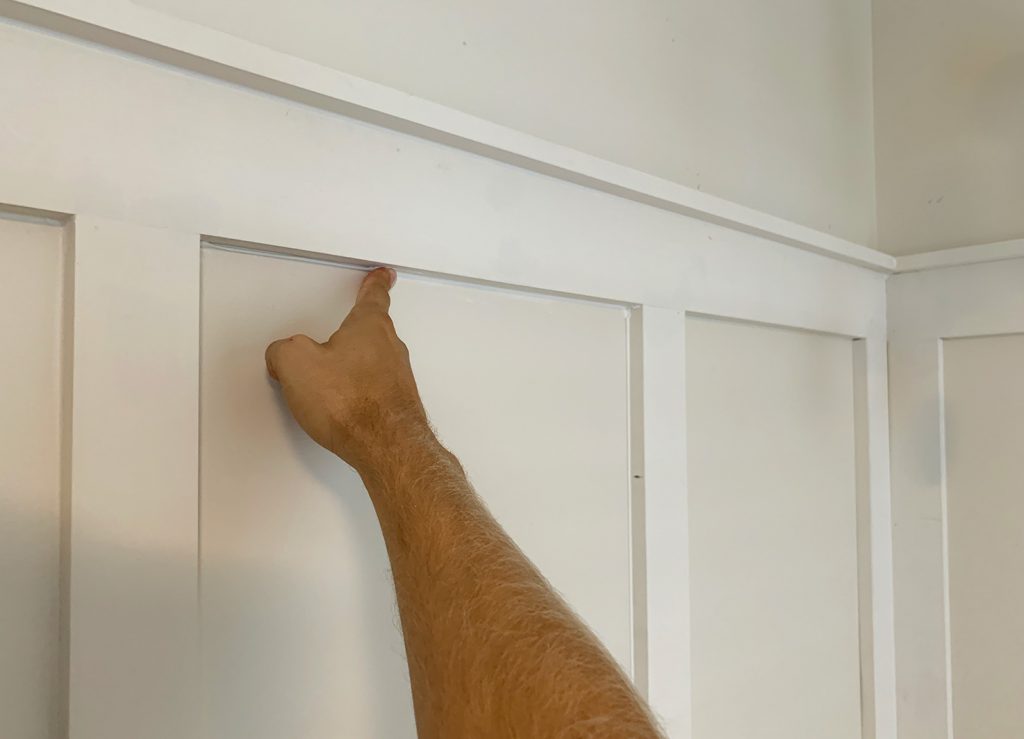
Step 4: Install Top Rail
The first step is hanging the top rail (the 1 x 4″ board) horizontally around the room. This should be easy because you’ve already determined your height and marked your studs. An airless nail gun like ours makes it pretty fast too.
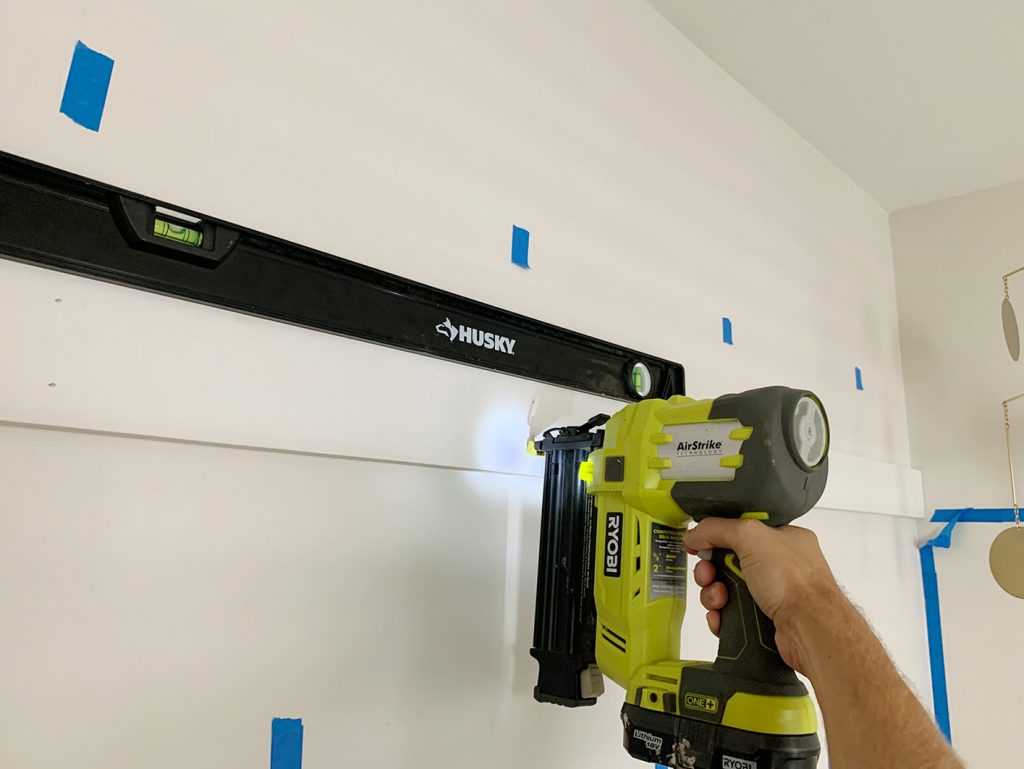
Just be sure to keep a long level handy as you do this. Our beach house is 115 years old, so none of the ceilings or floors are perfectly straight (wonky walls = character… right?). So you may want to match your level to the slope of the ceiling instead of blindly going by what the level says. That will help your final install look the most level to your eye because it will look parallel to the closest plane.
We use our miter saw to cut the boards to length, but you can cut by hand if you’d prefer. You can even get Home Depot to make the cuts for you if you have measured them out beforehand. We didn’t do any angled or mitered cuts in the corners, so it’s pretty straightforward. The only angled cut we did was on the wall you see above where we had to use two board pieces to span the whole wall. The angled cut helps to hide the joint more than straight cuts, but it’s not necessary.
Step 5: Install Vertical Battens
Now that you’ve warmed up your measuring, cutting, and nailing muscles, it’s time for the main event: installing your vertical battens. It’s certainly not rocket science – especially if you’ve already determined your spacing – but the back and forth of this process can get a bit tedious. I prefer to measure each one before I cut it just to be safe (again, our walls aren’t perfectly level). This helps to ensure that your battens fit as snugly as possible.
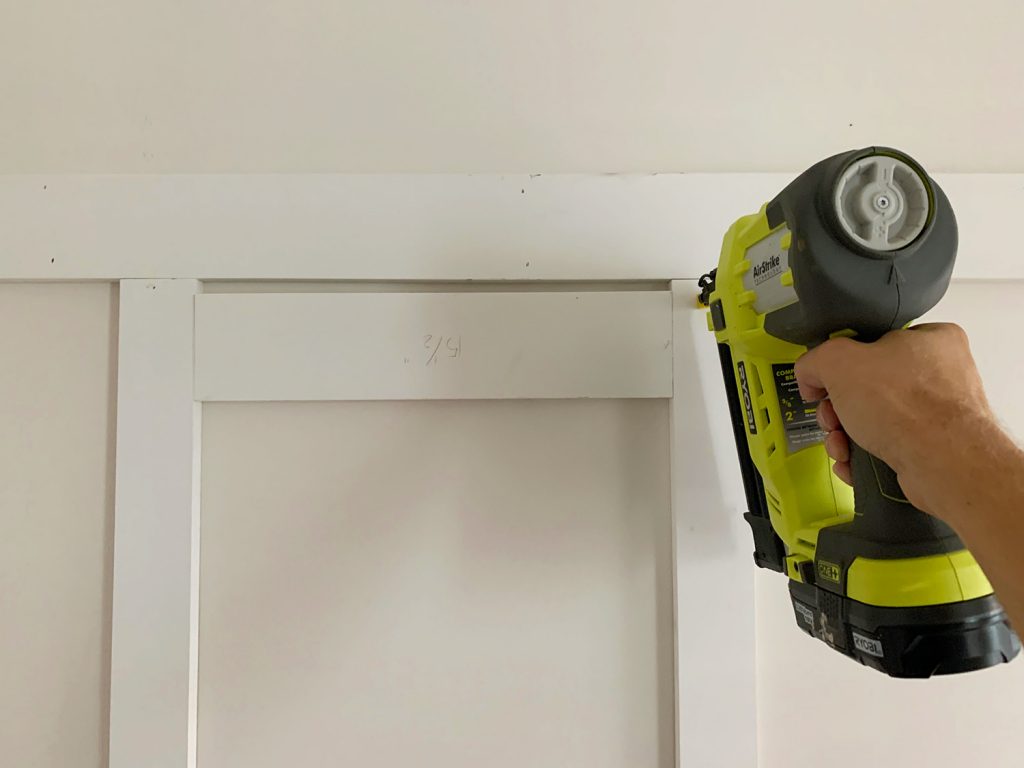
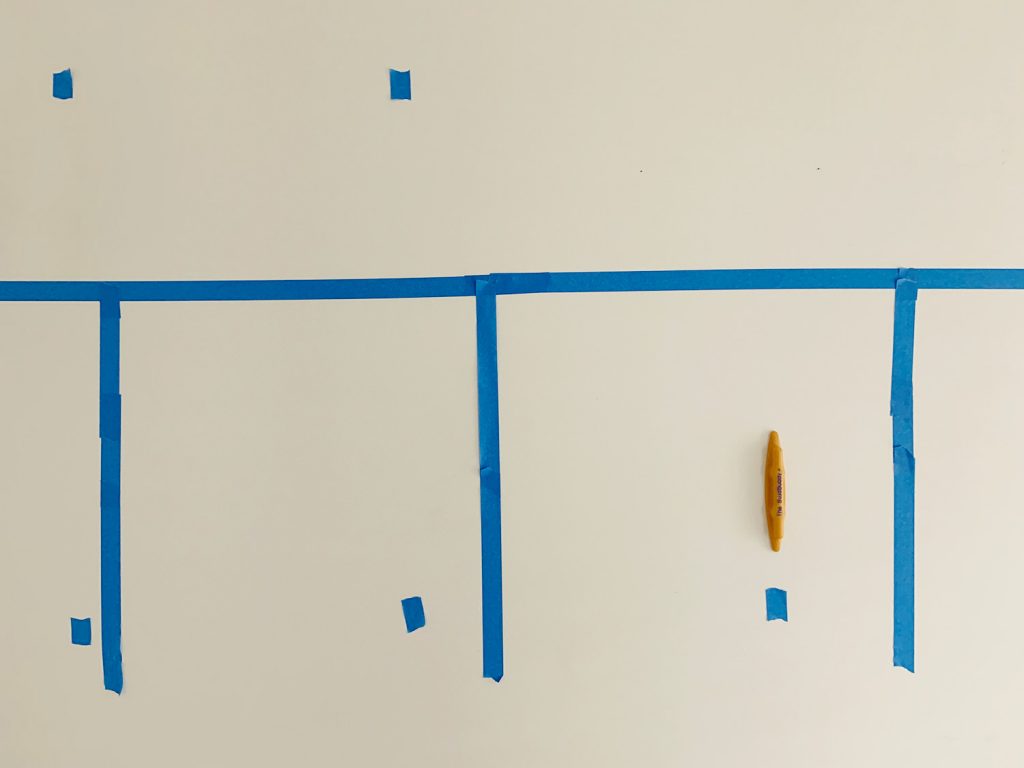
The other thing I highly recommend is creating a “spacer” out of scrap wood. You can see mine in the photo above (it’s between the two middle battens floating below the top rail). This makes it easy to ensure each vertical batten is evenly spaced without having to break out a tape measure each time. Since my 2.5″ wide battens are 18″ apart from center to center, my spacer is cut to 15.5″ wide.
Some people apply glue or caulk behind these battens, since your nails aren’t always hitting studs. I don’t like to do that because of the extra damage it would leave on the wall if we ever decide to remove the wall treatment. I’ve found that they stay in place plenty well with a few nails up and down the board, plus the caulked edges and the paint you’ll be adding next. Just don’t hang anything really heavy (like a coat hook) unless that batten has been nailed to a stud.
Step 6: Mind The Corners
Perhaps you’ve ironed this out in your planning step, but sometimes the spacing can get a bit tricky depending on the length of your wall. We generally tried to center one batten in the room, and then install them evenly at 18″ until we got to the corners (or a door or window). You know, if that last one got “cut off” in the corner, so be it.
But we discovered through some trial and error that the corners looked best when two “full” battens met each other. By full I mean that they didn’t overlap in the corner, which would’ve made one look skinnier than the other.

So as you can see in the photo above, this meant not pushing our corner battens fully into the corner. Instead, they floated off the corner ever so slightly so none of the corner battens overlapped each other. This way they both appeared full size instead of one looking slimmer than the other.
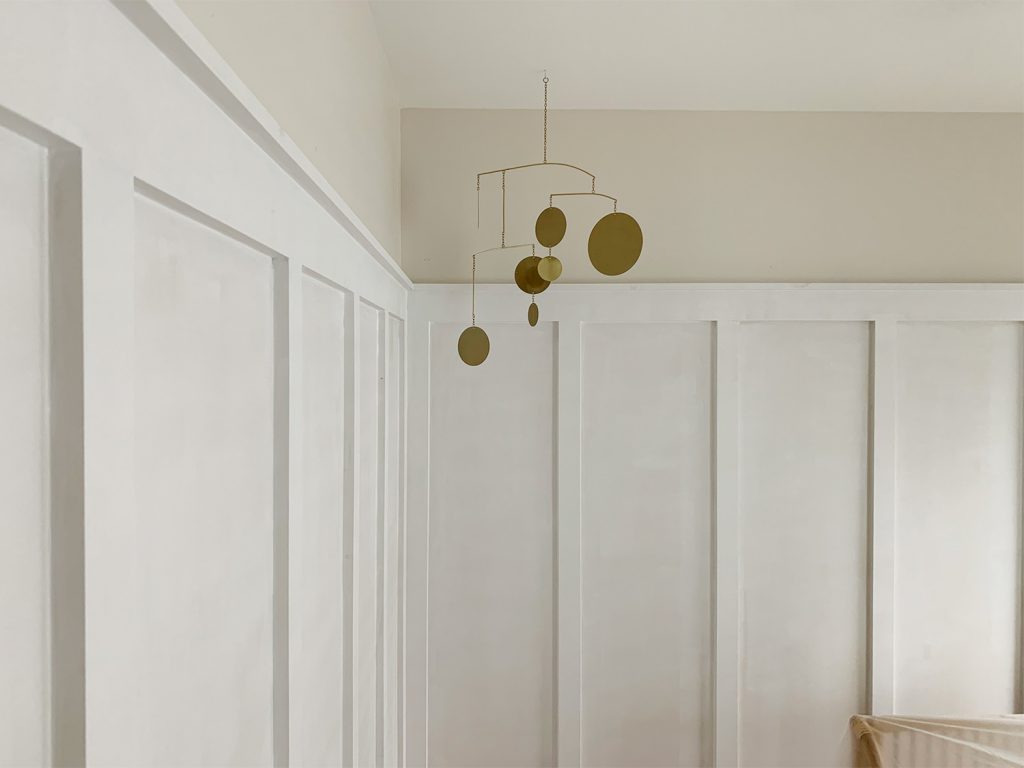
Step 7: Add Top Ledge
After skipping a top ledge for our first board & batten project, we’ve since decided it’s worth the extra effort. A flat ledge looks more substantial and creates a spot to lean artwork or something on top. To add it, we used a 1 x 2″ board just nailed along the top.
We don’t plan to lean anything on ours, but if you do (particularly something heavy) you may want to consider using screws instead of or in addition to your nails.
Step 8: Spackle & Sand Nail Holes
Before you paint, you’ll want to fill all of your nail holes. Many of our podcast listeners said this 4-in-1 spackle tool is perfect for a job like this. And you guys were right. And spackle knife would do, but this way was so fast!
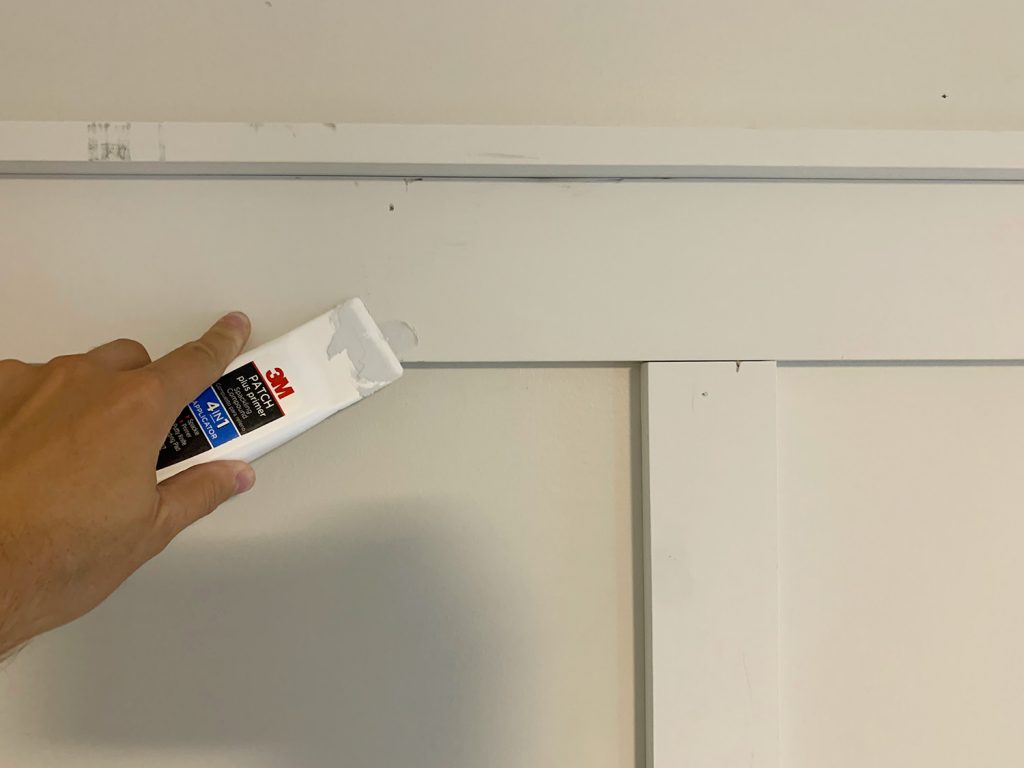
To use it, you squeeze a dot of spackle out of the tube and then flip it around to smooth it with the flat edge on the back. It has a sanding pad on the cap too, but we found it easier to use a larger, regular sanding block.
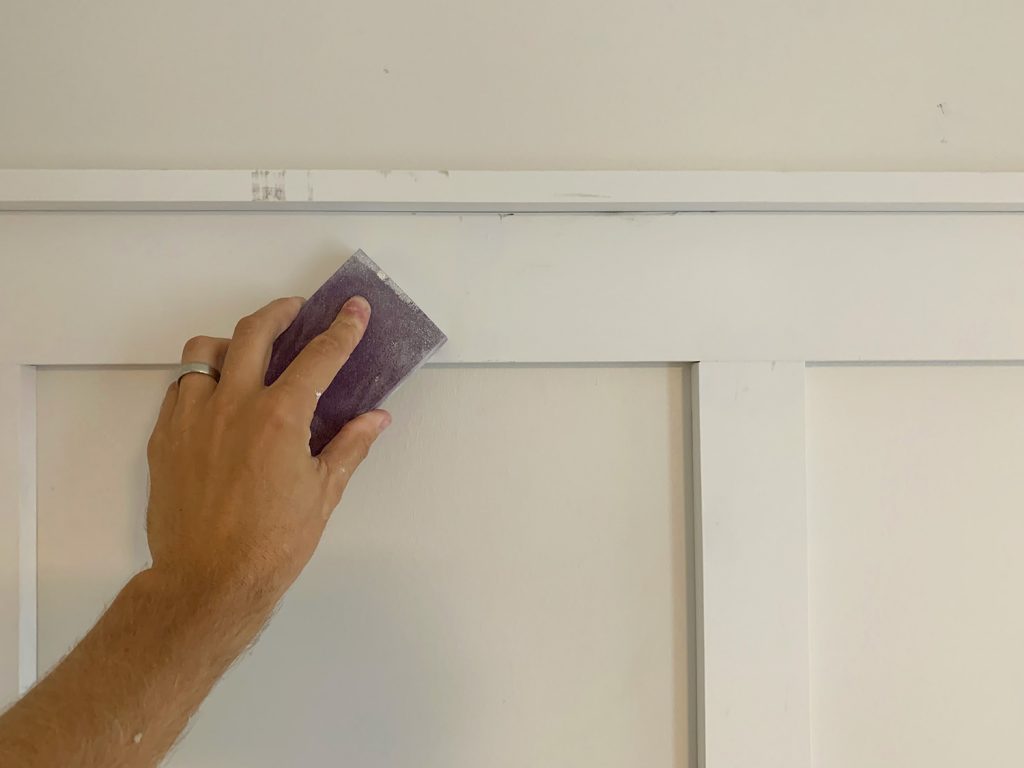
Be sure to dust off the sanded areas too before you paint. A microfiber cloth or paper towel works great for this.
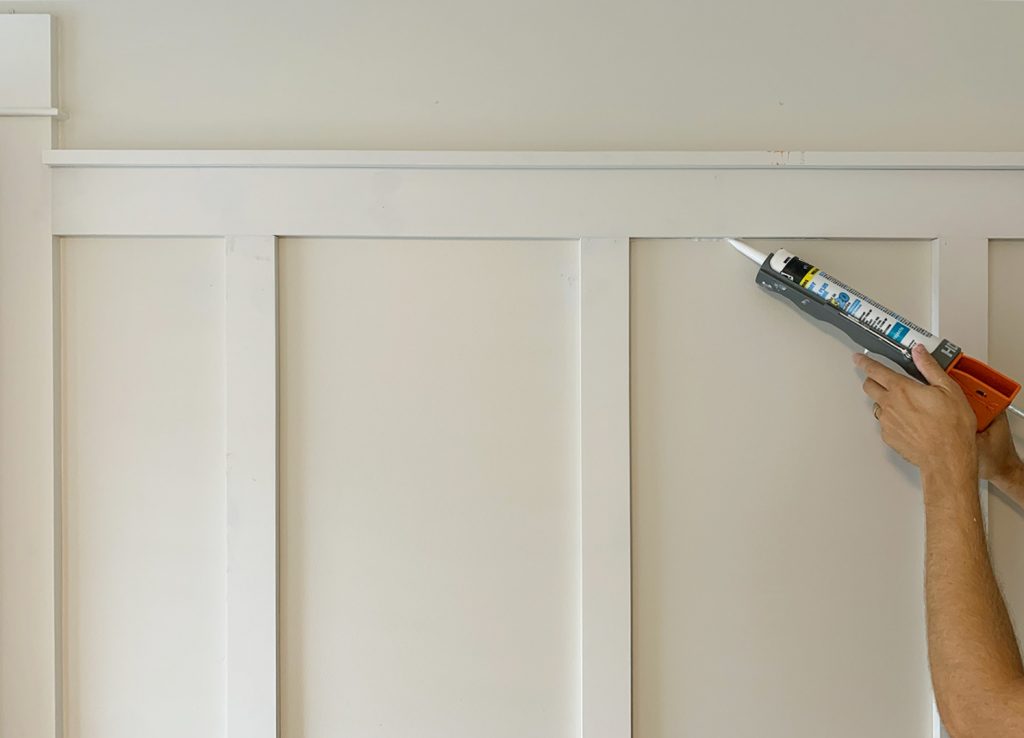
Step 9: Caulk Seams
Next, caulk any seam where your boards meet the wall or one another. This helps disguise any bows in your wall and makes the board and batten look like it’s part of the wall – not just something nailed on top of it.
We love this Extreme Stretch caulk because it resists cracking and separating when the temperature or humidity in your house changes. Our local store was out of it so we used this fast dry stuff instead, which is also pretty good – especially if you’re eager to get painting.
You probably won’t need a thick line of caulk for this project, so be careful not to cut too much off the tip of your caulk tube (even better if you can cut it at a slight angle and keep it nice and small). That will help this part go faster and you’ll stay cleaner. You can always cut off more if needed.
We found it was fastest to squeeze out a thin line of caulk around all four sides of a particular “box” all at once, rather than stopping to smooth each side one at a time. Dip your finger into a cup of warm water before smoothing the caulk line yields a smoother result – and keeps the caulk from sticking to your finger.
Step 10: Prime & Paint
You might think it’s unnecessary to prime pre-primed board like ours. And it may be. But we always think it’s the safest bet to do one coat of primer over areas where you’ve caulked or spackled. It just helps to prevent your final paint job from “flashing.” That’s when you can detect a change in sheen from certain angles. We’ve had more than a few projects annoy us because we noticed those shiny flashing spots AFTER we’ve painted. So yeah, better safe than sorry flashing.
That photo above was taken after everything was primed, which is why the finish is a little blotchy. But thanks to that “just in case” coat of primer, it only took one coat of paint to get a perfect finish.
We used the existing trim color (Sherwin-Willaims Pure White in Semi Gloss) because we wanted that beachy look of bright white trim, but this type of wall treatment would look good in any number of colors… even in just a glossier sheen of your wall color for a tone-on-tone look.
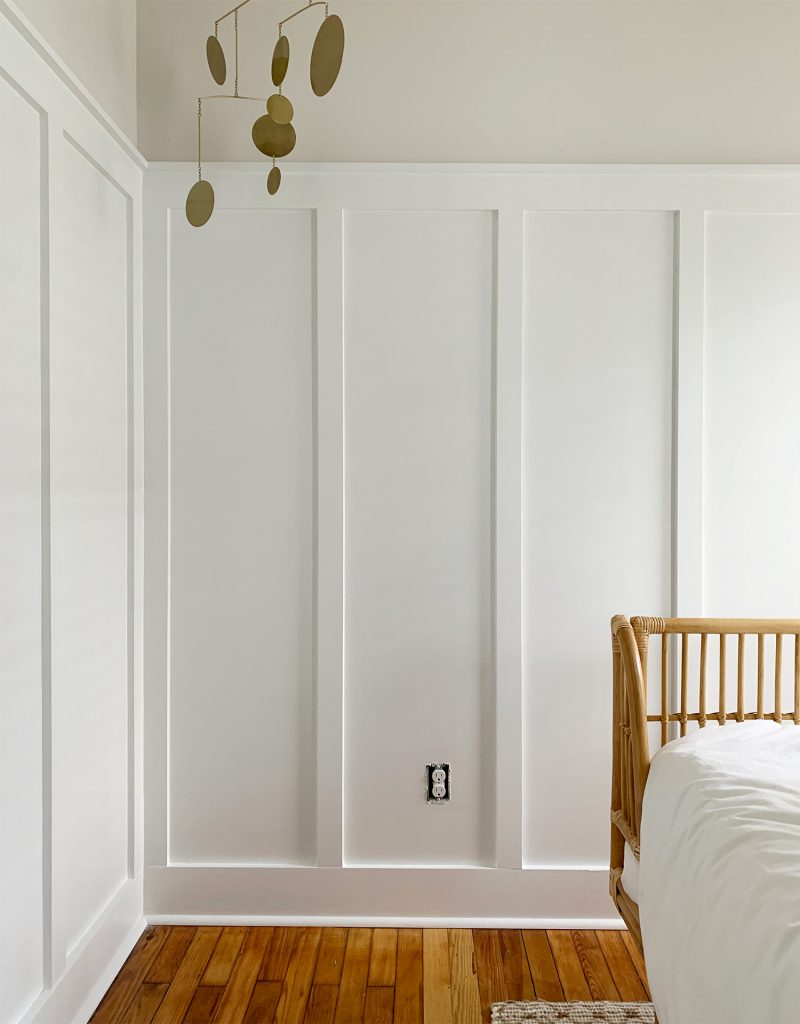
The Finished Board & Batten
As you saw at the start of this post, we later added wallpaper above our board and batten. You can learn how to hang peel & stick wallpaper yourself. It’s super easy too! You can also see more photos of the final bedroom makeover, along with all of the product sources.
So there’s the board & batten tutorial for everyone who has been waiting for it – and for anyone who wants to see the room completed (and learn all about how we hung the wallpaper & read our tips for that process) that’s coming! We just have to take some photos with the good camera & write that all up for you (we even made a video tutorial for that one). In the meantime, here are some other DIY wall treatment projects you might want to try:
Board & Batten FAQs
Is board & batten outdated?
Nope! Board and batten is a timeless look that can be adapted to many styles and applications. To keep it from looking dated, paint it a crisp white (we love SW Pure White) or another on-trend color.
What kind of wood can you use for board & batten?
You can use many types of wood or MDF to get the board & batten look. We like to use pre-primed pine or lattice strips for our battens because it saves time. If you are installing boards over your drywall, MDF panels will give you a smoother finish than plywood. Just don’t use MDF in a damp location like a bathroom or kitchen because moisture can cause it to warp. If installing outdoors, be sure to use pressure treated wood or cedar to withstand the elements.
Where does board & batten look best?
There are no hard rules about where board & batten can be used. It is popular for hallways & entryways, as well as bedrooms & dining rooms. Just be sure your wall space is large enough to fit at least 3 panels, so the repetition makes sense.
How high should board & batten be?
Board & batten typically looks the best between 1/2 and 2/3 up your wall. It can even go all the way to the ceiling! We suggest using painter’s tape to visualize the best height for your space, keeping in mind the height of ceilings, doorways, and artwork. We recommend erring on the side of higher than lower, especially if going that “halfway” look. A true halfway measurement often looks too low, so consider cheating it a bit higher.
How far apart should board & batten be?
We suggest spacing your vertical battens between 12″ and 20″ apart. The larger your room, the wider you may want to space them. We recommend testing your space with painter’s tape first. And remember that different walls in your may require slightly different spacing in order to prevent small or cut-off sections in the corners.
Can you install board & batten on textured walls?
Yes, but you won’t be able to use your existing drywall as the “boards” like we do in this tutorial. Instead, you’ll want to install thin, smooth boards over your drywall before adding your battens. We suggest a thin MDF that is screwed into wall studs to achieve this.
More DIY Wall Treatments
Looking for more ideas to add architectural interest to your walls? Here are more of our favorite DIY-friendly wall treatment projects, including other iterations of this board & batten:
- Our $57 Board & Batten Tutorial
- A “Fancy” Version Of Board & Batten
- Decorative Box Molding In Our Bathroom
- A Colorful Wood Wall Treatment
- Installing $31 “Shiplap” Kitchen Backsplash
- Quick Bathroom Shiplap Backsplash
- Adding Crown Molding Yourself
- How To Add A Removable Wallpaper Mural
*This post contains affiliate links*
