When we needed some heavy-duty garage shelving for our new shed, we turned to this shelf tutorial from our friend Ana White. Shelves like these stand up to the weight of heavier items like power tools & paint cans and, most importantly, are also SUPER straightforward to build – even for beginngers!
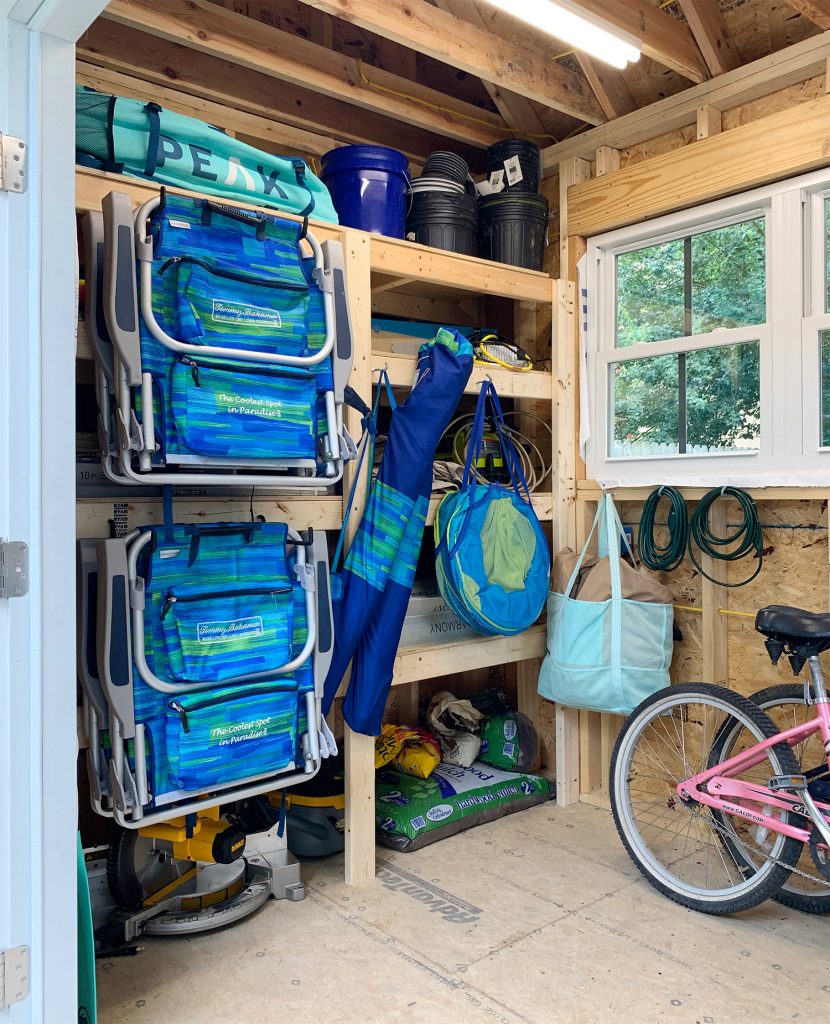
We ended up loving this technique so much, we’ve since repeated in the shed at our beach house (seen below) and the small shed at our current hosue. They’re such an easy DIY project and I find them FAR superior to most store-bought garage shelving units. Making these long shelves with generous spacing between them to creates flexible storage with easy access to even my bulkiest items.
Lastly, they’re adaptable to pretty much any-sized space, and they’re especially easy to install when you have exposed wall studs to drill directly into.
Tools & Materials Needed
The material list for this is pretty short, which is another reason this is a great option for anyone needing to build some quick and easy shelving for their garage or shed.
- 2×4″ boards
- 1/2″ plywood, MDF or scrap wood
- Miter Saw
- Table Saw or Circular Saw
- Pocket Hole Jig
- Tape Measure
- Long level
- Nail gun
- Drill & wood screws
- Stud finder (optional)
The amount of lumber you’ll need depends on the size of your garage and how many shelves you’re building. We prefer to build ours from the floor to about 18″ below the ceiling, which should leave room for large items on the top.
DIY Garage Shelves Tutorial
Here is a quick overview of the steps you’ll follow to construct your garage shelving.
- Step 1: Cut Pairs of 2×4″ Shelf Supports
- Step 2: Hang One 2×4″ from Each Pair
- Step 3: Screw The Other 2×4″ into the First (Temporarily)
- Step 4: Attach Vertical Supports
- Step 5: Remove Your Temporary Screws
- Step 6: Add Side Pieces
- Step 7: Nail In Shelf Tops
The beauty of this technique is that it takes a lot of the guesswork out of getting your shelves level and lined up. Plus, they end up super sturdy!
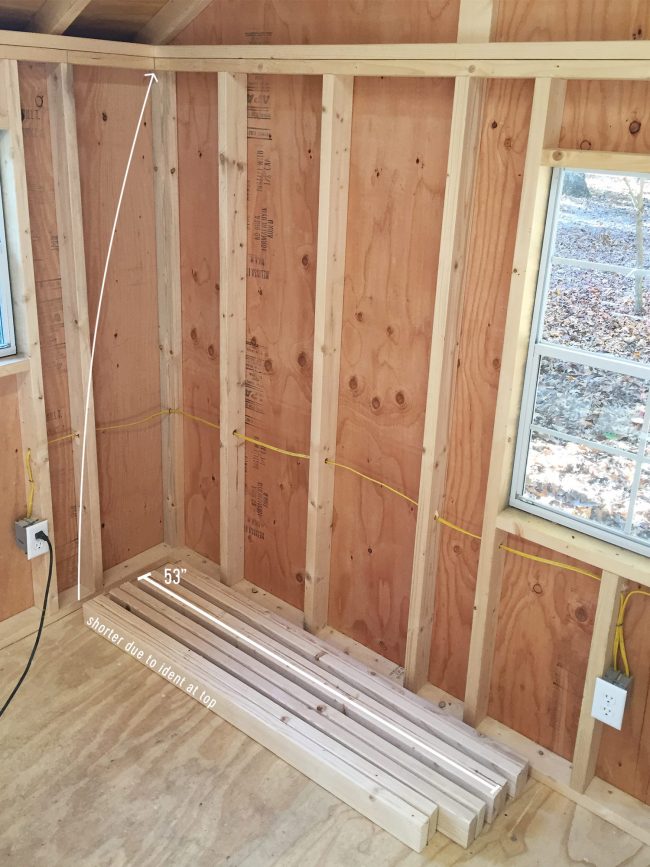
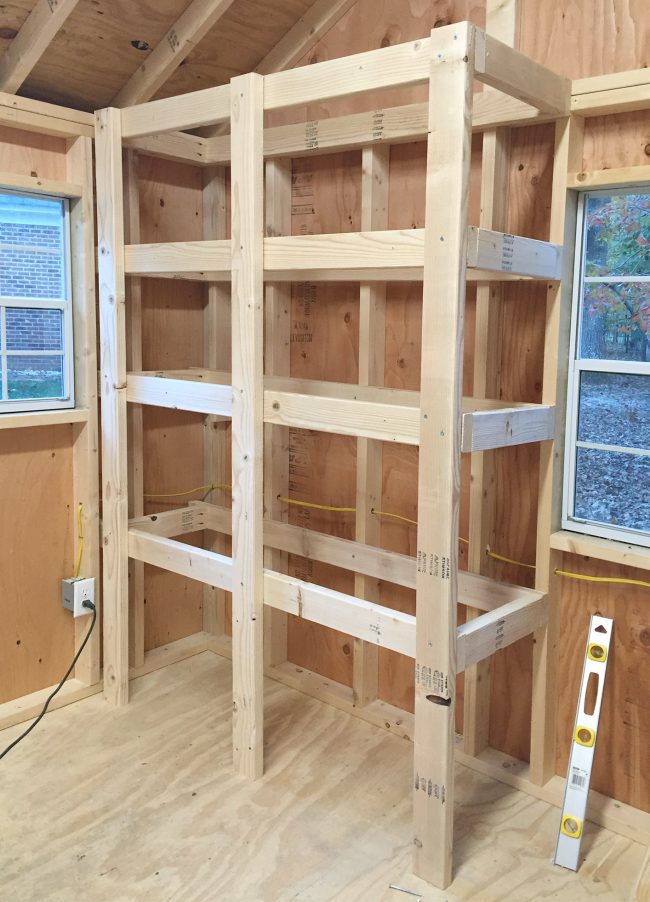
Step 1: Cut Pairs Of 2×4″ Shelf Supports
We chose to build ours on the same wall as our DIY scrap wood organizer, but on the larger side of the window. I started by cutting 4 pairs of matching 2 x 4″s using my miter saw, measured to fill the wall between the corner and the window (53″ in our case). Each pair will act as the bottom of a shelf, with one board going against the wall and the other along the front of your shelf.
Step 2: Hang One 2×4″ From Each Pair
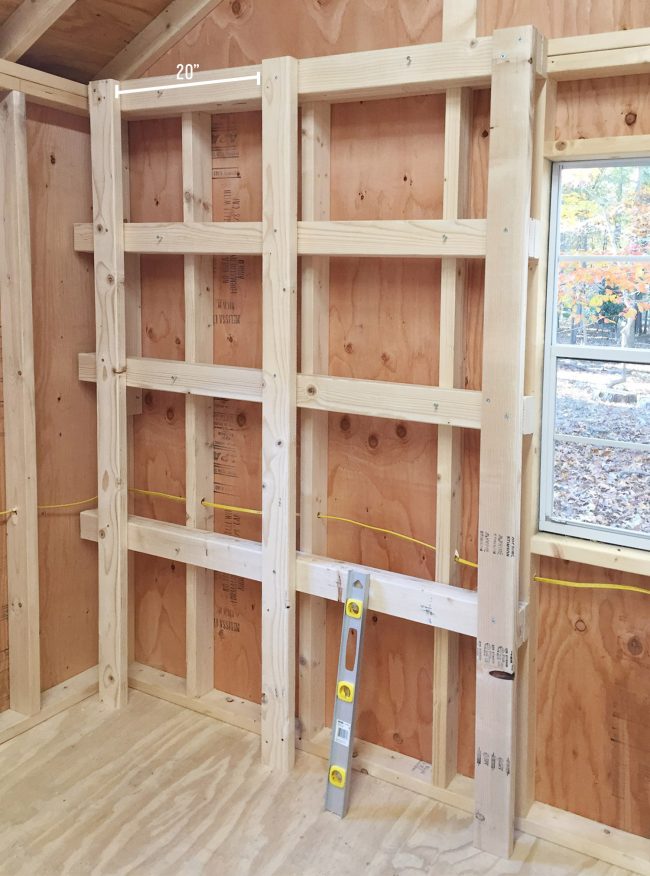
Using a level and a tape measure, I used long wood screws (into wall studs!) to hang one board from each pair against the wall. Your shelves are ultimately going to rest on top of these boards. You can see the spacing I chose below, but it’s really up to you. You could even customize the height to perfectly fit items like plastic storage totes, paint cans, or other items you know you’ll be storing.
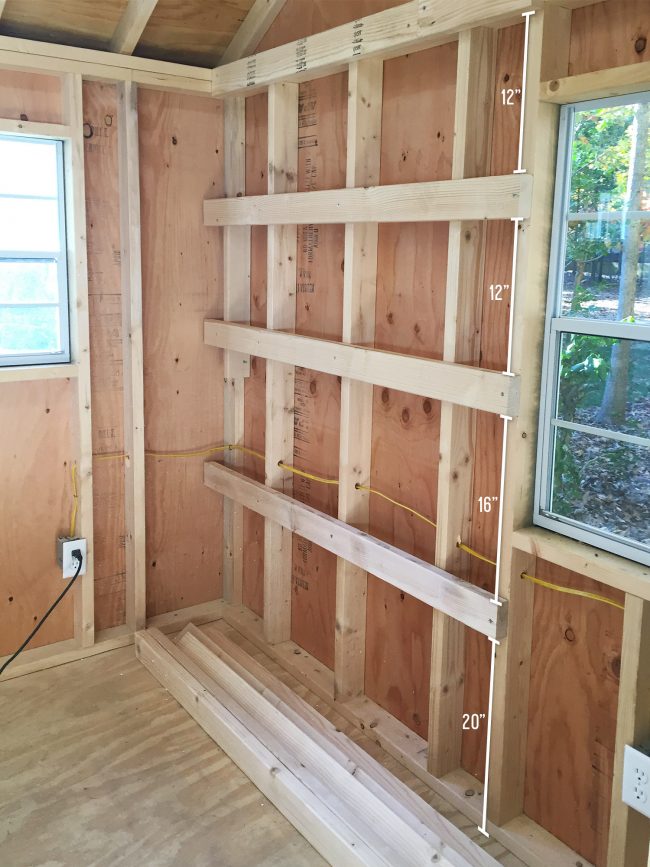
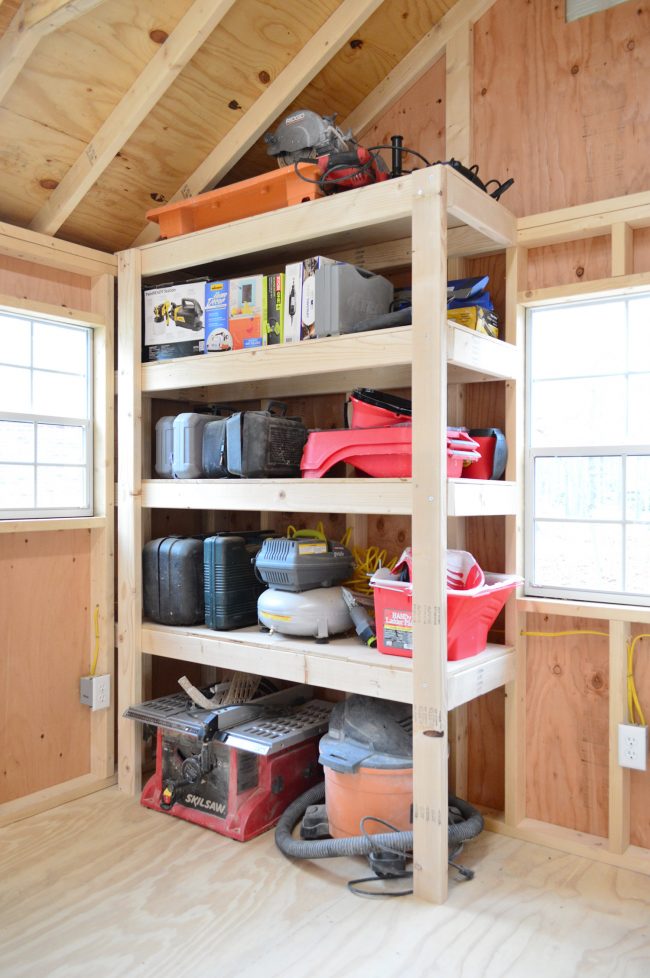
I also recommend making your bottom shelf taller than the rest to create storage space for larger or heavier items you won’t want to lift. And leave enough room up top to fit items between your top shelf and the ceiling. Ours was a little funky due to the slope, but you can see in the “after photos how it turned out to be the perfect place for my wet saw.
Step 3: Screw The Other 2×4″ Into The First (Temporarily)
Next – and this is going to sound weird – you loosely attach the other half of the each pair directly over the boards already in the wall, making sure to line everything up perfectly.
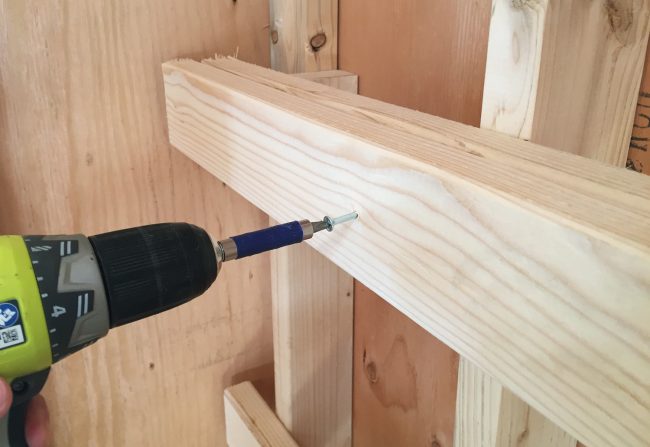
I used two screws per board, and you don’t have to drive your screws all the way in, just enough to hold everything together for the next few minutes. This part is just temporary.

Step 4: Attach 2×4″ Vertical Supports
Next, you’re going to add vertical 2 x 4″ supports that rest on the floor and are cut to go no higher than your top board. I started with three, but as you saw in the final photo – I ended up removing the middle post. You’ll want to screw these posts tightly into the outer horizontal pieces (make sure your screws aren’t so crazy long that they go into the back pieces too). And again, use your level to keep them straight.
Step 5: Remove Your Temporary Screws
Now you can remove those “temporary” screws and the whole front portion of your shelving system will pull away from the wall in one glorious piece. Here you can see what that looked like in our beach house shed.
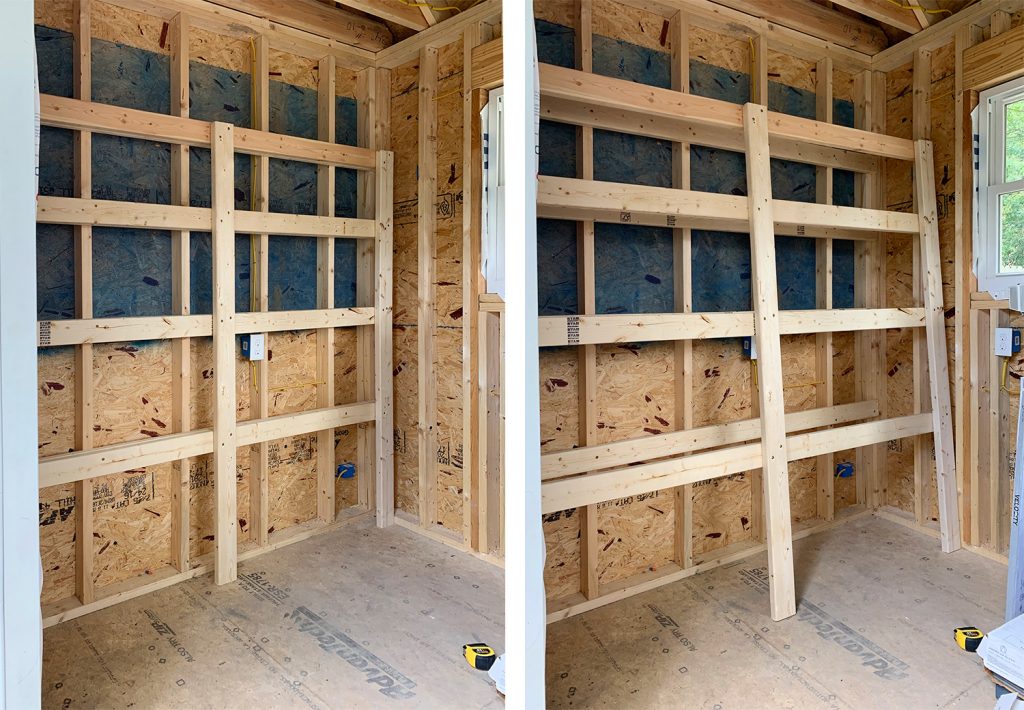
You’re basically cloning the back frame exactly so that when you pull it off the front frame, the pairs of horizontal shelf supports will be perfectly lined up.
Step 6: Add Side Pieces
Next, you just have to add some side pieces that will connect front and back horizontal supports. We cut a bunch of 12″ using our miter saw and drilled pocket holes in them using our pocket hole jig. This will make the total depth of each shelf about 15″. You adjust this measurement to your needs (we had a window on one side that prevented us from making them deeper). I wouldn’t go much larger than 18″ without using thicker plywood or adding extra cross support under your plywood. Otherwise they may sag over time.
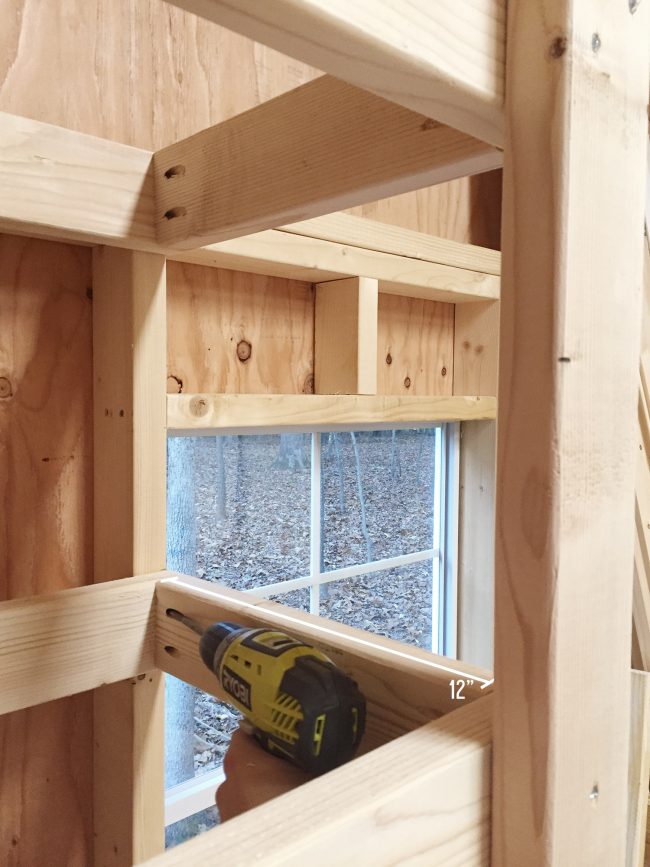
When you’re done with that part – your shelf frame should look a little something like this.
Step 7: Nail In Shelf Tops
Next, I added some leftover 1/2″ plywood pieces to the top with nails (you could also use wood glue). I used my table saw to cut them exactly to size, but you could also cut them using a circular saw. Stores like Lowe’s and Home Depot will also cut sheets of plywood to size for you.
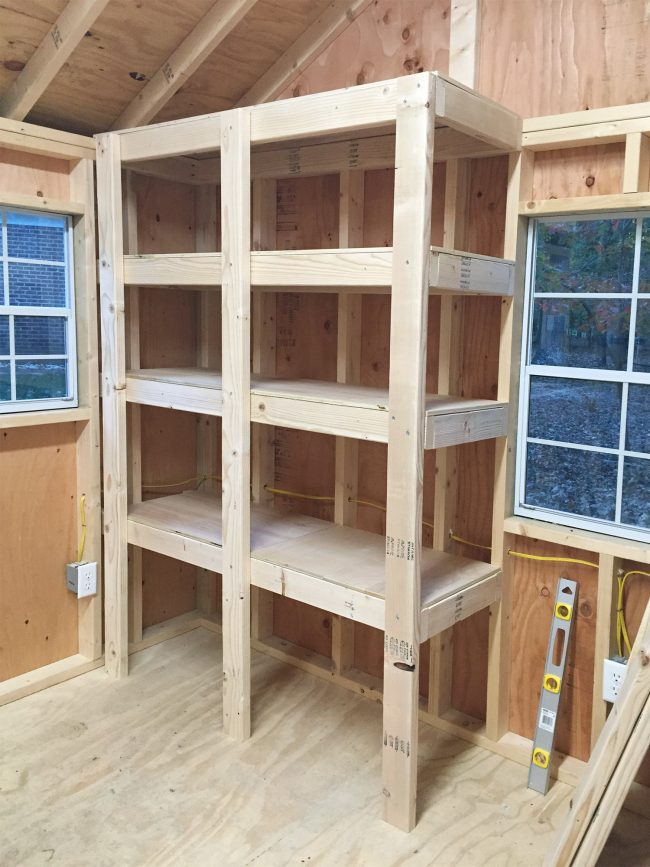
It was around this time that I realized it was EXTREMELY steady and I could remove that middle post (which would ultimately make it easier to slide large objects onto the shelves).
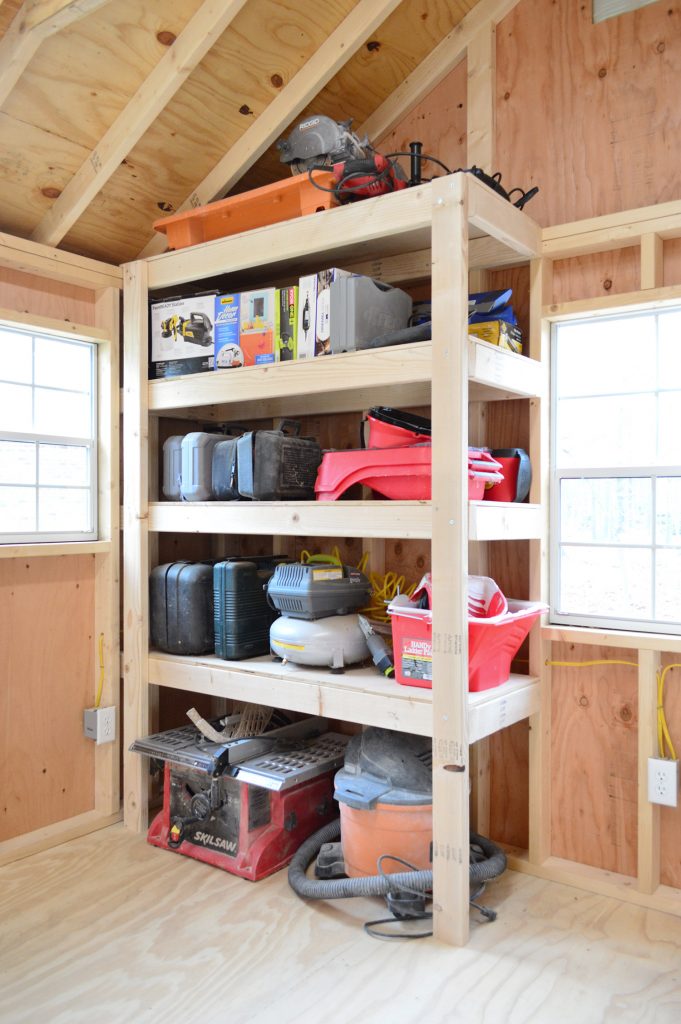
I’ll admit I didn’t really “plan” what was going to fit on there when I built it, but it turned out to be great for lots of our boxed tools, random painting supplies, various saws, etc. This thing is so dang sturdy you could invite a few dozen kids to climb all over it. Or fill it with tons of heavy tools, which is what I did. Sorry, kids.
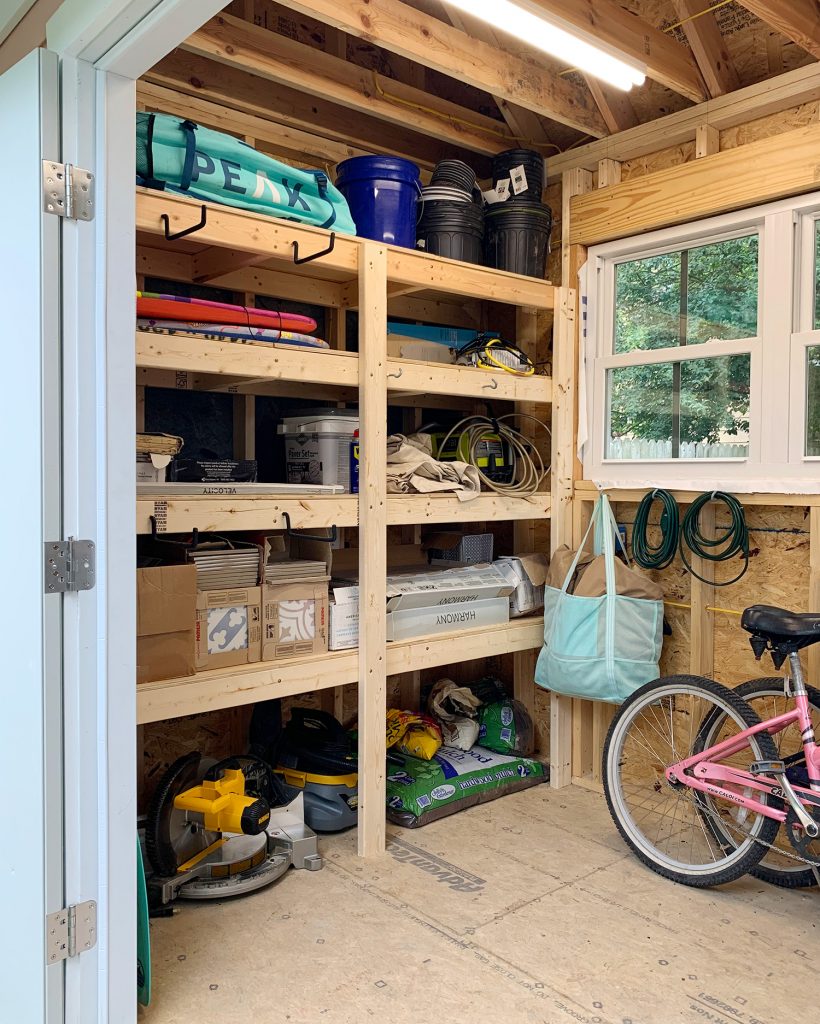
You can also see more about how we customized this same garage shelving for our beach house. We use it to store lots of spare tile and paint, meaning we don’t need to access everything very often. So to make them even more useful, we hung some storage hooks on the front for all of our beach chairs and umbrellas.
And again, thanks to Ana White for giving such a simple and effective solution for some heavy-duty DIY shelves! We’ve also got a round-up of more DIY shelf ideas for other parts of your home too.
More DIY Garage Storage Ideas
If you’re interested in more garage organization and storage projects, check out some of these other posts:
