This is a heartwarming story featuring Ethan Hawke and Gwyneth Paltrow about getting crafty with a pillowcase, some fabric paint, and a metal grate, hence that pun-tastic title.
I don’t know about you, but I always seem to have one or two extra pillowcases around. We only have one set of sheets per bed, but I think since I buy two extra pillows for every bed (and therefore need extra pillowcases) I must see them on sale and grab them without making sure I really need them (hence the over-abundance). Really, it’s sort of a mystery to me since I’m the girl who won’t buy tomato sauce or toothpaste unless I’m sure I’m out, but maybe in another life I was short a pillowcase and it ruined my day so now I hoard them. Truly, it’s weird.
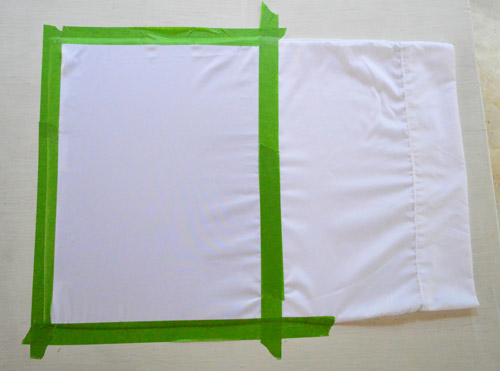
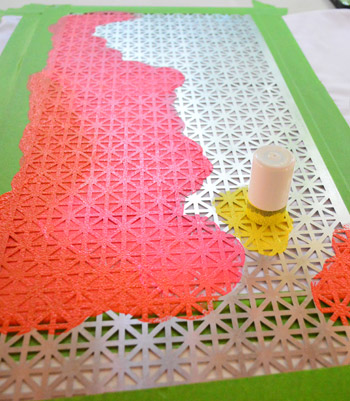
But anyway, I had this extra pillowcase so I thought it would be fun to use it as spare fabric and get a little crafty. And thus this project was born. First I taped it off in a rectangular shape using painter’s tape to hold the fabric taut. Oh and I slipped a piece of cardboard inside the pillowcase to keep it from bleeding or sticking together before taping it down.
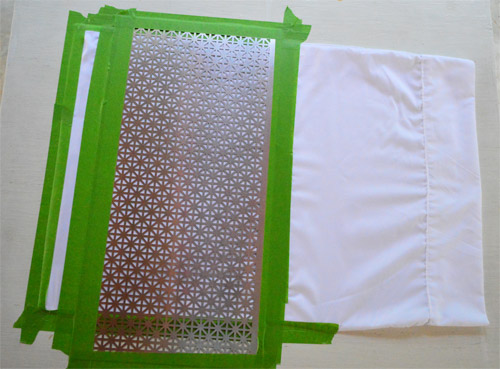
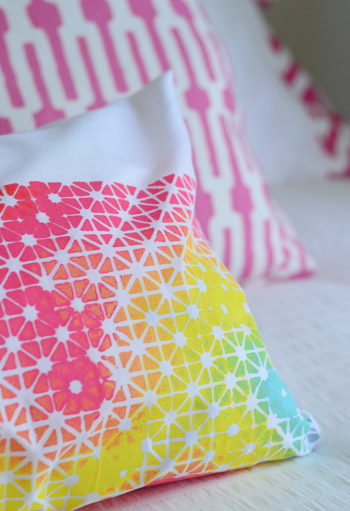
Then I taped this cute metal grate over it that I picked up at Home Depot for $9, which I immediately looked at and my brain said “um – STENCIL!” At first I debated doing this on paper to make some frame-able art, so you can go that route too, but then I thought using fabric paint on a pillowcase and stitching that up to make an easy little bolster could be fun, so I veered that way at the fork in the road that is Craft Street.
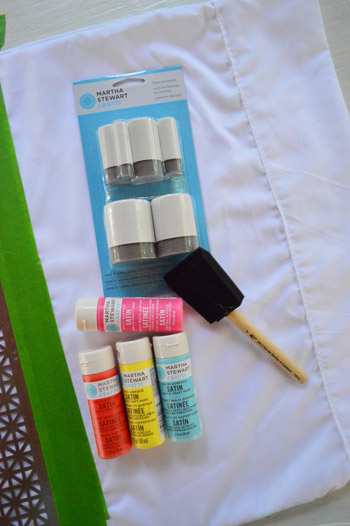
I raided my supply drawer for some Martha Stewart craft paints (they say right on the label that they work on fabric – and they’re only a few bucks a pop so I grab them in colors that I like whenever I see them on sale). I also had these stencil brushes (the ones in the blue package) in my craft basket after using a coupon to get them almost free a little while back from Michaels, so I was happy to finally put them to good use. All told, the only thing I bought for this project was the $9 grate, but if you had to pick up the paint and the brushes and the grate it would probably be around $20 as long as you have some fabric on hand. The good thing is that the grate is reusable, so you could make a few pillows or even a table runner and matching napkins and then make some art/stationery/gift tags with it. Oh man, now I’m thinking about the holiday-gift potential…
Next it was stamping time. I tried not to load my brush up too much (I worried from the start that things could bleed under the grate – and thick paint applications can make fabric crunchy) so I dabbed it on a paper towel a few times to get rid of excess paint before tap-tap-tapping my way around the grate. I tried to do sections of colors in sort of an irregular wave shape, just so nothing looked like obvious stripes and dots, but had more of a sand-art feeling. Oh yeah, who remembers sand art?
Occasionally I blended stuff using a bunch of extra dabs. This is what the blue did on top of the yellow after some extra pats in that area (see how it mixed to create sort of a yellow to green to blue gradient there?).
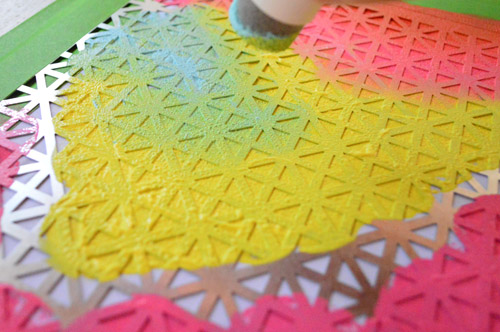
In other places I went with less of a blended edge and more of a defined color-meets-another-color border. It was fun and loosey-goosey and the whole thing probably took me around twenty minutes.
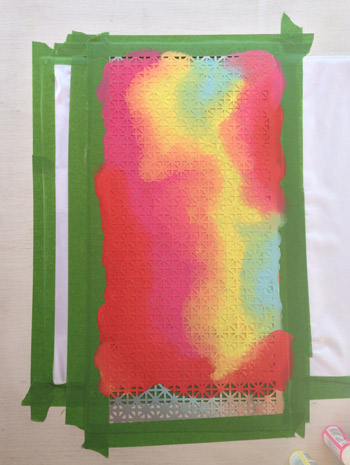
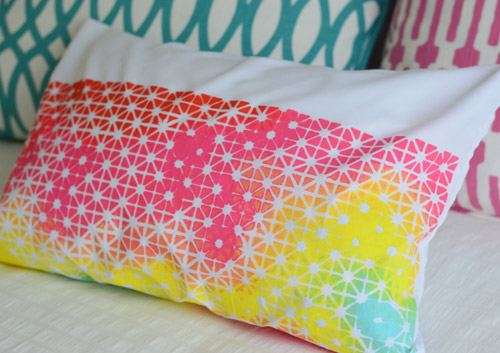
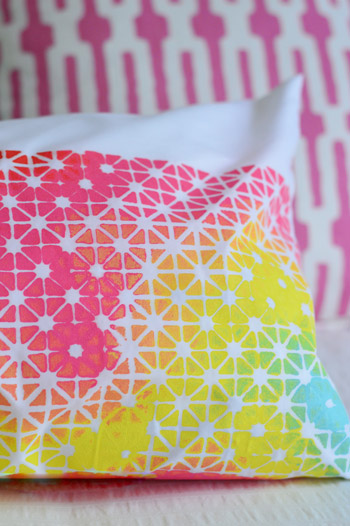
I waited a little while to remove the grate (maybe an hour?) just because I worried I’d shift it slightly while ripping off the tape and smear the whole thing. When it dried and I finally removed it… welp, there was some bleeding in a few areas. At first I was sad, but the more I looked at it, the more I liked the varied/imperfect pattern. It almost reminded me of constellations.
I think if you were going for a perfectly clean-lined look at home, using some stencil adhesive to stick the grate to the paper/fabric might result in a crisper edge, and using even less paint on your brush (and just dabbing it suuuper lightly) would probably cut down on the bleeding issue as well.
But in the end, I’m calling those imperfections a happy accident. Sort of like how you pay the big bucks for those hand stamped block printed fabrics that are cool and irregular… but that’s the charm. At least that’s what I’m telling myself.
Update: For those asking if this is washable, someone commented to say they had luck washing fabric that they painted with the same Martha Stewart product by following the directions on the container, so it looks like it can work! I’d just read the label first to find out what you’re dealing with if you plan to wash the item often (like cloth napkins for example) because other fabric paints might have simpler instructions.
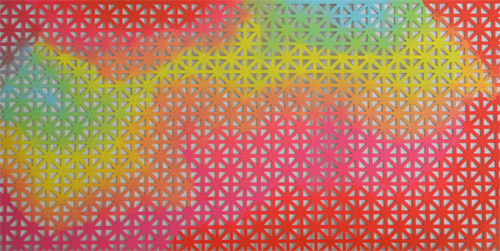
Heck, I also think the grate is pretty great art itself. So you could always just paint the grate and not worry about any bleeding under it and then use a metal snip to cut it to fit a frame.
And now that I’ve mentioned the potential for reusing the grate, I’m kind of excited at the idea of a homemade runner or a matching set of napkins. Anyone else planning to try their hand at some grate creations? Will Ethan Hawke be invited? Will Gwyneth Paltrow bring the crudités?
Psst- Wanna know where we got something in our house or what paint color we used? Just click on this button:


Jude says
Sherry, your little bolster is so pretty! The colors are beautiful, like a sunset on the beach. You have some awesome God given talent.
So happy your family is expanding, you guys are truly blessed.
Have a great day :)
Herta says
So,so great!
Absolutely beautiful effect, the colour combo is perfect.
Mareka says
It’s gorgeous. Looks like a nebula to me. I’m off to Home Depot to pick up the grate. I’m thinking red, white, and blue. Wish me luck. :)
Bonnie Marie Z says
Such a creative and beautiful idea!! I will definitely be trying this one out. Thanks for sharing.
Pam says
Love this idea! I was really excited to see this; we used the exact same grate as door inserts for a table my husband built for our entryway (following Ana White’s plans for the Rhyan console table (http://ana-white.com/2011/12/plans/rhyan-console-table)). Now I have an idea for the leftover piece!
Thanks for being so awesome :)
YoungHouseLove says
So cool!
xo
s
Frannie says
You may have answered this already, but for folks worried about washing, there is a Martha Fabric medium. You mix it with your paint and it keeps it soft and you can wash it. I made a ton of onesies for my little girl with it and they held up great, through multiple washings!
YoungHouseLove says
Love that! We used fabric/textile medium when we painted curtains for our book and loved it!
xo
s
Lauren says
This looks like a design that I would absolutely buy from Society6 – in either a print or a pillowcase (or heck, even an iphone case). I would love to see your artist muscles flexed more both on the site, and in places like Society6 where I can buy :)
YoungHouseLove says
Aw thanks so much Lauren!
xo
s
Wendy says
Sheri,
I tried to find this grate material (HA!) at my local HD last year and they had no clue what I was talking about…even WITH a picture. Do you have the item # from your receipt or something you could tweet me with? Or even what dept to look in?
@wendymari #lilhelp :)
YoungHouseLove says
Ours was in the area with the mailboxes and the house numbers. It’s slipped into cubbies like they display some other stuff (plywood squares, etc) so you’d only see the side of it leaning up in the cubby. It’s a metal heating screen so maybe asking for the venting/heating/cooling aisle is easier?
xo
s
Stephanie says
Great minds think alike! I just picked up an air filter at our local Habitat for Humanity store to use as a stencil for an outdoor rug. I love how the pillow turned out. The bleeding looks like it was planned! Thanks for the craft tips.
Rishia says
Well Sherry, as always you never cease to amaze me. What with that is on your mind right now…you pop this out. I have seen of course on Pinterest every imaginable way to deco a pillow case. Lace as a stencil, stencils, ombre of course….on and on…YOU always come out of left field with something exceptional. As others have said..the flowing of the paint albeit something perhaps not expected, is , for me the beauty of it. I am a ‘folk’ artist, I call it word art, and I use multimedia in my work. THIS technique gives a very 3D multimedia affect to the beholder.
I natch posted this on every possible board of mine and one ‘crafty’ board I am on…Your blog is the ONLY blog I rave
about, explaining the John and Sherry way of things…research, trial, change if needed, practical, thorough and as inexpensive as possible without sacrificing desired outcome.
You really do never fail to amaze me.
Lots of WONDERFUL blogs out there, I can’t keep up with all the ones I choose to follow…..yet YOU TWO are special, so very special….you have got ‘it’ as us old timers would say.
Cherish it, be thankful to be so blessed with your talents…and accept the fact you two are genius persons…that includes Clara of course …such a joy to see her reaction to HER baby brother/sister in YOUR tummy. EXACTLY as I anticipated.
You two deserve every good thing this life brings….sorry so many words….sometimes I just can’t help myself.(: LOVE to all including Burger and the ‘bun’, Nanny Rishia
YoungHouseLove says
Aw thanks so much Rishia! You’re so sweet.
xo
s
Lilja says
To add to the chorus of “uneveness makes it more charming”: At first I thought you had purposely painted the bleeded areas, to add some flower/star detail. Sometimes crafting holds such beautiful surprises :)
(Also digging the geometric patterend pilllows).
Stephanie says
This turned out so super cute! I love the colors that you chose!
Ahsamon says
Sherry, this is absolutely BEAUTIFUL!! I love it! Grate idea! ;)
Cassie says
Sherry, I saw these art panels on One Kings Lane tonight and immediately thought of your grate art! Would be neat to try to do something that mimics these :)
https://www.onekingslane.com/product/27506/1644428
YoungHouseLove says
So cool!
xo
s
Christine says
What I always find myself wondering while I look at your website is “how can they be so creative?!” You are always so creative. How do you look at a grate at a hardware store and image it as something so much greater?
YoungHouseLove says
Aw thanks Christine! It just looked so stencil-ish to me! But so many people have commented with other cool uses for them (magnet board, hurricane holder). It’s fun to think about all the possibilities!
xo
s
Anne O'Brien says
I used the same grate from Home Depot but painted it with magnetic paint and my daughter hung it in her dorm room and uses it to hang stuff on with magnets
YoungHouseLove says
Sounds cute!
xo
s
Lindsay Osborne says
OMG! I was dreaming about this grate and pillow last night. In my dream I even pulled over on the side of a busy road to buy a matching grate. A dream-worthy project! ;)
Emily @ Life on Food says
Framing the grate would be great!! Hehe!
Lindsey says
This is a great idea! I am not very crafty and always am afraid to try DIY and end up spending a fortune on décor. I think I am going to try this in a Chevron! Will post a picture.
YoungHouseLove says
Would love to see a pic!
xo
s
Maya says
Love the idea. Any tips on finding hypoallergenic paint products that last and still look good?
YoungHouseLove says
Hmm, maybe just check out JoAnn and see what they have? Or google around/try amazon.com? Anyone have tips for Maya?
xo
s
Kate Craig says
You forgot to say you also need an artistic eye ;) I love your colors/pattern! And the bleeding doesn’t bother me at all. I really think this looks store-bought, not DIY-ed!
Lara says
Great tutorial! I’m sure the same idea with the stencil and paint can be used on a solid-colored patio pillow to change things up too.
meaghan says
what!? that is too cute.
Jill says
This turned out fantastic! Love the colors you chose and the way you blended them!
Carissa says
I just got so inspired I feel like my brain is on fire.
Kate Hougen says
Love this!! And napkins made from Clara’s artwork in the same or similar colors would be a wonderful sequel to this – and great addition to your new kitchen table. Would love to make some for you! :) -Kate @MiraJeanDesigns
Bailey says
I love it – what beautiful colors! And while I had to look hard to find the “imperfections” you were mentioning, they definitely add a “twinkling” effect to the stars. Wonderful craft project!
Bailey
http://akaBailey.blogspot.com
Kim says
Just saw this on a 4-panel print that totally reminded me of your grate experiment. https://www.jossandmain.com/Oliver-Gal-Artist-Co.-4-Panel-Vida-en-Tanger-Canvas-Print~HOTG1192~E7734.html Thought you’d be inspired. Really like how your print turned out.
YoungHouseLove says
So much fun!
xo
s
Mackenzie says
Question… What was the size of the cushion you used? I assume you also had it lying around the house? I love this idea, but I think I will need to buy a cushion.
YoungHouseLove says
It’s just a little lumbar cushion I had from our first house. It’s around 18 x 9″ – hope it helps!
xo
s
Courtney says
Hey Sherry!
I went to Home Depot last night to try to find the grate and didn’t have luck finding the one you used. The nicest man ever tried helping us find them but we only could find grill grates (expensive) and the cheap $1-$2 flimsy grates. I know you said it was near the mailbox section in your store – any other pointers on what the grate is called or where it would be? Thanks for your help!
YoungHouseLove says
Maybe saying “heat registers” would help? They’re leaning up in wood cubbies, sort of slid into them vertically. People use them for radiator covers so maybe mentioning that helps too?
xo
s