Upgrading to a larger bed meant we needed to swap our big bedside tables out for something smaller. So we whipped up this super simple plan for DIY nightstands that *perfectly* fit the space. They require only one material (butcher block counters!) and minimal cuts, meaning it’s a building project anyone can do.
By using a chunky material like butcher block, you not only get a modern look, but it also makes them super sturdy. You don’t have to do any fancy construction techniques like shelf supports or sliding drawers. Again, super simple!
Why Build Custom Nightstands?
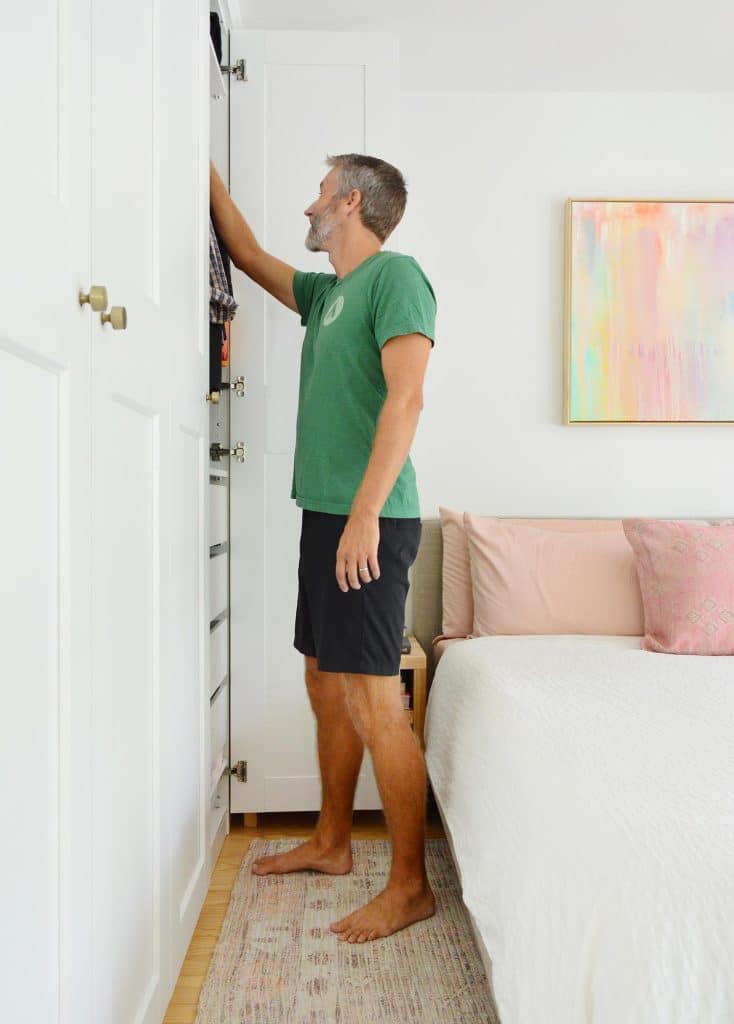
To fit our new king-size bed in our room, we had to position it slightly off-center on this wall. It’s only by a couple of inches and not super noticeable, especially due to a secret about our bedroom that we reveal in the video below. But putting the bed off-center was important for giving us enough space to access our closets.
This slightly asymmetrical situation left us with a few options for getting new nightstands:
- Finding matching nightstands that (miraculously) came in two slightly different sizes
- Embracing that non-matching nightstand look
- Getting two smaller nightstands, and leaving a little gap on my side
- Build our own!
All of the options had potential (except for maybe #1). But since our desired measurements were pretty specific, we decided to build our own!
See Our DIY Nightstands On Video
Not to jump ahead, but a lot of this will make more sense if you watch this short video. In it you’ll see:
- Why we needed two differently-sized nightstands
- How we maintained room for the closets to open
- What the wall of the bedroom does on Sherry’s side of the bed
- What we store behind the closet door that’s fully blocked by the nightstand
- A quick tip for adding more storage to your DIY nightstands
Note: You can also watch this video on YouTube.
Saving Money By Building DIY Nightstands
We also realized that building our own bedside tables would save us quite a bit of money. Just look at some of the inspiration we found online! We knew we wanted something modern, chunky, and wood, but many of the storebought options were surprisingly pricey… especially if we had to buy two!
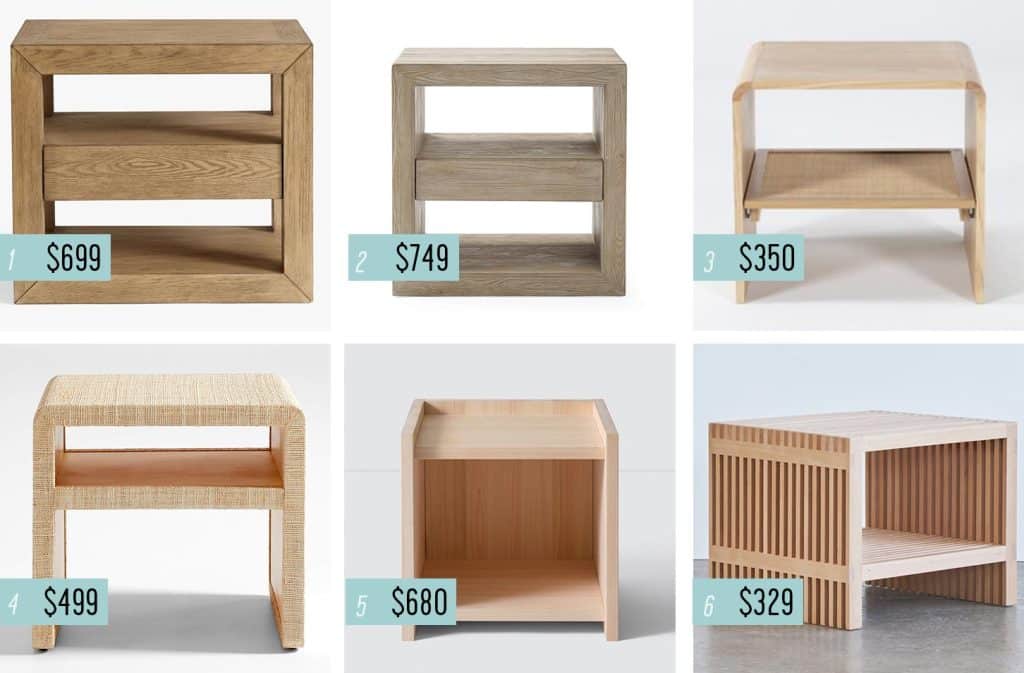
The good news is that our final cost for BOTH nightstands was just $310. And that’s just for two materials – wood and oil. That means each one breaks down to about $155 for a super substantial solid wood nightstand. Not bad!
Materials & Tools Needed
We knew this butcher block would be great for recreating this look. We’ve used it elsewhere in our house, like our utility closet and the built-in cabinets in this same bedroom. The color works great with our floor and the chunkiness can elevate a store-bought cubby or an Ikea cabinet. But if you’d rather another wood, you can still follow the same building plan.
- Butcher block counter (we purchased the “island” size)
- Circular saw
- Kreg Pocket Hole Jig
- 2″ pocket hole screws
- Power drill
- Clamp (we used our Kreg clamp for pocket holes)
- Power sander and medium- or high-grit sandpaper
- Cutting board oil
- Measuring tape
- Painters tape
- Pen, pencil, or marker
- Rag or paper towel
Step 1: Plan Your Build
Even though the butcher block slabs are cheaper than those store-bought nightstands (the island size, 72″ x 39″, is $300) it’s still pricey. So we really wanted to get TWO nightstands out of ONE piece of wood. Sherry and I sketched out a few options, crunched some measurements, and came up with a design that we were excited about and didn’t waste wood.
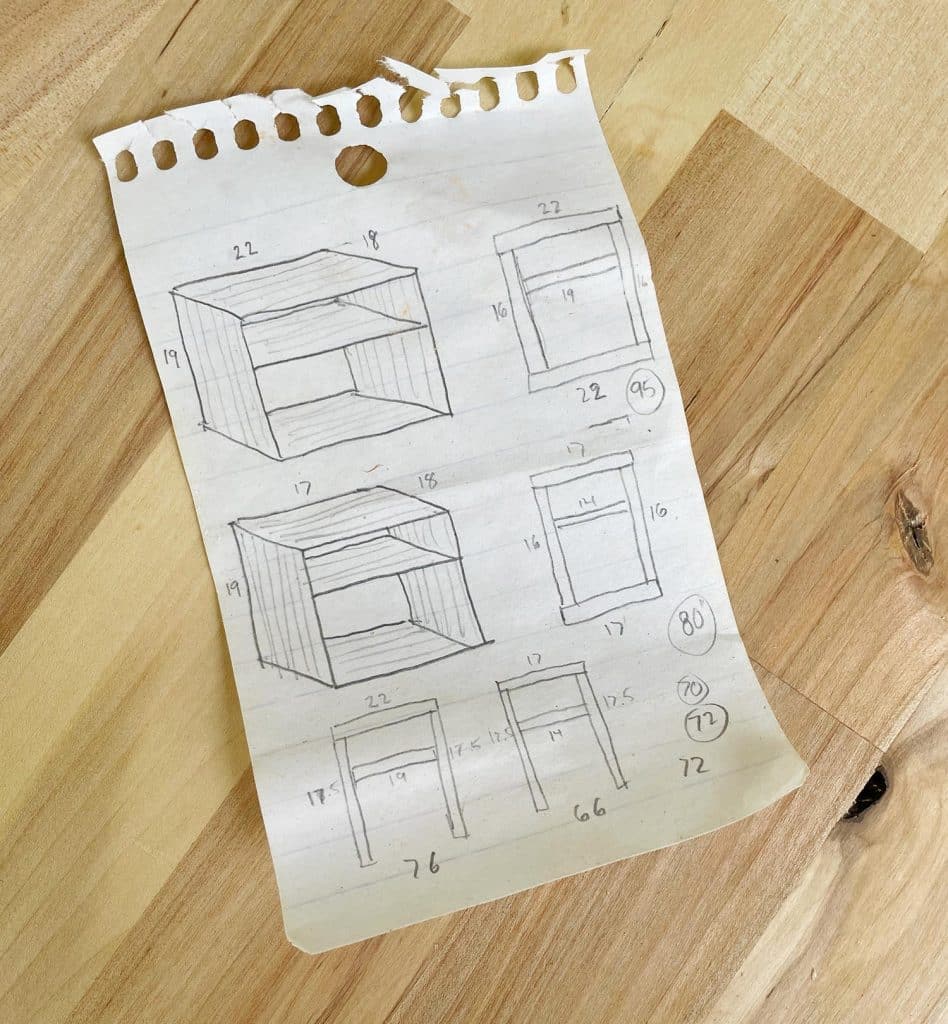
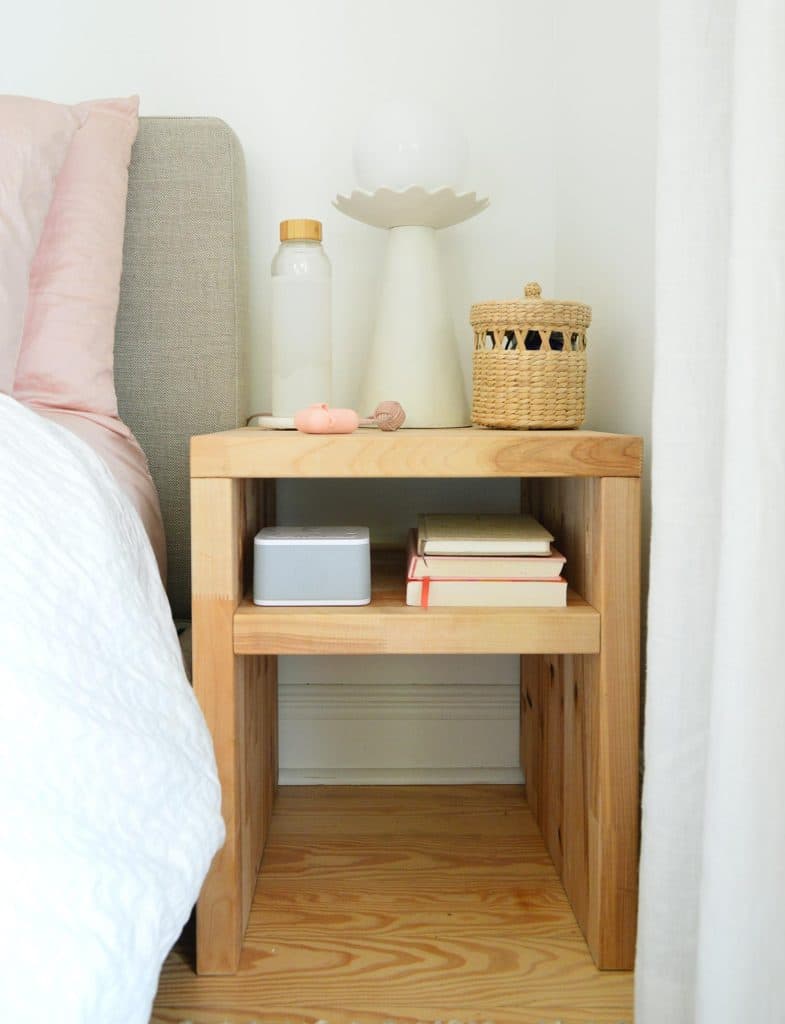
You can see from my rough drawings above that we debated a version with three horizontal surfaces (more on that in the video we shared above). Ultimately we scrapped the bottom shelf, leaving it the profile looking more like a blocky “A” instead of an “8.” The bottom shelf didn’t feel necessary and would only make the nightstand heavier. Bonus, it’s easier to clean under for our robot vacuum to clean under!
Step 2: Cut Your Butcher Block To Size
Using a circular saw, we cut the butcher block island twice down the center area to give us two 18″ wide slabs. Each slab would become one, 18″ deep nightstand. Alternatively, you could cut it exactly in half, one time, leaving you with two 19.5″ slabs. For us, that would’ve made them too deep and it would block access to my closet door.
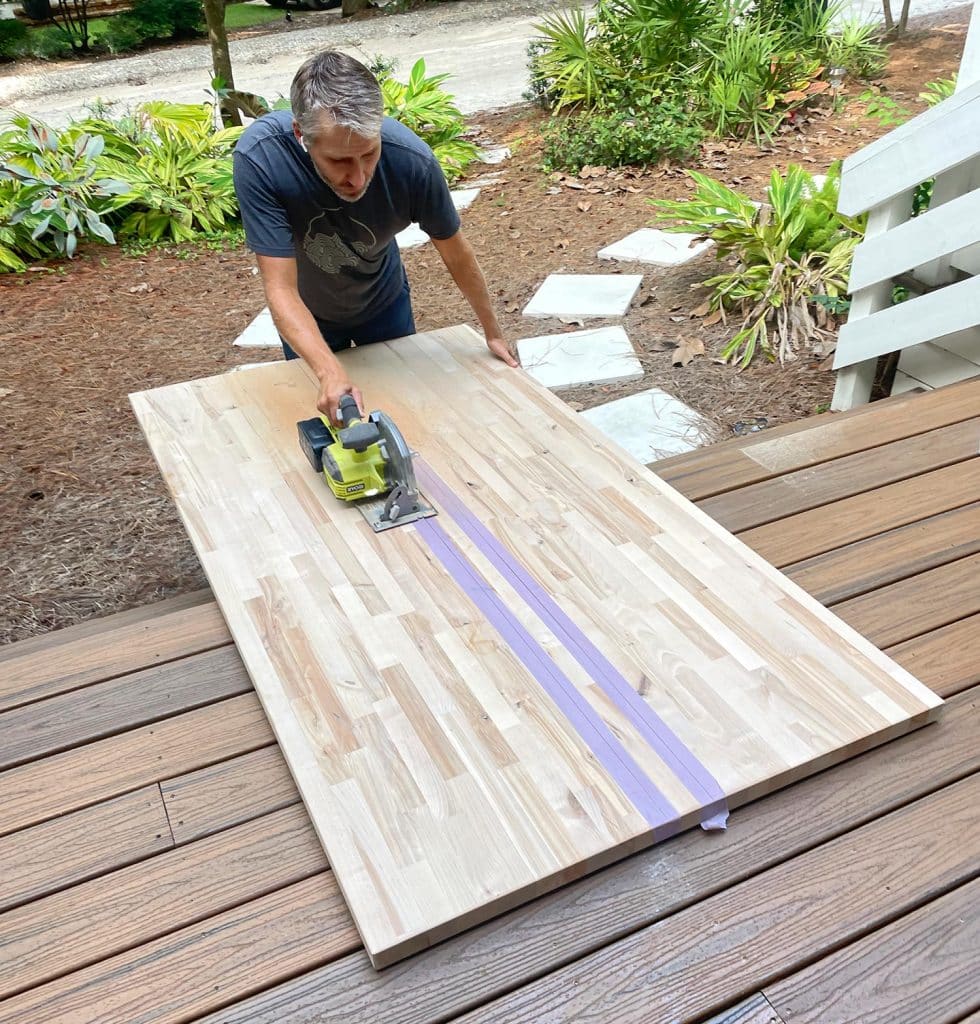
I realize my front porch “workshop” leaves something to be desired, but it gets the job done. And don’t worry, I make sure that to never cut the actual decking. We spin the piece around to finish our cuts so the blade is always hanging over the step. Also: wear safety goggles. I got them on right after that shot above (see the picture below).
Once I cut my two 18″ slabs, I measured carefully and cut each into the 4 pieces needed for each nightstand: 1 top, 2 sides/legs, and 1 shelf. Although, I actually waited to cut the shelf pieces until the other 3 pieces were assembled. That way I could double-check my measurement for a tight fit.
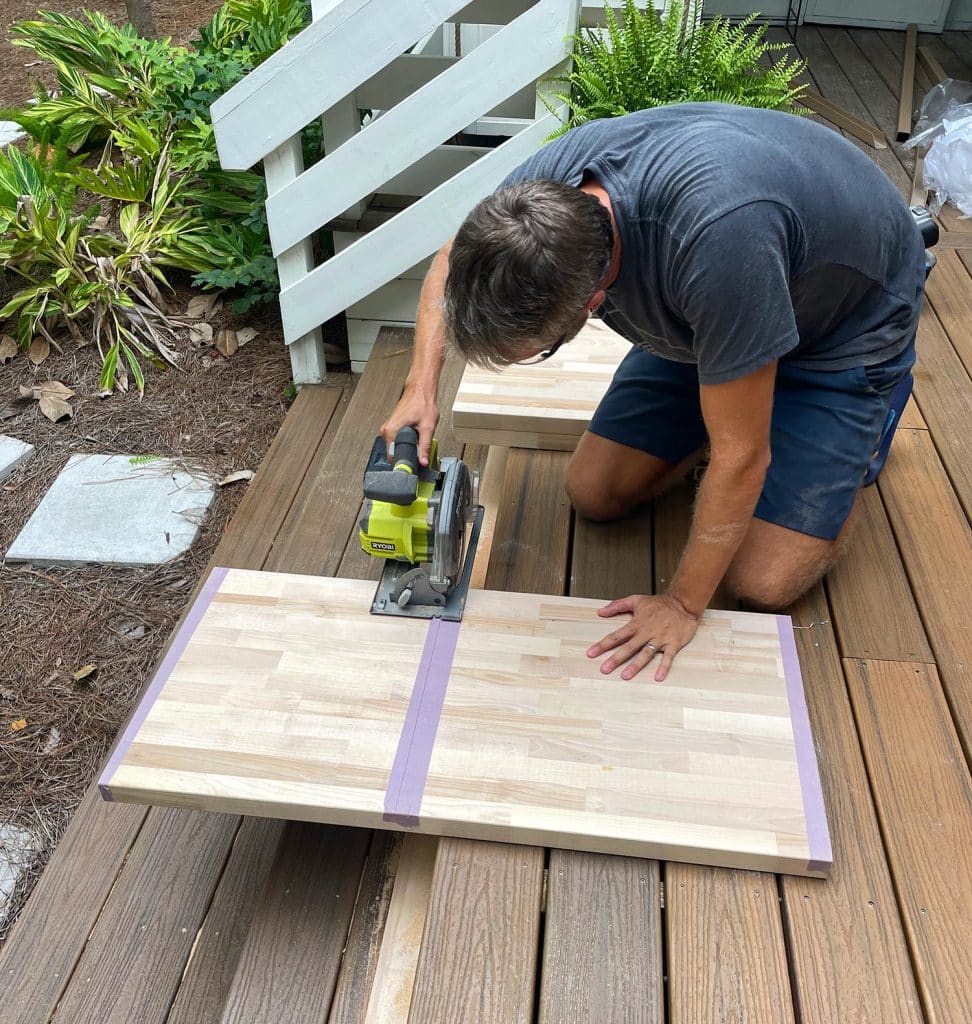
You’ll also notice we use painters tape on each of our circular saw cuts. This not only creates a surface to draw a line on (without marking up the actual wood), but it also prevents chipping and splintering.
Step 2: Label Your Pieces
After my cuts were made, we roughly balanced the tops on each set of legs to check our progress. We also chose which sides of each piece we wanted to show – like which surface the fewest knots, which edges had the prettiest grain pattern, etc.
Once we determined our layout, we used painter’s tape to loosely mark the orientation of each piece.
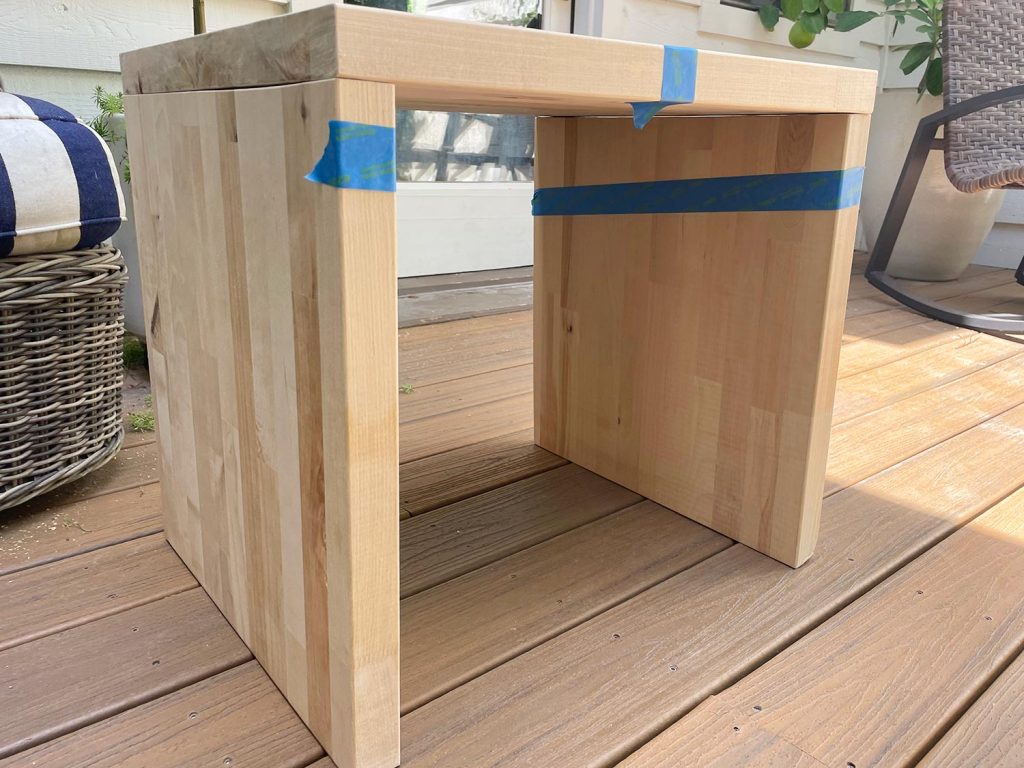
The long pieces along the inside of each side piece were especially helpful to remind us once we proceeded to the next step: drilling our pocket holes.
Step 3: Drill Pocket Holes In The Legs
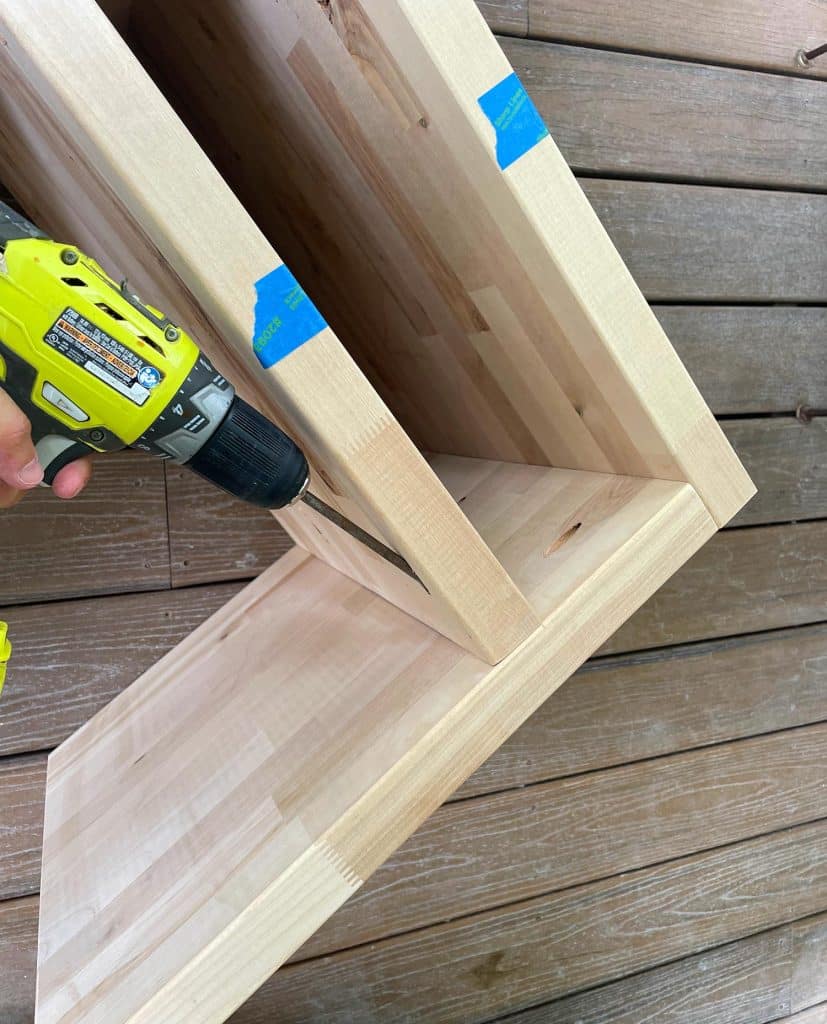
To attach the side pieces to the top piece, we wanted to screw up from the inside of each leg into the top – that way we wouldn’t have any visible holes on the top of the nightstand. To do this, we used our Kreg Jig to drill three pocket holes on the inside of each leg (this is where our tape markings helped remind us where to drill). Here’s where you can learn more about how to use a Kreg Jig. It’s an MVP tool we’ve had for over 12 years!
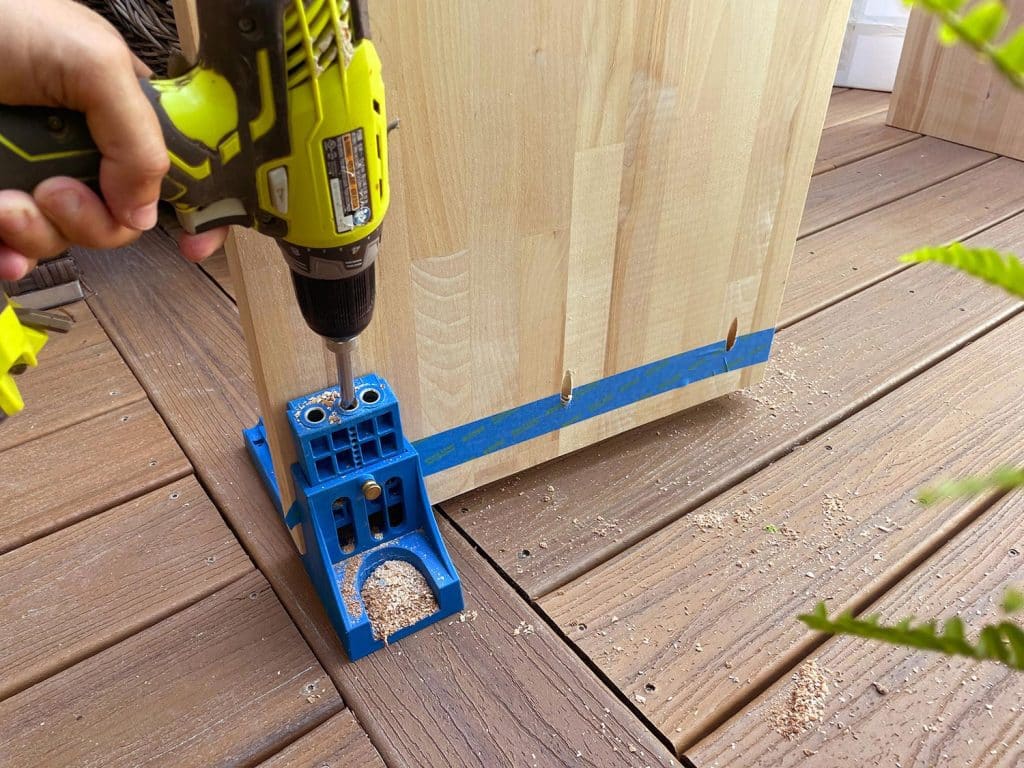
I drilled all of the pocket holes for the legs in one step since it saved me from switching out my drill bit back and forth for the next step.
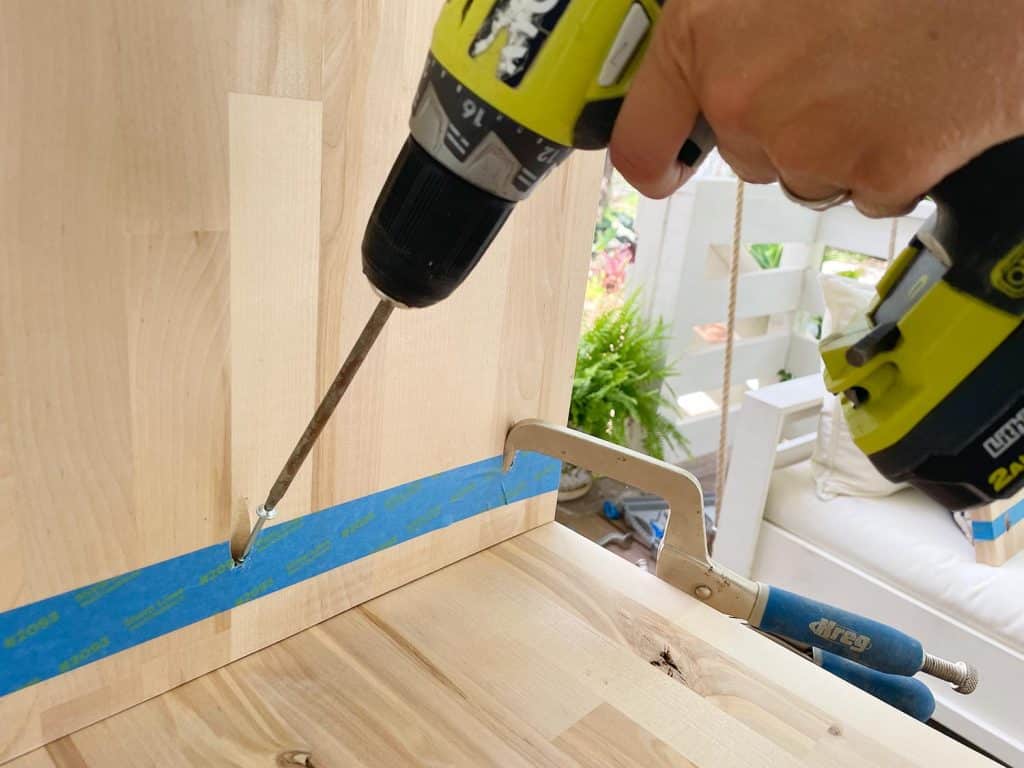
Step 4: Clamp & Screw The Legs To The Top
With our pocket holes drilled into each leg, we turned the top piece upside down and clamped one leg in place using this clamp designed specifically for pocket holes. This helps keep it precisely in place while you drill, so you don’t have any last-minute shifting.
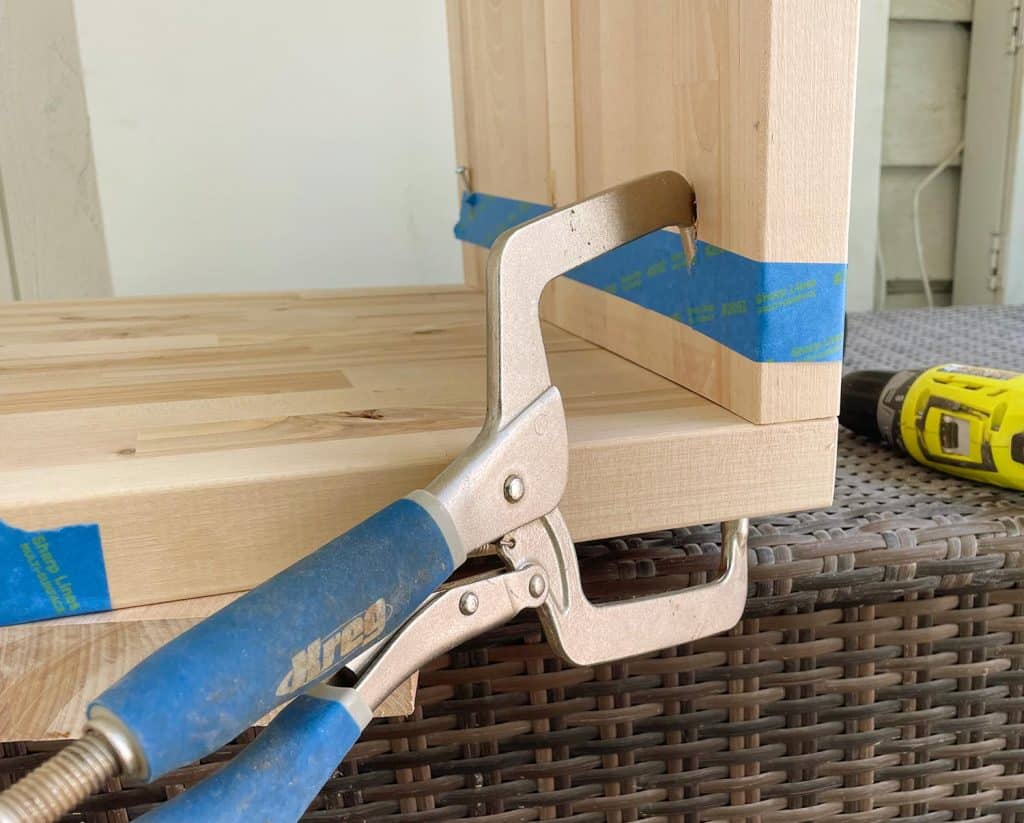
With one end securely clamped, we carefully screwed through the other open holes using 2″ pocket hole screws. Once those were secured, we removed the clamp and screwed through the last pocket hole.
Then we just repeated the process on the other leg, and then again for both legs of the second nightstand.
Step 5: Repeat This Process For The Shelves
With the top and legs attached, we measured the precise length for each shelf and made our final cuts using our circular saw. Then, we broke out our Kreg Jig again to create three sets of pocket holes under BOTH ends of each shelf piece (being sure to drill them on the underside).
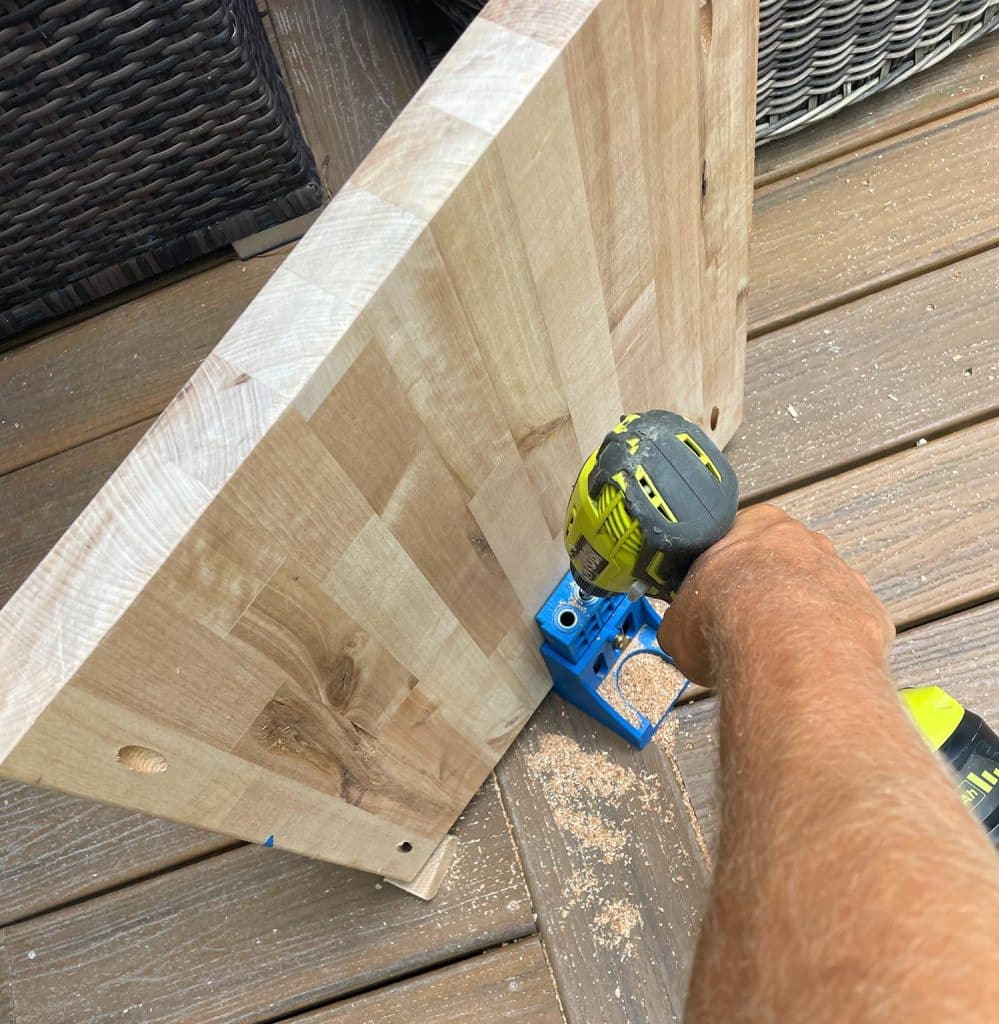
Next, to attach each shelf, we laid each nightstand on its back and set the shelves in place (we had cut them to be such a tight fit they basically held themselves upright). Finally, we screwed them together just like we had done before.
We chose a 5″ gap for our shelf, but it’s really up to you. We had tried something a little bigger at first but it almost looked like we had mismeasured the halfway mark. So the smaller 5″ spacing made the shelf look more intentionally placed towards the top of the table, which we really liked about the shape of table #4 below:
Plus, it’s turned out to be super functional for us, as you’ll see in the afters below.
Step 6: Sand The Edges
To make sure all of the edges, especially the cut ones, weren’t too sharp – we gave all of the exposed corners and edges a quick sanding with some medium- and then high-grit sandpaper, just to round them off ever so slightly. That way if we bump against these or reach over haphazardly in the night, we’re not gonna slice ourselves open on some raw edge of wood.
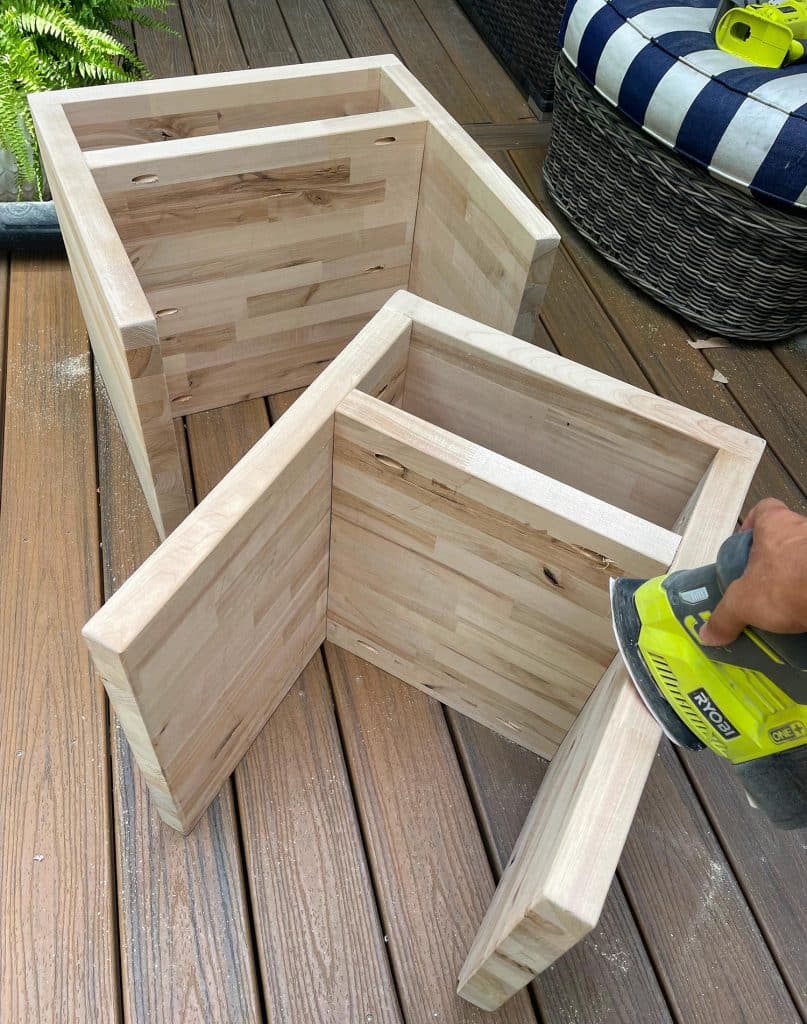
Just be sure to thoroughly wipe down or blow off any sanding dust before proceeding to the next step.
Step 7: Seal The Butcher Block With Oil
Our favorite way to finish off butcher block is with a single coat of Cutting Board Oil. It darkens the wood a bit and brings out the grain nicely, while also sealing it. It’s extremely easy to apply.
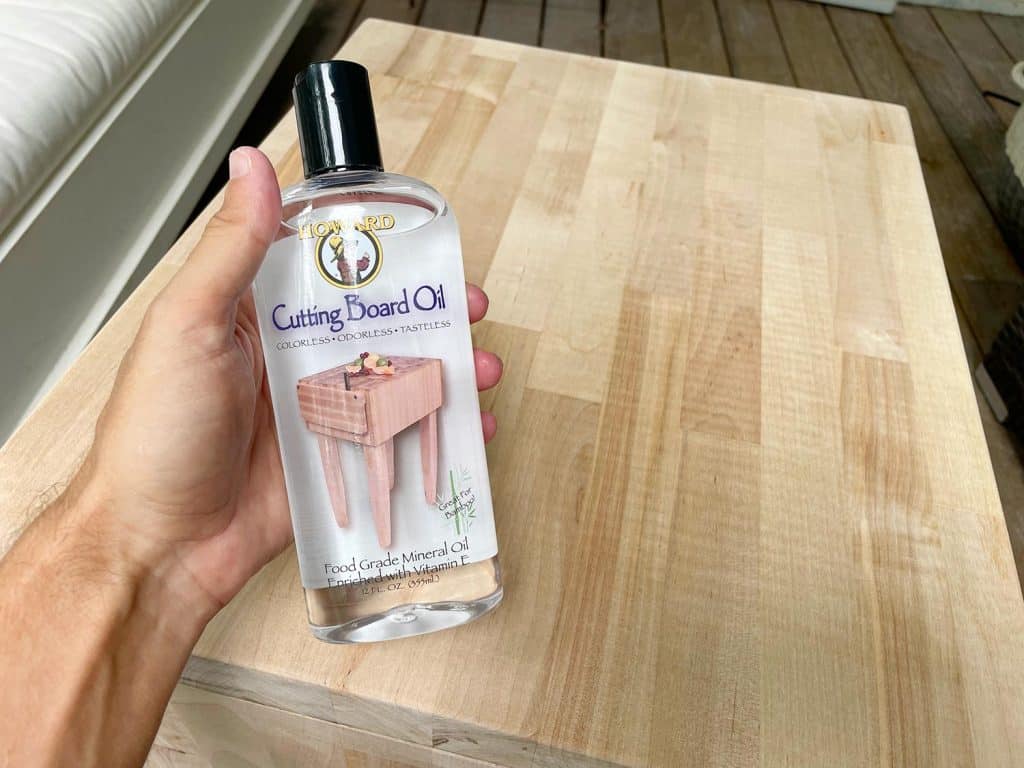
We typically pour a small puddle directly on the butcher block and then wipe it around with a rag or paper towel until it has all soaked in. It lightens up a little bit as it dries, so don’t be too alarmed if it feels much darker than the unfinished wood at first.

And of course, if you’d like a more specific color you can always apply stain or sealer instead.
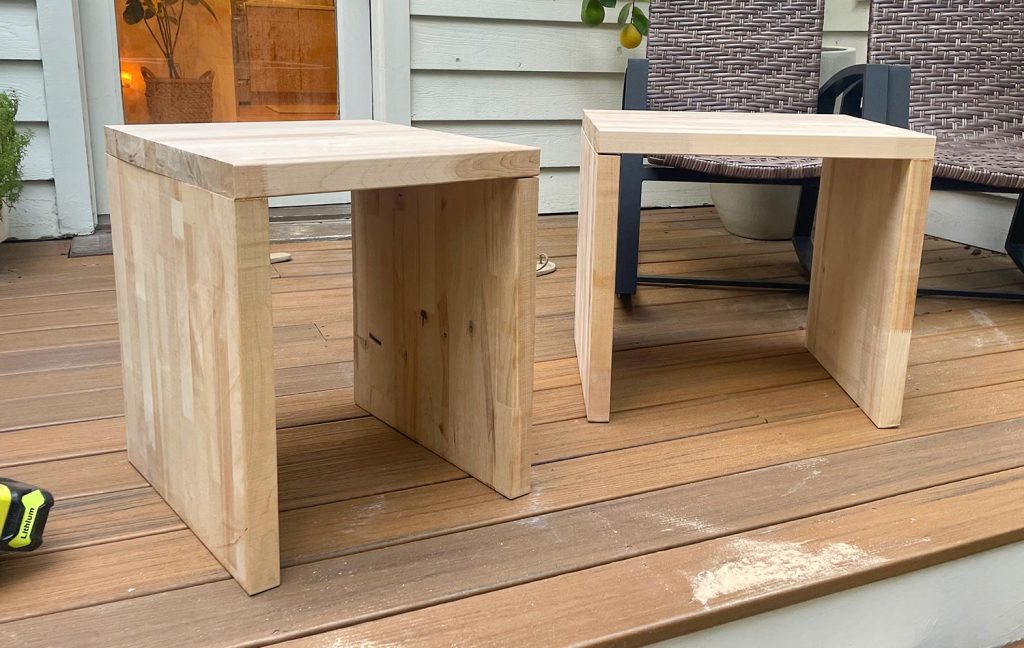
Step 8: Let Dry & You’re Done!
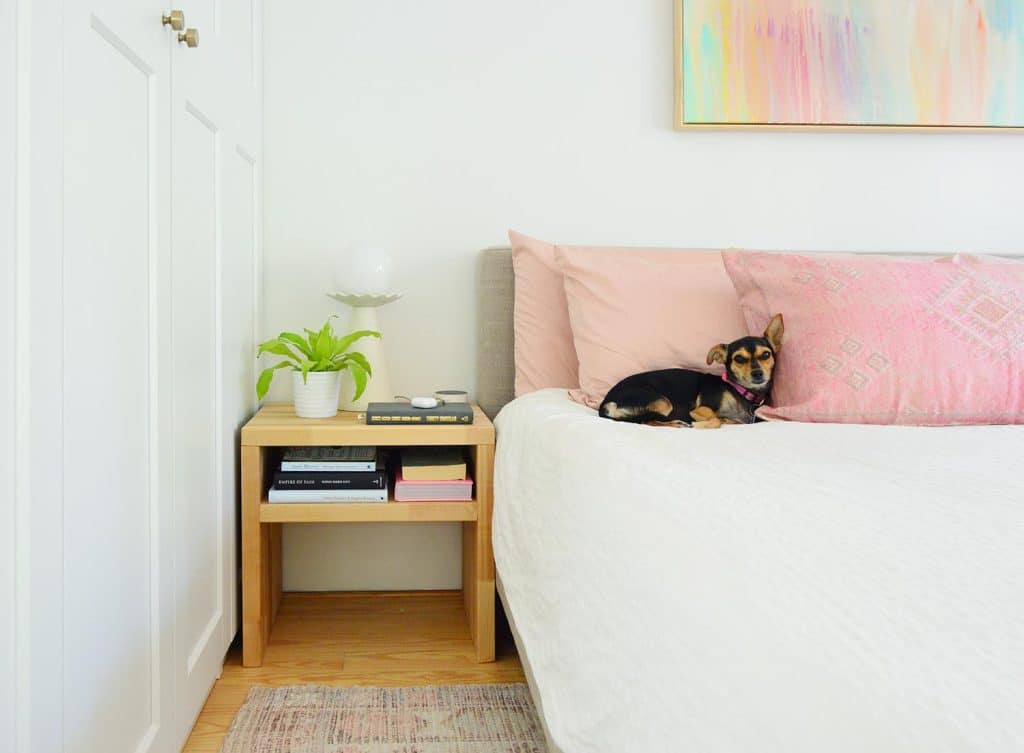
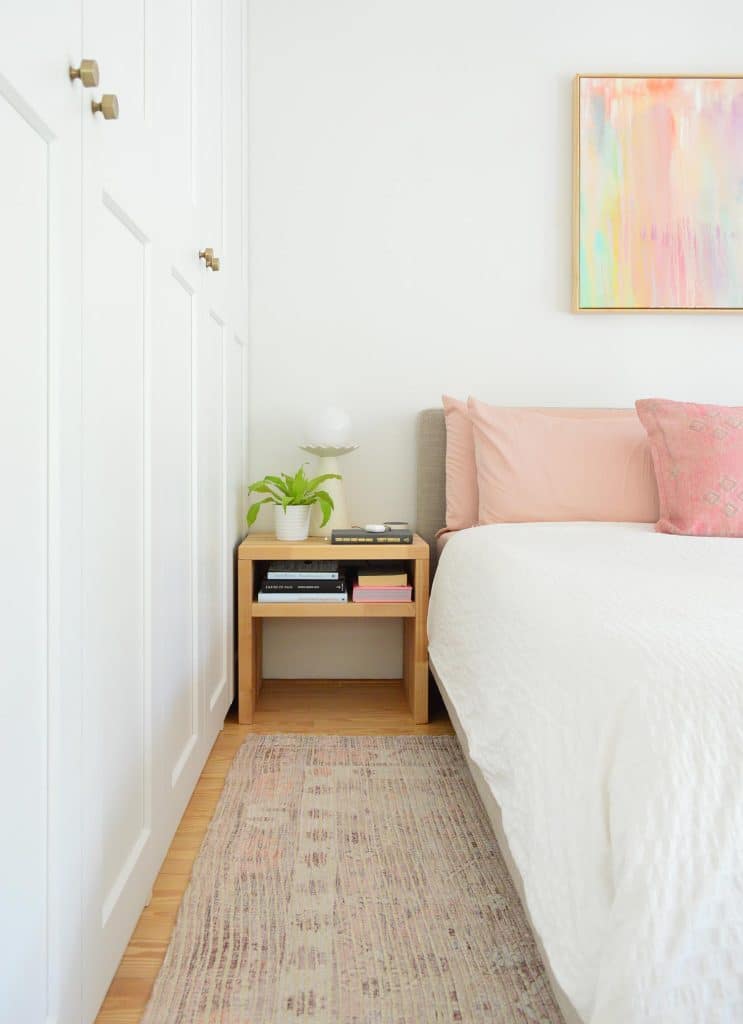
We gave our DIY nightstands about a day to dry before putting them in place, and we’re really happy with how they turned out!
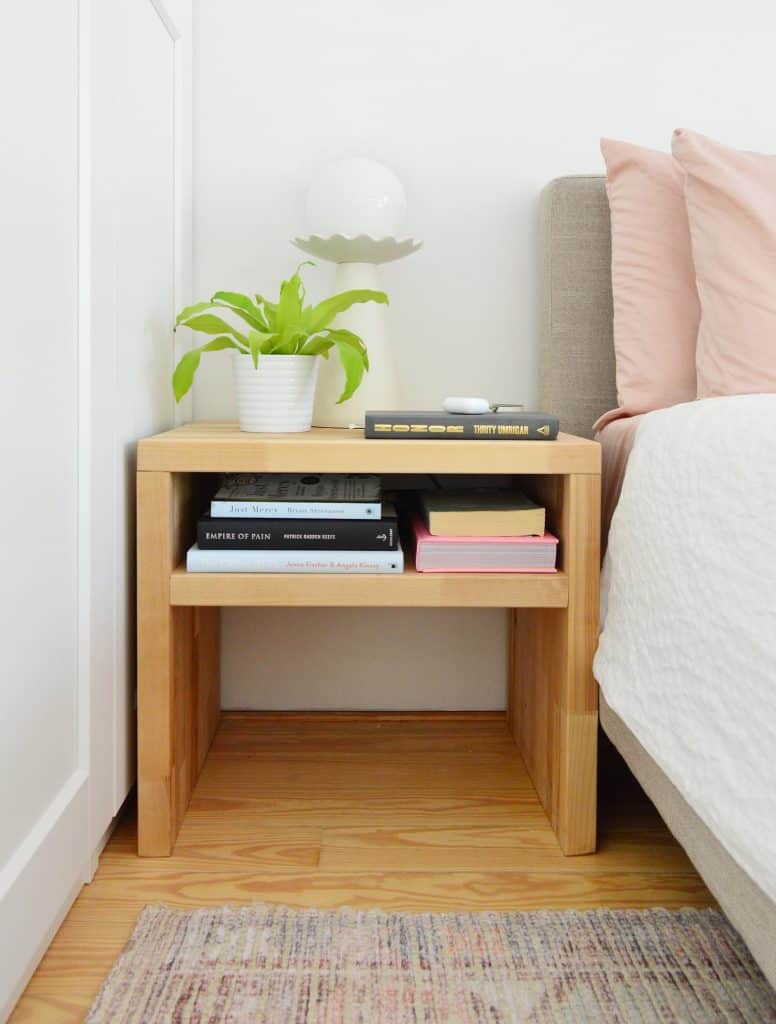
They fit perfectly on each side of our bed, just as we had planned, while also giving us more function than we originally thought we’d get. At one point Sherry had been willing to settle for a basic garden stool as her bedside table!
Storage In Our DIY Nightstands
We’ve considered storing things underneath – like a basket or something we can slide in and out – but every time we’ve put anything down there it just looks unnecessarily cluttered and we don’t need the space. So unless we actually need to store something there down the line, we’re happy to leave it empty. Plus, it really is a sight to see our robot vacuum happily spinning around to get each corner in there.
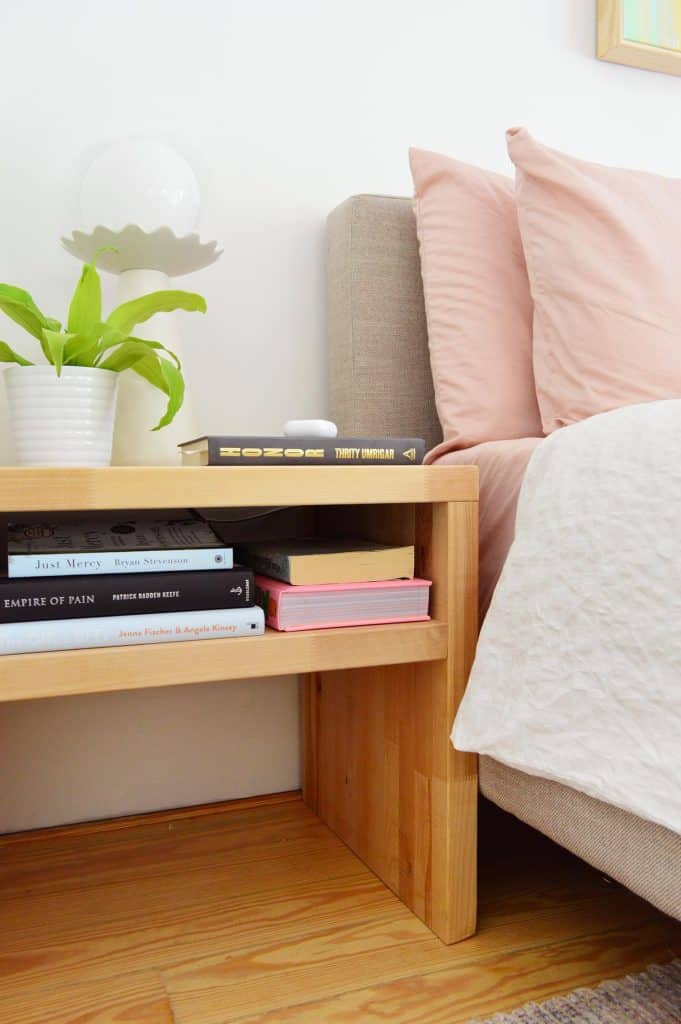
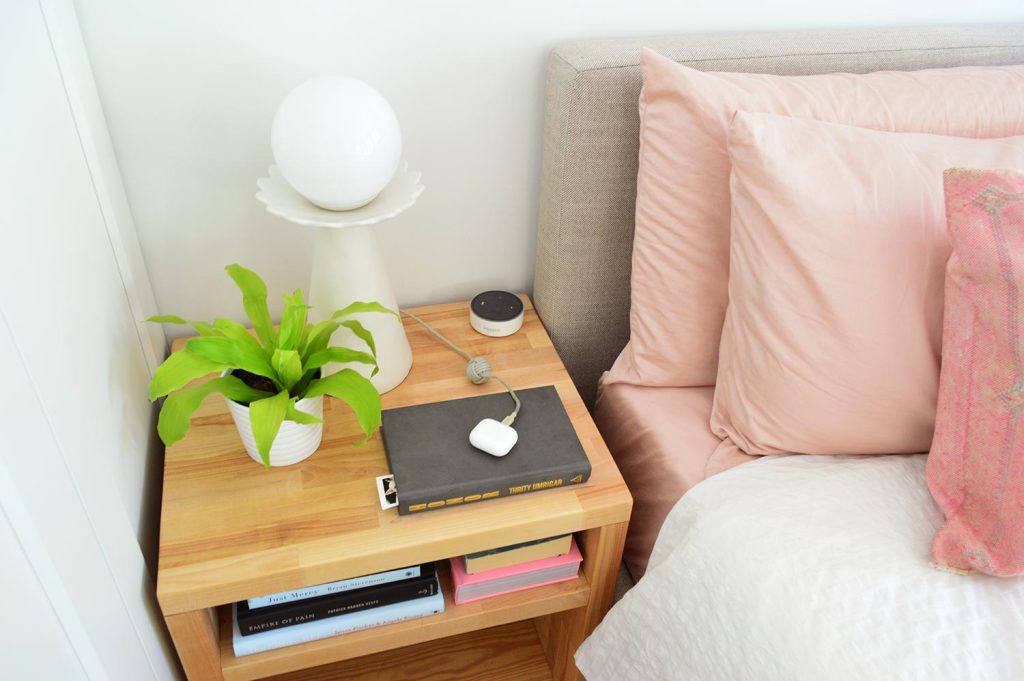
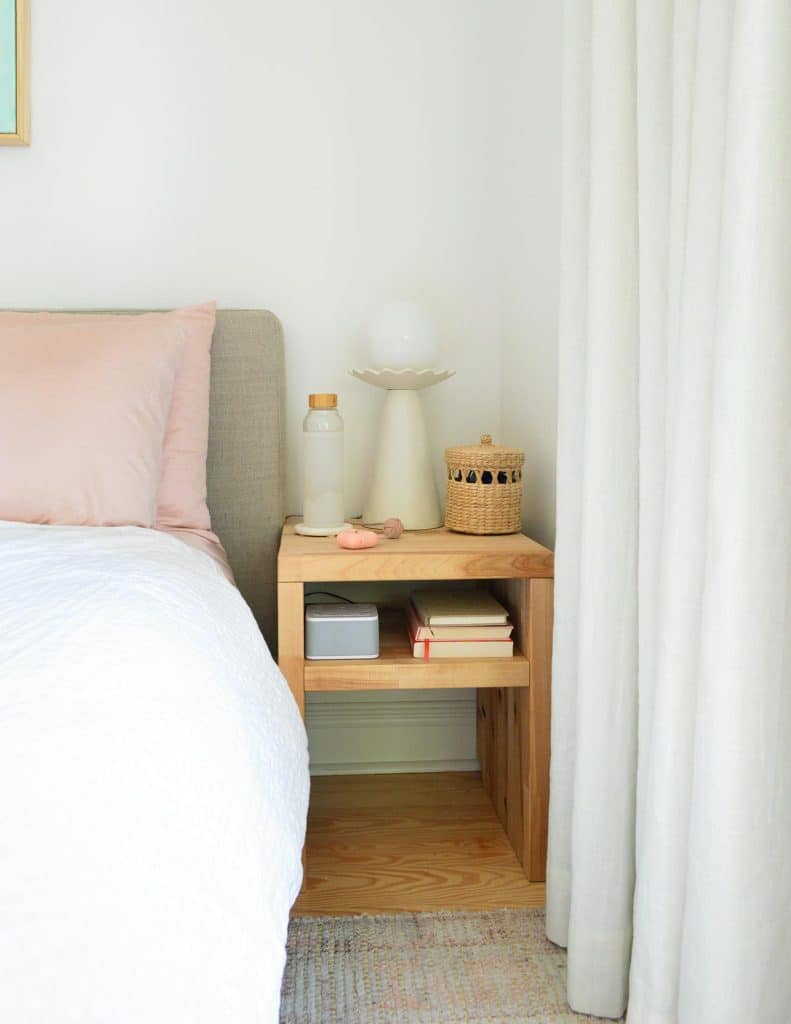
My nightstand is 22″ wide, so it has given me plenty of surface space for books, chargers, a lamp, our Alexa, and even a plant. In fact, it usually has more on here (like a water bottle, baseball cap, or a rogue Skittles wrapper) but I tried to be less of an animal for these pictures.
Sherry’s is definitely a bit narrower at just 19″, but she found this small woven storage basket that wrangles all of her bedside stuff – contact lenses, chapstick, nail clippers, and what I assume is a large collection of poems professing her love for me. (What?! They’re her blue light glasses? OK fine.)
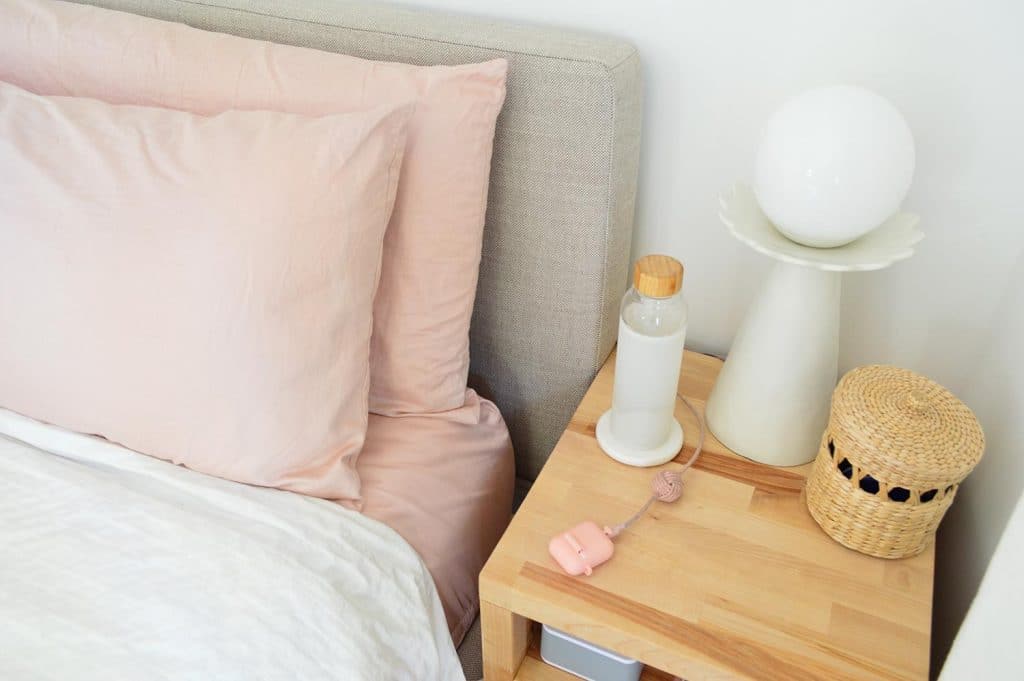
Sherry’s side may look cramped in these photos, but if you watch the video you’ll see that she’s got plenty of space to move around thanks to that *special* wall in our bedroom.
More Bedroom DIY Projects
If you want to read more about how we added storage and style to our bedroom, you can also read about our hacked Ikea cabinets by the fireplace and how we added built-in closets too. And of course, there’s the whole story about why we finally upgraded to a bigger bed in the first place.
More DIY Building Projects
Here are some other DIY furniture projects and easy builds you might be interested in – especially if you’re looking to add some extra wood storage.
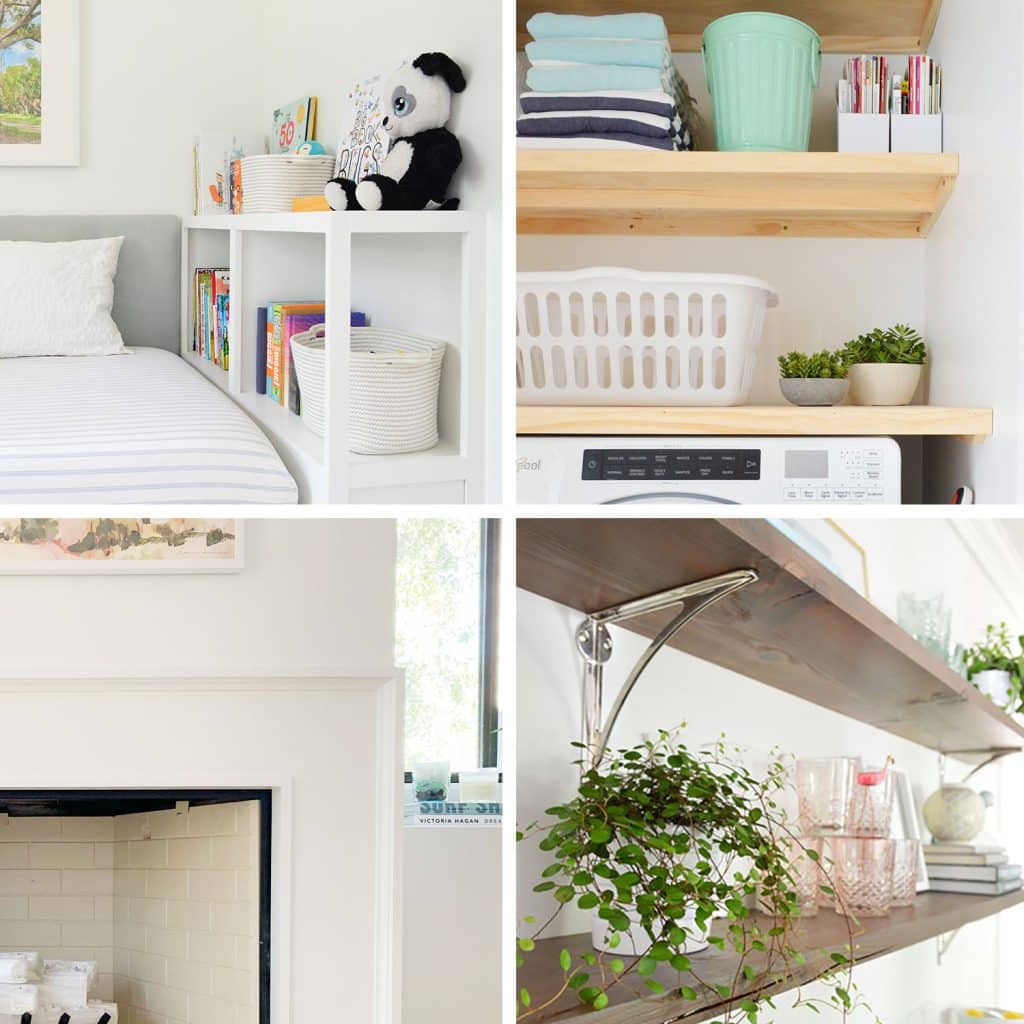
- How we made a built-in bedside bookshelf for our son
- Making quick & easy plywood shelves in our laundry room
- How we built a modern fireplace surround in our bedroom
- Creating reclaimed wood shelves in our old kitchen
*This post contains affiliate links, so we may earn a small commission when you make a purchase through links on our site at no additional cost to you.
