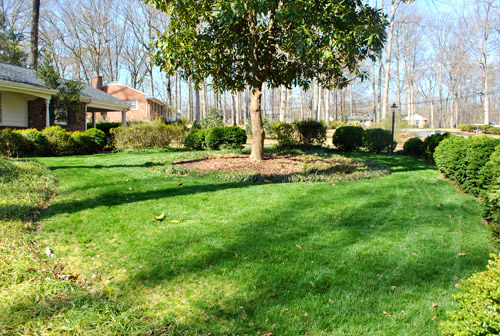
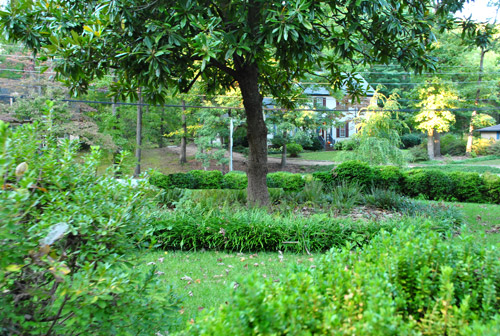
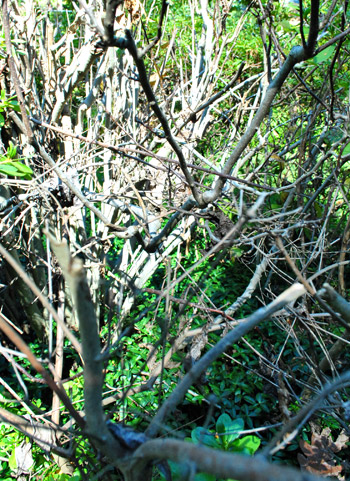
We did it! Over the course of two nice long Clara naps (and with a little help from a friend) we managed to open up our front yard in what we like to call “Phase Two Of Ten Million” when it comes to slowly transforming our front yard. Why so many phases? Well it started out looking like this:

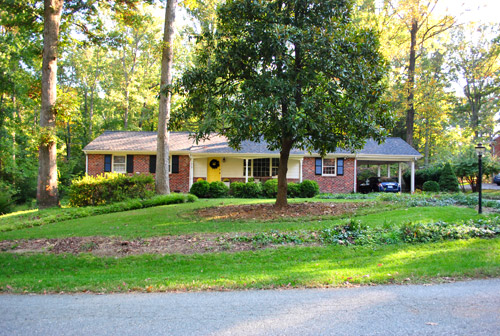
Much like our first house’s yard, we figure it’ll take a few years of tweaks to get it where we want it, so this phase was just about clearing things out for a you-can-actually-see-the-house-now effect (Phase One was limbing up the magnolia). In short: we dug up/transplanted/removed a ton of bushes (with the help of a friend of ours who took home some boxwoods in exchange for helping us get a bunch of them up). This post is full of photos, so I’ll let them do the talking. Without further ado, here are the before and afters (we tried to take photos from the same angle for comparison). First there’s the AFTER to the before above (don’t mind the black feather wreath out there on the door for Halloween):
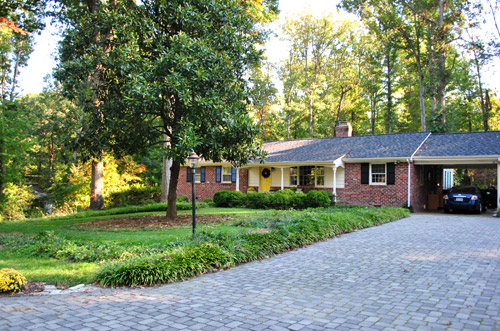
Here’s another BEFORE for ya from the driveway:
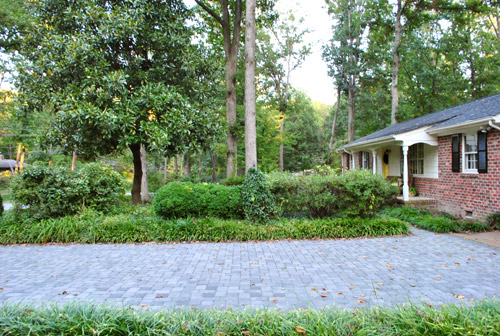
And another AFTER from the same angle (a little further away):
Another BEFORE:
And the AFTER:

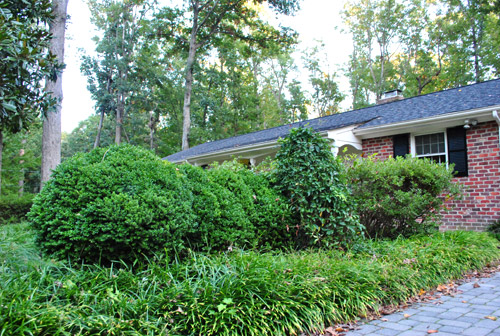
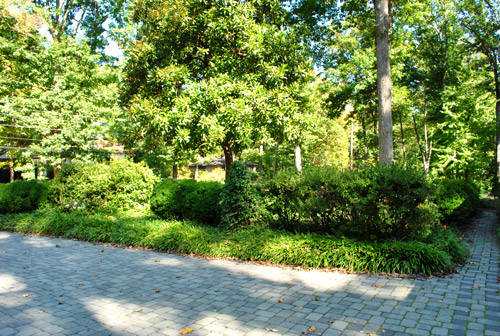
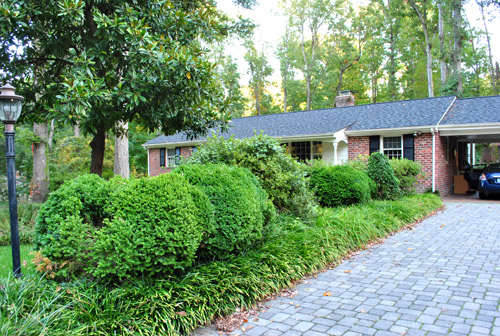
Here’s a side-angle BEFORE:
And an AFTER from the same POV:
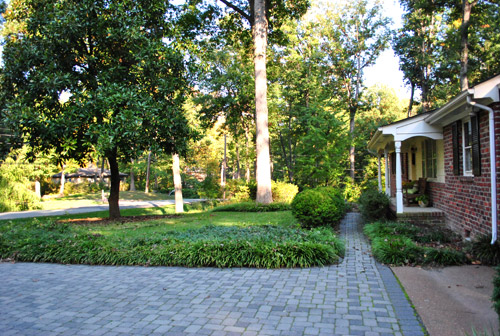
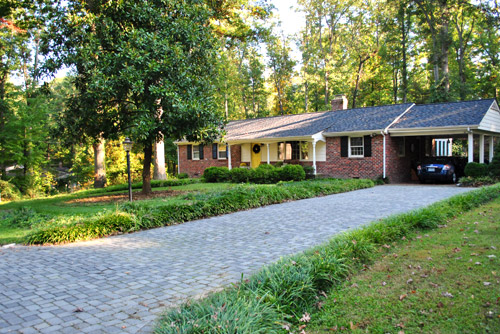
Another BEFORE facing more towards the street:
And the accompanying AFTER:
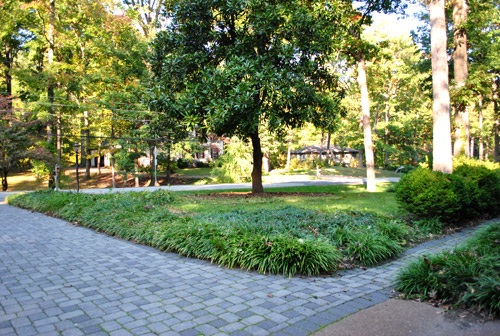
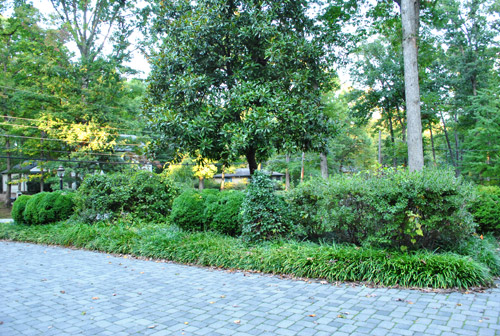
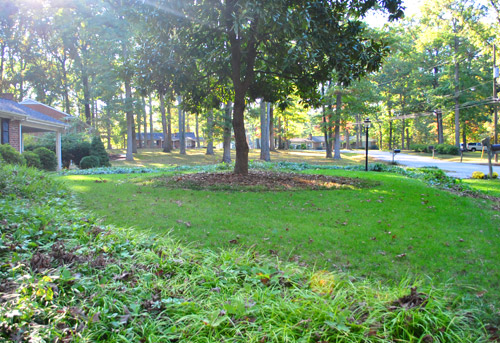
Here’s a BEFORE from the other side (the bushes used to completely stop the eye so our yard felt way smaller):
And here’s the AFTER from the same angle:
Yet another BEFORE:
And another AFTER:
Here’s how it looked from the front porch BEFORE:
And AFTER:

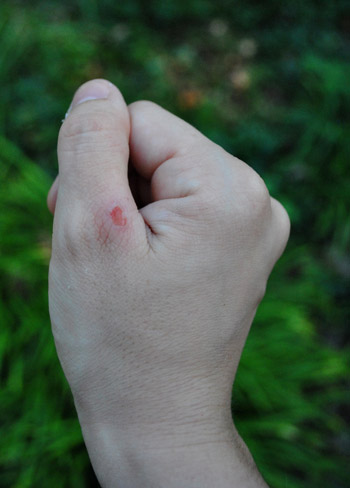
The only drawback? I got me a blister. So in that aspect it was exactly like Phase One (seen here). Totally worth it though. No pain, no gain.
As for where we put the bushes that we transplanted, we just dug them up…
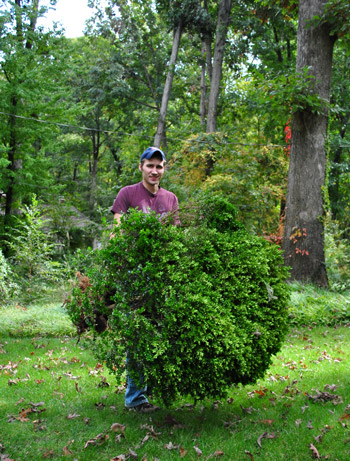
… and planted them in the naturalized parts of our side and back yard (and our friend who helped us dig made off with the rest of the healthy ones). Sadly some of the bushes were dead…
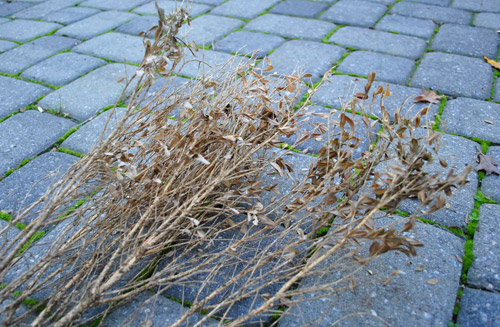
… so those just got removed with a sawzall (aka this reciprocating saw by Skill). Which was probably more fun to use than it should have been (it was actually our first time sawzalling, so we took turns and grinned like fools the whole time). And you know we loved the fact that this big curb appeal makeover was f-r-e-e (well, I guess it cost us a few boxwoods in return for some helpful friend labor, but it was foliage well spent).
As for our future lawn plans, we’re definitely just getting started out there – so there are a lot more phases on the over-the-next-few-years agenda. We’ve got plans to:
- dig out some ivy/monkey grass
- lay down some grass seed in certain areas
- layer in some low maintenance native (and less vinyl fence-like) plantings to soften things up around certain areas of the perimeter
- landscape around the front of the house (there are hardly any plants on either side of the porch – so it’s just sort of a mud pit in those areas)
- do a million other things that are slipping my mind at the moment (one big one: convert the carport to a garage)
So this step was just about clearing things out to make way for some less house-obscuring choices and opening things up to let the eye travel a bit further in certain places. Feels nice to let the house breathe a little. And the neighbors have all been saying such sweet things about the change. Whew! Has anyone else been up to a few exterior tweaks? Do you do them during baby naps with the monitor outside on full blast so you can run in at a moment’s notice? Do you hold your breath until the neighbors approve? We totally do.
Psst- We’re over on BabyCenter talking about a Halloween surprise that we discovered on Sunday night. Let’s just say Clara’s in love. Here’s the story.

Kristen @ Popcorn on the Stove says
Ah! The house looks a million times better!! And I’m sure your neighbors dig it, too. Now, you’re not those neighbors
sew says
That looks just wonderful. Very impressive. Congrats on such eye opening progress!
Staci says
Incredible transformation! The rolling lawn makes the whole place look much more “estate-like.” Perfect for the South!
Amanda @ Our Humble A{Bowe}d says
Holy cow that made such a huge difference! Way to go! We’ve been clearing stuff out ourselves. Our kitchen floor: http://ourhumbleabowed.wordpress.com/2011/10/25/after-the-dust-settles/
Off to check out the Baby Center post. :)
YoungHouseLove says
I love it! Awesome work over there!
xo,
s
Petra says
Hi yard! I’m sure you all are doing cartwheels!
Rachel H. says
WOW! What a difference! It looks fantastic!!!
heather says
Wicked nice!
Crystal says
What an amazing difference that made! It looks awesome and now your house pops!
Relevant Notes says
Wow – what an amazing difference! It must be so nice to be able to see your house from the street! Your neighbors must be in shock :)
jodi says
looks terrific!!
Dara says
Oh my Gosh! What a Huge transformation! You guys are so impressive. Its amazing what a lil grooming and relocating of plants can do! Your yard does look so much bigger now. Although, you are no longer hidden from the world behind those bushes so your neighbors can actually see you. Which could be a good thing or a bad thing! Regardless, the yard looks amazing! Congrats. Now back to that kitchen! lol. j/k.
Elisa @ The Self Life says
Wow, the difference is crazy!! Amazing how much bigger it makes your house look.
Also, we’re planting 6 MORE trees in our backyard on Thursday **happy dance** — in addition to the 7 we’ve already planted. Be happy you were removing and not planting! Hah!
Stacy says
AMAZING!!!!!!!
Maureen @This (Kinda Old House) says
Wow! Looks fantastic! And I have that same wreath, by the way. :)
We have the opposite problem of hardly any landscaping at all. Working on it, though. And I love that you replanted the bushes. I can’t tell you how upset I get when I see that people literally throw-out their healthy plants!
Hope things are going well in kitchenland as well. :)
Theresa says
What a difference, it looks great!
Cody says
Wow, looks so great, amazing- what a difference. Great job!!
Kay says
Fantastic-such a difference. And woo-hoo for free!
Jamie says
Holy crap! Great job! It looks like an entirely new house!
Dominique says
Such an improvement! Your house looks totally respectable now!
Regina says
It does look much nicer, but I can understand why someone would want a bush fence – privacy. It does look incredible, though. Nice job! :)
YoungHouseLove says
Since we do most of our evening living on the back side of the house (the kitchen, living room, and our bedroom are not on the front side of the house) no one can really peer in at night to see what we’re up to! If they could I think we’d rather close blinds in the evening than live behind a bush fence though!
xo,
s
Kristin says
I carved a pumpkin with a sawzall once. It was awesome. (The yard looks great!!)
Katie D says
Wow! What a difference! I bet people drive by now and say, “Oh! There is a house back there!” Can’t wait to see what else you do! Love your site!!
Christine says
Capital! That is just an incredible improvement. I love it.
This spring I transplanted about 71 liriope plants and they all made it and even bloomed this fall. I love that you all are transplanting too!
Catherine says
Wow, I am speechless!
Gina @ Running to the Kitchen says
Holy cow, that opened the yard up SO MUCH! It looks a million times better! I’ve always disliked when you can’t see a house at all from the street because of overgrown shrubs/trees. Your house is so pretty, it’s worth showing off :)
Karen L. says
Great job! Sometimes people just can’t allow themselves to dig up trees or shrubs but they do get overgrown and bad looking. It’s great to make it look pretty. I had to convince my husband to remove really old, gigantic boxwood-like shrubs at one of our houses years ago as you couldn’t see out of our family room window! But it still took me three years to convince him to take them all out–ha! You’re so right—-we could breathe, plus have a view. :)
my honest answer says
Oh wow that’s quite the transformation! Looks like serious hard work to me. But I think it’ll be easier to mow, which I bet you’re looking forward to next summer.
Rebecca @This Nest is Best says
Holy WOW! What a difference! Several years ago we did quite the clear out in our backyard (lots and lots of small plants vs. your giant plants!).
http://thisnestisbest.com/2011/05/20/backyard-entertaining/
YoungHouseLove says
Wow- that looks so much better! Love it.
xo,
s
toni from says
Wow! You guys move fast, the front yard looks amazing and almost unrecognizable. Congrats on a job well done. Also, i like the black feather boa wreath, I think it looks cool in the photos, especially the ones from a distance.
Erin @ One Project at a Time says
You guys can really maximize a nap time! Nice work. We’ve been ignoring our front yard since we moved into our rehab house with very strange curb appeal 6 months ago. I guess I’d be more motivated to get to work if I had any idea what to do. I need HGTV’s curb appeal! :) http://oneprojectatatime.blogspot.com/2011/08/look-what-sprung-up.html
YoungHouseLove says
I think it looks nice out there! So many pretty plants with fresh mulch!
xo,
s
Kit says
that looks GREAT! :)
Bridget says
It looks completely different but awesome none the less! Good luck moving forward!
Gina says
GREAT work! we’ve been doing something similar. Based on your lirope experience, we offered our boxwoods for free to anyone who would dig them up. Three cheers for free yard labor! Unfortunately, our yard still looks way more torn up than yours. :(
YoungHouseLove says
Yeah, sometimes that can end in large holes! But if you add in some topsoil and toss down some grass seed it can get better! That’s how we did things at our last house and it ended up looking so good. Can’t beat free labor!
xo,
s
Dennis says
It looks fantastic guys! What a difference.
Jeanna says
Looks so good, really makes a world of difference for the better IMO!!!
I was dying to know what the neighbors were saying so glad yall included that tidbit!
Julia @ Chris loves Julia says
That’s incredible. Already looks 10x better. We are really wanting to do yard tweaks. The previous owners must have been gaga for roses because we have about 12 rose bushes around the perimeter of our front yard. It is just TOO much maintenance for us. Not to mention, I am more of a fan of shrubs and plants that look good year round. Unfortunately, our next door neighbor loves our roses and would probably cry if…..WHEN we rip them out. We are in such a pickle. Lose the roses or the neighbor???
YoungHouseLove says
Oh man that’s so hard! What about transplanting them so the neighbor knows you didn’t kill them and you can appreciate them in a cluster in the backyard with some other plants that look good year round to “round things out”?
xo,
s
Reenie says
Give the roses to the neighbor so they can plant them in their yard =)
Sher & John ~ WOW what a difference. It looks great. I’d be out there staring at it from the street. :)
YoungHouseLove says
Oh yeah – that’s an awesome idea!
xo,
s
Tara says
Looking good!
I am curious… did you install sod over the newly bare ground immediately? It doesn’t look like a dirt pit out there… how did you do it??
-Tara
YoungHouseLove says
Many of the bushes are surrounded by ground cover (ivy, monkey grass, other green vines) so we dug up the bushes and sort of pushed the ground cover over the hole for now (just to keep it from looking like a messy mud pit). We definitely plan on clearing out some of that ground cover and adding in some dirt to level things off before we toss down some grass seed though!
xo,
s
Kara says
Holy cow, it looks GREAT! :)
liz @ bon temps beignet says
WOW!!!!! It looks amazing. We have a wall of bushes/trees on the side of our house. I don’t mind it to much since it blocks out the noise from the college age boys who rent the house across from us. They’re the kind of young men who think pumpkin smashing parties at 5AM are fun. I’m making my 26 year old self sound like a grandma.
Mandy says
Wow what a change!! It looks so much better now :)
Traci says
The new yard is totally working for me! And I love that you guys went green (pun intended) by re-purposing the bushes to other parts of your property! :)
Meg says
WOW! What a difference! You must feel so accomplished to get such a dramatic before/after during only two Clara naps!
Mike at The Big Stick says
I’ve been reading your blog for 2-3 years and this is without a doubt my favorite before and after photos you all have posted. LOVE the yard. So un-cluttered and open.
Rachel says
Congratulations! It looks so awesome. Thats one less headache you guys need to deal with now :)
Christine at Casa-de-Christine says
Looks fantastic! Really opens things up! I love how the yellow door pops and you can really see it now.
Would love a close up shot of the feather wreath. I have a thing for wreaths. lol
YoungHouseLove says
We’ll have to work one in soon for ya!
xo,
s
Dani says
Wow. Just wow. It looks amazing! Now I feel pretty unaccomplished having only painted the dining room this weekend. :)
Lindsay says
Looks amazing! I love how your neighborhood is laid out (lots o’space between houses, adorable homes, etc.).
Zoe says
What a fabulous before and after and well worth the blister, now your yard can “breathe” I have an indoors before and after that has that same “I can breathe” effect.
What do you think?
http://www.creativeinchicago.com/2011/07/dear-chicago-house-hurray-i-can-dance.html
YoungHouseLove says
Wow- what an update! So gorgeous and breezy!!!
xo,
s
Stephanie says
It looks totally amazing!! Must feel like a breath of fresh air when you look out at it?!!
Regan @ RenovatingRothenbergers says
Amazing transformation!!!