Parking our car got a little more scenic this weekend with the completion of our carport pergola. Or, cargola (pergolaport?) if you will.
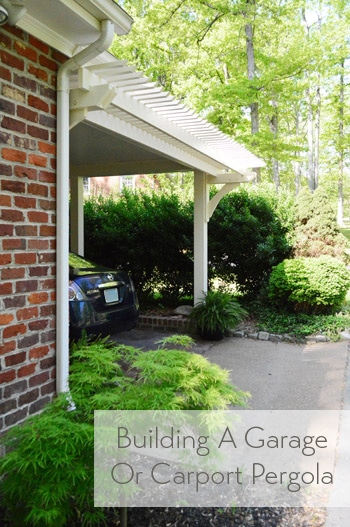
Last week we talked about dressing up our carport with the help of some pergola plans from Workbench Magazine. The plans took a lot of the guesswork out of it, but there was still plenty of actual work. All-in-all it took about 4.5 days of work (the half day was spent picking up the materials, which we talked about here) but I’m gonna boil it down to one simple post. So here we go.

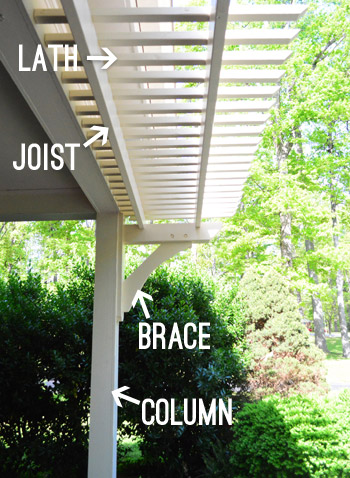
What you need to know is that there were four main parts to this building project: 1) the column, 2) the braces, 3) the joists, and 4) the lath.
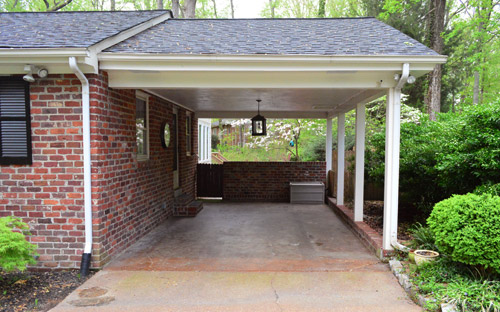
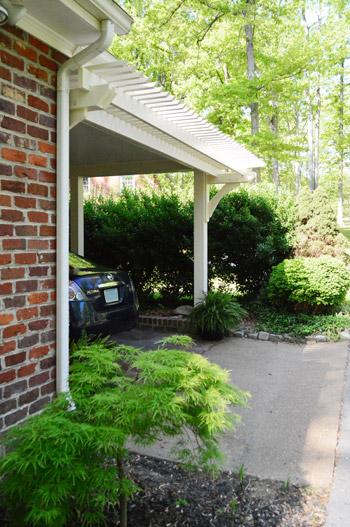
Most attached pergolas don’t have the column in the equation (they just attach to the walls beside or above a garage door or a french door), but because our carport only had posts on the left side (see below) our first assignment was to add one on the right to add symmetry and create a place for the pergola to attach.
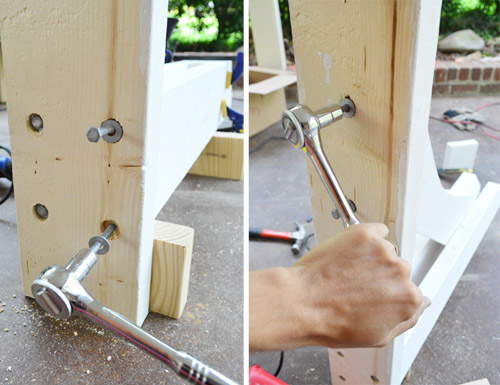
To attach a post to our concrete floor, we used this post base which is built for situations like this. And I got to break out my hammer drill to make a pilot hole for the concrete anchor, which was a good time. I bought the hammer drill back when I was starting the deck, but never ended up using it, so I’m glad I had it around because I needed it’s drill-plus-hammer motion to get through the concrete. Then I hammered in a wedge anchor and tightened the nut to keep it in place.
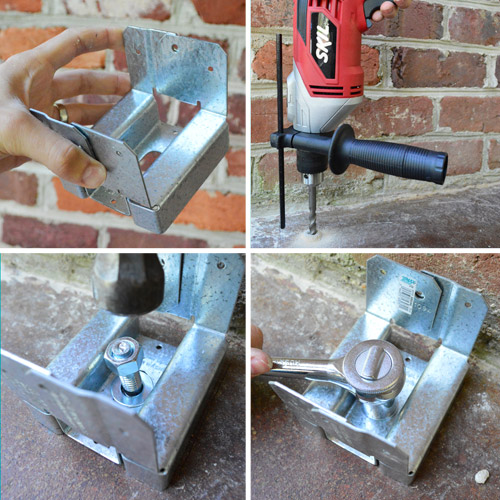
I attached another metal post base on the ceiling (this time just using heavy-duty screws) so that we could slide a 4 x 4″ post right in there and nail it into place.
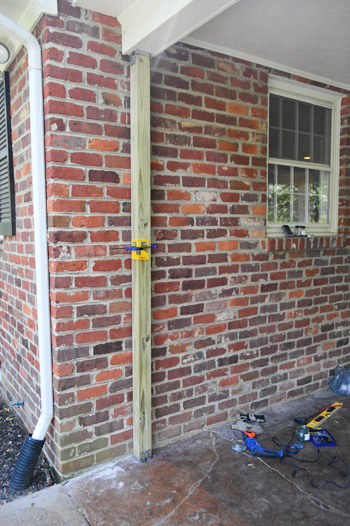
Since that post is neither very attractive or big enough, we used the same method as we did when we beefed up our porch columns. They didn’t sell any pre-primed pine in long enough boards, so we primed and painted the two 1 x 6″ and one 1 x 4″ boards before hanging them. Here I am using our nail gun to attach the boards in place and give the column a chunkier look.
After we caulked the seams and added some touch-up paint, our first of four steps was officially checked off the list. And I should add that this took me the better part of my first day (with occasional “hold this with me” and “take a picture of this step” and “help me paint while Clara naps” assistance from Sherry).
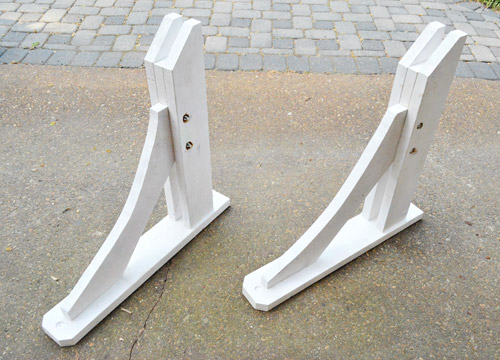
The other part of day one was spent getting started on my braces (or “knee braces” if I’m feeling formal). These were by far the most complicated of all four steps, since there were four sub-step when it came to building each one. We originally hoped to purchase these pre-made, but we couldn’t find any in the size that we needed. In the end, I’m glad I made them because it was much cheaper.
Some of the braces that I saw online were going for $50 – $100 a piece, depending on the size. Each of mine were made from one single 12 ft piece of 2 x 6″ and a few bolts, making mine about $22 each. So the first step was to cut my 2 x 6″ into the lengths that my plans called for. Burger double-checked my work.
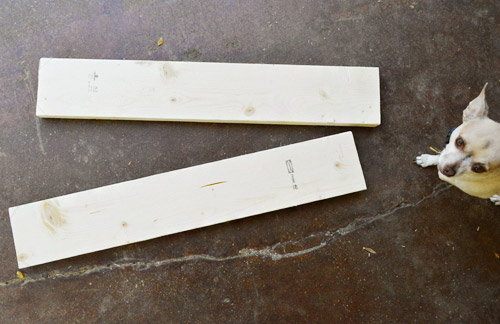
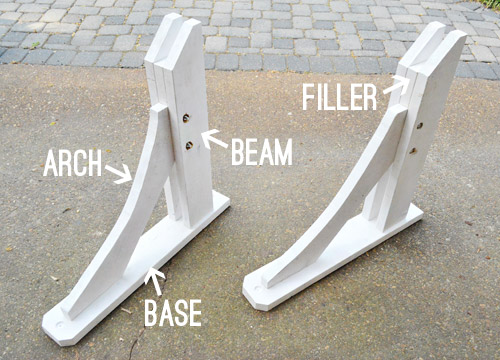
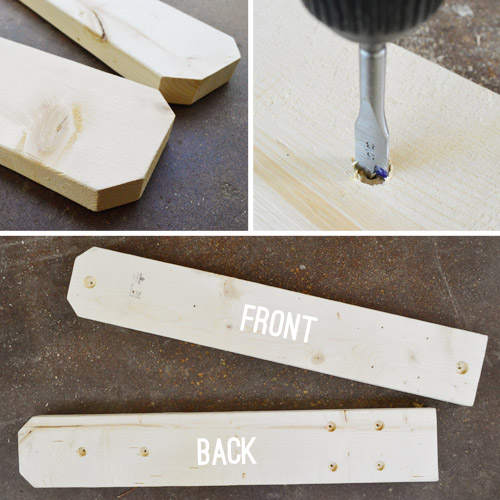
First up was what I’m calling the “base” (the part that rests against the column). They were pretty straightforward. I cut some decorative notches on the bottom with my miter saw and then used some hole-boring bits to make a few places on each side to countersink my bolts. Again, my plan took a lot of the mystery out of what to do, but it was still a bit tedious.
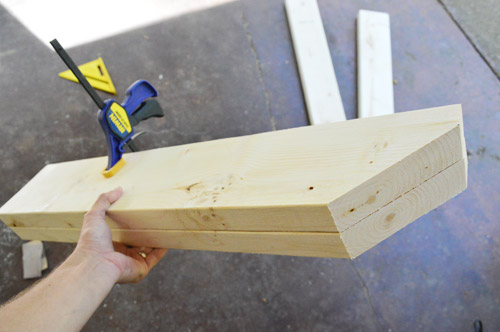
The next pieces I tackled were the “beams” – the parts that would stick out from the base at a 90° angle. They were really easy, which was lucky because I had to make four of them. I actually clamped two together when I made the cut so that I’d be sure the beams that got paired together on the same brace were absolutely identical.
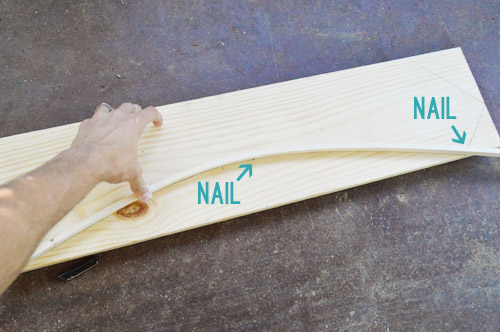
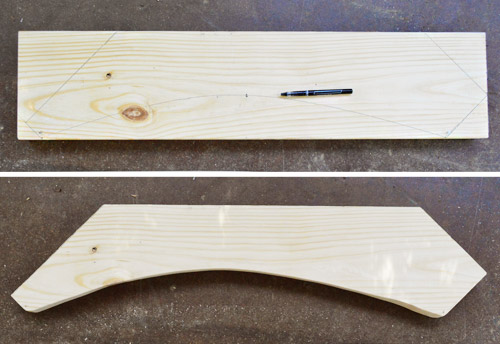
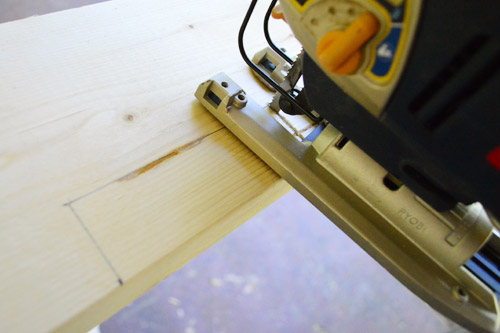
With the easy stuff out of the way, I turned my attention to the “arch.” Yes, a dreaded curved cut. Cue the dramatic music. To mark my curved line, I tapped some temporary nails into the wood at both ends and at the middle/top of my curve. Then I used a thin piece of scrap wood (a small piece of PVC works too) and bent it over my nails to create an arched shape. That held long enough for me to mark the curved line between my two nail-points.
Next was the challenge of actually cutting that line. Since I don’t own a scroll saw, I had to rely on my jigsaw. It did the job okay, but since it’s sometimes hard to keep the blade perfectly vertical, my arch had a couple of wonky spots (not majorly wonky, but wonky enough that I noticed them) so we sanded the heck out of it to try to smooth things out.
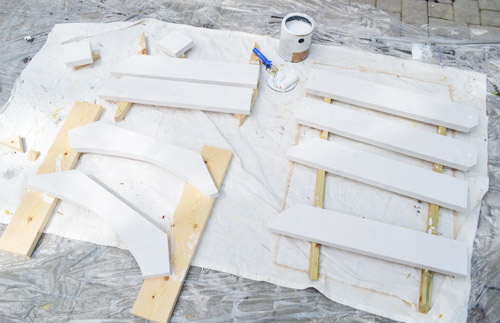
After some vigorous sanding they were a lot better looking, and some primer further cleaned things up (we primed all of our brace pieces together once they were all cut out).
Then we had to assemble them. It was a tricky system of clamps, temporary nail gun nails, and balancing on scrap wood pieces to get it done, so don’t even try to make sense of this picture (it’s upside down, if that helps).
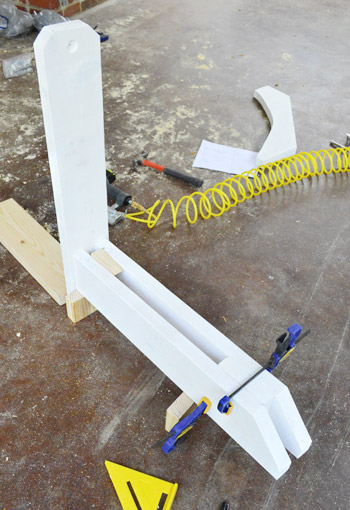
Basically we had to get both of the beams and the single arch piece aligned (and centered and level) and then screw them to the base using some 3″ lag bolts. It took a bit of finesse to get it all done without attaching something slightly crooked, but eventually we got the job done.
Then we had to drive some bolts through two beams (and the portion of the arch that sat between them). It sounds very straightforward, but the process took me a while and the rest of the day was spent rerouting a gutter and outdoor light fixture. So by the end of day two we had built two braces, but I couldn’t call this step complete since they were neither painted (that happened the next morning) nor hung (which also got done the next day).
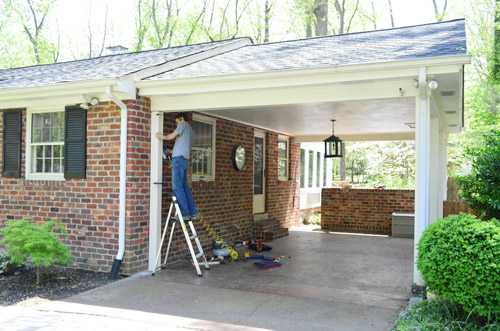
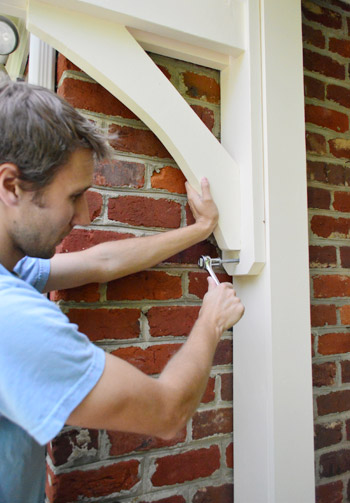
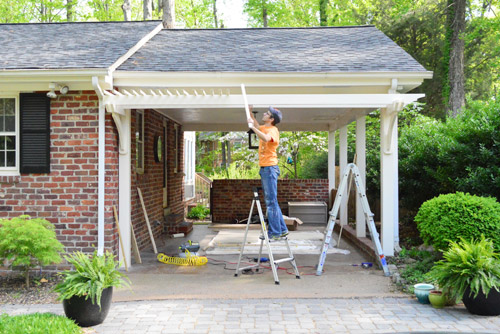
Hanging them took some finesse too, mostly because one of us had to hold the weight of it while the other checked that it was level and temporarily nailed it into place. There’s no way brad nails would support the weight of it over time, but they kept each brace in place long enough for us to drive a lag bolt into the top and bottom of each one, which secured it for the long haul.
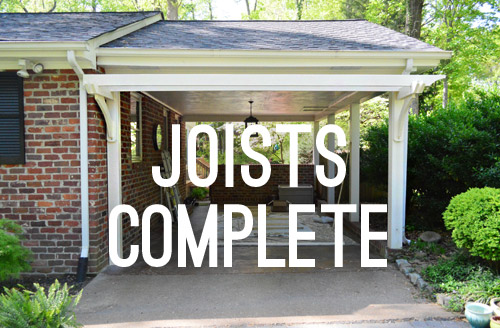
By noon on day three we were finally ready to move on to step 3.

Step 3 was the joists. You know, those two long pieces that would rest on each of the braces. These were again made from 2 x 6″ board and again they required a decorative curved cut (marked below). We did the curve on just the left side since on the right side they’d butt up against the side of the house.
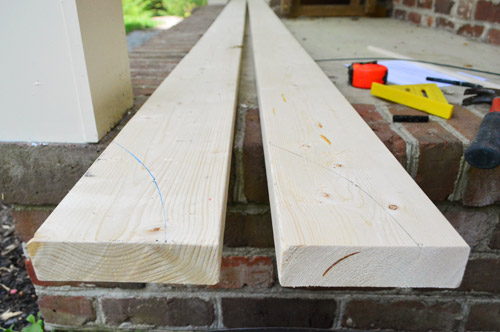
Once they were cut, we hoisted them into place and marked the exact spot where they rested on the braces.
These marks showed me where we needed to cut notches in the joists so they’d sit tight on the braces. And while we had them down, we also primed and painted them.
While the paint dried I got started on step 4, so it wasn’t until the next morning that we could actually hoist them into place. As for how we screwed them into place, we basically drilled a long pilot hole through the top of each joist and used a long drill bit to screw right through the top of the joist and into the brace’s beam below.
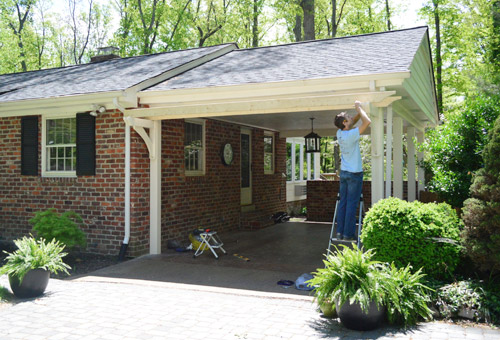
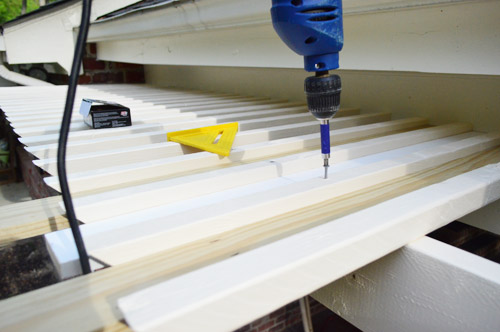
The last step was the lath, or the small strips that create the rail across the top. Since we were going to paint ours I couldn’t use the pre-cut pressure treated 2 x 2″ pieces that they sell pre-cut for deck railings (they say pressure treated lumber should be allowed to “dry out” for a number of weeks before paint or stain traps the treatment’s moisture in – and we wanted to paint things right away). So we bought regular 2 x 2″ boards that were 8 feet long and cut them down at home. This ended up being substantially cheaper, but we needed 50 of them (including a few just-in-case extras) so cutting and sanding them took me a good two hours. It was not exactly fun, but it was nice and mindless. Then came priming and painting all. those. pieces.
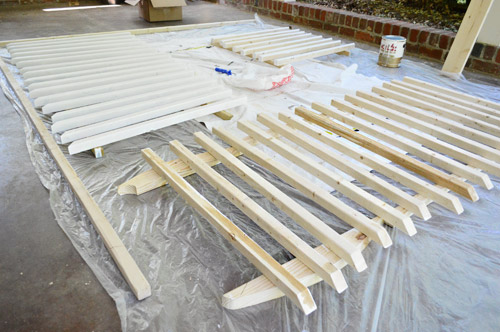
We had to cover all four sides of them since they’d all be seen, so thank goodness the paint had good coverage and it only took one coat (it’s Benjamin Moore Exterior paint leftover from the previous owners). Once everything was dry, we could start putting the lath into place on top of the joists.
This was the point that we both started to get giddy because the pergola was actually starting to look like a pergola. Oh and we cut a few 3-inch wide “spacers”out of scrap wood to help us keep our gaps even so we could screw them into place as quickly as possible (see the two longer unpainted boards in the picture below?).
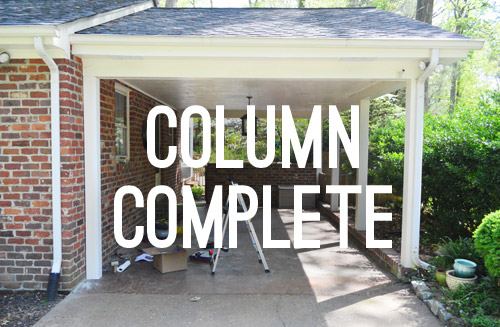
By the end of day four, step four was 100% done.
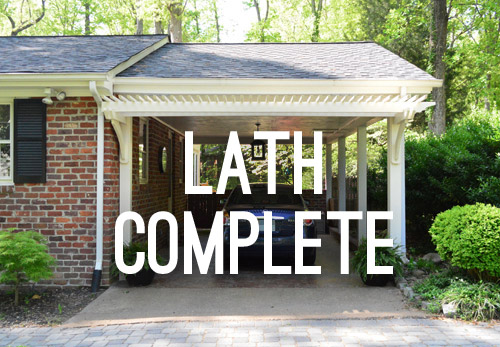
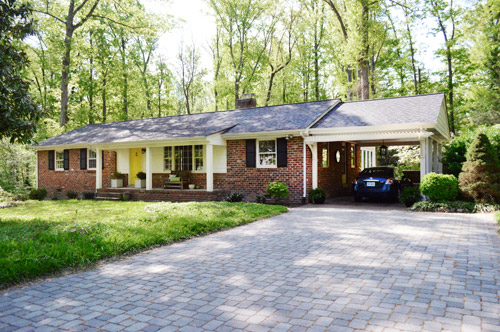
And with that, we could step back and enjoy our gussied-up carport. How YOU doin?
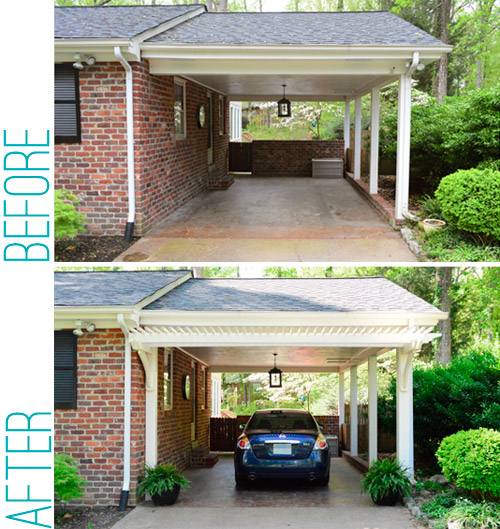
We’re both crazy happy with how it turned out. We were nervous (well, I was nervous) because it wasn’t the most conventional spot for a pergola – but it really is a huge upgrade. Suddenly that parking space tacked on the end of our house has some character. It has actually turned two anti-carport people (remember we almost didn’t look at this house just because it had one) into carport lovers. Well, cargola lovers.
Despite being a bit tedious, none of the labor was really that back-breaking. And the DIY price can’t be beat – especially when we heard that custom attached pergola kits are being sold for over 2K! Here’s where ours wound up:
- Truck rental (to get materials home): $19
- Lumber: $112
- Post bases: $23
- Nuts, bolts, & screws: $46
- Materials to reroute gutter & light: $14
- Paint & primer: Already owned
- TOTAL: $214
Oh and if you have a carport that already has two columns (or a garage with outside walls to rest the braces on) and you buy the braces instead of building them it would be about 50% easier (and should cut out around 2 days of work). So that’s an awesome option for anyone who wants to instantly cut four steps down to two.
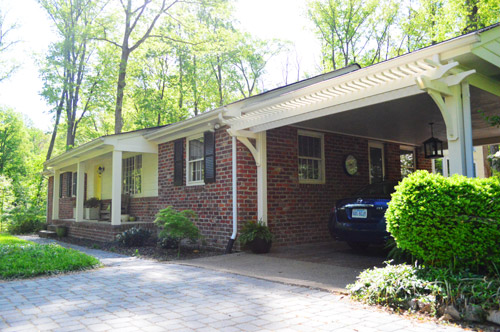
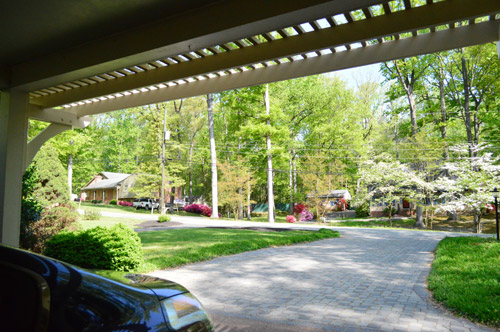
I feel like the new pergola gives our house a bit of “quaintness” (if that’s a word). We especially like how it frames the view of our street, which is currently blooming like crazy. Either way, it definitely adds some nice dimension to our flat ranch.
So yeah, between this and our beefed up porch columns, we’re falling in love with the front of our house all over again. And can you just imagine some flowering vines growing up those posts and across the top of the pergola? Holy charming, batman.
What’s on your outdoor agenda these days?

Janette @ The 2 Seasons says
Wow!!! It looks great. I would love a mini version in our courtyard. Good job!
Lisa says
What a difference! I love it.
Kara says
I love that… visually even just the first step of adding the column made a huge difference. Can’t wait to see it all greened up! These are the types of projects I NEVER would have thought of.
Jordan@the2seasons says
Wow I am shocked the difference that made for your carport. Looks great!
Rene @thedomesticlady says
This is seriously one of my favorite projects you have done. Love it!
http://www.thenotwedding.com/sappy-love-story-joe-rene/
Annabel Vita says
Looking good! It definitely makes the carport look more like an actual thing and less like an unfinished garage!
Will you be adding any matching arch supports to the porch?
YoungHouseLove says
I think for now we’re happy to not add too many doodads to the porch (we like keeping it simple and open) but we think window boxes would be pretty, so those might be coming up :)
xo,
s
Lauren says
Ooh yes!! Window boxes would be gorgeous! (Love the update to the carport, by the way)
alisha says
So charming! I was wondering the same thing about the porch–haha =] But you are right, less is more. Window boxes will be darling with this!
Claudia says
This is awesome!!! we are thinking of adding a pergola to our front yard so we can hang out there on summer evenings. Love the look you guys got!
Harmony_G says
wow. That really makes it feel brighter and yet more robust then before. I’m a little suprised that i like it so much but it really matches the house very well.
Rebecca @This Nest is Best says
Oh, this looks great! I love, love, love a pergola! And the flowering vine (someday) will be amazing!
Jess @ Little House. Big Heart. says
Wow! That looks great! It really beefs up that side of the house! I loved the idea of painting everything first, too!
I thought even just the column alone helped a bunch!
Theresa says
It really looks great and you make it look so easy. Do you know what vines you’ll plant?
YoungHouseLove says
We have had lots of helpful suggestions from readers, but haven’t made it out to the nursery to further investigate things quite yet :)
xo
s
Ashley@AttemptsAtDomestication says
It makes the carport look so cute! I really like it!
We’ve been talking about building a pergola for our back patio, but we need to get around to redoing the patio first haha.
Lu says
I’ve read a little bit about indoor pergolas (in high ceilinged spaced). Do you think these plans could be adapted to fit that? Looks great, by the way! Love the exterior updates!
YoungHouseLove says
I would imagine they’d work inside as well (the braces need to be heavy duty to hold the weight of the wood whether they’re inside or outside, but I imagine if you bolt them to interior studs you’d be good to go :)
xo
s
Emily says
LOVE, LOVE, LOVE this addition to your house! It definitely adds charm and character, and it makes the carport an even nicer space for those occasional family gatherings or whatnot. Awesome job! :)
YoungHouseLove says
Yes! I think we’ll be loving the space for Clara’s party in a few weeks (sans car, and with lots of chairs and goodies) :)
xo
s
April says
I was reading the other day about planting hops (yep, like the kind in beer!) as a quickly growing, vining plant if ya’ll want coverage fast!
YoungHouseLove says
So interesting!
xo
s
Alison says
They are great vines, and fast growing but hops are extremely poisonous to dogs. So it might be best to not go that route.
YoungHouseLove says
Thanks for the tip Alison!
xo
s
Kim says
FYI: hops are extremely poisonous too dogs. That said, we grow them (my husband brews) and it is a cool vine but we are very careful to keep it on a side of the yard where our dog cant go.
Kim says
whoops, i just read Allison’s reply…
YoungHouseLove says
No worries Kim! Thanks for all the tips everyone!
xo
s
Kristen | Popcorn on the Stove says
The pergola looks great!
Crystal @ 29 Rue House says
I’ve been looking forward to this post and it turned out great!
We’re in the beginning stages of considering building a shed…we really want a handmade custom one v. a kit but as we start pricing it out, I’m finding that all the materials will add up to quite a bit.
Anele @ Success Along the Weigh says
BURGER! (Sorry)
That looks SO cute and you’re right, little flowering vines and such will look amazing. I love how much architectural interest this gives the house now. Bravo y’all!
Melissa says
Love the cargola! Any idea what kind of flowering vines you’ll grow up there? May I suggest Wisteria???
I live in Annapolis, MD and we have a great restaurant with an outdoor beer garden that is covered in Wisteria. We also have a Wisteria House…the entire house is covered in it. It looks amazing this time of year!
YoungHouseLove says
Sounds lovely!
xo
s
Lesley says
I wouldn’t recommend wisteria. Albeit very pretty, it can grow in any cracks on the driveway or bricks on your house and start to ruin structures. My parents had some and it actually started to grow into the mortar and pop bricks out on their house. It is a nightmare to get rid of once it takes off.
Liz says
Wisteria is high maintenance. We inherited a wisteria along the fence of our townhouse. I have to prune it all the time during the spring, summer, and fall because it loves to put a chokehold on our neighbor’s shed. Every year I hack it back and secretly hope I kill it. I’m a terrible person.
YoungHouseLove says
Haha! Wisteria seems to be a polarizing plant! We hear from some who love it and others who loathe it!
xo
s
Audrey says
I would also recommend against wisteria. I love how it looks and smells, but it is an invasive species.
http://www.fs.fed.us/database/feis/plants/vine/wisspp/all.html
It spreads very quickly and kills off native plants and trees. The US Forest Service is actually trying to get rid of it, not have people intentionally plant more!
YoungHouseLove says
Thanks for all the tips everyone!
xo
s
Lisa E says
Looks fantastic, great job! Really does add lotsa charm!
Kiera says
wow- fantastic job! Will you add Wisteria or Jasmine or some other climbing vine to it or keep it simple?
YoungHouseLove says
We’d love to add some vine growing up it sometime – just haven’t sleuthed out our options yet or made it to the nursery!
xo
s
Alison says
Really impressive work, especially the brackets. It will look great with greenery on it. Have you thought about painting that gutter a brick color in the hopes that it blends with the brick? Just a thought.
YoungHouseLove says
Yes! I HATE that gutter and would love to paint it a deep red tone to blend it in :)
xo
s
Kate says
We painted our gutters charcoal – the same as our shutters and it made an amazing difference! We also have a brick ranch – looks similar to yours. You don’t even notice them anymore.
YoungHouseLove says
That sounds awesome!
xo
s
Han @ brooklyn diy designs says
we also decided to build our own pergola last year after looking at how expensive the kits were!
It was definitely hard work but very rewarding and made the backyard into an extended living space; also the amazement from friends and family when they found out we built it with our own hands is great!
YoungHouseLove says
We can’t wait to show the family for Clara’s party here in a few weeks :)
xo
s
Hanna says
It looks amazing! Actually, even adding the column on made the carport look better somehow. Less like something stuck on the side of the house and more like a structure.
YoungHouseLove says
Yes! We used to think it looked like a roof held up by little sticks, so now it feels less like an add on and seems to have more substance (and feels a lot less flimsy). So glad!
xo
s
Cathy M. says
Absolutely beautiful! Love the ferns, too. :-)
bridget b. says
really cool! i’d never heard of these before, but it’s the perfect thing for your carport. i’m still brainstorming plans for my front and back porch makeovers. http://623designs.tumblr.com/post/48774822380/spring-and-summer-patio
Janelle @ Two Cups of Happy says
I like how it adds dimension! The carport has officially been upgraded.
Audrey says
Adorable! Im always so impressed with the stuff you guys are able to build from scratch.
Will you be adding plants to climb along it at a later date? I always think a pergola looks a bit naked without plants…
YoungHouseLove says
Yes, we’d love to add some flowering vine snaking up the posts and over the top :)
xo
s
Kami says
“pergolaport” almost made juice come out of my nose… :)
Stacey says
The Before and After is impressive as are most of your outdoor updates. I’m keen to see what else you have planned outdoors. I’ve been re-reading your outdoor updates as inspiration for the start of our autumn and winter when it is much more comfortable to work in the garden.
Jain says
Wow – I absolutely love it! You both have such a great eye for balance. Well done.
Tricia says
Do you think that one day, you’ll be selling this house? If so, are you hoping–because of your steady improvements–that you’ll be able to make a great deal of money in profit? Just curious. :) Because the house looks leaps and bounds better than it did when you first moved in (obviously). :)
YoungHouseLove says
We definitely hope we’ll at least earn back what we’ve invested, and maybe make a little money for our efforts, but we don’t think we’ll be high rollers or anything. Haha! We always watch those house flipping shows where people “improve the value of their home by 50K” but in real life it’s usually more like they make 10K when they sell because that’s the going rate for comparable houses in the area, etc. We definitely like to share that stuff (here’s a post about how much we made selling our first house) so we’d post all about that if/when the day comes for sure :)
xo
s
Ashley Bussiere says
I LOVE it! Our house is very similar to yours, one story brick ranch with a carport on the right side.
Are you planning on staining/painting the concrete slab? I’m in the middle of our “porch” redo and am debating between stain and paint :)
YoungHouseLove says
Ours already appears to be stained a reddish brown tone (sort of the same color as a fence) which we like. Stain is nice because the texture of the cement still comes through and it’s super durable to drive on. Hope it helps!
xo
s
A says
If we weren’t moving soon, I’d be all over that for our house! I’ve been wanting to do that over our little one car garage and am so glad to see you tackle it! Maybe I should make that a requirement when selling our house? You know a “You can only buy this house if you put a little pergola over the garage” clause?
YoungHouseLove says
Haha! Do it!
xo
s
Lesley says
wow that looks great! I am like you and probably would have been detered away from a house with a carport but you have definitely changed my mind. I am so glad you chose this route instead of your original plan, especially once you said you would have had to close off the windows. It looks fabulous and you guys make it look so easy!
YoungHouseLove says
Yes! We’re so grateful not to lose those windows, and this will come in handy for parties and things (like Clara’s birthday coming up in a few weeks) whereas we couldn’t really use a garage at all for those things :)
xo
s
Reenie says
Love it… great job John!! :)
Kathy Benca says
I love, love, LOVE it! What a difference it makes! Who’d have thought? :)
Robin O says
Wow!! Super inspiring! I love it!
Jill P. says
Since I live in the North, carports are extremely rare since everyone wants a garage to hide their car from the snow and cold.
Funny question… where do you put all of your garage items?!?! (lawn mower, garbage can, etc) Do you have a shed?
YoungHouseLove says
We have an outdoor wooden storage area for the garbage can and the lawn mower is tucked in the back yard (out of view but convenient for mowing). All of our garden stuff (leaf blower, rakes, cutting shears) are in the basement workshop, and all of our decorative things like holiday decor at in plastic bins in the attic :)
xo
s
dtchgrl says
Looks beautiful! We need to add some character to a big flat 3 car garage and have been considering this. Any chance you can point the direction to where you saw the premade supports? Thanks!
YoungHouseLove says
We just googled “pergola knee brace” and looked at everything that came up :)
xo
s
Amber says
It’s amazing how transformative this was!! Looks great!
Jen says
Beautiful job! It looks like it was always meant to be that way.
YoungHouseLove says
Aw thanks Jen!
xo
s
KathyG says
Very Nice Job! It does change the face of that front quite a lot.
I have a question for John. Do you mind – or do you prefer – working alone on projects? My hubs really likes me right there with him, to hand him things, or just as “moral support” LOL he calls it.
YoungHouseLove says
I really like Sherry’s help when she’s able to lend it (four hands are almost always better than two!) but sometimes with Clara it’s impossible for us both to work on something except when she’s napping. This project might have taken three weeks in tiny 2 hour installments, so in this case I was happy to do as much as I could on my own and then call Sherry when I needed an extra hand or wanted her to snap a photo. Sometimes she and Clara were outside playing nearby so she could lend her mental help even if her hands were full, and then when Clara napped Sherry could help me paint/nail/drill/caulk, etc – which went a lot faster during those times when we both were on duty.
-John
Courtney @ FamilyGoneHealthy says
I was unsure about how it was going to look when you first announced the plans but I actually really like the final look! Great job! I am also impressed with John’s bracket-making skills.
YoungHouseLove says
Dude can make a mean bracket, eh? Haha! I’m a proud wife.
xo
s
Jen says
I’ve been planning an addition of a pergola to my garage entrance for three years. Your picture from the inside of the carport has done it! In love. I must have one. As always, thanks for all of the details.
YoungHouseLove says
Yes! I told John I think I like it even more walking out than in! It’s so pretty to see the woodwork above, and the view out the office window includes that now :)
xo
s
Ashley says
Personally, I think it looks a little misplaced, but the execution is beautiful. It looks very well done! Your building projects are always executed so well, very inspirational! Glad y’all like it!
Jennah's Garden says
I agree. I loved the point where you added the column, but I’m not sold on the whole thing. Seems like you had been removing just the sort of touch (the porch arch things etc) that this adds in.
Perhaps a vine will change my mind? I would also argue AGAINST wisteria and def no ivy – it will take over in a bad way. Really do your research before you pick a vine or you’ll be left with a mess. Also, you may want to pick something evergreen, like maybe Jessamine (I live in MD so we have similar climates).
Gabriella @ Our Life In Acton says
I love it! We’ve been toying with the idea of putting one above our garage door too. Seeing this, I am sold. I absolutely LOVE it!
Bri says
Wow!! Such a great job that adds so much curb appeal.
Annelies says
Good job John, this looks really nice !
Each time you now post some big improvement I can’t help but thinking “oh no, soon the house will be finished and then what? Slow down!” :-) I’m sure you have a plan in mind and I’m really curious to find out, but I would find it sad if you would leave this house, especially after all the hard work you put into it.
YoungHouseLove says
Haha, you know us! Plans are always a-brewing!
xo
s
Erin says
I feel the same way! Each week I’m like “Oh no! They’re almost done! Slow down!”
Nicole says
WOW! I’m so impressed with what a big difference the pergola made to the look of the entire house. Major charm and quaintness going on! Now I need to figure out where I can add a pergola at our house…