Parking our car got a little more scenic this weekend with the completion of our carport pergola. Or, cargola (pergolaport?) if you will.
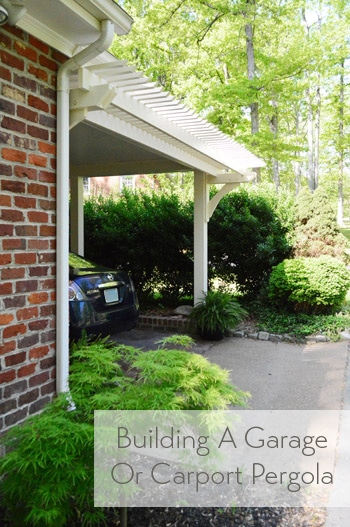
Last week we talked about dressing up our carport with the help of some pergola plans from Workbench Magazine. The plans took a lot of the guesswork out of it, but there was still plenty of actual work. All-in-all it took about 4.5 days of work (the half day was spent picking up the materials, which we talked about here) but I’m gonna boil it down to one simple post. So here we go.

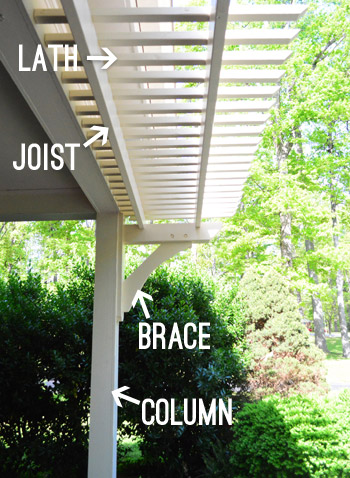
What you need to know is that there were four main parts to this building project: 1) the column, 2) the braces, 3) the joists, and 4) the lath.
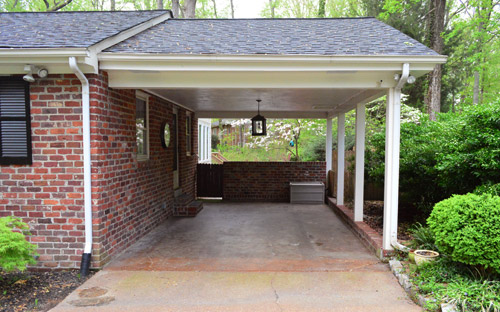
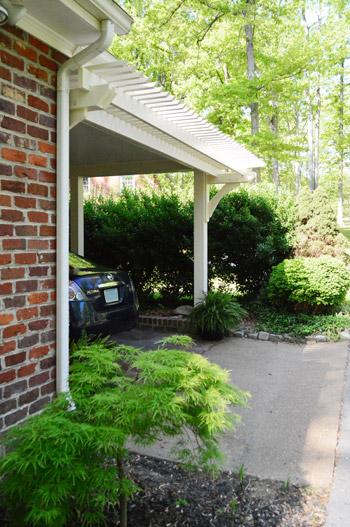
Most attached pergolas don’t have the column in the equation (they just attach to the walls beside or above a garage door or a french door), but because our carport only had posts on the left side (see below) our first assignment was to add one on the right to add symmetry and create a place for the pergola to attach.
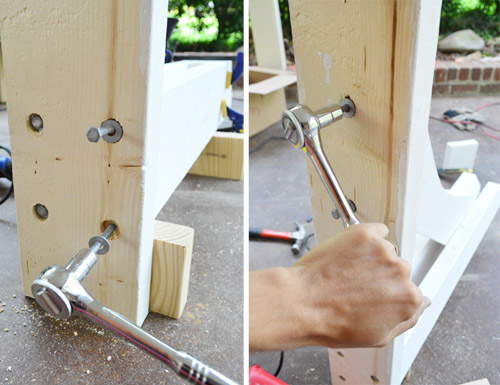
To attach a post to our concrete floor, we used this post base which is built for situations like this. And I got to break out my hammer drill to make a pilot hole for the concrete anchor, which was a good time. I bought the hammer drill back when I was starting the deck, but never ended up using it, so I’m glad I had it around because I needed it’s drill-plus-hammer motion to get through the concrete. Then I hammered in a wedge anchor and tightened the nut to keep it in place.
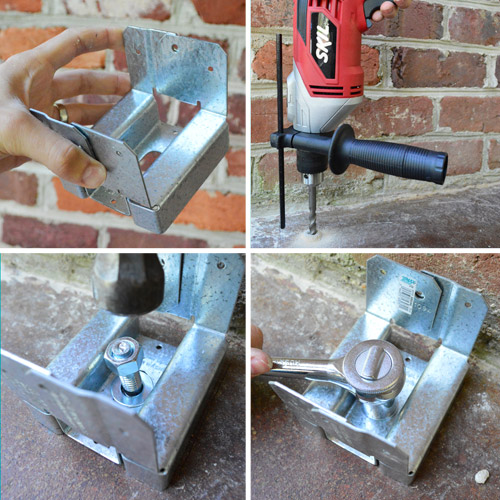
I attached another metal post base on the ceiling (this time just using heavy-duty screws) so that we could slide a 4 x 4″ post right in there and nail it into place.
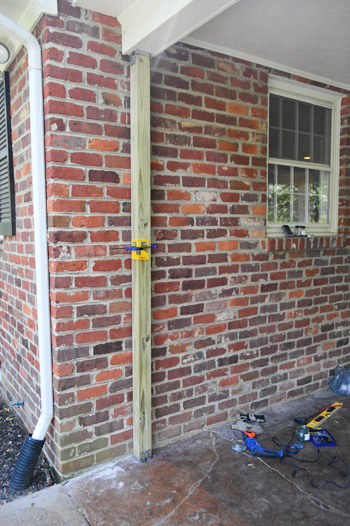
Since that post is neither very attractive or big enough, we used the same method as we did when we beefed up our porch columns. They didn’t sell any pre-primed pine in long enough boards, so we primed and painted the two 1 x 6″ and one 1 x 4″ boards before hanging them. Here I am using our nail gun to attach the boards in place and give the column a chunkier look.
After we caulked the seams and added some touch-up paint, our first of four steps was officially checked off the list. And I should add that this took me the better part of my first day (with occasional “hold this with me” and “take a picture of this step” and “help me paint while Clara naps” assistance from Sherry).
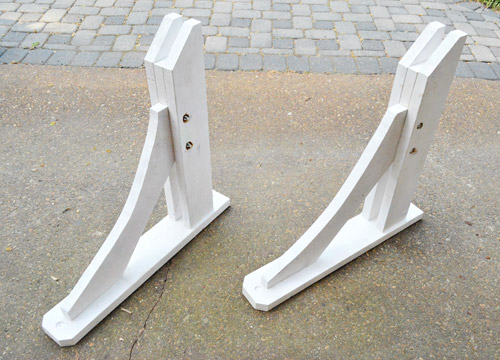
The other part of day one was spent getting started on my braces (or “knee braces” if I’m feeling formal). These were by far the most complicated of all four steps, since there were four sub-step when it came to building each one. We originally hoped to purchase these pre-made, but we couldn’t find any in the size that we needed. In the end, I’m glad I made them because it was much cheaper.
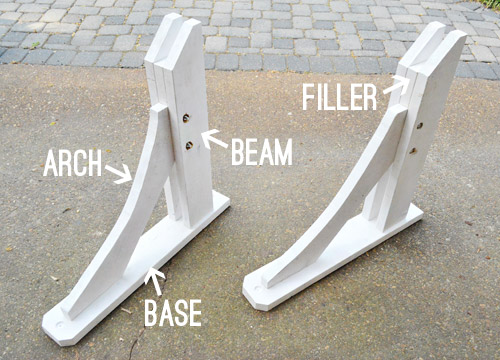
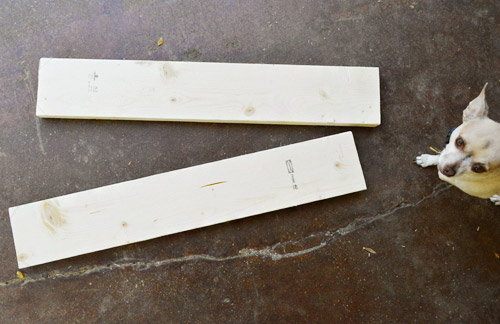
Some of the braces that I saw online were going for $50 – $100 a piece, depending on the size. Each of mine were made from one single 12 ft piece of 2 x 6″ and a few bolts, making mine about $22 each. So the first step was to cut my 2 x 6″ into the lengths that my plans called for. Burger double-checked my work.
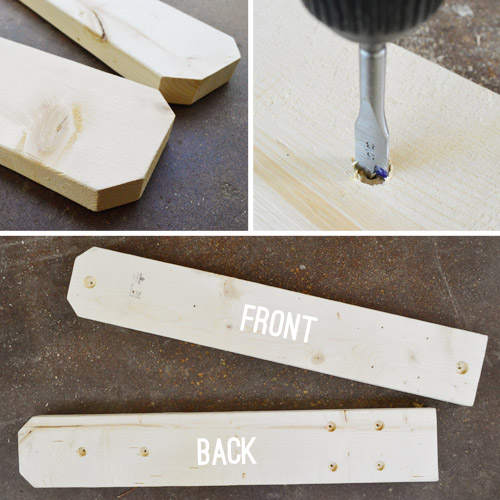
First up was what I’m calling the “base” (the part that rests against the column). They were pretty straightforward. I cut some decorative notches on the bottom with my miter saw and then used some hole-boring bits to make a few places on each side to countersink my bolts. Again, my plan took a lot of the mystery out of what to do, but it was still a bit tedious.
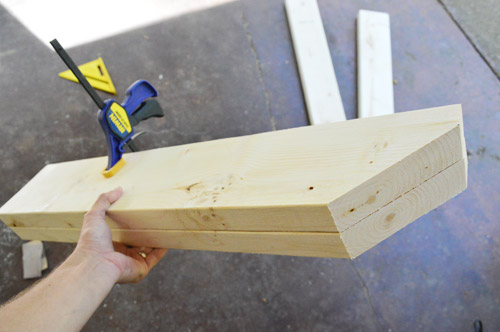
The next pieces I tackled were the “beams” – the parts that would stick out from the base at a 90° angle. They were really easy, which was lucky because I had to make four of them. I actually clamped two together when I made the cut so that I’d be sure the beams that got paired together on the same brace were absolutely identical.
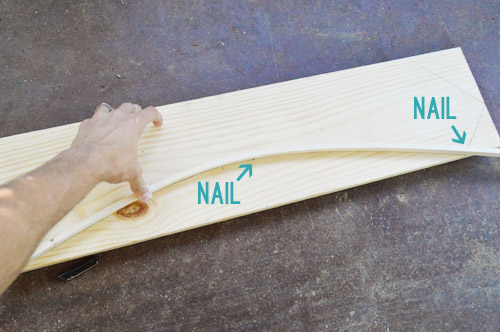
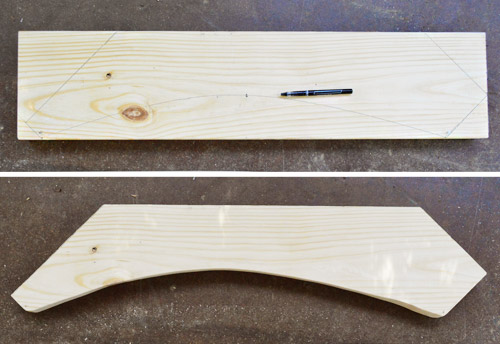
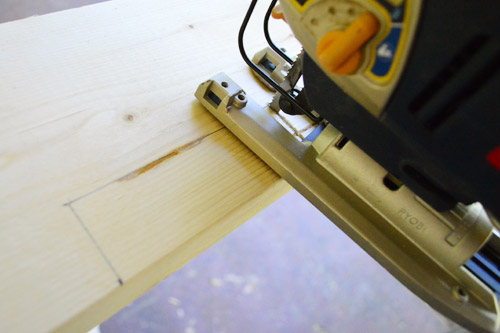
With the easy stuff out of the way, I turned my attention to the “arch.” Yes, a dreaded curved cut. Cue the dramatic music. To mark my curved line, I tapped some temporary nails into the wood at both ends and at the middle/top of my curve. Then I used a thin piece of scrap wood (a small piece of PVC works too) and bent it over my nails to create an arched shape. That held long enough for me to mark the curved line between my two nail-points.
Next was the challenge of actually cutting that line. Since I don’t own a scroll saw, I had to rely on my jigsaw. It did the job okay, but since it’s sometimes hard to keep the blade perfectly vertical, my arch had a couple of wonky spots (not majorly wonky, but wonky enough that I noticed them) so we sanded the heck out of it to try to smooth things out.
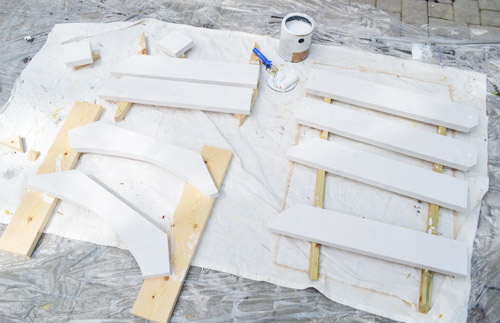
After some vigorous sanding they were a lot better looking, and some primer further cleaned things up (we primed all of our brace pieces together once they were all cut out).
Then we had to assemble them. It was a tricky system of clamps, temporary nail gun nails, and balancing on scrap wood pieces to get it done, so don’t even try to make sense of this picture (it’s upside down, if that helps).
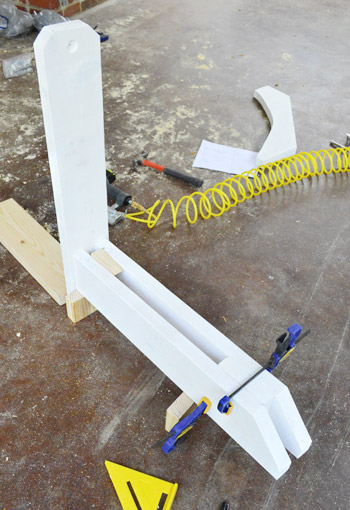
Basically we had to get both of the beams and the single arch piece aligned (and centered and level) and then screw them to the base using some 3″ lag bolts. It took a bit of finesse to get it all done without attaching something slightly crooked, but eventually we got the job done.
Then we had to drive some bolts through two beams (and the portion of the arch that sat between them). It sounds very straightforward, but the process took me a while and the rest of the day was spent rerouting a gutter and outdoor light fixture. So by the end of day two we had built two braces, but I couldn’t call this step complete since they were neither painted (that happened the next morning) nor hung (which also got done the next day).
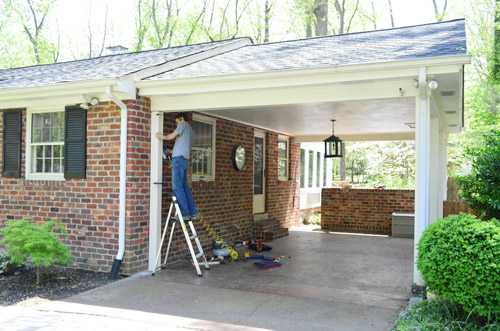
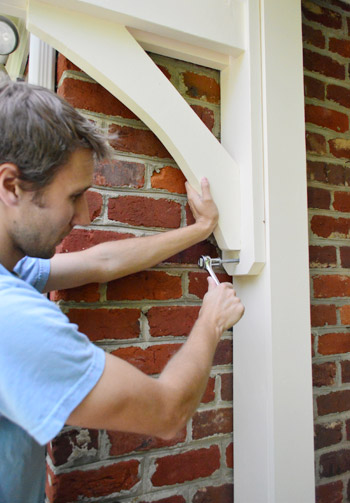
Hanging them took some finesse too, mostly because one of us had to hold the weight of it while the other checked that it was level and temporarily nailed it into place. There’s no way brad nails would support the weight of it over time, but they kept each brace in place long enough for us to drive a lag bolt into the top and bottom of each one, which secured it for the long haul.
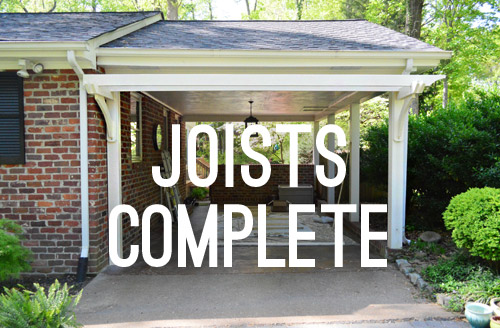
By noon on day three we were finally ready to move on to step 3.

Step 3 was the joists. You know, those two long pieces that would rest on each of the braces. These were again made from 2 x 6″ board and again they required a decorative curved cut (marked below). We did the curve on just the left side since on the right side they’d butt up against the side of the house.
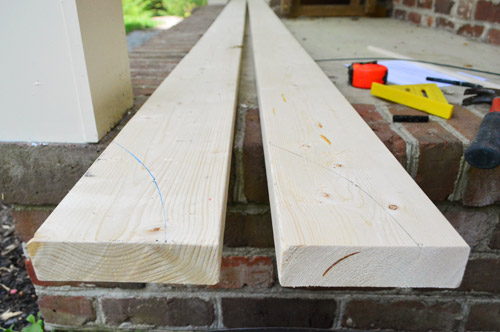
Once they were cut, we hoisted them into place and marked the exact spot where they rested on the braces.
These marks showed me where we needed to cut notches in the joists so they’d sit tight on the braces. And while we had them down, we also primed and painted them.
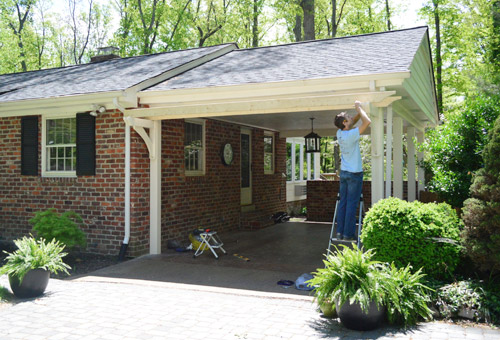
While the paint dried I got started on step 4, so it wasn’t until the next morning that we could actually hoist them into place. As for how we screwed them into place, we basically drilled a long pilot hole through the top of each joist and used a long drill bit to screw right through the top of the joist and into the brace’s beam below.
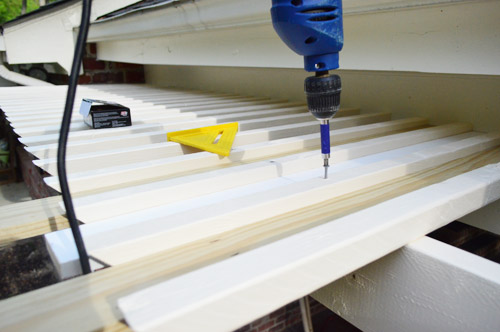
The last step was the lath, or the small strips that create the rail across the top. Since we were going to paint ours I couldn’t use the pre-cut pressure treated 2 x 2″ pieces that they sell pre-cut for deck railings (they say pressure treated lumber should be allowed to “dry out” for a number of weeks before paint or stain traps the treatment’s moisture in – and we wanted to paint things right away). So we bought regular 2 x 2″ boards that were 8 feet long and cut them down at home. This ended up being substantially cheaper, but we needed 50 of them (including a few just-in-case extras) so cutting and sanding them took me a good two hours. It was not exactly fun, but it was nice and mindless. Then came priming and painting all. those. pieces.
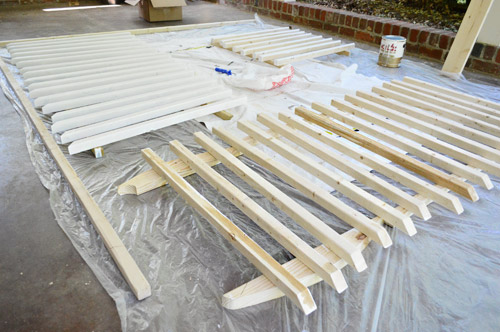
We had to cover all four sides of them since they’d all be seen, so thank goodness the paint had good coverage and it only took one coat (it’s Benjamin Moore Exterior paint leftover from the previous owners). Once everything was dry, we could start putting the lath into place on top of the joists.
This was the point that we both started to get giddy because the pergola was actually starting to look like a pergola. Oh and we cut a few 3-inch wide “spacers”out of scrap wood to help us keep our gaps even so we could screw them into place as quickly as possible (see the two longer unpainted boards in the picture below?).
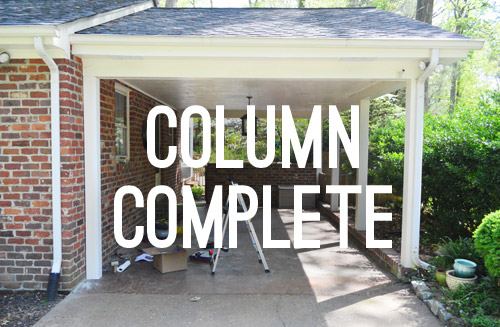
By the end of day four, step four was 100% done.
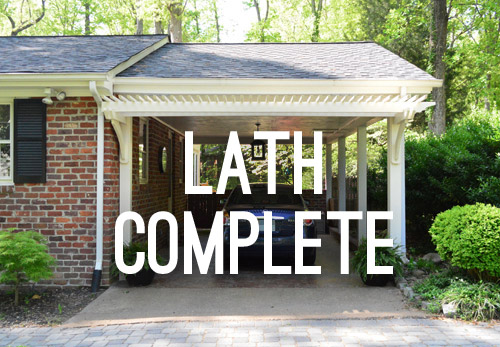
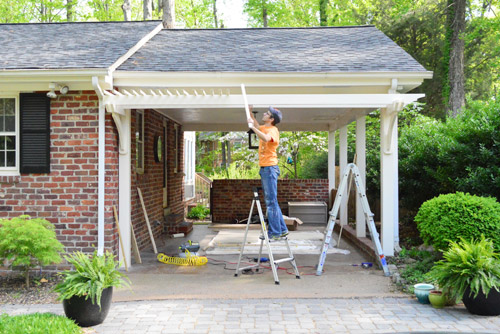
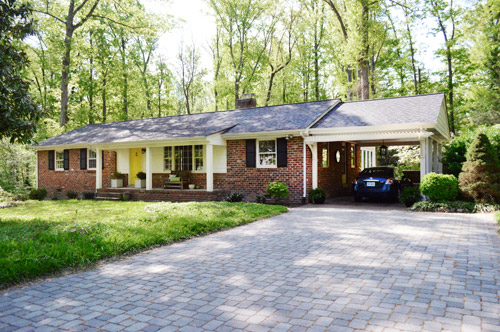
And with that, we could step back and enjoy our gussied-up carport. How YOU doin?
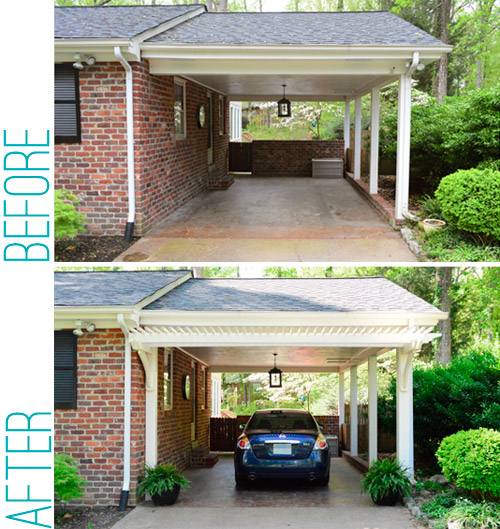
We’re both crazy happy with how it turned out. We were nervous (well, I was nervous) because it wasn’t the most conventional spot for a pergola – but it really is a huge upgrade. Suddenly that parking space tacked on the end of our house has some character. It has actually turned two anti-carport people (remember we almost didn’t look at this house just because it had one) into carport lovers. Well, cargola lovers.
Despite being a bit tedious, none of the labor was really that back-breaking. And the DIY price can’t be beat – especially when we heard that custom attached pergola kits are being sold for over 2K! Here’s where ours wound up:
- Truck rental (to get materials home): $19
- Lumber: $112
- Post bases: $23
- Nuts, bolts, & screws: $46
- Materials to reroute gutter & light: $14
- Paint & primer: Already owned
- TOTAL: $214
Oh and if you have a carport that already has two columns (or a garage with outside walls to rest the braces on) and you buy the braces instead of building them it would be about 50% easier (and should cut out around 2 days of work). So that’s an awesome option for anyone who wants to instantly cut four steps down to two.
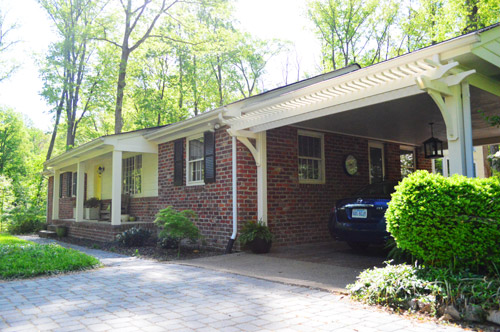
I feel like the new pergola gives our house a bit of “quaintness” (if that’s a word). We especially like how it frames the view of our street, which is currently blooming like crazy. Either way, it definitely adds some nice dimension to our flat ranch.
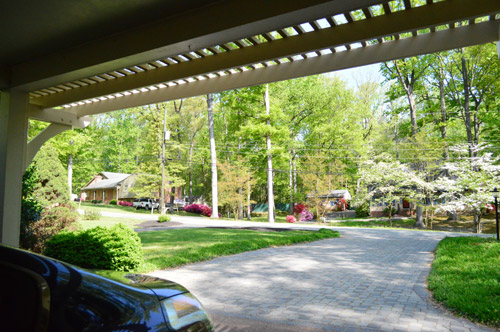
So yeah, between this and our beefed up porch columns, we’re falling in love with the front of our house all over again. And can you just imagine some flowering vines growing up those posts and across the top of the pergola? Holy charming, batman.
What’s on your outdoor agenda these days?

Laura C says
I’m so impressed – it looks fantastic! And, you can decorate with hanging flower planters until whatever vine you choose grows in. Awesome job!
Parke says
The pergola looks amazing!! I seem to remember y’all mentioning possibly adding a pergola over the deck… is that still an option? I would LOVE to see that project!
YoungHouseLove says
We thought about that some more and worry it’ll close things in since those two exterior house walls on either side of the deck are a lot closer (and fully closed in, whereas the carport is more open) so for now we think leaving it open is nice. We think swagged white string lights would be pretty up above though!
xo
s
Shaina says
Nice job! I love the character it adds. We’ve been considering putting a pergola on our detached garage for awhile, but have felt a little intimidated by it. It *seems* simple enough, but you really made the process look pretty easy and doable.
On a side note, I am a little jealous of how green your neighborhood is! Here in Kansas, our Spring has been so strange (86 today, 52 by Wednesday for example), we still have a lot of trees that don’t have leaves yet. Poor nature is so confused…
YoungHouseLove says
Oh man! Hope it warms up (and greens up) for you soon!
xo
s
Shannon says
Seriously John!! You’re a rockstar!! This looks awesome!!
Sarah Woods says
Our house had a garage on it that burnt down long before we bought it. The hubs and I were talking about building one back at some point, but didn’t know if the cost would be worth it since we are not planning on staying in this house forever. I showed him your carport and now we think that is the way we are going to go. Covered area for entertaining on the weekends and a way to keep frost off the car in the winter. It is a win, win! I’ll keep you updated when we decide to do it in five years ;)
YoungHouseLove says
Wahoo! Good luck Sarah!
xo
s
Jenny Stoudt says
Speaking of the outdoors, I was browsing for grass seed this morning when I stumbled upon this picture from your first house. It appears the company lifted the image from your site and I just thought I’d pass it along.
http://www.spnursery.com/maintaining-a-fescue-lawn/
YoungHouseLove says
Thanks for the tip Jenny! Off to check it out!
xo
s
Stephanie @ Sandpaper & Glue says
I love this update- it is really charming! I can’t wait to see what it looks like with vines and flowers… it’s so hard waiting for plants to growwwww! :)
Laura says
Double wow! Well done. Thanks for sharing.
Allisen says
I personally prefer “pergolaport.” I can’t stop saying it in my head! I think I will attempt to work it into everyday conversation today :)
PS. It looks awesome, I wish I had somewhere to put one!
YoungHouseLove says
Haha! Ten points every time you work that into real-life convos.
xo
s
katie says
It turned out great!! Wow – crazy-impressive!! That is going to be amazing with some vines on it – super charming :)
Kate Sigler says
One good vine idea is a combination of Morning Glory and Moon Vine. As with their names, the Morning Glory shows its blooms in the morning and the Moon Vine in the evening. That way you have blooms throughout the day that change as the day progresses.
YoungHouseLove says
Sounds really pretty!
xo
s
Diane says
Sara Richardson would approve.
Do your neighbors comment on your DIY improvements? Or do they just hate you? LOL!
YoungHouseLove says
They seem to love watching us do all the work! One of our neighbors keeps saying “come do my house next!” and we’ll be all sweaty and gross while shouting “be right over!” – haha!
xo
s
Kimberley says
Beautiful. Love the character it adds as well as the visual appeal. Such a wonderful project, great job guys!
Henna | HENNA BLOSSOM BLOG says
CARGOLA LOVERS! awesome. haha. You guys never cease to amaze me, and crack me up at the same time. :)
xo,
Henna
Tyesha @ House Made Home says
LOVE! It makes such a huge difference and for just a little of $200, you can’t beat it!! Good job guys!!
Angela says
Be careful if you paint the gutters! Mine were expensive Leaf Guard in almond and I had them painted to match the siding when I redid my house. Loved that they blended in. But…several years later they took on a pink tint!! I didn’t want to have to keep repainting them so I replaced them with almond again. Yikes!
YoungHouseLove says
Thanks for the tip Angela! Never knew that!
xo
s
Erica says
Looks great.
We built a pergola over our patio last fall!
Feel free to do what I like to do:
Refer to it as #pergolawesome
And sing about it like… “We built this pergola…. We built this pergola with ROCK and ROLL!”
:)
YoungHouseLove says
Haha!
xo
s
YoungHouseLove says
Haha!
xo,
s
Sara says
What a fabulous upgrade to the house!!! I never would have thought to do it!
Emily says
I love this! It’s amazing what a little change like that will do to really improve the look of the carport. We spent our Saturday outside in the beautiful weather giving our headboard a makeover to save us the money of having to buy a new one. It was an easy DIY project and turned out so well. And saved us a ton of money. Thanks for all the inspiration you guys give with your great projects!
http://emilyandtylerglover.wordpress.com/2013/04/28/diy-old-to-new-headboard/
YoungHouseLove says
Looks great Emily!
xo
s
Kristin @ Little Corbin Hill says
Looks awesome! I love it =)
dJS says
Nice architectural detail!
One thought on any climbing vine – think about the cons of a flowering vine. They attract BEES!! If you are walking through there or sitting out there, it can get quite unpleasant :) We made this mistake planting some heather by our walkway. Tho it smelled heavenly, the bees were extremely annoying to walk past, and there was some bee stings to deal with. Bummer.
YoungHouseLove says
Thanks for the tip!
xo
s
Courtney says
Do you have any plans to paint the outside brick
YoungHouseLove says
Here in Richmond it’s a selling feature to have unpainted brick since it’s extremely low maintenance (painted brick can get green mold, needs to be repainted periodically, etc) – so we’re happy to leave it as-is.
xo
s
Jill says
I believe the term is “quaintitudidity.”
YoungHouseLove says
Hahaha!
xo
s
Karen F says
NICE job, John! And a very well written/informative post to go with it. The “cargola” looks great! I would love something like this over my garage, but alas neither me nor the hubs are handy enough to tackle this ourselves!
Juliemara says
your neighbors must love you. Do most of them know what you do online and follow? comment around the neighborhood? get inspired by you? I would. Looks beautiful.
YoungHouseLove says
Some of them follow along, and others just walk by and say “my house next?!” and we all laugh (while I try to tame my crazy hair and wipe away my sweat. I’m sure we always look glamorous mid-project… haha!
xo
s
Shay says
Looks great! A vine of confederate jasmine would be beautiful on that cargola.
YoungHouseLove says
Lots of votes have been case for jasmine so we’d love to check it out!
xo
s
Dana @ House*Tweaking says
It’s time 4 da pergolator.
Personally, I am a little disappointed that this post wasn’t accompanied by a video of your family percolating under your pergolator. Yes, I am officially dubbing this newest upgrade “the pergolator.”
You guys, it’s awesome!!!!!!
YoungHouseLove says
Holy cow, how did we miss that opportunity? Can $herdog get a do-over?
xo
s
Karyl says
thanks for the step-by-step instructions on this one–one of my favorite projects to date you’ve done! Love it! Well done!!
YoungHouseLove says
Thanks so much Karyl!
xo
s
Thais Bessa says
Beautiful! It will be lovely with the vines. Question: what do you think about adding some trellis panels to the open side of the carport, making it a bit more closed in, but still keeping the light in?
Oh, and now I think Mr. Carport definitely deserves to be included in the House Tour before and after! :)
YoungHouseLove says
Never really thought about that! I think we like the open-ness that it has now, but we definitely could consider that and see where we end up :)
xo
s
Liz | Hogs Ever After says
This looks amazing! Like people said above, the extra column alone did wonders. I can’t wait to see it with some vines and window boxes hanging out around it. I vote we pergolaify all ranches ever! Also, we should add “pergola” into as many words as possible. “Oh look at Clarola and Perger playing in the perglaport.”
YoungHouseLove says
Hahahahaha!
xo
s
christina @ homemade ocean says
That is one FANCY cargola :)
YoungHouseLove says
Haha! Maybe we should change our names to The Fancysiks. Or the Pergolasiks.
xo
s
Katie says
Did you have to re-route a gutter and security lights from the right exsisting post? It looks like they magically disappeared. :)
YoungHouseLove says
Oh yes, we mentioned that in the post. The gutter was just routed down the side of the column instead of the front :)
xo
s
House Crazy Sarah says
Wowzers! It just brings such a dynamic punch of curb appeal to your garage & home – well worth the tedious work John! It looks fantastic!
Katherine says
WOW. Adding that one column makes such a huge difference – the whole pergola looks great, but I’m especially amazed by how that one column took the space from all carport-y to looking like a defined space that just happens to house a car. Symmetry for the win!
John @ Our Home from Scratch says
Too bad you don’t own a Peugeot, then it could be a Peugogola. Eugoogoly.
Quite the effort! Looks brilliant though. Love how it frames up the whole space.
YoungHouseLove says
Hahah, if only we had a Peugeot…
xo
s
Lisa in Seattle says
Eugoogoly! I love that movie all out of proportion.
Elaine - Visual Meringue says
WOW! Love this! Great job guys. It adds SO much charm to the front. Perfect :)
YoungHouseLove says
Aw, thanks Elaine!
xo
s
Lauren says
Looks fantastic! I saw a few people mention Wisteria, but definitely talk to a nursery pro before choosing a variety (if you go that route)- it can be a lot of maintenance and if you’re not prepped for that, could damage your gorgeous structure. Southern Living had an article on it a while back, so they’d be a much more official resource than a random reader like me. :) Either way, it looks awesome.
YoungHouseLove says
Thanks Lauren!
xo
s
bethblntn says
It looks amazing! Love the white it really ties everything together so well. I think if you guys had stained it it would have looked out of place. Done like a pro :)
YoungHouseLove says
Thanks Beth!
xo
s
Richard says
This is SUCH a wonderful addition to your home. It is amazing what you get out of a (mostly) horizontal element!
Piece of (unsolicited) advice about the vines you mentioned–
Stay away from wisteria. That stuff is so strong, it’ll rip the whole pergola down, if it has a mind to!
YoungHouseLove says
Thanks Richard!
xo
s
Christine says
You guys never cease to amaze me – this project came out awesome!
We’ve been house hunting for our first home and every so often, I find myself thinking, “Interior Brick wall? No problem. There’s a YoungHouseLove post about how to pretty this up!” My Realtor keeps accusing me of watching too much HGTV and I keep correcting him and saying, “No, it’s YoungHouseLove!”
Keep up the good work guys!
YoungHouseLove says
Haha, that’s so sweet Christine! All the best with everything!
xo
s
Hilary L says
This adds so much charm :0) I love your idea for adding window boxes (I follow you on Pinterest) I can really picture them now – especially in the last pic! Now that it’s warming up, I’m sure we will have some “get outside” posts! Looking forward to what’s next as always!!
jess says
Love it {as always}!
And window boxes would look amazing! I have a 1950s stucco rambler and I’d love to put in window boxes, but we are afraid it would damage the stucco. I’d be interested to see how they are installed on brick! :)
Katie Baker says
Do your neighbors know that you have this blog and are epitome of a DIYer? Or, do they just drive by and go, “Wow, that house is really coming along”? Seriously, if I were your neighbor, I’d totally be watching your house to see what you do next…and then steal the idea and do the same to my house!
YoungHouseLove says
Haha, most of them know and follow along (and occasionally ask us to come over later and help them, haha!).
xo
s
Patti says
Wow YHLovers!! This is one of the most impressive projects I’ve seen from you guys. So much bang for your $214 bucks!
YoungHouseLove says
Thanks so much Patti!
xo
s
R Sims says
LOVE it! I’ve been wanting to put one over our garage to beef up the curb appeal, and this is now making me itchy to get it done! Great job : )
oh Holland says
Genius! I am now re-thinking my carport’s possibilities. So far it’s only painted to match the house, but now I see it could be so much more.
Amy says
Hi,
I love your blog and been following for awhile. This is kind of a random question but just curious what the square footage of your house is. We are looking to purchase a new home and love the layout of your home and want something similar.
Thanks,
Amy
YoungHouseLove says
Thanks Amy! It’s around 2500 square feet, which initially felt crazy big to us, but I guess we’re like goldfish and we just spread out. Haha!
xo
s
KarinK says
It looks fantastic! Great job, as usual.
Lezlie says
Just an FYI – you can use colored stain on pre-treated wood right away. We added a screened porch to our house a few years ago and all of the lumber was pre-treated, then immediately painted with Olympic colored stain. It looks just like paint but wears much better. I even painted the floor a pattern with it in three colors and it never chipped once!
awarmlight says
Quaintness is a word.