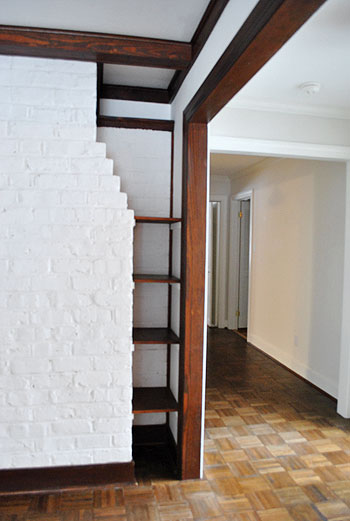
Let’s talk about breathing room. One thing we learned from our last house was that we prefer to let rooms “breathe” a little. Which means resisting the urge to fill every corner and span of wall with furniture and plant stands and coat racks and storage baskets and everything else that you can stick in there to crowd the perimeter of a room. So after a bit of deliberation we decided that letting the previous shelf-riddled corner of the fireplace breathe was the best choice for us. I actually attacked them after only a few days of living here and realized I never shared the pics while writing my list post– so here they are.
We’re planning to add storage ottomans and to build or buy a new media cabinet with lots of storage space in other areas of the room, so we’ll still have a nice amount of stash spots in there without potentially forgoing the whole balance thing by keeping those shelves.
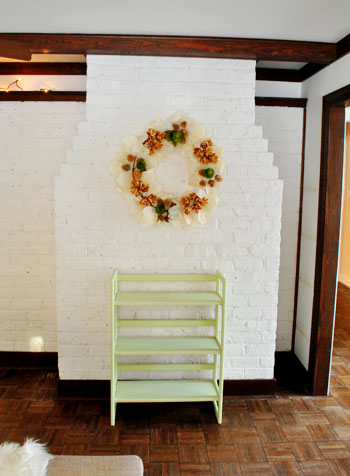
See balance is key to us because it seems to keep spaces feeling more inviting and relaxing. And we knew that a shelf full of baskets, books, and stuff on one side of the fireplace would make that small niche feel heavier while the longer bare expanse of wall on the other side would feel, well bare and unbalanced by comparison. And we didn’t want that wall to feel lopsided. Especially since it’s such a small nook. You know how you wouldn’t try to stuff the smallest corner of your bedroom with the largest piece of furniture (like a floor to ceiling bookcase?) and instead you’d save that for a larger expanse of space (and would probably leave that smaller corners well enough alone)? That’s why we thought those shelves had to go.
Different strokes for different folks though- I’m sure some people would have loved to keep them around. I, on the other hand, couldn’t wait to break out the ol’ screwdriver-as-chisel method:
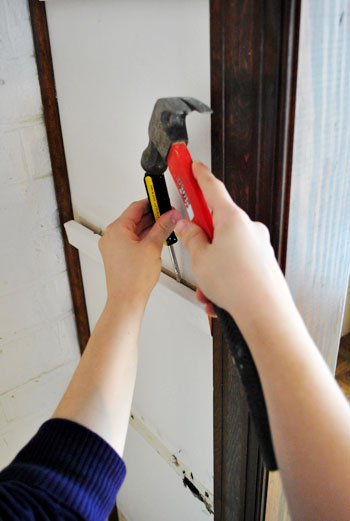
The wood shelves lifted right out, but the shelf supports turned out to be tough cookies thanks to super long nails holding the shelf supports in place on each side. But I was still able to get ‘er done all by myself while John was on Clara duty. Girl power (why do I always picture the Spice Girls when I type that?).

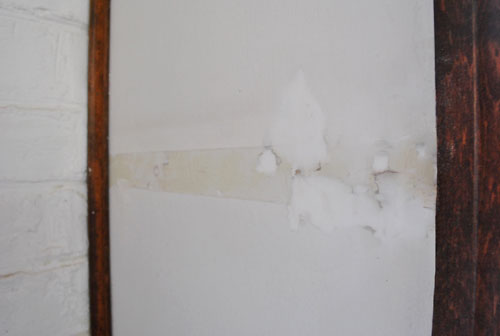
The walls were looking a little rough in some areas due to some particularly clingy nails. Yikes.
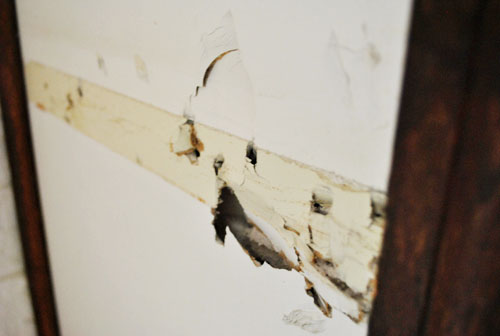
… but it was nothing a little spackle couldn’t solve. And the previous owners had sweetly left behind this lightweight kind so I gave it a try for the first time in my life (we always get the heavy duty traditional stuff, also by Dap).
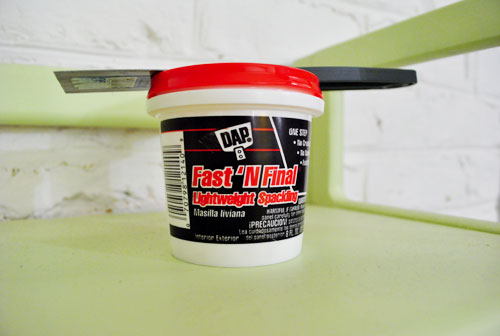
The verdict? I loved it! It’s really airy and whipped, like shaving cream. And it’s easy to get a super smooth skim coat over every hole in the wall – even that insanely large one pictured above. Look how easily it cleaned up:
I just used a flexible metal putty knife and smoothed it on. Unlike the heavy duty spackle that I’m used to, this lighter stuff said that it didn’t even need to be sanded. But I gave it a good once over with some high grit sandpaper after it was fully dry just to make it as smooth as possible. I’m in love with how easy it was, so I already have a big tub of this new lighter spackle stuff on my shopping list. Now all we need are a few paint touch ups to make all evidence of those shelves a thing of the past.
If only we had the wall paint around to touch things up. Wop wop. We haven’t come across that yet (although it might be hiding in the basement somewhere) but if we don’t find it we could always bring home a bunch of white swatches and try to make the closest match. Or better yet, we could get our butts in gear and paint the entire room in the soft gray color that we have yet to settle on (and take the trim to a nice glossy white color while we’re at it).
That little corner might not look like much now, but we promise to share pics of the whole room from that angle as it evolves and we take on more projects (like painting, hang more stuff on the walls, and adding in more furniture). That small breath of uncluttered space in the corner will be a welcome break indeed. Plus we picture kiddos hiding there with their eyes squeezed shut who fully believe that they’re invisible. Ah youth. Remember when you’d close your eyes and hide somewhere totally obvious and fully believe that nobody could see you? Those were the days.
Pssst- We announced our random winner for this week’s giveaway. Click here to see if it’s you.

Summer says
About the closing your eyes as a kid….my 14 month old has started doing that when she pulls her little shenanigans! We tell her “no, NO” and she closes her eyes really tight and then peeks at you to see if you are still there, then shuts them again. Too funny!
YoungHouseLove says
Haha, that’s so cute!
xo,
s
Kristin says
I’m looking at a grey for my dining room. I’d love to know which shades you have considered.
YoungHouseLove says
Hey Kristin,
We’ll share our gray paint choice (and a few runners up) when we finally land on one!
xo,
s
rebecca says
you need to invest in a pry-bar! They are SOOO much fun, and makes a girl feel super powerful. AND it is fun!
susan says
hey! you may have already answered this but i have a question about the spackle you used. we have old plaster walls – do you think it would work to fill holes on them?
thanks!
YoungHouseLove says
Yup, we have plaster walls too. Works well in drywall and plaster from what I’ve learned in the last few days of using it.
xo,
s
Jen F says
So much better!
Lauren Janelle from Charles & Hudson says
I love love love that you are going to paint it grey. Removing the bookcase makes it look much nicer and larger. Can’t wait to see the finished result. :)
Wendybird Graphics says
Thank you for taking the time to share the process. Especially for letting us in on your thought processes. These are very valuable!!!!
Bree says
I had to laugh because I was telling my husband we should use lightweight spackling to cover holes in our apartment walls and he said it wouldn’t work. Lo and behold here comes my mother-in-law to help out with lightweight spackling. I guess a gentleman at the hardware store recommended it to her when she was checking out. Too funny, usually I’m the one with foot in mouth syndrome!
Thanks for the great tips, we’ll be using them next week as we start painting our first house!
Lissa says
Hi guys
I just checked homedepot.com but I can’t find the DAP speckle you mentioned here. Have you guys bought a big tub of it already? If so, where? I would really love to try this instead of the heavy duty ones too. Thanks.
YoungHouseLove says
It’s only in stores. Just ask for the lightweight spackle by DAP in the red container. Hope it helps!
xo,
s