There are almost always three main steps to the room makeovers that we tackle, and depending on the scope/depth of them, they can take a few days or a few months (ok, and sometimes we jump around so much that things take years). Either way, the order seems to go like so:
- prep/planning (brainstorming, picking a color palette, going shopping, priming, sanding, spackling)
- bigger upgrades (painting walls, refinishing or painting cabinets, laying new flooring, etc)
- finishing touches (curtains, new hardware, art, accessories – all the things that add “you” to the space)
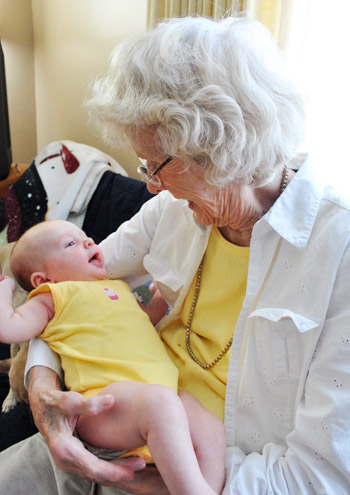
So when John’s mom mentioned his grandma’s half bathroom could use a little makeover we got to put those three steps into action. It resulted in a three day bathroom blitz that involved two seven hour drives and some obligatory midnight painting (thank goodness John’s parents traveled with us to keep Clara busy and happy). First you should meet Granny. She lives in Huntington, West Virginia, and is one of the happiest, kindest women you’ll ever meet. Here she is holding baby Clara for the first time:
And you know we love to share the day-by-day play-by-play, so with further ado, here’s what our To-Do list looked like for our turbo-charged three-day project (along with guesses about when we’d actually tackle things in parenthesis after each line item):
- Brainstorm colors & go shopping for accessories (Day 1)
- Spackle/sand/caulk everything to prep the room for paint (Day 1)
- Rebuild the cabinets a bit so they look more balanced (Day 1)
- Prime and paint the cabinets for a more updated and open look (Day 1 & 2)
- Paint the entire room, including the ceiling (Day 2)
- Fix a few issues, like a rusted duct and an old dingy corner below the sink (Day 2)
- Redo the floors, which were that old sheet laminate stuff (Day 2)
- Revive some hardware/accessories with a fresh finish (Day 2)
- Make & hang curtains to add some charm (Day 3)
- Bring in some meaningful art (Day 3)
- Add some functional/personal accessories to finish things off (Day 3)
- Reveal the whole shebang for Granny, who promised not to peek beforehand (Day 3)
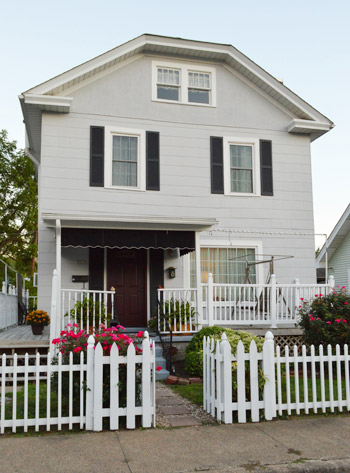
Here’s her charming 1920’s house, which they’ve in since the 1940’s so John’s mom and her siblings all grew up here. John’s late grandfather (“Papa”) actually did a lot of the handiwork himself over the years so there are lots of stories and memories tied to this place.
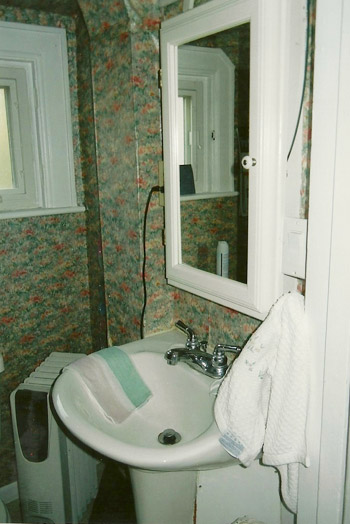
In fact, it was Papa who converted an old kitchen pantry into this little half bathroom! So everything from adding the plumbing to the electrical was all him. But that was decades ago, and the room was looking ready for an update, especially thanks to some wallpaper that Granny was “ready to tear off the walls” herself (at 90 years old, she still has that DIY spirit running through her veins, by the way). So here’s what the room looked like before the wallpaper was removed:

Thanks to Granny, our Aunt Ellen, and our Uncle Dean, the wallpaper was all miraculously removed before we arrived around dinnertime – just in time to work the night away prepping the rest of the room. But not knowing our store options in Huntington, we did some shopping before we left, including a mad dash into HomeGoods for some items we thought could work (we over-bought, knowing we could return whatever she didn’t need). We also knew Granny might have some of the items that we grabbed, so ideally we would get to use some of the new stuff, and some of her existing stuff, for a nice mix (and some nice savings).
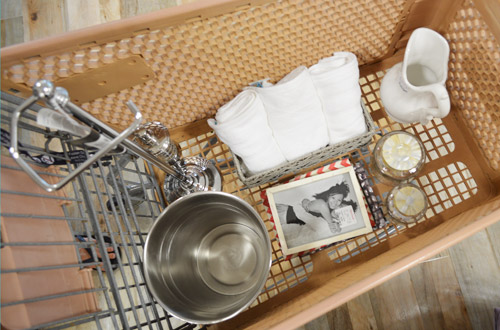
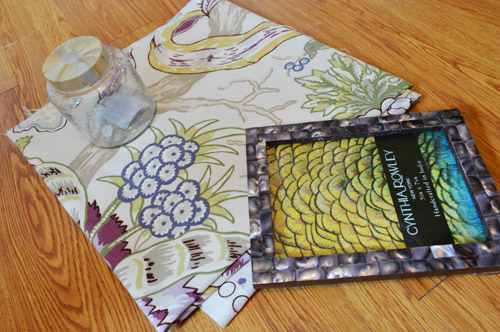
We also stopped at our favorite fabric outlet (U-fab) and grabbed a yard of pretty floral-printed fabric that felt a lot like Granny (it’s made by Braemore, for anyone looking for it) to make sweet little cafe curtains for the one small window in the bathroom. Here’s that fabric with some of the accessories we picked up, just so you can see where we were “going” in our brains:
We also stopped into Home Depot and grabbed some new flooring (which you’ll see more of during Day Two) and we used our seven hour drive to brainstormed a few other ideas for the space while we took in the road trip scenery (slash kept a pooch and a toddler occupied).

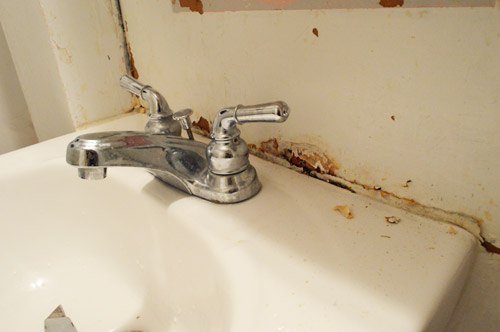
Here’s what the room looked like when we arrived. It was already looking worlds better with just the wallpaper being gone.
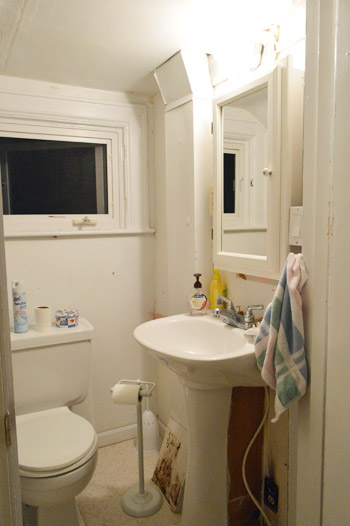
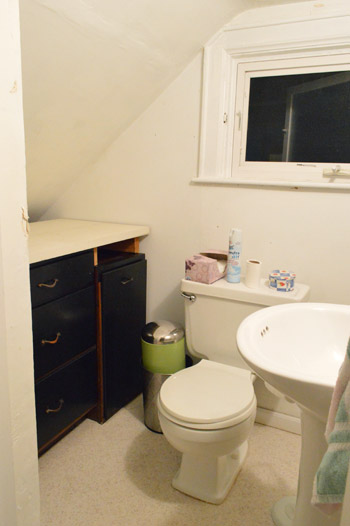
Apparently the paper came down with just a little tugging, so that was the good news. But without the wallpaper, some areas of the room actually looked even more worse for wear… like the bottom corner of the sink, the burned outlet, and the rusted vent on the other side of the pedestal sink.
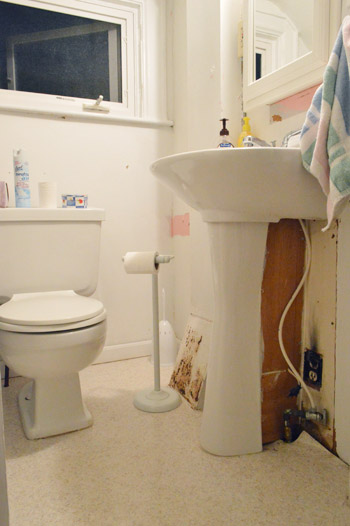
Yup, there were definitely some areas that needed attending to…
So we got right down to business. My job was cutting all of the old caulk out. It’s a step that doesn’t look much better immediately (sometimes it looks worse)…

… but once we get some fresh caulk and painting done, it looks as good as new.
Speaking of cutting out caulk in general, it’s amazing how much of it there can be. Just look at my pile after tackling the sink, the baseboards, and other random corners that also had bits of leftover wallpaper and cracked flooring:
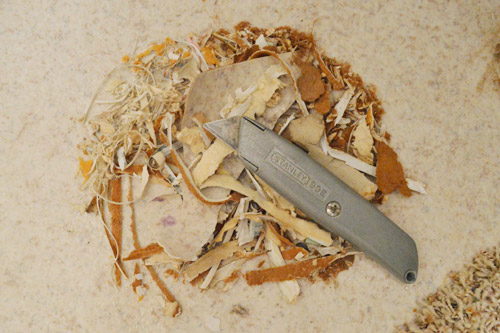
I actually ended up using an entire tube of caulk in this tiny space! Everything from the baseboards to that area around the sink and the doorway/window trim got some fresh caulk. It’s definitely a tedious job, but so worth it for a polished look.
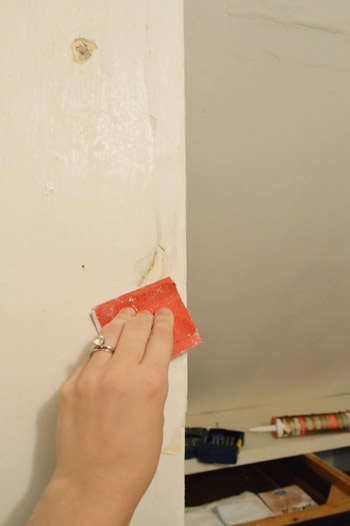
Then it was on to spackling and sanding. We just used regular old Dap spackle (with the blue lid) and a spackle knife, and pressed it into every crack and crevice, working our way around the room. Sometimes I’ll sand something before I spackle it, just if there’s something hanging off (ex: a flake of plaster) so I get a better finished look and a less crumbly foundation under my spackle job.
Meanwhile, John was off doing some wood cutting in the middle of the kitchen. I guess this is what happens when you don’t have your usual workspace and tools with you?
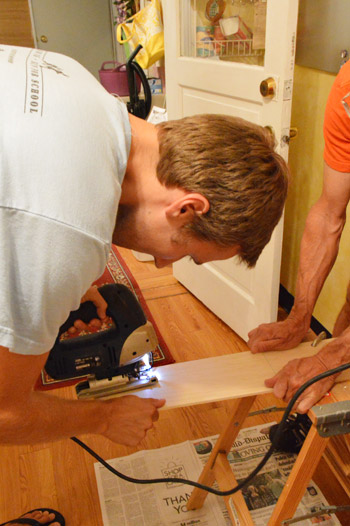
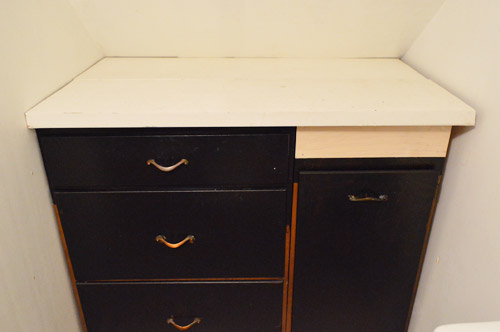
He was cutting a small plank of wood to cover a gap in the top of Granny’s cabinets since they’re actually two cabinets pushed together and topped with an old hollow-core door. So we filled the gap for a seamless look by nailing the plank into the 2 x 4 pieces that were already there to support the counter.
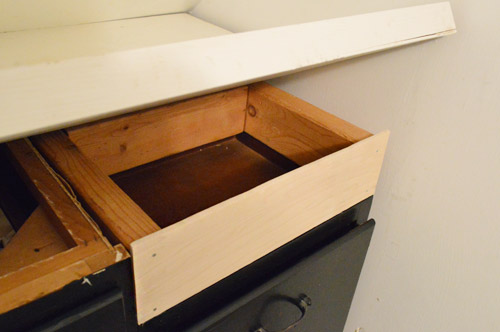
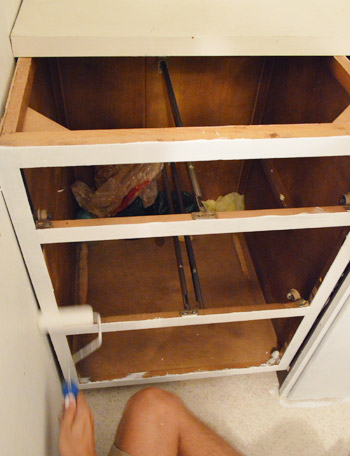
It would of course look more seamless once it was painted, which meant it was time to remove the hardware and prime those cabinets.
Here’s John rolling on some primer (this post has a much more thorough rundown of how we prime and paint cabinets).
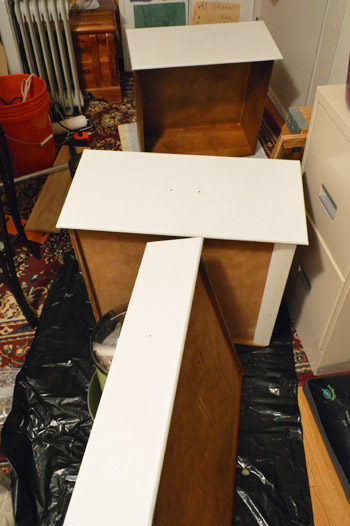
And here are the drawer fronts all drying in Granny’s back-room-turned-cabinet-painting-studio:
It took us a good four or five hours to prep the room as well as prime the cabinets and the countertop, so our to do list now looked like this (with little notes next to each remaining task about when we hoped to tackle them):
Brainstorm colors & go shopping for accessories (Day 1)Spackle/sand/caulk everything to prep the room for paint (Day 1)Rebuild the cabinets a bit so they look more balanced (Day 1)Prime andpaint the cabinets for a more updated and open look (Day 1 & 2)- Paint the entire room, including the ceiling (Day 2)
- Fix a few issues, like a rusted duct and an old dingy corner below the sink (Day 2)
- Redo the floors, which were that old sheet laminate stuff (Day 2)
- Revive some hardware/accessories with a fresh finish (Day 2)
- Make & hang curtains to add some charm (Day 3)
- Bring in some meaningful art (Day 3)
- Add some functional/personal accessories to finish things off (Day 3)
- Reveal the whole shebang for Granny (Day 3)
We had high hopes that we could bang everything out in our three day blitz, and we were really happy with our end-of-Day-1 result. A nice fresh clean slate to start gussying up in the morning. So it was off to bed exactly at midnight, after a very full day of shopping, driving, prepping, and priming.
We’ll be back with the full Day 2 rundown tomorrow, we just have to edit some photos (um yeah, we might have taken 1,294 in just three days…). Are there any other bathroom updates going on? Or shopping/prepping/brainstorming? Have you ever done a little room makeover for someone you love? It sounds weird, but it was even more fun than doing something like this for ourselves because the excitement of the big reveal for Granny got us so dorked up and giddy.

chrissie lynn says
we have a 1920 cape with a pantry-turned-bathroom too! it is in dire need of a renovation (the previous owners painted it a crazy blue that doesn’t exactly jive with the orange-ish oak trim). can’t wait to see what you chose for the flooring, we happen to have that sheet laminate in ours now too.
(all this has me thinking it’s my new after-work project for the week).
thanks for the inspiration as always!
Sonya says
What a sweet thing to do for your grandma! I can’t wait to see the result!
Jessie H. says
Looking good! We did a full master bath reno on my in-laws bathroom before we were married – that’ll test your commitment! It was a full, floor to ceiling reno that took us about three months to complete due to the 5-hour drive between houses. It wouldn’t have been the colors or design for my bathroom, but my MIL loves it, and that’s what counts!
YoungHouseLove says
Aw, that’s so sweet!
xo
s
Jenni says
Impressed as always! I would love to do this for my Granni who has the most gorgeous but dated historic home, but she is so resistant to a lot of change!
Linda says
Yay all of you! I’m really impressed with the relatives who took down the wallpaper, and you two for doing things right! Unlike my prior owner and, ah, myself – I definitely didn’t spackle as much as I should have after getting my wallpaper down over Labor Day. It is always so tempting to do something a little quick and dirty – but I can already see that this bathroom is being done right, all the way along.
That said, even my inexpert, first time getting wallpaper down and trying to fix walls after is a thousand times better than my before…and it honestly was John and Sherry (and the nice lady at the Benjamin Moore store) who gave me the courage to try.
YoungHouseLove says
Haha, go Linda! I love that.
xo
s
Paige @ Little Nostalgia says
You guys are so sweet to help her out! I bet she’s stoked (or whatever the equivalent is for a 90-year-old). I’m doing a little facelift in our main bathroom right now, too. Painting over the pink-ish tan walls with a dramatic medium gray. It’s pretty awesome so far.
Lindsay @ Me, Ed and Pea says
Redoing a bathroom for granny!? Awesome. You guys are simply the best *queue Tina Turner*
Anne says
…I just love how Clara and her Granny matched their outfits for the first meeting. ;)
How fab of you to be doing this! You guys are awesome. Can’t wait for the big reveal! Hope one of the 1,294 pics shows your Granny’s reaction.
Tamsen says
Totally off topic but have you spotted this chair? You guys have something in common!
http://www.target.com/p/avington-upholstered-armless-accent-slipper-chair-gazebo-cloud-floral/-/A-13916598
YoungHouseLove says
Haha, I love it!
xo
s
Cheryl says
Just wanted to say how much you rock doing this for your grandma! I can’t wait to see the finished room. I know she just loves it.
Oh, and I too, am part of the pink bathtub club. What were people thinking???
Carri says
I love to read about your WV adventures! I commented one other time when you visited Old Central City Antiques. I’m from Huntington, went to Marshall, also had a Granny who lived in Huntington and still go there from time to time to visit family. When I started reading the post I thought to myself, “Where will they go for supplies?” being all too familiar with the limited resources there—great city but fabric shopping? Please. Unless you’re willing to drive to the mall for Hobby Lobby’s fabric department or else go down to Ashland to see their offerings. And even then…I chuckled when I read that you all picked up things beforehand. Oh what a smart move. I know you need to keep some things anonymous but I would love to know where her house is. I grew up on the southside and went to Cammack Elementary. Always fun to find others with WV connections!!
Nicole says
I can’t wait to see Granny’s reaction when you do the big reveal! Her house is super cute, btw.
how2home says
What a fun project! Can’t wait to see what you did on day 2!
Erin says
Just preordered a copy of your book! Woo-hoo, can’t wait to get it!
YoungHouseLove says
Wahoo! Thanks Erin!
xo
s
LindsayH says
Do you have a post about caulking? My bathroom has no caulk except around the tub and I think it would look better if the trim, sink, etc. were caulked, but I have no idea where to start!
YoungHouseLove says
We actually made a caulking video, so we’ll share that in a day or two for ya (just have to edit it, haha).
xo
s
Sherry from BC says
Oh, I am glad you have made a video…..I really have to redo my place and have never done it before. Somebody else always did it for me…..oh what an exciting first time, not.
Marcie says
What an awesome lady and a neat project!
I’m brainstorming a new master bath. My husband said I could use the funds we saved from not having to buy formula if I make it exclusively breastfeeding for the whole first year (TMI? Maybe.). 3.5 more months to go and finally figure out the new floorplan. :)
Clara says
I can’t wait to see the rest of this redo!!
Kim says
So sweet! See, if you run out of projects on your house (not likely), you can do other people’s houses! Granny first, obviously, but can I sign up for some day? haha!
YoungHouseLove says
Haha, that would be fun!
xo
s
Lynn @ Our Useful Hands says
Oooo…this is gonna be fun! Your Gran must be so happy to have such talent in the family. Can’t wait till tomorrow. And the next day…
My best, Lynn
Carol N. says
I’m not quite as ambitious as you guys (and a good bit older) but I am making some new fresh pillows for my mother-in-law now and it does feel extra good to be able to do something for someone else. I just hope she likes the fabrics I picked out!
YoungHouseLove says
That sounds so sweet!
xo
s
Hillary says
I love that Braemore fabric! I can’t find it by a search. Do you, by chance, know the style name?
Can’t wait for Post #2!!
YoungHouseLove says
I tried to search too and didn’t come up with anything. So sorry! Anyone know?
xo
s
VickiP says
How wonderful of you two! And I bet Granny is SO glad to see Clara, too! I’m excited to see you tackle a home from the twenties. Ours was built in 1921 and whenever I am up to my eyeballs in plaster or other ancient house guts, I wonder: “What would John and Sherry do?” a little WWJASD? Or maybe: WWYHLD? Haha!
YoungHouseLove says
Haha, you’re so funny Vicki.
xo,
s
Keri Beth says
I NEED YOUR HELP!
We are in the middle of our upstair 11′ x 12’8″ bathroom remodel. Moving fixtures and trying to figure out what to put where. This will be a kids bathroom and well as we dont have kids now im not sure what i will want down the road.
Did i mention the ceiling was slopped and we can’t figure out a storage solution for the 6ft wall side.
YoungHouseLove says
That sounds like a fun challenge! Feel free to post pics on facebook along with a question and hopefully folks will chime in with helpful suggestions!
xo
s
Kristen says
I can’t tell you how much I love this idea! I love that you have a limited budget and only 3 days – it’s like the John and Sherry Show – On The Road. Of course bonus points for doing it for someone you love!
Mia says
I just want to say how great you guys are! Enjoyed this story, can’t wait to see more. Not to mention talented!
YoungHouseLove says
Aw thanks Mia!
xo
s
Cathy C says
Just loving the fact that you have a Granny and a Papa too… :). My Granny turns 94 on New Years Eve. She and Papa were married for 52 years and had 6 kids (two singles and two sets of twins!)
Em says
This looks like so much fun :D Me and my sister actually updated our mum’s bathroom while she was away on holiday, she had no idea! Her reaction was priceless, really looking forward to seeing your reveal :)
YoungHouseLove says
That’s so sweet! I love that!
xo
s
liniv says
So, I always seem to come along with non-post related questions, but the phone of tons of caulk removal jogged my memory…what is the way you deal with cleaning caulk? We just recently chose to get rid of the counter-like backsplash in favor of a pretty tiled one, and I used your blog as a defense to why we can do it (well YHL did it! It’s fine!). How is the caulk holding up behind the sink, where it’s exposed to water/food spray/etc?
YoungHouseLove says
So far it’s doing great! Admittedly if hasn’t been that long, but if it ever got nasty I’d cut it out and recaulk like we did in Granny’s bathroom! Hope it helps!
xo
s
Laura says
So sweet of you guys to do this for your sweet granny! You reminded me of the folks with the Renew Crew (heard of it?). In case you’re interested or want to mention them (for others who might want to volunteer to help an “adopted” grandparent or friend :) ), I thought I would include their website:
http://www.therenewcrew.org/
They’re really great!
YoungHouseLove says
What an awesome organization! I love that!
xo
s
Kelly O. says
The bathroom in progress looks great — but what really looks great is the picture of Granny and Clara! I love that their shirts match — but I love even more the look on each of their faces. What a treasure!!
YoungHouseLove says
Isn’t that so cute?! Total accident. We love that pic.
xo
s
Katie says
Totally off topic, but isn’t it your Blogiversary this week? If so, congrats! Wondering if you’re planning a “Blogiversary Week” again this year? Looking forward to seeing more of your makeover of granny’s bathroom!!
YoungHouseLove says
Aw thanks Katie! It’s actually this coming week. Wahoo!!
xo
s
Evin says
Now THAT is a great reason to make two seven-hour RT driving trips. What an improvement taking down the wallpaper made too!
I once redecorated (painted, reupholstered,…) a basement room to be a family room with a dry bar while my parents were out of town. It took about 24 hours because I spent weeks beforehand collecting supplies and storing it all at my neighbor’s house. Including a vintage bar mirror from Scotland. Such fun to do something like that for someone who appreciates it. Can’t wait to see days two and three!
YoungHouseLove says
That’s so cool! I love that!
xo
s
Ashley Travers says
I can’t wait to see the finished product!
We re-did our bathroom recently and sometimes its the small space that you get the most joy out of. Its nice to get up and shower in a nice new space.
http://thefreckledredhead.blogspot.com/2012/08/bathroom-remix.html check it out!
YoungHouseLove says
Looks great!
xo
s
Elizabeth says
So I’ve been hunting for that fabric all afternoon. Do you have any other information on it? Love the colors!
YoungHouseLove says
I wish! Other than seeing the name Braemore on it, we don’t have a clue. I tried to hunt for a link but was stumped. It was at a fabric outlet, so maybe it’s older. Maybe try ebay?
xo
s
Natalie B. says
Do you ever worry about your wedding ring being damaged? (Saw it in the spakling photo) I usually remember to take mine off, but it’s had its share of run-ins with paint splatters, etc!
YoungHouseLove says
I’m a weirdo who never takes off her ring (John and I sleep in them, shower in them, etc). We have definitely heard that if you leave them on you have to scrub them more to clean all the splatters, but it’s not as bad as taking them off and losing them. Haha! This is coming from a girl who’s own momma dropped her wedding ring down the drain. Eeks!
xo
s
Sarah C. says
Out of curiosity, when you both took the Homegoods quiz did you happen to get ‘sassy’? Or were you surprised to be something else entirely different?
YoungHouseLove says
I actually got Sassy on the first try and John got it on his second one. How funny is that? John got Urban Funk at first, but then tried one more time and got Sassy.
xo
s
Lisa says
Ha, my husband is from Huntington and allllll of my in-laws still live there. Maybe I’ve seen Granny around somewhere :)
heather s. says
Can’t wait to see the space made-over! I just did six minor updates to my bathroom that made a world of difference (especially the revamped light and DIY towel bar).
http://athomewithh.blogspot.com/2012/09/makeover-your-bathroom-in-6-easy-steps.html
YoungHouseLove says
Really cute Heather!
xo
s
Lindsey says
I just graduated from Marshall last spring, and I just gotta say, your granny’s house is so adorable! Huntington has a lot of gorgeous older homes, but quite a few have fallen into disrepair. =( Also, it’s a good thing you guys brought your supplies, because although there’s a couple of hardware places downtown, the big orange and blue stores are all the way in Barboursville along with Jo Ann Fabrics, Michael’s and Hobby Lobby. I do believe that there’s a Habitat for Humanity ReStore somewhere in downtown Huntington, though!
Melissa Phouthavong says
I am from Charleston, WV and just bought my first house here in December. I can’t believe you were only about an hour away! I read your blog religiously! You guys are such an inspiration for a newbie like me! Next time you visit Granny, come redo my retro bathroom in Charleston hahaha
YoungHouseLove says
Aw, thanks Melissa! You’re so sweet! We’d love to run into you in Charleston someday!
xo
s
Kellye says
I love it when you guys take your DIY show on the road. Was it john’s sister’s patio bedroom you re-did? I remember that was an amazing transformation. Can’t wait for the big reveal!
YoungHouseLove says
Yes! That was his little sister Carrie. That was so much fun!
xo
s
Laura says
Tease!!!! I love these types of makeovers and can’t wait to see day 2 & 3!!! Make haste, please!! :)
Hillary says
Fun! Last fall I actually surprised my mom with a total room makeover! She went out of town and came home to a completely different space. She loved it and her reaction was just like one of those “While you were out” type of shows. I actually used your blog for lots of inspiration and I even made my own version of your paint chip gradient art!
YoungHouseLove says
That’s so sweet! What an awesome thing for your mom to come home to.
xo
s
Sherry from BC says
This is great. Can’t wait to see how it turns out. I have to have a go at my bathrooms one of these days. They just haven’t made it to the top of the list. This weekend I finally started one of my been forever on the list” jobs and actually started laying the carpet tiles in my attic bedroom. The room is planned for a student to help augment my funds to do other renos. It is a big airy room that had a crappy floor. I started in the summer by painting in all Benjamin Moore Cloud White which really brightens up the place and with all the sloping angles, it looks rather modern and welcoming. I had already ripped out the old carpet and section of lino (don’t ask it was that way before I moved in). Anyway I had it painted and the floor prepped and then other things intruded and the room began collecting stuff. So Saturday I emptied the room of all the extra crap and swept and vacuumed and checked the floor for stray staples from the old carpet. Then Sunday I got up bright and early and started the carpet. Managed to get a good 2/3 done before I had to break to make dinner for the family. I have done a lot of the worst cuts and just have to finish and replace the baseboard trim. The tiles are taupe subtle stripes and used a checkerboard layout as I figured they would always look like carpet tiles & I felt this looked more interesting. It already looks so much better. I was too tired after work to finish tonight but will hopefully finish by the weekend. I am a granny myself and just don’t have the stamina I used to. All that crouching to lay the tiles was hard. I wish my grandchildren would come and makeover one of my bathrooms. Maybe one day after all they are on only 6 and 3 right now….Thanks for the inspiration.
Elizabeth@ Food Ramblings says
impressive work in day 1– can’t wait to see the next steps :)
Lisa says
Scope Me! Farmhouse Glam was spot on! The touch of Boho, not as much, but it was fun. Nice bathroom…can’t wait to see the finished room. :)
Blondlady says
I would love to see the finished product in your Grandma’s bathroom! I’m new at this and I haven’t found pictures if you’ve posted.
YoungHouseLove says
Oh yes, yesterday we shared day 1 and today will be day 2. Then comes the big reveal! We like to post in real time, so if something takes us a few days or a few weeks we just chronicle that process and share things as they happen ;)
xo
s
Katie says
I just started remodeling my half bath! The wallpaper didn’t come down as cleanly as it did in your reno, so we are a little slowed down by that. However, everything else is really coming together!
Susan says
Oh you got me! I thought I was going to read the entire 3 day process in one post… cliffhanger!
Jaye @ Just Trying to Make Cents of it All says
I can’t wait to see your Granny’s reaction on the reveal! Thanks for sharing your awesomeness!