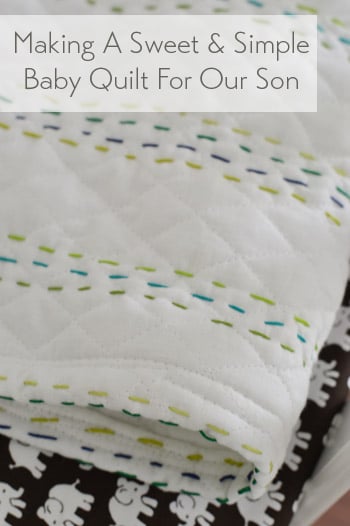
Here’s the story of how I made a cute little quilt for our baby boy on the way.
A few years ago I chronicled how my not-nearly-a-seamstress buns were compelled possessed to make a quilt for the bean.
And here I am a few years later (after a tornado of thread and a surprisingly successful sewing machine date) with another homemade quilt – this time for our little man.
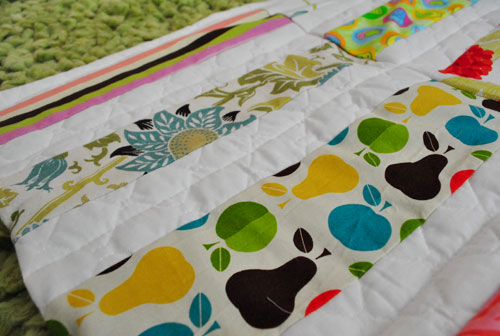
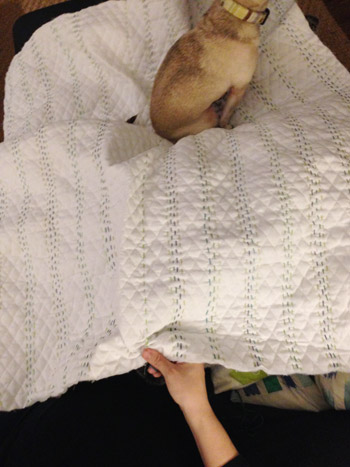
I don’t think I would have been so into making him a quilt if Clara hadn’t grown so attached to hers. She not only has slept with it pretty much every night since I finished it…
… but she brings it in the car for road trips, and even drags it downstairs to to the sofa for lazy Saturday snuggling.
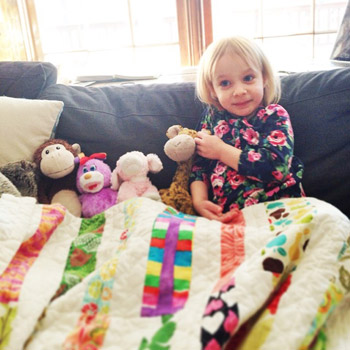
The sweetest thing about it is that John has told her a few times that mommy sewed it just for her, so every once in a while when she hugs me or kisses me goodnight she leans in and whispers “thank you for my beautiful quilt.” Yup, just typing that made me tear up. She’s the best.
So I wanted to make something for my little man to hopefully love just as much, but I thought it might be fun to try a different method this time. I hedged for a while, not really sure where to begin, and then I saw this awesome hand-stitched quilt and knew it was just the inspiration I was looking for (it’s by Citta Design, but sadly no longer for sale).
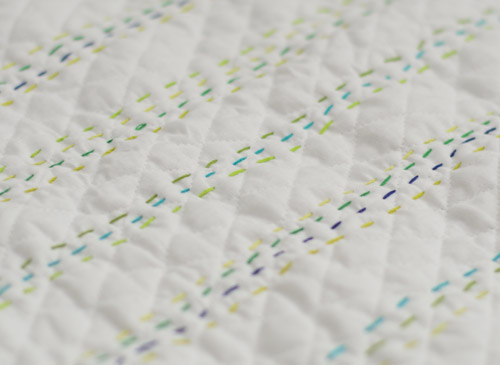
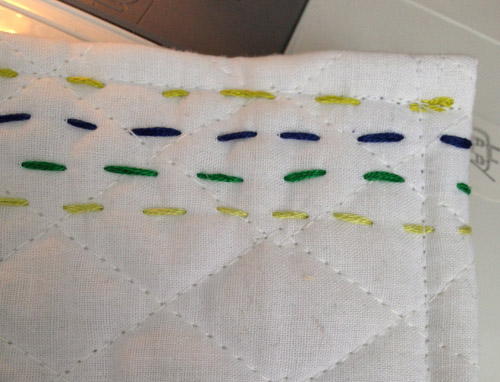
I love how charming that sweetly imperfect hand-done stitching is. Each line is irregular enough to clearly not be machine-made, and it feels so full of love thanks to those slightly varied dashes. So I decided to give it a try…
Here’s a list of my materials:
- one square yard of white diamond-quilt fabric from JoAnn (the kind with a quilted cotton front and back with some thin batting sandwiched in the middle), which came to $4 after using a 40% off coupon that I googled for on my phone
- 17 little packs of embroidery floss in a variety of colors from Michaels – like chartreuse, kelly green, pale green, teal, navy, and lime (I actually bought 5 of each of those colors for a total of 30 packs, but ended up returning 13 of them, so at 27 cents each, the 17 that I used rang in at $4.59)
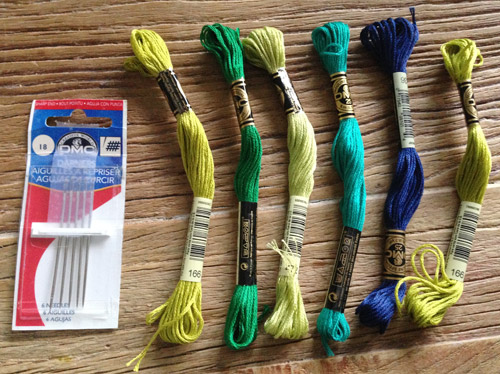
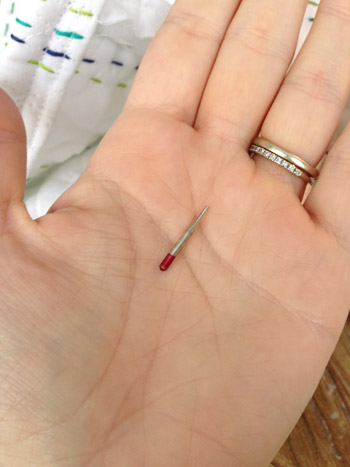
- a leftover pack of embroidery needles, which just look like giant sewing needles and can be threaded with embroidery floss instead of string (they were originally 99 cents at JoAnn when I bought them for a book project a few years back)
- my sewing machine (I already had Oh Brother all loaded up with white thread)
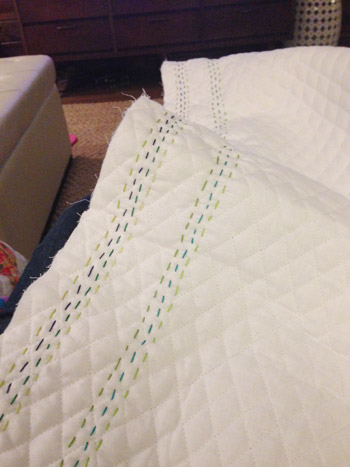
All told, I spent under $10 to make this quilt (and about ten million love-filled man-hours spaced across a weeks’ worth of evenings, but we’ll get to that in a second). While I was pre-washing my quilt fabric (I thought it was best to let it shrink up before I embroidered it), my first step was just to decide what type of stitched pattern I liked best. I debated everything from evenly spaced lines like the ones in the inspiration image to some sort of diagonal or crosshatched design, but in the end, the idea of some simple stripes in varying tones of blue and green won out.
I just started from the left side of the quilt and hand stitched four different lines of embroidery floss – each one in a different color.
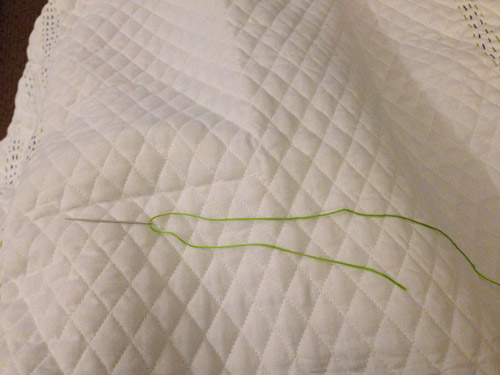
I made sure not to double up my thread (I kept it single like the inspiration quilt, which meant threading the needle like this with a little excess, but not looping it all the way down and knotting it like I do when I sew a button with regular thread).
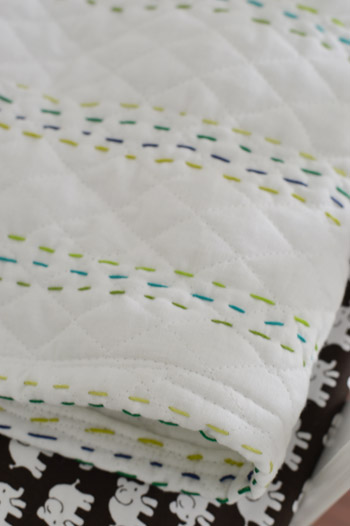
After completing my first “stripe” (which was comprised of four different stitched lines that went from top to bottom) I used the diamonds on the quilted fabric to roughly space the next stripe about two diamonds away. That way I could keep the spacing somewhat even, although I did some of the stripes 4-stitched-lines wide and some of them 3-wide, just for variety. I really do love how the inspiration quilt is unmistakably done by hand – and it doesn’t hurt that I couldn’t make something look perfectly spaced if I tried.
The diamonds in the embroidery fabric also helped me keep my lines somewhat straight from top to bottom. For example, if I started one hand-stitched line at the peak of a diamond, as I stitched from the bottom of my fabric to the top, I made sure to connect each diamond peak as I went. This kept me from veering off too far to the right or left.
Now let’s talk about the time factor. You know I like to keep it real with you guys, and I’d never say “fast and easy” if something takes forever. Well, the good news is that this quilt is mad cute. The bad news is that it takes forever. I don’t know if I’m slow or just easily distracted by Housewives drama (I did it every night across about a week while sitting on the sofa watching TV), but my average was about 3-4 stripes (made up of either three or four colors) a night, which took about 2 hours.
So all told, this 16-stripe one-yard quilt (well technically there are 57 stripes, but they’re spaced to look like 16 thicker ones) took me around 11 hours in total (including one more hour spent hemming the outside seams with a sewing machine, which actually wasn’t too bad).
Even though it took a while, it wasn’t one of those torturous projects that makes you want to poke your own eyeballs out (that’s painting blue trim or peeling wallpaper, FYI). It’s more like one of those relaxing repetitive motions you can do at night from the sofa, where your butt might be parked anyway. But instead of taking quizzes on Buzzfeed or scrolling around on Instagram, you get to be stitching something while snuggled under a blanket with your chihuahua and feeling pretty dang quaint about it.
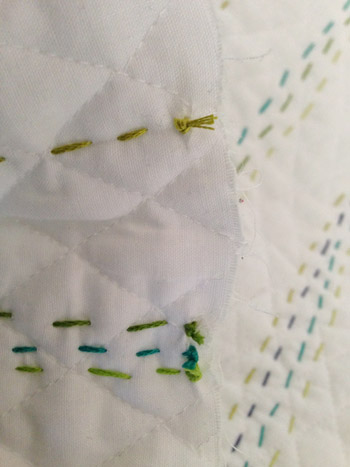
As for how I knotted each stripe, I just tied off the top of each one with the thread still on the needle on the top edge of the back of the quilt. And then on the bottom edge I cut the embroidery floss off with about 7″ to spare so I could slip my needle back onto that end and knot it there as well. That left me with a seam full of knots like this along each edge (top and bottom) on the backside of the quilt.
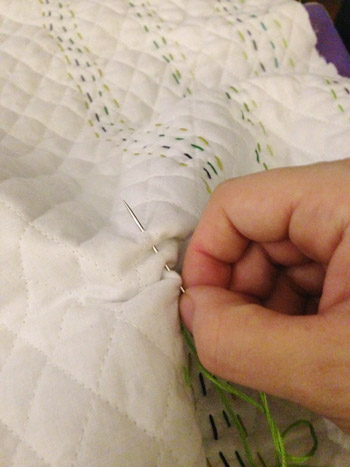
Once I got about a third of the way done with my stripes (working from left to right), I started on the right side and worked from right to left to get about a third of the way done with that side. Then I bounced back and forth doing every other stripe on each side, as I got closer and closer to the middle of the quilt, which allowed me to space everything so it was somewhat symmetrical. It probably would have been just as easy to work from left to right and use that two-diamond spacing, but I might have had to trim off a few inches of the quilt at the end if everything didn’t line up perfectly, and I liked the idea of a square quilt.
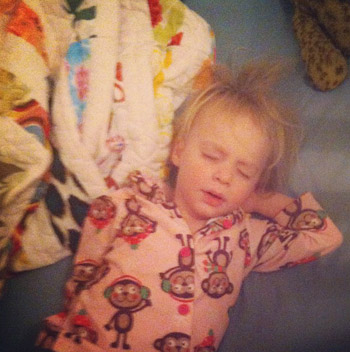
Allow me to share this creepy low-lit iPhone pic to demonstrate how I sort of worked in towards the middle.
To hem the edges I broke out the ol’ sewing machine and said a few prayers to the sewing machine gods. I’m paraphrasing, but they were something like “please let me make it through this attempt without throwing this thing out the window or revealing my evil sailor-mouthed alter ego to my sweet husband in the next room.” Then I just folded each edge over in the back, took three deep cleansing breaths, and stitched them in that folded position.
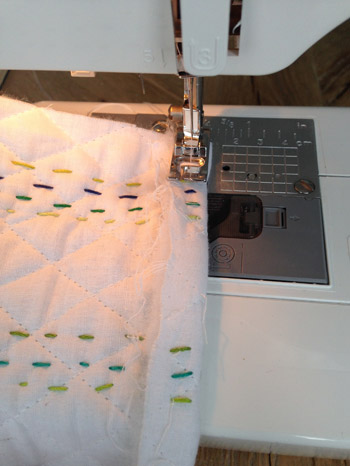
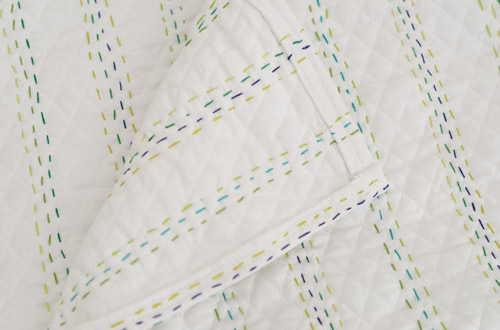
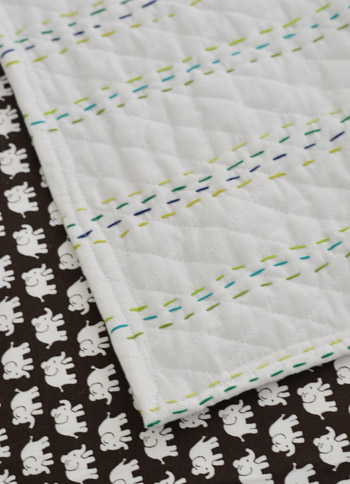
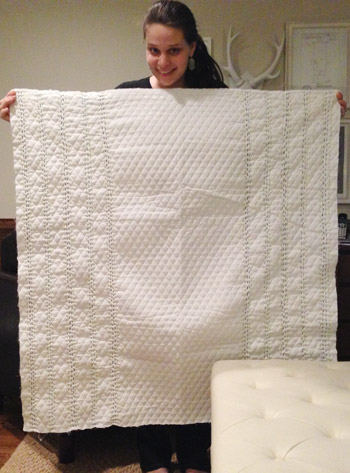
This hid the knots on the top and bottom but there was still not a finished edge along the back hem, so I folded each of them over again and did one more stitch-session with each side for a nice finished look from the back and front. This is the front:
And here’s what it looks like from the back:
Lo and behold, I only broke two needles (that’s not a joke, I really managed to break two needles) but I think it came out really sweet.
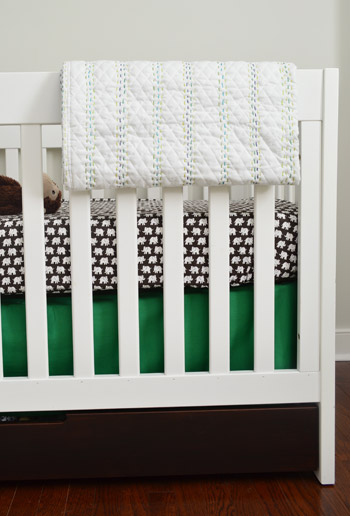
Can’t wait to meet this little bun and wrap him up with all sorts of love and quilt-y snuggles.
Right now it’s just chilling in the nursery, waiting for the big arrival.
Is anyone else sewing anything for their kiddos? Friends or relatives? Four-legged babies? Have you ever tried hand-stitching or embroidery? It’s oddly restful. Sort of like hand hypnosis.
Psst- Wanna know where we got something in our house or what paint color we used? Just click on this button:


JP says
FYI,
You can use bias tape for the edges of quilts (lots of tutorials online) so you don’t have to make a double fold.
Also, you can switch out the needle in your machine for heavy duty or lightweight sewing depending on the application.
YoungHouseLove says
Love the tips. Thanks JP!
xo
s
Melissa@TheChicDream says
That is so sweet! I love how simple it is. I have been wanting to make a quilt for our baby girl for so long but keep putting it off. Good for you, you’ve made two! Look, I’m a poet.
Chasity says
You’ve inspired me! I’m going to make a quit to for my little bun – inspired by this one: http://www.pinterest.com/pin/87820261458533055/ We did a quilting project in my geometry class 10 years ago and I loved all the math and planning involved. I’ve already sketched out my plan! How big are the quilts you made for Clara and baby boy? Also, are you planning on doing weekly/monthly photos with the new baby as well? If yes, with fabric like Clara or something different?
YoungHouseLove says
That’s an awesome quilt! Good luck with it Chasity! I’m scared of mathy ones like that so I bow to you! As for the quilts, they’re both a square yard, and we’re going to do weekly pics for the bun too, but with a slight twist from Clara’s. Will keep you posted!
xo
s
Sam M says
I just finished making three sets of nap blankets and pillows for my daughter and her two besties to take to mother’s day out this week. The blankets were simply a yard and a half of a cotton print on one side and a solid flannel on the other. It’s just enough weight with out the added bulk of batting for easier travel. Then I made pillow cases out of another half yard of the flannel for a 12×16 insert with a little ribbon from my stash for a decorative edge. Plus, I caught a nice sale at JoAnns and got almost all of it for half off.
YoungHouseLove says
Those sound great!
xo
s
kyle says
Love. This is by far my favorite project of yours to date and I’ve been reading since the blog went public. Love.
YoungHouseLove says
Wow, thanks so much Kyle!
xo
s
Jenny L says
I’m a quilter, and think that homemade quilts make the best gifts for baby showers! My kids each have 3 or 4 quilts that were made for them as babies, and a crocheted blanket or two, and they each rotate between their various homemade blankets/quilts! I love that you get inspiration from other quilts that you’ve seen, and figure out how to do it on your own, and each time, have made something very sweet and with lots of meaning. Great work!
YoungHouseLove says
Thanks Jenny! That’s so sweet!
xo
s
emily says
it’s beautiful. i sew a lot and i think you do a really good job :) you’re so smart to use the prequilted fabric. i’ve never used it before. is it soft?
YoungHouseLove says
Yes, it’s really soft and sort of plush thanks to the batting in the middle. I love it! Used it for Clara’s quilt too.
xo
s
Tanya says
LOVE IT!!!!!!! I’ve had that same inspiration photo pinned for a while, dreaming about it! I adore your version! Super perfect!!
Lindsey d. says
Quick question — When I cross stitch with embroidery thread, I pull out two strands of the six to thread my needle with, but it looks like you used all six at once. Is this correct?
YoungHouseLove says
Oh no, I just used one needle with one thread at a time. So I did one stripe in emerald, tied it off at each end, then did a stripe right next to it in lime, etc. Hope it helps!
xo
s
Jenn says
Sherry, just an FYI, as I think you misunderstood Lindsey’s question: embroidery floss is made up of six individual strands of thread. When you cross-stitch, you separate out two strands to use and remove the other four. I think Lindsey was asking if you threaded your needle with all six strands together, which I believe you did, or if you separated some out. I hope that makes sense and helps you for the future. :)
YoungHouseLove says
Thanks Jenn, you’re right, I totally did! I just left it all bound together and threaded them onto the needle, so I didn’t separate any of them out. Sorry for the confusion!
xo
s
Jennifer says
Most peeps probably wouldn’t use this kind of thread for this project anyway, it won’t last very long once it starts getting washed, usually you’d use Perle 8 (non-divisable thread).
Martina @ snapshotsandwhatnots says
I’m in awe of the dedication it takes to hand quilt something! I’m currently in the process of sewing my first ever quilt – it’s going to be a present for my mother – and I’m machine quilting it and it’s still taking forever. It’s kind of therapeutic though to sit an sew and while watching TV – it’s very obviously still a work in progress but hopefully it’ll be worth the effort when I give it to my mother.
http://snapshotsandwhatnots.typepad.com/my-blog/2014/02/sewing-woesalso-known-as-that-time-i-messed-up.html
YoungHouseLove says
That looks awesome Martina!
xo
s
Allison says
This is such a cute idea, but I’m wondering how delicate it is? Will you give an update after a few washes/uses with baby? I’d love to do something like this but scared the thread will all come out in the washer!
YoungHouseLove says
Will do! I tried to keep the stitches nice and short so they’re less likely to get snagged, but will definitely report back how it wears over time. I bet you’ll see pics of it popping up in Facebook/Instagram too since Clara’s ends up there sometimes ;)
xo
s
Beth says
Thanks for the baby works update! I’m nesting along with you, Love, Barneys internet granny
Sarah J. says
i love it! such a good job Sherry! and yes, embroidery is a very chill hobby, as is knitting and crocheting. i love them all. :)
rachel says
Sherry,
That is so, so, sweet! It reminds me of the “artisan created” quilts from Land of Nod, only your is so custom, so handmade, and filled with love from one corner to the next. I just love the colors too!
I’ve been wanting to stitch my daughter name onto embroidery hoops to hang above her crib (in fact, got at far as hanging the empty hoops!) You’ve helped me realize that I don’t need to be a professional embroiderer in order to do it! Off to get some embroidery floss and start my own sweet little love-filled project…
YoungHouseLove says
Good luck Rachel!
xo
s
Karen says
Ok, seriously, *I* started to tear up just picturing a sweet pregnant mom sitting on a couch sewing a quilt for her baby.
Karen says
I don’t know much about sewing machines, but… could it do what you did manually on the machine too? Yet, the hand-made-ed-ness is what’s so sweet.
YoungHouseLove says
Oh yes, I think you could hem it by hand around the edge, I just really wanted tiny stitches that would hold well (through many washings) so I machine hemmed it like Clara’s quilt to hopefully keep it together for the long haul.
xo
s
Jenn says
Sherry, I think Karen was asking if the part you did by hand (i.e. all of the colored stitches running throughout the blanket) could be done by machine. Karen, I don’t quilt myself, so maybe an actual quilter could answer you, but I would think that with the right thread tension and stitch length, you could do the whole blanket by machine, rather than by hand.
YoungHouseLove says
You’re right! I totally read that wrong! I do think you could do it on a machine, but it might have a tighter, thinner look like an outside seam would have. I think you’re right that a quilter might have some tricks to make the stitch length longer though! That would be cool to see!
xo
s
Jenn says
Sherry, your sewing machine should have an option to adjust your stitches to your desired length. What model Brother machine do you have? I’d bet that you can find a user manual for your machine online, if you no longer have a physical copy. It should tell you how to make adjustments, such as tension and stitch length, and also explain different types of stitches and presser feet. I really hope you continue to use your machine and learn more. I realize it can seem scary when you don’t know how to use it, but it’s really not hard, and it’ll allow you to make even better crafts in the future. Hope you have a pleasant night!
YoungHouseLove says
Thanks Jenn! I’d love to get to know it more. My mom’s coming for a visit soon and she’s an amazing seamstress so I’ll have to pull her away from Clara for a tiny tutorial here and there ;)
xo
s
Kayla says
We are expecting at the end of May and have a cousin due five days later. I am busy knitting baby blankets for both baby’s. I have been knitting up baby blankets like crazy (we are at that age) and I love trying a new pattern each time, and gifting each special mama to be with something hand knit with love. Best wishes in your last weeks as a family of three!
Diane says
I’ve always sewed but didn’t start quilting until my kids were grown. So naturally with my twin granddaughters I got a second chance. One of the twins was always good during the ultrasounds and we knew she was a girl(her name is Clara after my husbands grandmother) but the second one would somersault and move like crazy so we weren’t quite sure who that was going to be. So one baby quilt was more girly and the other neutral baby tones. I just loved making them. You should think of putting a little label in one corner stating your name who it was made for and the year.
YoungHouseLove says
That’s such a sweet idea!
xo
s
beth says
You’ve inspired me, thank you.
You are such a loving mama bear! Very sweet.
Emily says
I just took on some throw pillows over the weekend and managed to survive installing a zipper for the first time! I can’t believe it actually functions like it is supposed to! Hand sewing is rewarding, but I am very thankful for my sewing machine :)
YoungHouseLove says
That’s varsity right there!
xo
s
Jean says
That is a real labour of love. Absolutely lovely x
Karen says
Love this! I’ve handmade something for all the new babies in the family or for close friends. Usually it’s some kind of easy stuffed friend, but for my nephew I knitted a blanket. As a beginning knitter it took FOREVER – I anticipated this though and started in September to make it in time for Christmas. Labor of love for sure. When my own son was born in 2012, it was the Year of the Dragon so I made this little guy for him: http://rhythmofthehome.com/2010/08/michaelmas-dragon/ It’s held up surprisingly well through some tough love and ear chewing. So excited for you and all the fun times ahead with your boy!
YoungHouseLove says
That’s so sweet!
xo
s
bdaiss says
So cute! But girl: bias tape. She’ll be your (and Oh Brother’s) best friend for finishing off those edges! Buy the double fold stuff, make a little sandwich on the edge and away you go.
YoungHouseLove says
Great tip! Thank you!
xo
s
Elaine - visual meringue says
I love it! So charming. Great job Sherri!
Trinity says
Beautiful job! I love to sew but don’t like hand work! Just two tips: after breaking a needed you may want to consider taking your machine to be serviced. When a needle breaks the whole machine jams up and it will run better with a little TLC. Second, next time try a double fold bias binding for your edges. Closes up everything nice & neat and you don’t have a thick fold to sew through. You can find this at Joann’s in a rainbow of colors.
YoungHouseLove says
Thanks Trinity! Great tips!
xo
s
Mamaw says
Love the quilt! The Bean and Bun are such lucky kids to have such a thoughtful set of parents. I have a hand-made quilt that was made by a family friend. Everyone was hoping for a girl, so it’s all pink and dotted swiss and frilly. He used it none the less, and now each of my grandchildren have used it (two boys and a girl (finally!). Those are special things, memories. Good job on the quilt!
Koliti says
Snuggles of love – such a sweet quilt for your baby boy. And Sherry you are sooooo smart to use that quilted fabric as your foundation!
I recently told 4 of my friends who cook that I was going to make them an oven mitt. So I researched – watched YouTube videos, went to Joann’s to check out cotton batting and Insul-Bright (heat-resistant insulated liner). I decided to make a “puppet-style” oven mitt (with the thumb on the under side, like a mouth), made my own pattern (after watching a YouTube video), and purchased the batting, insulated liner, and a collection of pretty cotton fabrics. I cut out all of the pieces and they looked beautiful. Yesterday was sewing day – when I started to quilt the layers together they wanted to get all wonky (I, too, can zen-out with my seam ripper). So I took out my first two quilting lines and tried again. And the different fabric and batting layers just want to shift in relation to each other – no matter how many pins I used. Good thing I was making an extra long oven mitt because I had to trim almost an 1 1/2″ off the bottom (cuff) edge to even up all the layers. The finished oven mitt is beautiful.
Fabric is such a squirrel-ly medium!!! You cut fabric into a 3″ square and sew them together – what do you have? A @!#$? rhomboid!!
Paper – You can trust paper – you cut paper into a 3″ square and BOOM! You have a 3″ square.
Also never tell ALL your cooking friends you are making them an oven mitt – one out of four is good. Gotta pace myself – ha!
YoungHouseLove says
Hahaha! I love you Koliti.
xo
s
Bethany Ann says
Hahahaha, love the rhomboid comment. So true, so true…
Koliti says
Hey Sherry, here’s an update…
I read in several venues (and here in the comments)that a “walking foot” would help with sewing layers together. Before going to work this afternoon, I called and went to Cathey’s Sew & Vac (here in Tucson, it’s a fancy sewing machine nirvana) with my little less-than-$100 sewing machine – and Bonnie, the helpful lady there, installed a walking foot onto my sewing machine. Bonnie said a walking foot works by moving the top layers of fabric through at the same speed as the bottom layers – and she demonstrated on my machine with thin, flimsy, gauzy material – I feel like the clouds have parted and I’ve entered a whole new world of sewing! I’m never gonna take that walking foot off! There’s hope my other 3 friends will get their oven mitts! I have tomorrow off – ha!
And Sherry, I forgot the BEST part of my oven mitt – it’s inside liner fabric is: RASPBERRY LEOPARD PRINT! You know – for your “inner animal”.
I’m thinking a nice Green Leopard Print Pillow would look awesome in the Bun’s Nursery! (do not fear the leopard!)
YoungHouseLove says
LOVE THE UPDATE! And the raspberry leopard print tidbit just made my heart explode. You’re the best mitt-maker ever ;)
xo
s
Jerri says
Love it! I’m a big old softie…Clara’s thank you brought tears to my eyes, too. My boys are 10 and 13 and sometimes when I’m speaking about things, they look at me to see if I’m crying and, if I’m not yet, they both are like, “Are you gonna cry?” LOL
YoungHouseLove says
Oh man, I was crying about something crazy sweet the other night and Clara was so concerned. She kept petting me and hugging me and it was making me cry more. Haha!
xo
s
Adriane says
Squeeeaaal! Sherry, it’s beautiful and SO sweet. And, I know what you mean about the bajilion love-filled hours, haha. I made a purple ombre, no-sew tutu for my daughter’s first birthday. Cutting and tying hundreds of strips of tulle meant I, too, was camped out on the sofa each night for a couple weeks (laugh at Modern Family and then, “hubby, hand me another strip”). So worth the hours–it was adorable on her and she loves it!
YoungHouseLove says
Sounds so cute! Clara would flip for that!
xo
s
Sarah @ Sarah's Daybook says
Clara is the cutest kid around. My older brother (who is 32) still takes his baby blanket everywhere. That is how he picks up the ladies. What a stud.
The bun is going to absolutely love that, Sherry! Can’t believe that it is only a month until he arrives. Obviously don’t tell us if you don’t want to, but have you picked out a name?
Sarah
http://www.sarahsdaybook.wordpress.com
YoungHouseLove says
Aw thanks Sarah! We have a few family names bouncing around in the arena but we’re going to wait to meet him until we pick a winner (gotta make sure he fits the name ;)
xo
s
Carmen says
You are such a sweet mom! I love it, so full of love! And thanks for sharing, this looks really approachable for a DIY.
Lizzie says
I love the hand-stitching of your bun’s quilt, and it makes me itch to try cross-stitching again after I quit it as a kid. (Especially now that I know about the irreverent Etsy patterns, thanks to other commenters!) I made a baby quilt for my goddaughter and could have used your insight into planning it. It was more of a patchwork blanket (7 rows of 6 squares, since my goddaughter was born on 7/13 and 7+6 is 13…I felt clever for that) and of course, once I machine-stitched the top together, it was crooked. I trimmed the edges to hide it as much as I could, but it was still a facepalm moment. Your idea of starting from the sides and working toward the middle is a perfect reminder that there ARE ways to combat crookedness without measuring every single stitch. Thanks Sherry!
Lisa says
Just looking at that embroidery thread makes me want to pull out my xx year (top secret) unfinished cross stitch and get to work. Seriously cute and relatively easy project that with have a huge return on investment, if Clara has any influence over the Barnacle’s choice of lovie!
Shelly says
I’m obsessed! So so cute for any little baby or even as a throw on your couch! It’s modern but still has a cozy handmade-with-love feel! So proud you stuck with it and finished it for Barnicle! I’m making my first quilt for our baby who’s 4mo. right now. Waiting for the basting pins to come in the mail so I can start on the hard part. :(
YoungHouseLove says
Good luck Shelly!
xo
s
Clare says
Thank you so much for this! I have wanted to make my little man a quilt since before he was born 7 months ago but I am terrified of my sewing machine. I think I could actually manage this! It is beautiful!
Leah: ) says
Oh Sherry, the quilt is beautiful…so excited for you guys!:) Don’t you love it when an “idea” comes together just like you hoped it would?!!
xo
Leah:)
Katie says
Super cute! Made with love and totally perfect! Well done Mama!
Susan V says
Great job on the quilt!
Each of my kids has a crib size quilt. My 14 year old (really just batting left :))and my 9 year old still sleep with theirs… My 12 year old was not a blanky kind of gal. My Mother made them for all the kids and we have worked on a lot together for my nieces and nephews, friends etc… we are no past most of the baby years. I always think handmade gifts for those occasions are the best.
Right now I have 8 ft of dense foam (for about 8 months) to sew a window seat cushion for my daughters rooms. I’ll let you know how it turns out.
Erika K says
Beautiful! I love that Burger was “testing” it out. Just to make sure it’s comfy for the baby…
Melissa says
Love it!! So pretty. I did some hand stitching With floss on a table runner once, and i still One of my favorite projects. Someone may have already mentioned this, but the first time you wash it, I’d use a Shout color catcher in the wash. Sometimes the dye on the embroidery floss can bleed a little.
YoungHouseLove says
Thanks Melissa! Great to know!
xo
s
Kelsey says
This quilt is beautiful Sherry! And thanks for making me, who has never sewn anything ever, feel like she can this on!
Heather says
Good job Sherry! I love that you have finished it before his arrival. I am looking forward to learning his name.
I think that his quilt would look great with some sort of binding around the perimeter. It would be relatively easy to do, just sandwich the quilt between the binding, pin it together, and sew! Something like this maybe…
http://www.joann.com/wrights-single-fold-satin-blanket-binding-2inw-x-4-3-4yds-/prd11052.html#q=bias+tape&start=8
YoungHouseLove says
Thanks for the tip Heather!
xo
s
Chrissy says
Your quilt looks awesome. I’m due in July and just started a cute elephant cross stitch pattern. It is very soothing to sit and relax. I agree with the hand hypnosis. My mom is a wonderful seamstress and quilter so I am leaving that duty to her. She showed me her fabrics for the baby’s new quilt and I cannot wait to see it. If only I had her talent and drive. She has made a quilt for every wedding or birth for anyone we know. So adorable!
Chrissy
Sabrina says
I love it! And may steal your idea for my kids. I was overwhelmed with the quilt you made Clara because I am so not a good sewer. I just went to the fabric store to buy fabric to make an Elsa dress for my 5 year old. I looked at the pile of glistening blue fabric and was filled so much fear lol We shall see how this goes! When they had all the dresses in the Disney store, my daughter didn’t want one. Now that they are impossible to find ( unless you want to sell a leg on Ebay) she wants one. Santa was not able to find one for her and has been filled with guilt ever since haha It was her #1 present she wanted!
Sally says
Broke only two needles? That’s great. I tend to break so many that I keep a batch extra, just in case. Seems like hemming jeans always does that to me….
I made an alphabet quilt for my daughters – 26 blocks, with an appliqued letter on each one. Homemade quilts are the best!
Erin says
So incredibly sweet and lovely. What a wonderful gift to your precious boy!
Amanda says
I LOVE this! I made a quilt for my daughter with my grandmother and she loves it. I try to not let her use it because it is so special to me and hopefully it will be to her one day, so maybe I could make one of these :) she is definitely a Linus with blankets!!
Laurel says
I love everything about your blog, but what I appreciate the most is your writing style. It really sets you apart. I also love how real you are–not out to impress, just out to be you. Thank you for sharing your home and family with us. Best wishes for an easy delivery and another healthy baby. Clara seems like such a sweetie. You are living the dream!
YoungHouseLove says
Thanks so much Laurel!
xo
s
Megan says
What a neat project! I’m working on a felt quiet book for my one-year-old. It started out as a relaxing project, and it’s turning into a poke-your-eyes out project…..but that’s mostly because I want to have it done in time for our cross-country flight at the end of this month, so a leisurely pace isn’t an option.
Kateri says
Love, love, love. Super cute!
It’d be cute if you embroidered his name or initials in the center of it or something?!
YoungHouseLove says
That would be cute!
xo
s