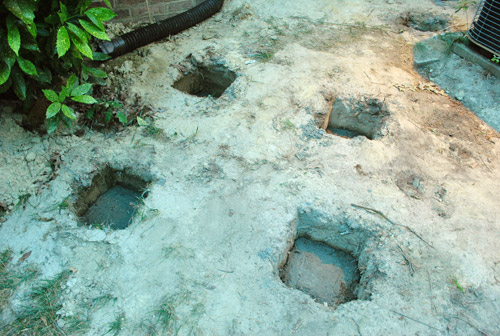
With my deck holes dug and officially blessed by the county inspection office it was now time to – well – fill them in. There must be some irony in there somewhere, right? As I had done when setting my fence posts last year, I started off by putting a couple of inches of rocks in the bottom for drainage since the deck experts in our area unanimously recommended it under the concrete that we’ll be pouring to hold the posts in place (we dug the holes at least 21″ deep, so that by adding 2-3 inches of gravel at the bottom, they still met the 18″ required depth for our county).
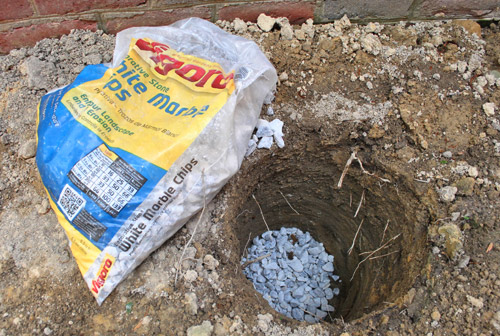
Imagine my surprise when my cascade of rocks caused some of the dirt to start hopping around. I guess some tiny frogs had gotten trapped and were so well camouflaged that I didn’t see them until they hopped to escape being crushed. But have no fear, I rescued them before continuing with my rock pouring.
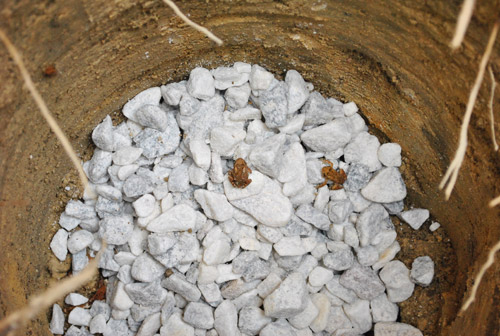
I took extra care to spot any frogs in my other holes before I started dumping rocks – but apparently my animal vision needs some work as I managed to miss this whopper of a toad.
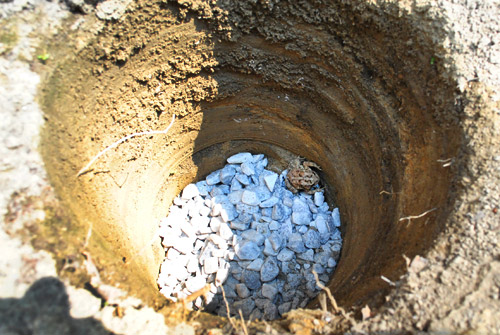
But after he made himself known I was able to rescue him (with my own bare gloved hands). It provided a nice impromptu nature lesson for Clara, who watched intently from behind the sliding glass door.

I love this picture (not because you can see me playing iPhone paparazzi) but because I imagine Clara giving Burger a little biology lesson: “See what we have here, young chihuahua, is called a frog. It goes ribbit ribbit.” They both were equally interested.

But enough about frogs. Let’s get back to our deck posts. Once my holes were all de-frogged (I only found one more) and had about 3-inches of drainage rock on the bottom, it was time to put the concrete footing in. A lot of you have suggested pre-cast Dek-Blocks, but they’re not allowed in our county. However, we are allowed to use these other pre-cast concrete blocks.
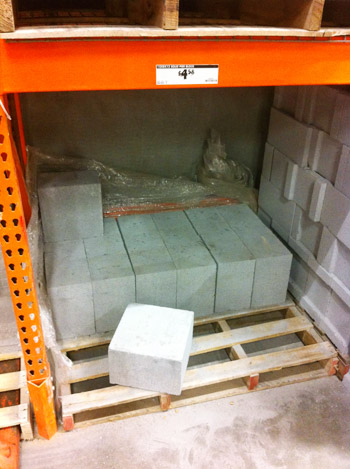
But I opted to go with mixing my own concrete. As straightforward as the precast blocks initially felt, I realized it would require each of my holes to 12 x 12 inches square to get the darn thing all the way in (most of my holes were round, so I’d have to do more digging). And I’d have to make sure the bottom of the hole was flat and level so the block would sit level. So I figured mixing my own concrete would actually make my life easier because it would fill any shaped hole and sort of level itself. Plus concrete had already come with my lumber order from 84 Lumber.
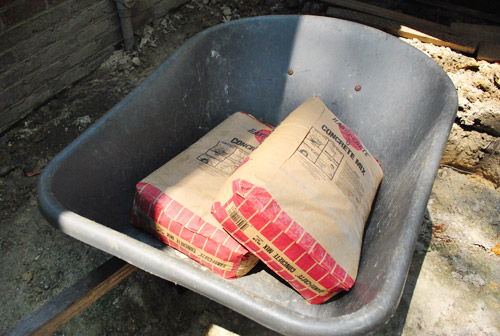
To mix it, I opened each 60lb bag in my wheelbarrow and added water until I got a creamy consistency.

I stirred it with a garden hoe. I won’t blame you if you giggled at that sentence.
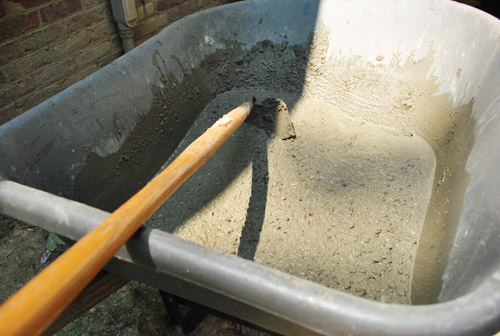
This batch that I photographed (my first) was a little soup-ier than I had intended, so in subsequent batches I didn’t use quite as much water. It still dried just fine though. And you can see how it sort of naturally flatted itself to be nice and level on top. Pretty perfect for setting posts on!
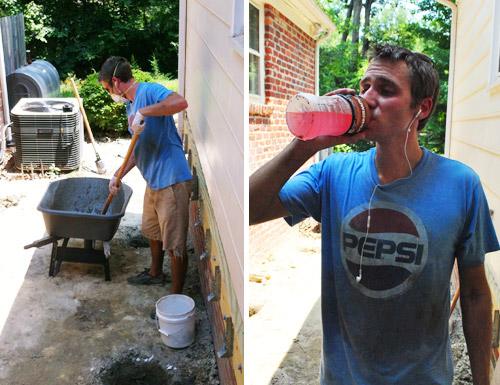
Mixing and pouring the concrete wasn’t really that interesting of a challenge. Nor would it have been that challenging had it not been a bazillion degrees outside. See that orange exclamation mark? That’s it warning me about the Heat Advisory for our county. You know, the kind that warns against being outdoors and doing any kind of physical labor?

So yeah, it pretty much sucked. I was a sweaty, dirty mess within about zero-point-one seconds of starting the project. I did my best to stay on the shaded side of my work area and I drank plenty of fluids (sorry that picture on the right looks like some weird cross between a Powerade and a Pepsi commercial).
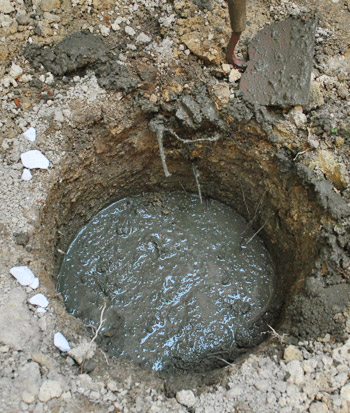
By the time all 12 holes had their 8″ of concrete in them, I was too hot to remember to take any pictures. So here’s one I snapped later that evening once the fire in the sky had gone down a bit.
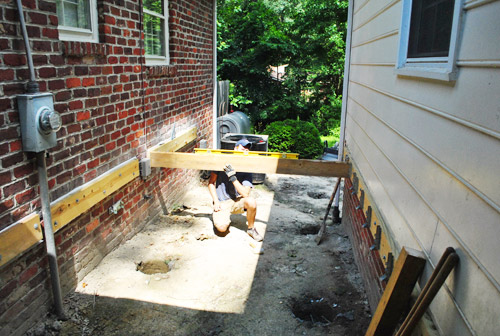
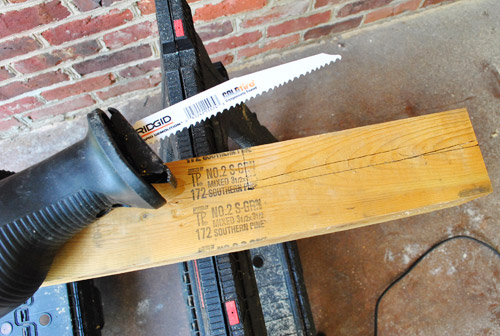
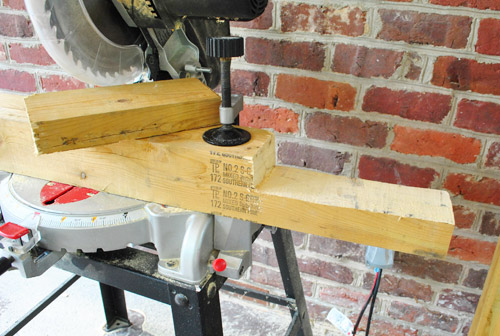
The next day my extra materials from 84 Lumber arrived. This is the stuff I had to order when my county made me revise my plan to include more posts and girders after giving me the a big fat F. Pretty measly compared to my first order. But at least now I had the 4 x 4″ posts for my next step of the project.
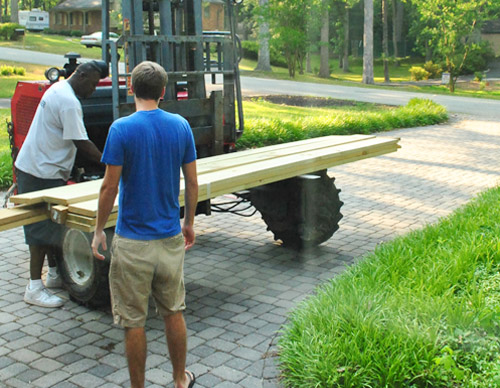
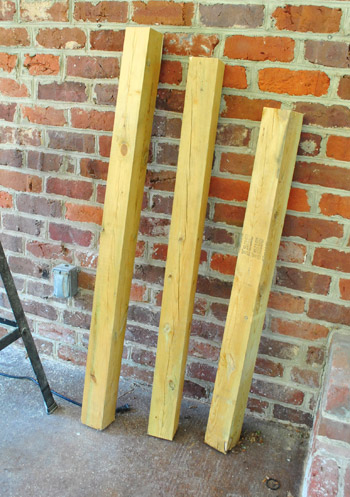
I had purchased some 12-foot long posts which – thanks to my barely 4-foot tall deck – meant I could get 3 posts out of each one. Score.
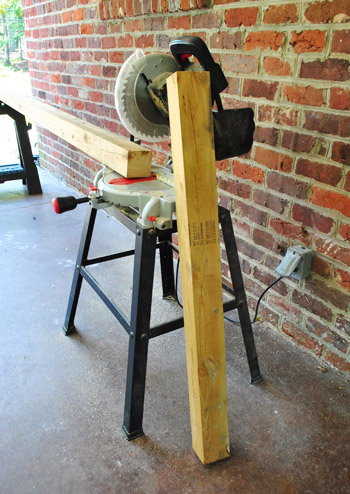
I staggered their sizes a bit since the ground slopes away from our house a bit.
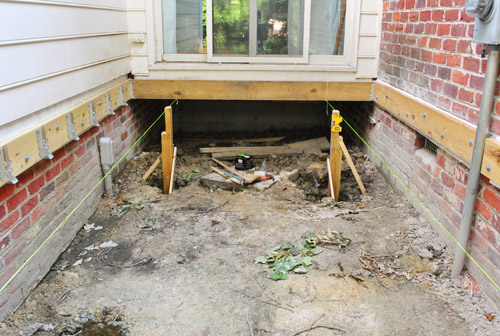
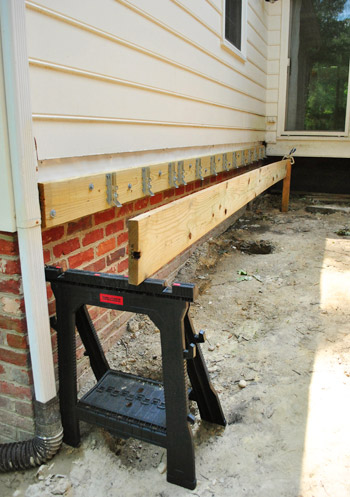
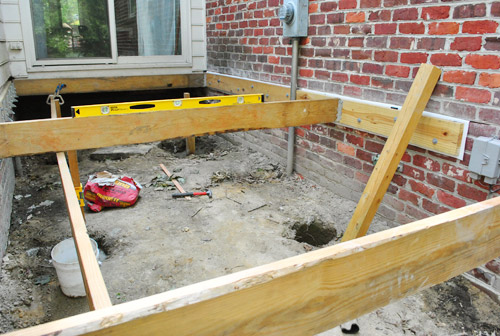
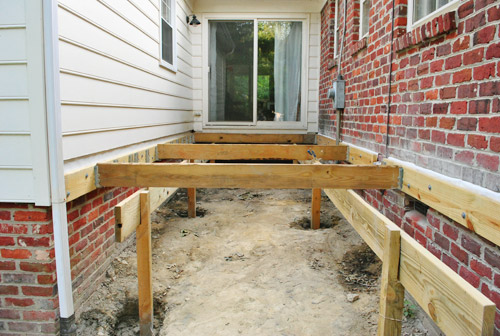
Setting these posts was going to be a bit more complicated than my previous experience doing fence posts because this arrangement is, well, a bit more complicated. Basically my posts would support big 2 x 10″ girder boards that run the long way below the deck. The joists (the boards that span the short way across the space) will rest on the girders. The joists need to line up with the ledger boards already attached to the house (which I will now call rim boards, since they won’t support the weight of the joists as originally planned – instead they’ll just provide extra stability side-to-side). This picture might make a little more sense of that description:
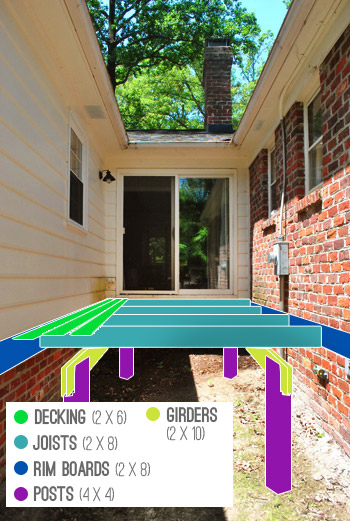
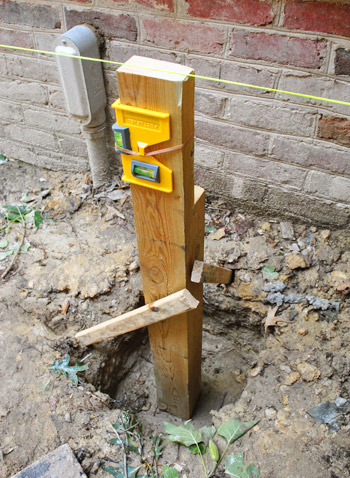
So before putting any posts in, I set up a few guides to help make sure I was staying in line with the rim boards that I had already attached.
After temporarily hanging joists on each end of the deck, I tied some nylon string to connect the bottoms of each – this would represent the top of my girder beams where the joists would eventually rest. The string was much easier than trying to temporarily hold up a 18-foot-long 2 x 10″ board.
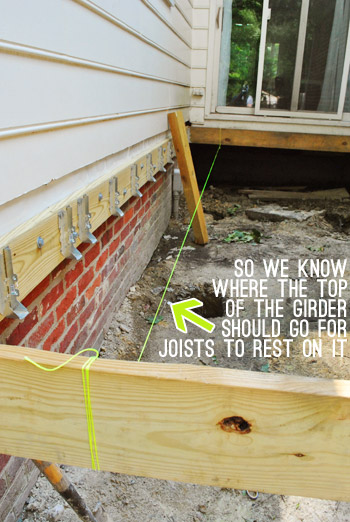
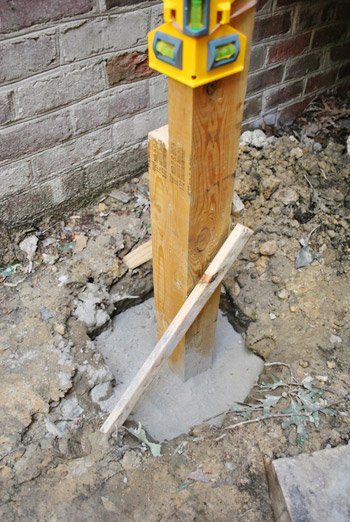
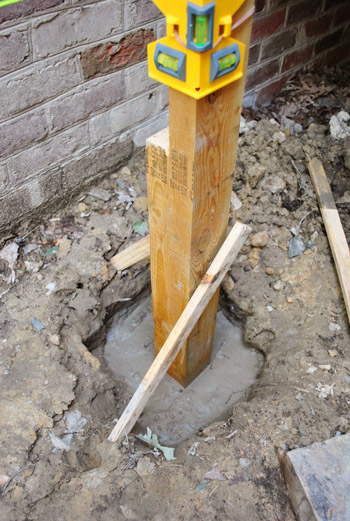
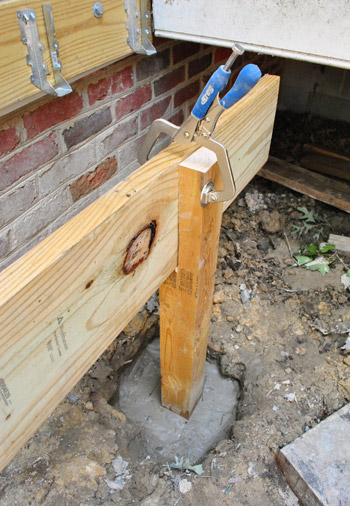
With string pulled taught, I rested a post in the hole and held it pretty straight (double-checking it with my post level) while I marked where the string hit it – thus indicated where the top of my girder would eventually be.
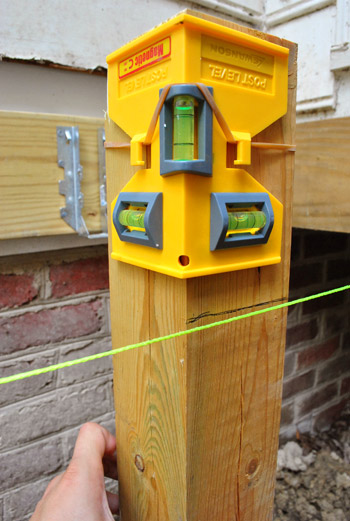
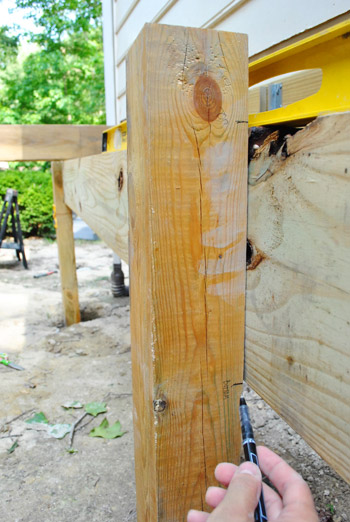
Our county gives us two options for attaching girders. You can buy a metal post bracket that sits on top of the post, or you can cut a notch into the post for the girder to sit on. I chose the later option, primary because it’s what I had seen done here. And it felt a bit more secure than the alternative. So I used my top mark to then measure and draw where I’d need to cut my notch so that one 2 x 10″ would sit at the perfect height.
I used my reciprocating saw to cut the notch. I have no pictures of this because it took everything in me to keep the saw steady on my lines. But here’s the result below (ignore the miter saw, I just used it as my work table because it had built-in clamps).
With my notch cut, I moved the post back into place, checked my cuts against the string, and then used some stakes to hold the post perfectly straight up and down.
To keep my posts in place for the long run, I could’ve just packed dirt in around the edges. I didn’t really trust that method, so I defaulted to the same method I used for my fence: Quikrete no-mix concrete (which is also an approved method in our county).
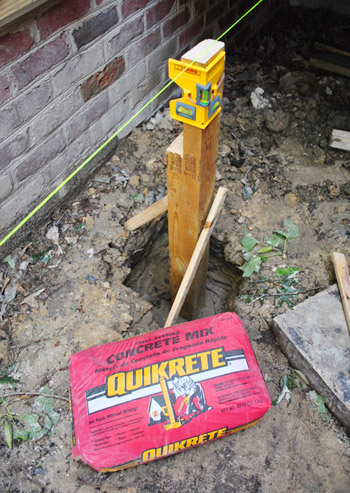
I love this stuff because you just pour in the dry powder…
…add water…
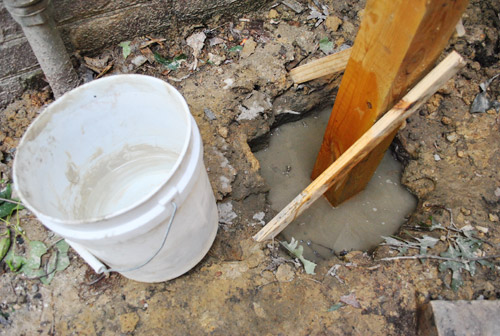
…and it soaks in and dries hard. It’s certainly easier than the stuff I mixed before (which I used instead because it’s what 84 brought me, so I didn’t want to waste money or materials).
I then repeated the whole string-mark-notch-stake-cement process for another post on that end. It really wish it had been as fast as typing that sentence just was, but it was actually a fairly long process (maybe three hours from setting the joists ’til finally putting cement in) and this day was not much cooler than the last so I was pretty spent. Fortunately I couldn’t do anything more until my cement was fully cured, so I had a good excuse for stopping.
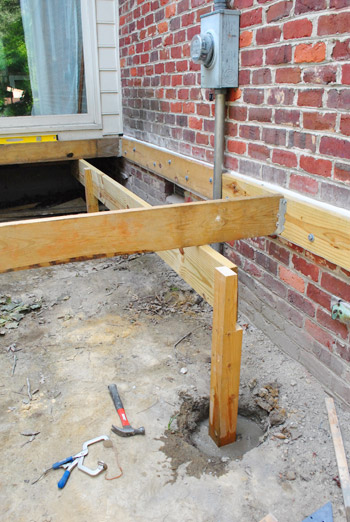
The third deck workday was girder day. I would’ve loved to have had my dad’s help for this step, but alas he was visiting my grandma in West Virginia so I was stuck setting this 18-foot-long board all by myself (Sherry was inside taking care of Clara, keeping up with the blog, and doing last minute book-proofing stuff, but was available to come outside for a few moments as I went to confer/lend a hand).
As much as I enjoyed my nylon string method, I figured using my actual girder to set my additional posts would be a more trust-worthy method. I clamped it in place on the already-notched post from the previous day…
…and used a sawhorse to help me keep it up on the other side. At this point I was trying to mark my post (which was just resting in the hole at this point) with where I should cut my notch. The sawhorse made the girder a bit high, so I performed quite the juggling act moments after snapping this photo: holding the board up, checking that it was level, and then marking my post with a pen.
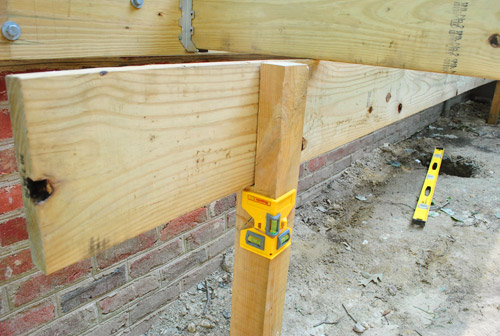
But I got my mark made, cut my notch with the reciprocating saw, and brought the post back into place so that I could double-check everything: that my post was straight up and down, that my girder was level (well, sloping down slightly for water run-off actually), that the joist that sat on the girder was level, that my post was as far from the house as my other post, etc…
Once that was all checked, I was able to cement the base of it (using the no-mix Quikrete again) without having to secure it with stakes. The weight of the girder board actually held it in place quite nicely.
And speaking of the girder… since it was now held up on both ends, I was able to mark my middle post with no trouble at all (each of my two girders is held up with three posts). Dare I say it was actually easy?
With one side of posts all done (and my girder held temporarily in place with nails and clamps), I was able to move on to the other side. This side was a bit trickier because it was too long (21 feet) for one girder board – so I’d actually have two separate girders that would butt up to one another at the middle post. So I decided to temporarily set another joist across the middle so I’d have a reference point for the height.
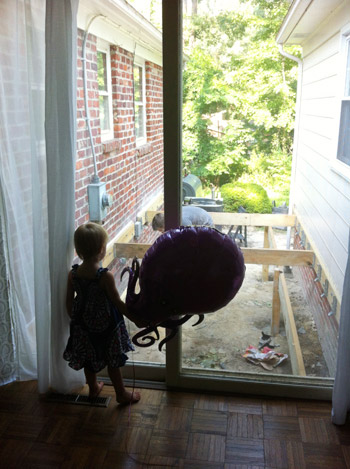
In case you’re not convinced as to how truly exciting this whole process is, just look how engrossed Clara is. I’ve become her favorite new spectator sport. Heck, it was so thrilling that she even brought this octopus balloon over to see all of the action while Sherry caught it on camera.
So here you can see how the girder board will share the middle post with another board that will span the rest of the space.
By the end of this (again very very hot) afternoon I had all six posts set in concrete and all of my girder boards temporarily held in place. Why temporarily? Well, the girders have to be doubled up (i.e. two 2×10’s thick) but that was a process I knew I’d need another set of hands for, so I had to wait for my dad to return from my grandma’s house since we knew it would take longer than Sherry could provide while taking care of Clara (aka: it was a longer-than-a-Clara-nap project).
Then once that step is done, I have to add two more posts and a girder to create the angled edge at the end of the deck (you can see the two empty holes towards the bottom left of this picture – one of which is shared by another post). But I figured I’d wait to get these first girders set before I tackled that step.
Sorry for such a long post, but it’s been a productive few days on the deck. I know it’s just barely starting to look like a deck – but I think big visual rewards are just around the corner. Once these girders are up I can install of the joists (which should be pretty speedy), and then come the actual decking boards. Woo hoo! I’m working up a sweat just thinking about it, but that’s probably just because my sweat glands are on overdrive lately.
What have you been sweating over lately? Are you doing any outdoor projects out in the blazing sun? Or just enjoying the outdoors in a more relaxing method – like by taking a beach day?

how2home says
The side yard is looking really good! Love that picture of Clara starring at the frog, so adorable!
1 question….I don’t quite understand why you put white pebbles in on the bottom of the post hole….is it just for extra support? But John poured concrete over it.
YoungHouseLove says
We hear it’s good for drainage and to keep posts from settling (apparently concrete can settle or not drain as well on hard dense dirt, but a few inches of gravel under it help a lot).
xo,
s
how2home says
mmm…this is pretty interesting. I didnt know about that, got to do some research now. Thanks Sherry & John :)
Hannah says
It makes me nostalgic seeing Clara watch John build the deck! I helped my father build our dock when I was about 12 (although I mainly just held boards steady and tried to not fall in the water) – being around all of his projects were great lessons to learn at a young age, instilling a good work ethic is irreplaceable! Thanks for sharing – I can’t wait to see the progress unfold :)
Crystal says
Wow! That made me tired just reading about it!! It’s looking great though! Can’t wait to see it all finished (although I’m sure not nearly as much as yall can’t wait)! :)
Lisa in Seattle says
John, I am in awe that you are doing this back-breaking labor in heat like that. If it ever gets to 102 (“Feels like 110”) in the PNW, it will be because the state is on fire. It’s been in the mid- to high 80s here for a little bit and I am dying. The hubs put 14 plants in the ground for me last Saturday while I stood in the shade and cried about the sun trying to touch me.
You know, if you buy a bunch of those post-levels in bulk, paint them green, label them as “Christmas tree levels” and sell them at a markup, you could stop right now and hire somebody to finish the deck. *I* would have bought one. Just a thought!
YoungHouseLove says
Ha! That’s a funny idea.
-John
Kate says
Oh my goodness, John you are a phenom! This is astounding! Also, with the kindness you showed to the frogs and toads, I’m pretty sure they’ve made you their king :)
Lesley says
I’m really shocked that the county permits the posts to just sit on top of the footing with no bracket! I don’t have a PhD in engineering like my husband does, but my common sense engineering tells me I’m not sure I’d want to be on a deck with its main supports not embedded in concrete or secured by brackets. Good for you for adding the concrete, John! Stay hydrated out there!
Amanda K says
it looks like all the little friends you found were toads — not frogs.
but whatev. it’s like the difference between an alligator and a crocodile. do you really NEED to know the difference, or do you just need to know to run away?
Liz says
Wow! I can’t believe you are doing this all by yourself, and in this insane heat!!
Last week we were sweating it out in rural Wisconsin for 2 Dave Matthews Band shows at Alpine Valley. That was recreational, and the awesomeness of the concerts made up for the oppressive heat. When we got back to our car at midnight last Friday night, it was still 98F. I have never, ever been as sweaty and disgusting (charming, I know!) as I was that night. Can we say heat rash!?!? We were barely able to cope with the heat for our own enjoyment, I don’t know how you’ve done it for work!!! I
Can’t wait to see the final product — looking great so far!!
cappy says
Great job! Just curious….what were you listening to while you are working on the deck? I need some good motivational music!
YoungHouseLove says
I was listening to a mix of the new Maroon 5 CD and the new Linkin Park CD. Also a little bit of whatever comes up on my Pandora station.
-John
Lucy says
Great job on the deck. I have to say I love that spirit level you have, I so know what I am getting the hubby for his birthday!!!
Ally says
Very informative, JBoom…thx for another great tutorial :) (and I admit I did giggle when you mentioned your use of your garden variety hoe :)
All the Clara pixs are adorable! Particularly the first close-up…look at those cute little cheeks, fingers, and that pensive stare…sooo sweet :)
I’m surprised your iPhone held out in that heat? We’re getting temps only in the mid 70’s here in Vancouver, BC. This weekend, I was soaking up some rays, and had my iPhone on a table beside me…all of a sudden, the phone lights up with a BIG YELLOW CAUTION EXCLAMATION MARK, and says TEMPERATURE WARNING! Then, the phone keypad screen appeared, and said “EMERGENCY CALLS ONLY”…out of curiosity, I dialed a friend’s number to see if it would go thru. It did not. I guess it meant only 911 calls? (And no, I didn’t call 911 for ‘test purposes’ :) I think my shiny metallic case was the culprit :)
xox
YoungHouseLove says
Oh wow! I did get an overheated warning once when I left it in the sun on the AC unit, but it snapped back to work pretty quickly. Most of the time it was in my pocket, so maybe the shade helped?
-John
Kelley says
I totally giggled when you stirred it with a garden hoe.
Heidi P. says
Way to rock it John!
Lindsay says
John – you definitely need to volunteer for a KaBOOM! build sometime. We can always use volunteers who like to mix concrete :)
If you haven’t heard about KaBOOM! – please check it out (www.kaboom.org). I bet the cause (importance of play for all kids) and our projects (building playgrounds in low-income communities) would really resonate with you guys!
YoungHouseLove says
Oh yes we heard about it at a home improvement store that had their employees help out and posted the pics- looked like so much fun! We’d love to play along sometime!
xo,
s
Sherry from BC says
Another informative post. I can’t say that I feel up to doing a deck but I am enjoying following along as your explanations are very readable and I always pick up little tips that help with my less challenging projects. Can’t believe you are doing it in such heat! What a trooper. I have a big ole craftsman style house with the porches on front and back and I will eventually have to have the footings looked at again. They were inspected by a professional about 5 years ago for safety and were fine then. You really do have a way of explaining things in a way that almost makes me think I could do it. Stay hydrated…..that day will come when you will be lounging on your deck with a much deserved sense of satisfaction.
Annabelle says
Good on’ya. We re-assembled a playset someone gave us in the yard two weeks ago in 105 degree dry heat in Denver. It involved moving 16 plants/shrubs and leveling the area in addition to assembly. It.was.hot.
YoungHouseLove says
Whew, that sounds like a ton of work!
xo,
s
Missy says
When I am facing your house looking at the deck there are three windows on the right. Is that the play room, former master bath and former master?
YoungHouseLove says
It’s the guest room, guest bathroom, and hall bathroom (we’ll be frosting the bathroom mirrors so light comes in but privacy is added).
xo,
s
Kevin H says
Great work- I really enjoy watching your progress. I hope those 4×4’s are rated for ground contact…
YoungHouseLove says
But of course! They’re from a lumber company who specializes in designing and supplying deck materials in our area!
xo,
s
John @ Our Home from Scratch says
Looks great guys! You’re giving me deck envy. We don’t have anything in our backyard yet but a 4 foot drop out of our sliding doors!!
emily says
What happens if/when the posts start to rot from moisture? Since they’re set in concrete, would you have to completely take apart the deck/break apart the concrete they’re set in to be able to replace one?
I might be missing something, but it almost seems like you’d want to be able to get into the holes (i.e. use dirt to fill around the post rather than concrete) to easily replace the post…
YoungHouseLove says
John’s dad built a deck this way 30 years ago and it’s still going strong! It’s just the recommended method in our area since dirt around the post tends to attract more water, therefor it attracts rot (it’s basically a post sitting in a puddle of dirt and water) so a post in cement is much more “guarded” from rot since it’s not sitting in a wet mud puddle. Hope that makes sense!
xo,
s
emily says
Absolutely! Thanks! And I don’t want it to seem like I was attacking your method – just wanted to ask! will there be anything at the foot of the posts to help deter water even further? (I’m kind of obsessive about things like this so I could see myself making some sort of totally unnecessary plastic post skirt.)
Brianne says
I also wondered about the concrete around the wood posts. Concrete is very porous and it’s usually not to code to have wood sitting in concrete because it causes the wood to rot. I’ve seen this happen with our front porch – the original builders (back in the 50s) set the posts in the concrete pad and they started rotting. I would hate for you to put so much work into the deck and then have it start rotting/become unsafe in another 10 years or so.
Ashley says
Looking awesome! I probably would have shrieked if I found frogs anywhere. Good for you for saving them and doing a show and tell with your daughter!
I kind of want to hire you guys to come help me do stuff to my house… sigh…. :)
Julie says
With our triplex perched on the side of a cliff, I’m pretty sure this is kinda how the whole house is standing. Totally freaks me out!
I’m in love of the close up shpt of Clara and the frog, such a keeper!
Karen J says
What a laborious process! My husband recently finished cementing an umbrella into a planter box on our pool deck. It was a long project for such a “simple” task; our son is now obsessed with the newly discovered fact that he weighs “as much as a bag of concrete”.
Kim S says
I will echo the many commenters that have already said this, but WOW John, I’m so impressed with this project! This is some heavy duty work, and you’re doing it like a pro! It’s obvious how much research went into this…the finished product is going to be so worth it!
Christine Witt (Brush Dance) says
So much work – it’s so impressive how you just dive right in to major projects like this and get ‘er done.
Michelle Davis says
Seriously, I love a good DIY project but watching you go through this one makes my head hurt.
The frogs just may be my favorite part so far :)
dana says
i have to give you guys a lot of kudos for this post and this project! not only is it an admirable task to take on yourselves, you did it in a 110 heat index!!! you’re already 1,000 times stronger than i am for that alone. but most importantly, i have to say thank you for making that photoshopped diagram with the joists, posts, etc. i have to admit, i felt a little lost when you were talking about the construction (probably because i’ve never constructed anything bigger than a table) but as soon as i got to the diagram, everything you said instantly made sense. but not only that, it put the project in layman’s terms. i loved that. it made me feel like something i couldn’t possibly comprehend constructing was actually possibly. i’ve heard (extremely little!) criticism of this blog before for not being “designers” or having the most original ideas, but for me that’s not what this blog is about. almost like you intended in your news article, you’re just a regular family, keeping it real and showing how you’re making your house a home with the things you love. while some might not find your designs super original, i think they’re just that! you guys don’t go into it with a concept theme and matchy matchy color scheme. you layer your rooms and homes with things you love and represent you. and you teach us readers how to do that to our own homes. (um, hello pinterest challenge? inviting us to create something homemade for our home that we put a little bit of ourselves into) you invite us into your beautiful home via this blog and right before you leave all of us envious borderline jealous, you show us just how to do it ourselves! there’s an old fashioned sense of pride that comes from building and creating your home yourselves and i’m so happy to see that not only have you guys preserved that, but you’re also encouraging all of us to do the same. i find it even more respectable that neither of you are designers (in full disclosure, i am an interior design student senior), you create a sense of charm and love and HOME in your house that no amount of schooling will ever teach. (i have to admit, there is very little creativity in design school and a lot of business, technical drawing and building codes) i guess i’m basically saying thank you. for over the past 2 years, your blog has been a very real, very inspiring, and very favorite daily read for me.
ps. i even love how most of your “name brand” items even have sentimental meaning to them, like the west elm beehive vases or the “clara” rug. :)
YoungHouseLove says
Awww, we’re blushing over here Dana! Thanks so much for taking the time to write all of that!
xo,
s
Becca says
This is what I love about your blog- it’s realistic! It’s not “start to finish in 3 paragraphs or less”. DIY projects really do take a long time and I love seeing all the little details, successes and even failures. Keep it up guys! :)
YoungHouseLove says
Aw thanks Becca!
xo,
s
Aana says
very impressive, both of you. 1st lovely family all the way.
2nd lovely home corner to corner , inch to inch. one heck of a DIY team:).
we have 1893 historic house in state of Maine, that we have been fixing from past 3 years. when we fixed our porch we layed 2 inches (thicknes)of 3/4 inch crushed rock to keep everything looking nice, prevent weed and erosion. Did you plan to put something under so you dont have to crawl under the deck to clean?
YoungHouseLove says
Yes, we hope to cover that in the next post or two!
xo,
s
Laura says
Hi John,
Is there no need to use pressure treated lumber for this? I am worried about your use of untreated wood for ground contact.
YoungHouseLove says
Oh yes, it’s all pressure treated. The entire lot of wood is meant for deck building so it’s rated for ground contact and pressure treated!
xo,
s
Jill says
John, you are a rock star! This whole thing is seriously so hard core.
Stacey says
Yay! Deck progress! Well done, John! This is such a big project that I’d be too intimidated to tackle (ever). But your work looks super professional. I wait with baited breath for the next post!
PS: I’ve been loving the Atlanta posts – wish I could visit that Aquarium.
Stacey says
What a talent you are John. And Sherry. I’m always amazed that you DIY as much as possible and it always looks so fabulous. Truly inspiring.
Col & Kate says
Thanks for another great post guys. The level of detail in doing the deck is great, because we plan to do one ourselves early next year. Also appreciate the earlier post that showed what went wrong with the inspector, to help others learn and avoid the same complications. Keep up the great work and we look forward to seeing the finished deck!
YoungHouseLove says
Aw, you’re sweet! You know we love sharing the nitty-gritty!
xo,
s
Stacy says
We have a deck project going on too. Not building one, but sanding one so we can stain & reseal. We will need to replace a few boards, but it’ll look a ton better once it’s complete. We skipped working on it during out 100 degree weather & went to Water Country instead. :) I dont know how you did it. You’re very dedicated. I have several projects going on right now. I just received my Adirondak chairs that I ordered from Joss & Main. We got the one that wasn’t stained or painted. It saved us $60 a chair! Now we just have to figure out the color to paint them. So many options.
Jaye @ Just Tryin' to Make Cents of it All says
Wow! I wish the yo-yo’s who built our deck had gone to that much effort! It’s going to look fabulous and I’m so impressed that you’re doing it by your self!!!
I won’t grip about our 90 degrees here in Denver anymore! Although we did get into the triple digits a few weeks back but that may have been fueled by the fact that everything was ON FIRE around here!!
Great job!
Kate says
Great work John!
You are Superman for doing all that work by yourself. =)
I can’t wait to see more progress on the deck.
Todd S says
The deck is starting to look good! If you guys are interested in hiding the screws you use to hold down the decking, you should check this thing out:
http://www.deckbuilderoutlet.com/camofastener.htm
I havent used it personally, but from what Ive heard its a pretty slick and easy way to make your deck look a little cleaner.
YoungHouseLove says
Sounds awesome!
xo,
s
Gretchen says
Seriously? You are a rockstar! I cannot believe that you don’t have a degree in engineering or carpentry or deck-building. I find this effort awfully impressive!
kayla says
I can certainly feel your pain! My hubby and I just purchased our first home, and the deck is the first job we are trying to tackle. It was not his first choice, but it’s not my fault I want to enjoy my new outdoor space ASAP! I’m cooped up all day in my office at Dish, so I’m really excited to soak up some rays outside. Are you guys using any resources to help you complete the job? So far, our biggest helpers have been HGTV and the DIY network. I never thought I’d be so addicted to home improvement shows! My Hopper DVR box is chalk full of project shows we’ve recorded. Luckily, it has heaps of memory available so we don’t have to be choosey with what we record, which is good because we need all the help we can get! Wish us luck! Yours is looking great already!
YoungHouseLove says
Lots of luck!! We usually have luck googling for online sites with specific info for each project we tackle. We also read some books from the library on the subject or try to call a contractor friend of ours with questions!
xo,
s
Jess says
Where is the ocotpus balloon from? It is super cute!
YoungHouseLove says
Kroger!
xo,
s
Chris says
This deck is going to be AWESOME!!! Not much more to say other than that. : )
Gina says
That picture of Clara looking through the window at the frog is GREAT!
Great job on the deck too.
Krissy says
John, the deck is looking great! Nate and his friend just finished ours up on Thursday. Building the deck also involved replacing a wall on the porch, but the just-deck part got knocked out in 3 (nonconsecutive) days at our house! Keep up the good work and stay cool.
(PS I got a kick out of your Pepsi shirt and Powerade drink, as Powerade is a Coke product [our friend works for Coke and gets upset if anyone has Pepsi products in their house].)
YoungHouseLove says
Haha, I have no beverage allegiance (as in, I usually love them all equally).
-John