Let’s make a floating frame, shall we? I did a little frame hack that’s super easy and free if you have a few basic items on hand – or only a few bucks even if you don’t. So for anyone out there who likes the look of a floating glass frame but doesn’t want to pay around twenty bucks for one, you can probably use an old frame that you already have to whip one up.

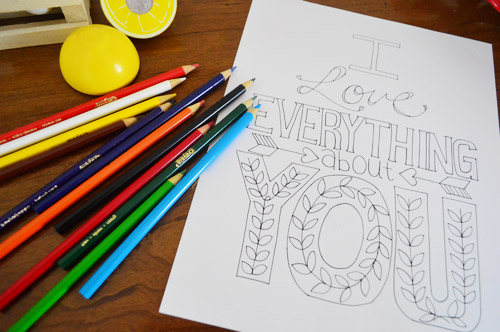
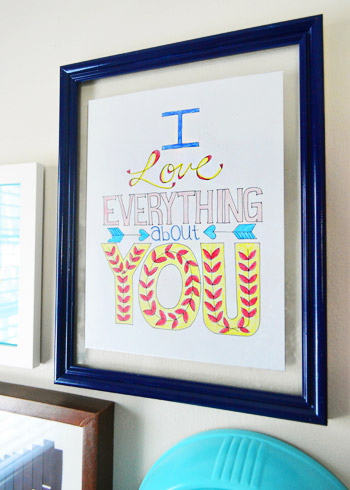
First, I colored this cool printable that I mentioned in that original art-hanging post (which I got here, printed on card stock at home, and colored with regular old colored pencils).
Then I was about to run out and buy some large paper to use as a backing or mat when I thought… what if I just let it float behind the glass? Sort of like the art in Clara’s nursery that floats in a store-bought frame from Target (it’s the frame on the bottom-left of this old pic).

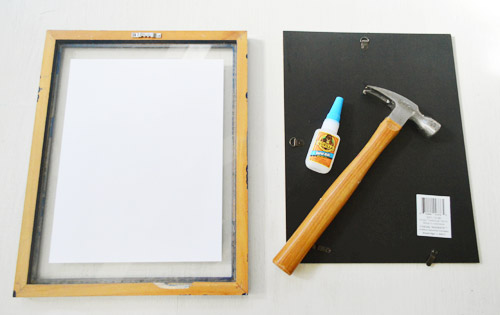
But instead of changing gears and running out to Target in the hopes of finding another floating glass frame, I took apart the regular old frame that I had and looked at it. And I realized that if I removed the backing, added a hook to the top of the frame so it would hang, and secured the art to the glass and the glass to the frame, I’d be good to go. So I gathered just a few materials…
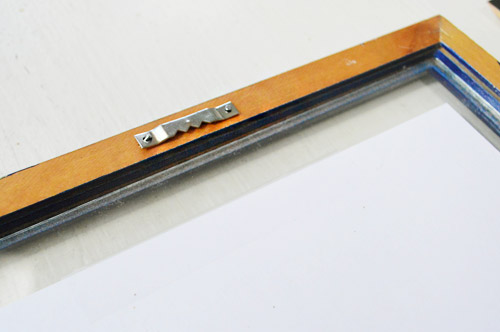
Material #1: A sawtooth hanging attachment, which I nailed into the top of the wood frame (make sure it’s centered so your frame hangs straight). These guys are usually four for 99 cents at Michael’s, by the way.
Material #2: Super glue, which I used to glue the glass to the front lip of the frame. This picture is like one of those “reenactments” on TV (you know the ones where the reenactor looks nothing like the original person being interviewed in one of those crime or ER stories). The reason it’s a bad reenactment is because I got too excited and glued the glass to the front lip of the frame and then realized I forgot to take a picture of the process…
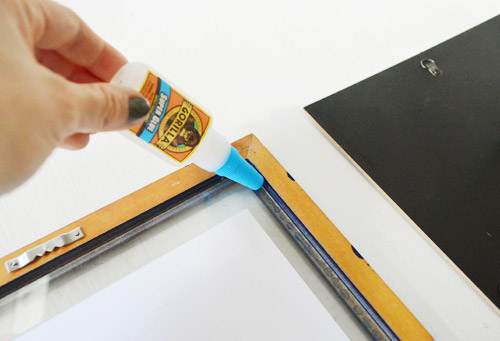
So just imagine that the cap is off of the glue, and the glass is actually lifted out of the frame. Yup, I just ran a thin bead of glue around the entire outside lip of the wood frame so that when I dropped the glass back onto the lip it would be glued in place. If you look closely at this picture you can actually see the dried glue along that lip, which isn’t visible from the front of the frame since the lip is there. Note: this doesn’t change anything about being able to clean either side of the glass – you can just lift the frame off the wall and wipe the back of the glass if you’d like.
Material #3: Nada. You’re done.
The result? Well, once it was all dry, I had a floating glass frame. As for how I attached the art, I used regular old clear scotch tape applied to the back of the art. I just overlapped it ever so slightly so the very very tiny top edge would meet the glass along the top of the printout and the very tiny bottom edge would meet the glass along the bottom. Lo and behold, it actually worked. Since it’s such a thin sliver it’s not noticeable from the front – even when you get close (I was pleasantly surprised that the tape didn’t show). And I only needed that one piece on the top and one along the bottom, so it was held nice and smooth.
If the tape was all awkward and obvious, my next plan was going to be trying spray adhesive – lightly spraying the front of the printout and carefully sticking it to the back of the glass in a nice centered position. Although I would only do that to something that’s not valuable or one-of-a-kind (so a free printable is a good example of something I’d dare to spray right in the face).
Speaking of that, my suggestion for this little frame hack would be to avoid using it to hang anything super valuable or irreplaceable since there are two notable differences:
- there’s no back pane of glass or piece of cardboard protecting the art from the rear (instead of being sandwiched like the art in most frames, it’s backless like a Carmen Electra dress). I’m not sure how much of an issue this poses, since it’s essentially just sealed in a box made by the the frame that touches the solid wall behind it on all sides, but it’s a difference so I thought I’d mention it.
- you’re putting a bit of clear scotch tape on the back of the art (which is actually something I do a lot when I frame things the traditional way as well, but it’s not the recommended method whenever you’re framing anything that’s especially valuable or irreplaceable).
That being said, for hanging a free printable that you printed and colored at home, well, it’s pretty darn perfect. I figure since we’ve got approximately nine million and seventy eight traditional frames in the house, two floating glass ones are a fun little twist. Have you guys added anything (or subtracted anything) from a frame or some other item of wall decor to give it a fresh spin? Spill the frame-hacking beans.

Leave a Reply