Two weeks ago, we shared our Children’s Hospital makeover project with you guys, and this week we got to start actually installing the room. Holy holly jolly, Batman!
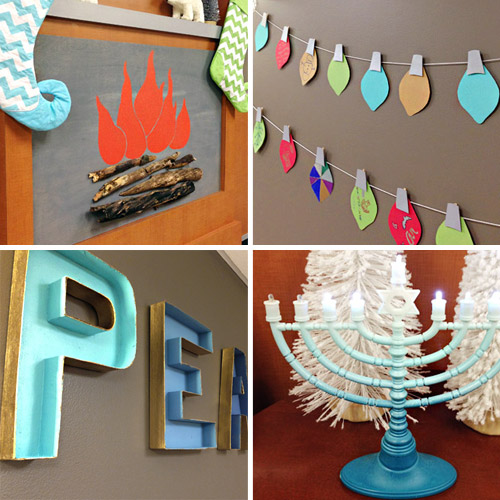
We’d share wider room shots except we’re still waiting on around 40% of the stuff to get delivered loaded in. In the meantime, we thought we’d share the details on four easy and affordable DIY holiday projects we completed for the space!
- A faux fireplace with real branches
- An interactive paper bulb garland
- A Gilded cardboard letters
- A gradient painted Menorah
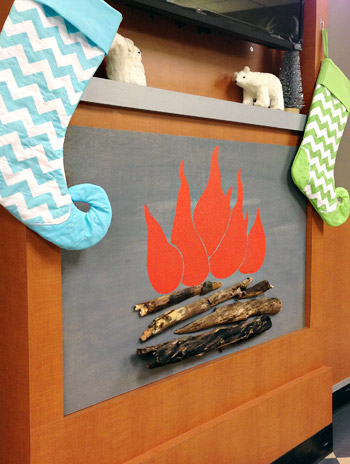
1. A Faux Fireplace With Real Branches
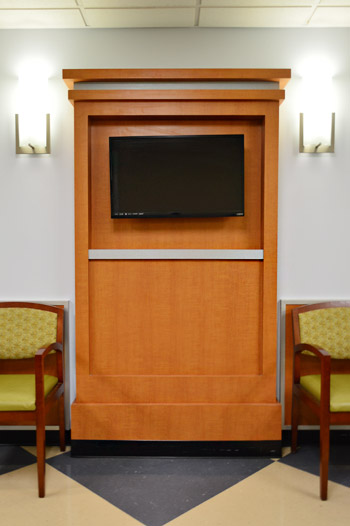
The first one’s our little faux fireplace that could be used to turn any spot into a kitschy, temporary hearth for the holidays. This room at the Children’s Hospital had the perfect spot in this niche below the TV.
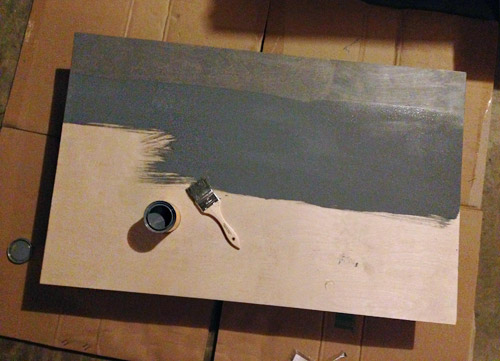
A real fireplace is obviously not an option in a fireplace so we opted to make them a fun faux one instead. The first step was getting a thin plywood board cut to size at Home Depot that we took home and stained gray with a small pot of stain (also from Home Depot).
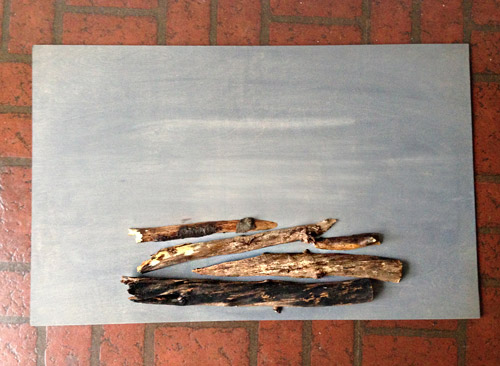
Our original plan was to just paint some wood and a fire on it, but I got the harebrained idea to incorporate real wood instead. I scavenged in the woods behind our house a bit and then ripped the fallen branches in half on my table saw. That way there was a flat side to rest against the plywood.
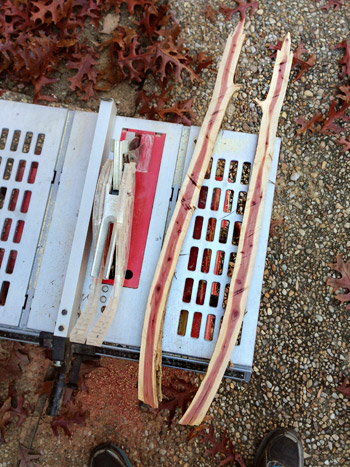
After playing around with a few halved-logs, I found an arrangement that sort of mimicked the look of stacked logs. So after letting them dry out and then sealing them with a few coats of spray poly on all sides (to make them less crumbly) I glued them in place and, once the glue was dry, I screwed them in from the back – just to be safe.
Sherry then used some spare orange paint (Terra Cotta Red by Valspar, which we got with free sample coupons from Lowe’s) to paint on some flames.
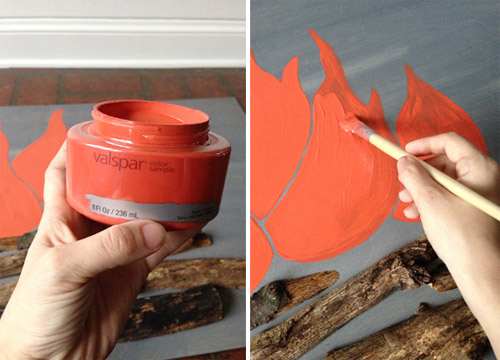
She originally planned to do some red and yellow too, but we both kinda liked how simple and graphic it looked with one color, so she left it as-is.
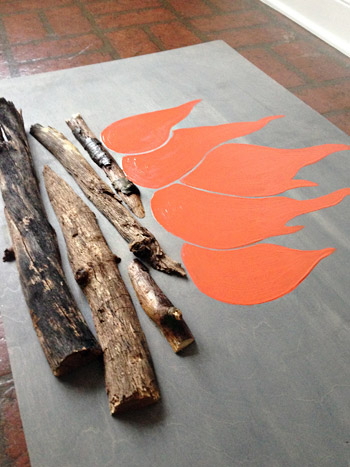
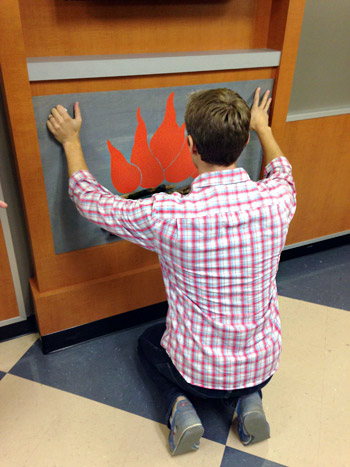
Then I just used 3M Command velcro strips to hold it in place in that recessed alcove under the TV (this way it’s 100% removable after the holidays).
Here’s a detail of the finished faux fireplace, complete with a few “mantle” decorations as well. The chevron stockings were a handmade-with-love donation from a local Etsy shop called Love by Design. Thanks Christen! We’ve already heard that they’re making the kids and families smile, and they’re not even full of presents…
2. An Interactive Christmas Light Garland
Next to the fireplace is a freshly painted wall with two more projects that we just got to hang. Let’s start with the easy one: our “Christmas lights” paper garland.
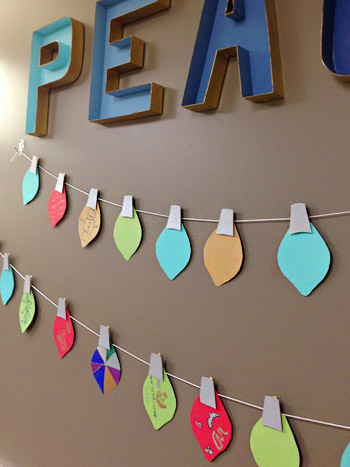
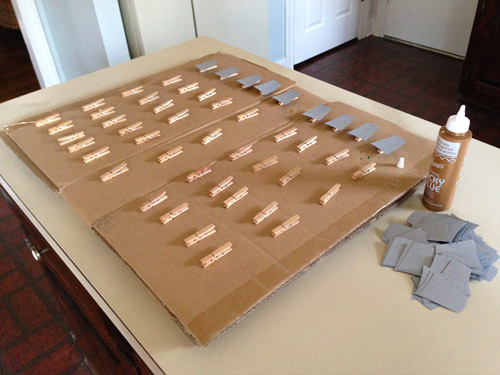
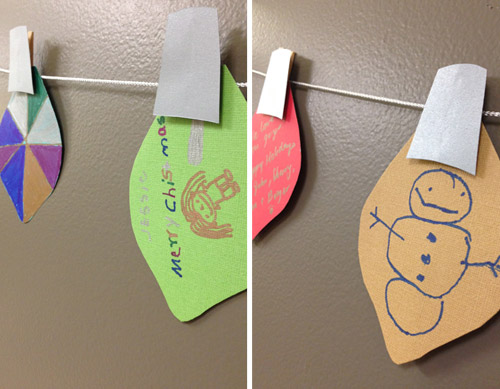
Early on we knew we wanted to do an “interactive” garland where the kids could help us by putting their personal stamp on things, so the obvious solution was paper clipped onto a string like a clothesline (so things could be colored and easily hung up to be displayed). But to give it a little holiday spin, Sherry cut the paper to mimic the shape of those old-school big bulb string lights.
Then she glued a silver paper “socket” to each one of the clothespins to round out the idea. Now when they’re all clipped into place on the silver twine, they look like little Christmas lights, and can be personalized by kids (and parents) of all ages.
Clara very kindly volunteered to color on a few of the bulbs before we left home, just in case the kids needed a subtle nudge that they’re allowed to go to town on these. But the nudge wasn’t needed. While we were there installing a few things, a 10-year-old girl named Jessie came in with her nurse and colored a bunch of them for us. You can see her self-portrait on the green one below. She’s just about the coolest kid ever. Thanks for getting the garland project started, Jessie!
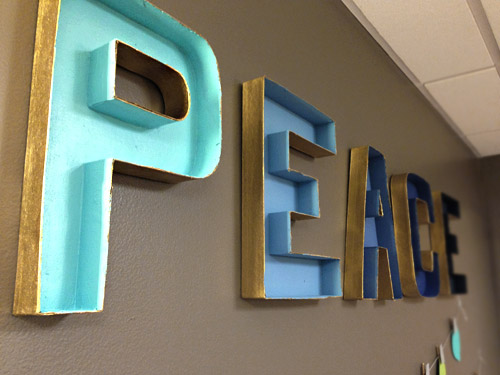
3. Vintage cardboard “PEACE” letters
Above the garland is a little lettered “PEACE” sign made from cardboard letters from the craft store. It’s a word we’ve been keeping in mind while choosing items for the room since, of all the feelings this holiday season can bring, peace seemed like a good one for a space that you want to be calming and welcoming for all of the families who will be spending their time in this room. The first step was grabbing these cardboard letters from JoAnn fabric.

We’d seen some folks on the interweb cut them open before, so we decided to give it a go. I sliced along the top edge of each one (not a quick process, I’ll warn you) and then smoothed things out a bit with a sanding block afterward. The cardboard didn’t cut super cleanly, so the sanding helped to get rid of some of the raggedness.
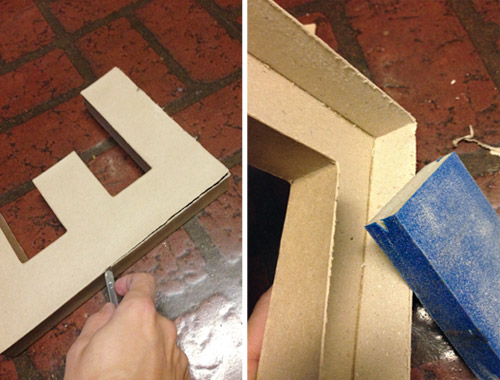
Here’s the scene after my cutting and sanding spree.
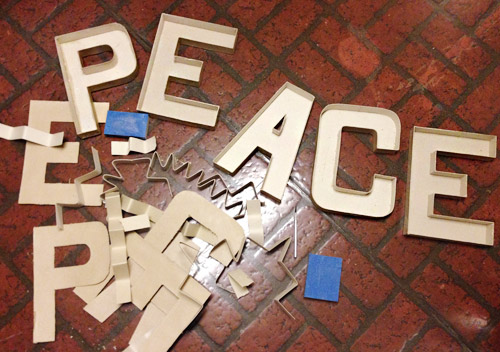
Once cut, Sherry took them outside and gave them a coat of gold spray paint (still leftover from our book photoshoots, wouldn’t you know). She focused her spraying mostly on the edges, because we had other plans for the inside: a colorful gradient from turquoise to dark navy. Since we had a few shades of blue craft paint around it was pretty easy to achieve the range of colors.
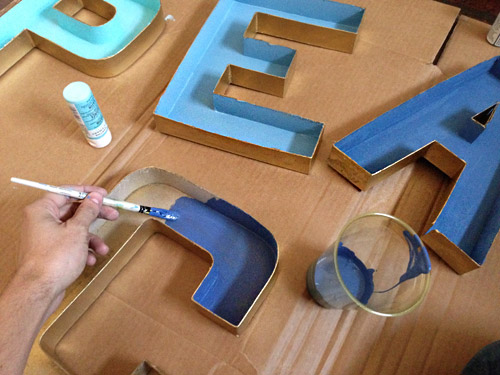
It wasn’t until after we were done that we realized they kind of resembled old metal letters. Somewhere between the metallic spray paint and the still sightly rough edge, it gave them a bit of a rusted, vintage look. It was awesome to see people reaching out to touch them, thinking they were made of something heavy and then realizing they’re just painted cardboard.
4. A Gradient Menorah
And speaking of blue gradients, Sherry decided to carry that theme over to the Menorah that we brought into the room, which was inspired by the gradient candles that were in her original moodboard’s menorah candles. Thank goodness we got it into the room with a few days of Hanukkah still left (it went in on Tuesday)!
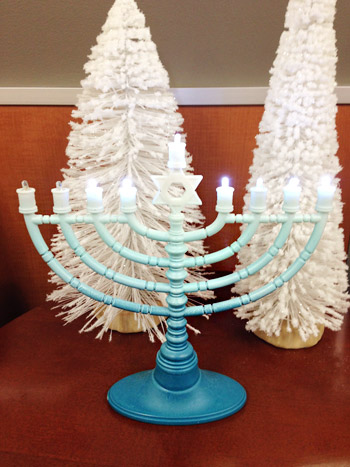
For this little upgrade, we found a regular white menorah at Party City, and Sherry bought two cans of spray paint for that graduated effect. The first one was a dark blue color that she applied around the base on all sides (Lagoon by Rust-oleum) and then some aqua got sprayed through the middle portion on all sides (Blue Ocean Breeze by Krylon). She simply left the original white color along the top, and it probably took ten minutes total.

So there are four little holiday updates that we’ve completed for anyone who has been wondering what we’ve been up to in there. Now we’ve moved onto the rest of the projects on our to-do list that are still not crossed off (see below) one of which will feature the messages, cards, and other well-wishes that a bunch of you have sent our way (thank you, THANK YOU!).
We’ll be finishing up next week (exciting bigger things will be coming in, like our cozy armchair, the window treatments, some bigger wall items, etc) and then they’re actually editing a short video of the makeover along with some Sherry’s-already-crying-just-thinking-about-it reactions from the sweet families who are spending their time in the room. We can’t wait to share that stuff with you guys as soon as we can!

Here’s what our To Do list is looking like as of this morning:
New paint job on walls.Done!Build a large custom chalkboard for holiday cheer messages and kid doodles (and hang it). Done!Assemble tree and decorate it.Done!Buy (and paint) menorah.Done!Make clip-up garland for kid-drawings.Done!Make removable fireplace panel for under the TV and decorate the “mantel.”Done!Cut, paint, and hang our big PEACE sign.Done!Receive custom art for the kitchen area from a kind reader (all the way in Australia!). Done, just have to hang it!-
Add in a white (but not ceramic) animal friend somewhere.Done! -
Add snowflakes to all the windows.Done! - Make wintry (washable faux velvet?) tablecloths & add small snowy tree centerpieces.
- Hang wreaths in kitchen area.
- Pick up window treatments (once they’re done) and hang them.
- Paint and hang di-cut trees around room ledge (can’t wait to share more details on this! We recruited the coolest local company to help us make them).
- Decorate pillars near entry and arch between them.
- Bring in cozy armchair for corner.
- Paint and hang two cork boards full of messages from you guys.
Create wood slice art (3 pieces) for the wall between those two cork boards.Done, just need to hang them!
Decorations and makeover aside, I have to quickly say what a humbling experience this has been. Maybe between now and the next post I’ll find the right words to express exactly what I mean – but witnessing what the staff at the CHoR does is pretty incredible. To get even small glimpses of the heart-wrenching stuff they encounter every day has been pretty eye-opening… and it really puts the idea of stressing over decorations and holiday entertaining into perspective. So in case we forget to say it later, a big thank you to anyone who does a tough job like that and makes such an amazing difference for so many families who are dealing with some very heavy stuff. We’re grateful there are folks like you in the world.
Update: You can check out all of our favorite holiday decor finds here – many of which are under $15!

Leave a Reply