This project gets a “don’t try this at home” warning for two reasons:
- It involves fire & broken glass so please use extreme caution & attempt it at your own risk.
- I couldn’t get it to work so you may not want to waste your time trying it anyway.
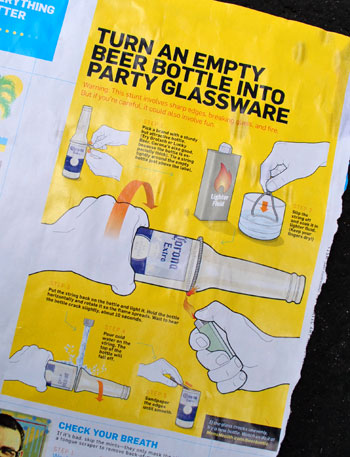
Yup, despite some die-hard persistence on my part, I couldn’t get this project to work successfully. Which sucks because I was really excited about it. According to the instructions I found in Men’s Health, it was a simple way to take beverage bottles and turn them into glass tumblers. Cool right?
Despite the project not working, we figured we’d share it with you anyway. Perhaps you’ll see where I went wrong or it will inspire you to try your hand at it (hopefully with a better outcome). If nothing else, it serves as proof that not everything goes smoothly around here 100% of the time. Plus I’d filmed just about all of my dozen or so attempts and I hated for the footage to go to waste. So check out the how-not-to video below (or watch it here on YouTube). Note: We recommend additional safety precautions like safety goggles, a fire extinguisher, and safety gloves (although Men’s Health didn’t mention them). Again, tackle this project at your own risk since glass plus fire can equal ouch!
And for anyone who can’t watch a video (if you’re at work perhaps) just keep scrolling for the written play-by-play below (which includes the sanding step that we accidentally left out of the video).
My first step was to gather the supplies that the article suggested:
- Lighter fluid and a cup to house a small amount of it
- Glass bottle(s)
- A lighter (or matches)
- Scissors
- String
- Cold water (we put ours in a watering can)
- Sandpaper (not pictured)
- Paper towels (not suggested, I added them for clean up)
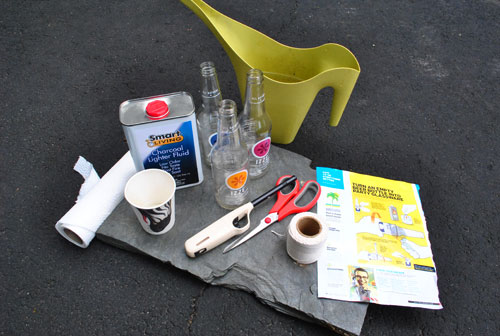
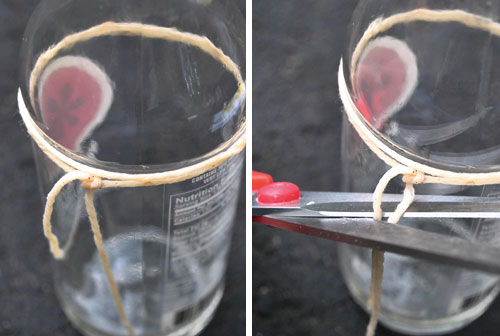
You’ll also see that I conducted this project on a spare piece of patio slate so that I wouldn’t risk burning our driveway below. The basic concept of the project is that by concentrating a lot of heat around the bottle in one clean line then suddenly cooling it with cold water, you’ll break the bottle apart leaving an un-tapered cup for drinking. So the first step is tying a string around the bottle right before it begins to taper.
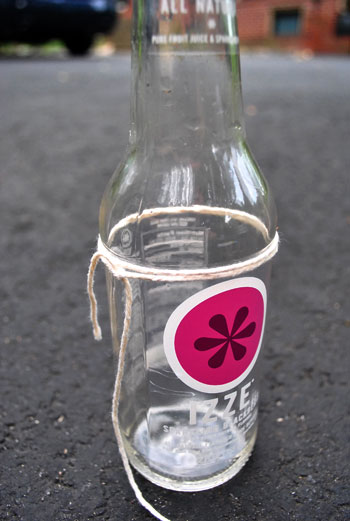
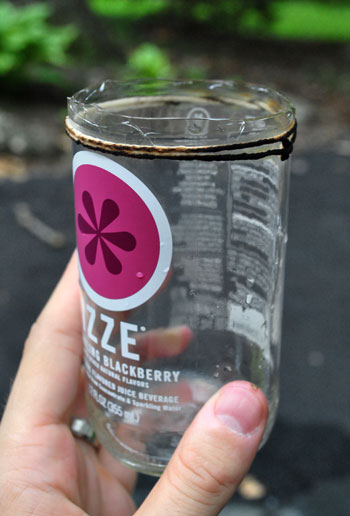
I tested this once before taking any video or photos and discovered one loop of string didn’t create enough heat to break a Boylan’s bottle, so I used two loops with my Izze bottles (seen above). Once you’ve tied the string, you remove it from the bottle and give it a good soak in some lighter fluid (doing your best to keep your fingers dry).
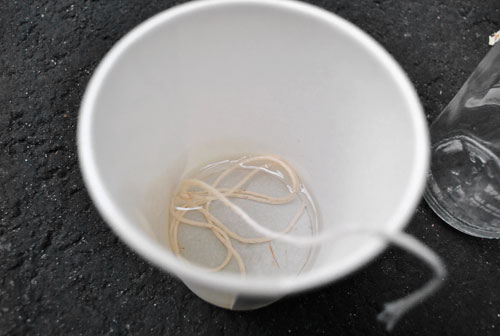
Once soaked, you put the string back on the bottle and cut off any excess (so as not to invite the flames to move down your bottle away from the spot where you want it to break). Putting the string back on inevitably got my fingers wet with lighter fluid so I washed them off in the water (so as not to invite any flames onto my hands).
Then came the fun part: lighting the string on fire. The article said to hold the bottle while doing this so that you can rotate it and help the flames spread evenly. I did this in some of my attempts, but usually just let the bottle sit on the slate so I didn’t have to have my hand near the flame. I just was sure to light the string on all sides before setting it down.
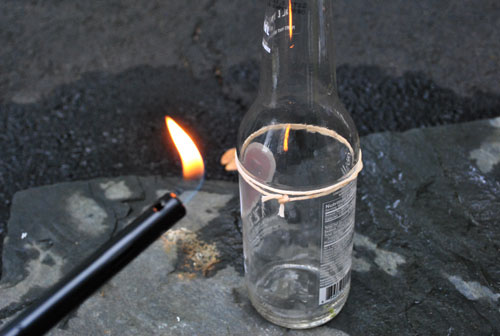
It produced something pretty like this! Oooooh, fire…
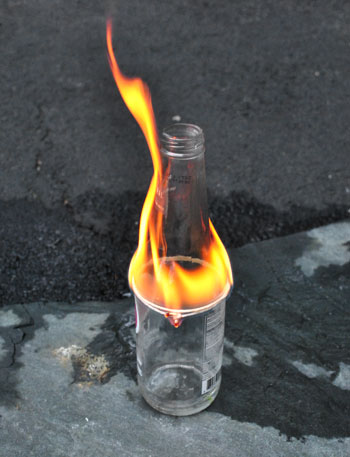
Now the article said I would hear a crack after about 10 seconds. That never happened for me (no matter how long I waited) so I jumped ahead to the next step which was pouring the cold water on the bottle which seemed to induce the cracking sound. I thought this might be where I was going wrong, but if I ever waited for the flame to go out completely before dousing it with water the bottle wouldn’t crack at all.
Ultimately, the goal is to get something like this:
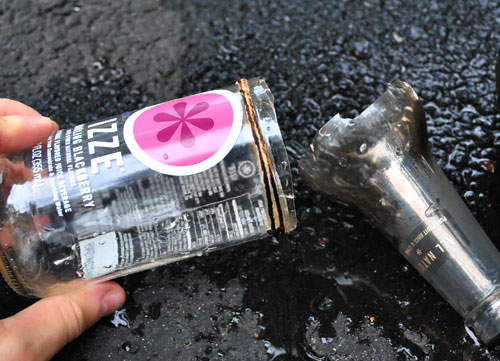
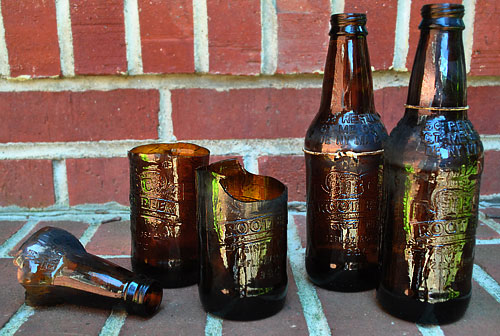
Except you’ll notice in that picture that the break isn’t totally clean. In fact it’s a lot more jagged than I would like – and certainly not something I’d put my lips to and drink out of.
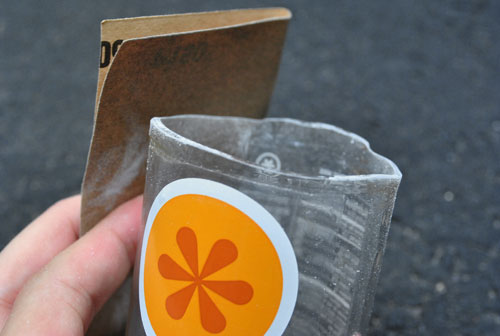
Sadly, this is actually one of my more successful attempts. I hoped that I could solve the jaggedness during the next step, which was sanding the edge so it would be smoother (you can see this being done below on my other semi-successful attempt). The sanding definitely make the edge smoother but it would’ve taken a lot of sanding to get a perfectly flat top to this glass. We did the sanding outside btw, oh and beware of inhaling any nasty silica dust if you take this on.
In the end this is what my three Izze bottles looked like. I didn’t even bother sanding the blackberry and blueberry ones since their breaks were so jagged. Sigh.
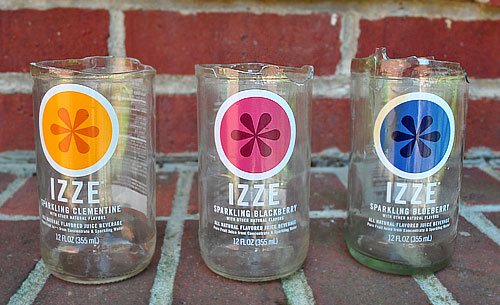
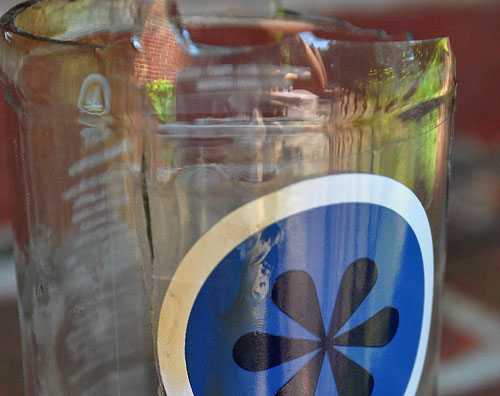
The blueberry Izze also illustrated a reason bottles like these aren’t perfect for this project. Since their logos are actually plastic labels stuck to the bottles, they can get melted and burned in the process (which is why cutting off the excess string is helpful).
After my attempts with the Izze bottles I questioned where I went wrong. I wondered if it was my bottle choice (not just for the label reason, but also because the article did suggest using a thick-ish bottle). So I tried the project again – as you saw in the video – with some IBC Root Beer bottles. They were both thicker and didn’t have plastic labels. But unfortunately the results were no better.
The thicker glass made them much tougher to break and the couple that did break were pretty jagged (while the others refused to break at all). I only got one that was semi-decent but for the most part it just looked like I had been in a bar fight.
In the end we didn’t end up keeping any of them, even though some could’ve made for decent little vases (assuming the flowers would cover the uneven edges). I have all sorts of theories about where I went wrong: was my string too thin? should I have started with cold bottles? is there some other bottle brand that would do better? But ultimately I’m just figuring it’s a “too good to be true” project and I’m not sure my belly can handle any more soda right now to try it again.
Have any of you guys tried this project or something similar? Have you had more success than me? If so, please leave your tips so someone else can try this with hopefully better results!

Leave a Reply