Our freshly painted laundry room is so bright and happy that makes me want to sing and dance like a crazy person. First I repainted all the trim (with Olympic No-VOC semi-gloss off-the-shelf white) and painted the annoying brown quarter round near the baseboards, so it blended in with the white trim. I applied three thin coats of the same Olympic No-VOC paint (no primer because I used the same method with success in the living room five months back and I’m lazy). Then when it came to the wall color, we decided to use the leftover paint that we used in the adjoining kitchen (remember when we painted that beastly paneling here?). Why that color? To brighten things up and connect the two spaces since you pretty much see the kitchen as soon as you step in the side door in the laundry room.
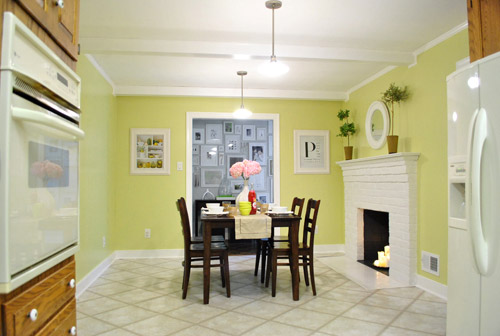
Since the laundry room is such a small space we knew a different color might interrupt the flow and make it feel a lot smaller than something that would connect slash elongate it. We might add a subtle stencil or some other paint treatment down the line if we want more mojo in there – but once we hang window treatments and a new dangly light fixture and add lots of other stuff (art, storage, etc) we’re not sure if it’ll be too much for the tiny room. So we’re waiting on the whole stencil/stripe possibility.
Bee tee dubs (yes I just spelled out btw, and turned the w into a dubs) the color is called Sesame 381 by Benjamin Moore (color matched to Olympic’s No-VOC paint in a semi-gloss finish). Our small semi-light-filled laundry room has a door and window that let in light from the carport, which isn’t super bright but it’s a lot brighter than our windowless kitchen. So the artichoke-ish grellow (green + yellow) tone:
- is a smidge brighter
- reads a little more yellow than it does in the kitchen
- is so insanely cheerful
We’re psyched. Who doesn’t love a happy little laundry nook? As soon as I started cutting in I knew it would wake up the whole space.
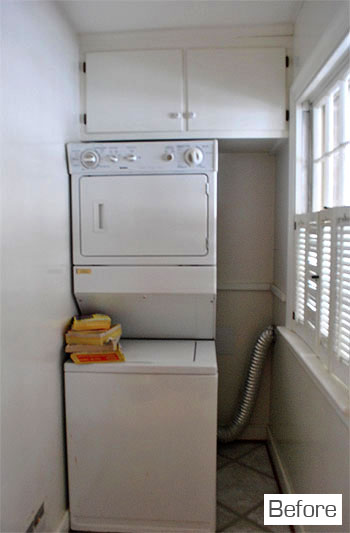
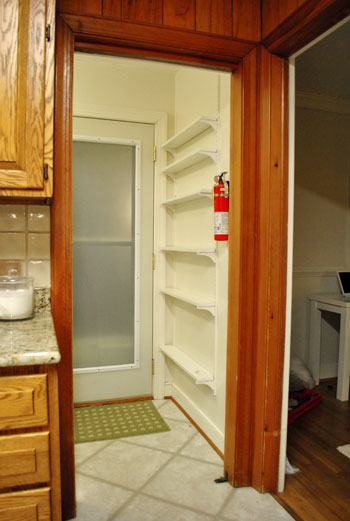
Here’s what it looked like when we moved in:
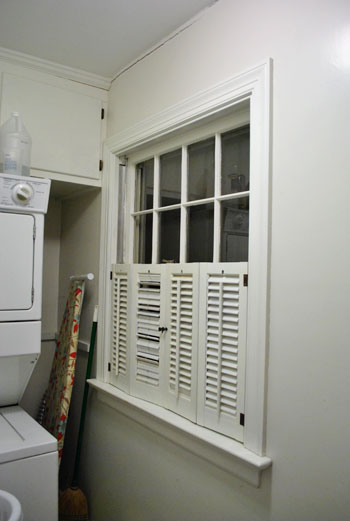
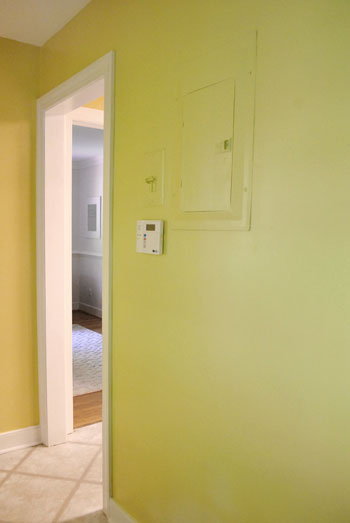
And here she is now with a slap of how-you-doin’-on-this-fine-morning color (along with some other changes covered here):
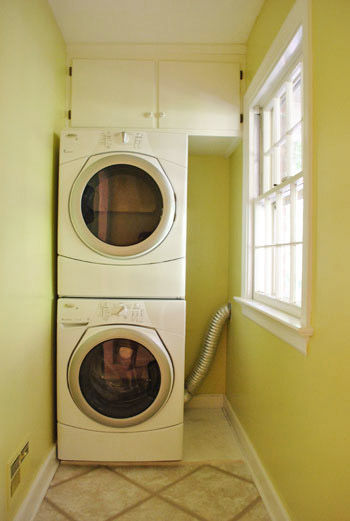
Oh and if you’re wondering what that white board is in the pic above and below, we heard setting stacked appliances on a nice thick piece of plywood that goes against all three walls can stabilize the machine for a longer life. So we did it. And I painted it white because when we add shelving to that side of the nook it’ll blend in like chin hair on a mountain goat. Made that up. Think it’s catchy? Nah, me neither.
Some of these photos look a little more neon and booger-ish than it does in real life. In real life there’s zero booger resemblance and it’s definitely not neon. Which is a relief. It’s light and sweet – like liquid sunshine. And here’s why we knew this room could handle some happy color:
- We’ll add a ton of white shelving to temper the color (along with the white washer/dryer).
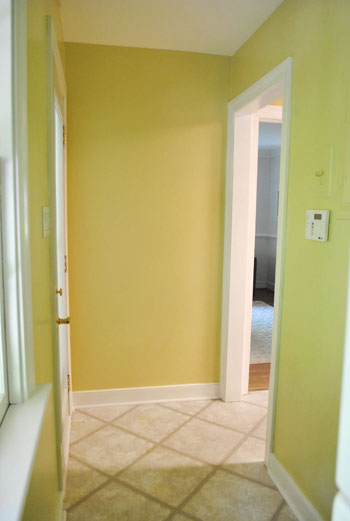
- It has a window & a glass door as well as a doorway into the kitchen to break things up.
- Eventually when we have wood floors in there it’ll be even more subdued.

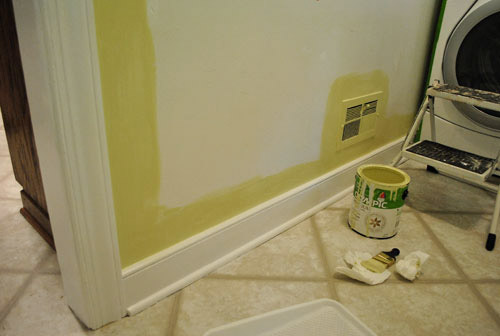
Oh and as for that crazy metal fuse box cover that we had going on – remember this?
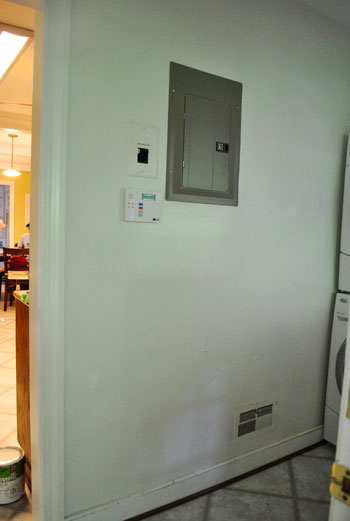
We just rolled/brushed a few thin and even coats of paint right over it. Didn’t even prime. We did that in our last house to hide a just-as-obvious one in the corner of the den – and four years later it still looked awesome. See if you can find it here. Metal actually takes thin coats of paint really well (like spray paint) so by being sure not to glob it on and opting to do more thin coats (as opposed to fewer thick and globby ones) I got some nice coverage. And it still opens and closes easily (tip: do that a few times between coats to ensure that things still work smoothly and nothing gets gummed up with paint). In short: thin and even applications = the painting holy grail.
Total spent for this phase of the makeover: $0 (thanks to trim and wall paint that we already had leftover from the kitchen). Wait, we did buy a pack of rollers so it was actually $8. Of course we still have plans for adding a ton of function (and a good dose of looks-nice stuff, like art) to the room – and that blank wall in particular. So that painted fuse box won’t just sit there looking, well, painted. We’ll share those details as we go.
As for the to do list, here it is as it stands today:
Paint the odd brown quarter round near the baseboards glossy white
Redo all the dinged up trim (also in semi-gloss white)Paint the walls- Replace our dryer hose with a safer all-metal one
- Add adjustable built-in shelving in that nook next to the stacked washer & dryer <– we can’t unstack them and put them on the long wall since the room is only 3.5′ wide so the doors wouldn’t even open
- Replace the hinges and knobs on the upper cabinetry
- Get a new light fixture <- DIY something? maybe a small chandelier?
- Add a window treatment (maybe a homemade one?)
- Add other functional storage near the door for shoes, Burger’s leash, etc
- Hang some art to keep it cheerful and obscure the giant metal fuse box
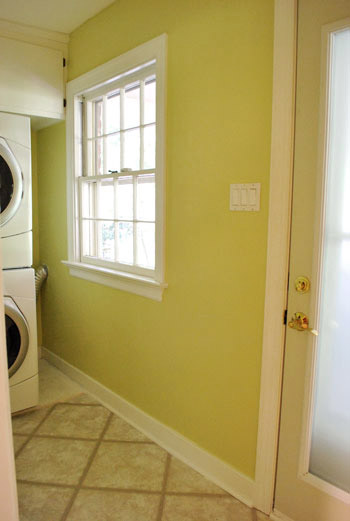
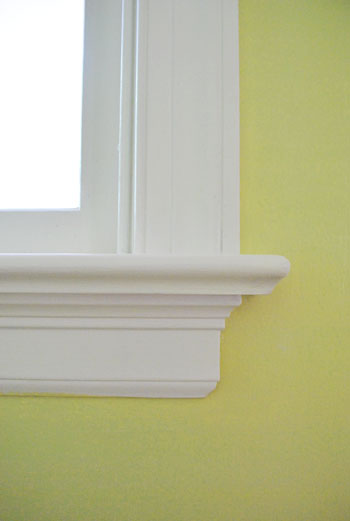
Mmm, crisp white trim might also be the painting holy grail. Doesn’t it look so great with warm greeny gold? This photo is probably the most true to life when it comes to the actual paint color and how it looks in there. It’s a little lighter in person, but this is the yellow with a hint of green tone to a T. It’s just like an artichoke heart.
Suddenly I actually feel like doing laundry. Weird.
Psst- You guys were all so sweet about my haircut yesterday. Seriously, I almost got a cavity. And I definitely got all awkward and clammy and blushy. Basically the opposite of cute. Anyway, rest assured that my hair will never look that good again (you know stylists possess some other-worldly powers to create a hairstyle that no one can replicate at home). So stop being so dang nice. It’s making me rashy.

Collette Douglas says
omg–could your hair be any more flippin gorgeous!? That is the most sexy, flattering hairstyle I have seen in years. Seriously. It rocks my socks off. I wanted to comment on your annie post but I was reading it on my mobile…and I am not so good on the tiny-key typing a-la cell phone screens. But anywho–sweetlemonade your wall color blows my mind! Talk about fun! thanks for the updates!
Reese says
I can totally relate to the whole wanting to do laundry thing. Every time I go to Lowes I have to check out the clearance paint and in the process of doing our laundry room I scored a $2 gallon on watermelon pink paint! Sweet right? What better room to make obnoxious then the one only you will ever spend time in.
Noelle says
Hey the room looks great! I love how you show that paint can look so different based on natural light.
For that box you painted over…. Did you catch that Sarah’s House where she covered up a box with a picture in her laundry space and went one step further by using a piano hinge so she still was able to get to it? It was really a neat idea
YoungHouseLove says
I loved that solution! She’s a genius!
xo,
s
Brandy @ midcenturymodernlove says
more yellow i saw today!…
http://design-crisis.com/?p=3039
more yellow submarine yellow, but very cool.
YoungHouseLove says
So fun!
xo,
s
Heather says
I just found out yesterday that it is illegal to cover an electrical panel and the insurance company would not cover any claim due to a fault with electrical if they found the panel hidden in some way. I assume that means placing a picture from over it or something similar to hide its unpleasantness. You guys seem pretty savvy so you may already know this but I am just passing the word along, from one Virginian to another :)
YoungHouseLove says
Never heard that! We’ve seen so many designers hiding them with photos and frames! We’ll have to look into that more! Maybe somehow indicating that it’s there will work (ex: small label on it that says electrical panel while it’s still painted to blend in?). We’ll have to call our insurance company to ask! Our old house’s panel was painted over and we never heard a thing at inspection or from other electricians about it. So funny!
xo,
s
Nikki says
Awesome sauce! Lurv it ; )
holly says
just curious—why do you choose semi-gloss finish for the wall paint and not matte/flat?
YoungHouseLove says
In mudrooms/laundry areas and kitchens and bathrooms we go semi-gloss so it’s easy to wipe down and can stand up to detergent spills and grease spatter and all that jazz. But it’s totally a personal preference thing. Some folks use satin or eggshell in those areas (we have old plaster walls which tend to suck in paint and not look as shiny, so maybe that’s why we go for it). Hope it helps!
xo,
s
Rachel Farley says
Someone else may have said this already, but instead of painting the fuse box you can hang a piece of art over it and viola! Instant art and no ugly box!
YoungHouseLove says
We love that solution too! Sarah Richardson did an awesome fuse box makeover by hanging a gorgeous glass frame over it!
xo,
s
Kate says
I might have missed it in the post/comments, but did you move the washer/dryer to paint on the side of them? I want to paint my laundry room at some point (not loving the orange the previous owners had) but I’m dreading having to try to move the washer/dryer out to paint behind them (our’s are not stacked so you can see behind them a bit while standing in the room).
YoungHouseLove says
I just used a short handled brush to get as far along that inside wall with the washer/dryer on them as I could. Thankfully it’s all shadows next to them so you can’t tell the whole wall isn’t painted back there! But sliding them out if you’re using a darker color that may be more obvious might be the best way to go).
xo,
s
Anne says
I have a questionnnn… You said that paint is BenMoore’s ‘Sesame’. I was checkin that out online cause I’m trying to find a yellow I can live with. But the ‘Sesame/381’ on their website doesn’t look much like your pictures. It’s beigey. I’m confused!!
YoungHouseLove says
That’s it! It just reads oddly on the monitor. In person it’s a greeny-golden-yellow with some camel undertones. Hope it helps!
xo,
s
Erin says
Just bought a grey colored house… I have been looking for a new front door color… sesame is it!! thanks!
Erin says
while i’m at it. maybe i could use the same color to paint my hand-me-down coffee table and side table…and sofa table. I don’t want it to look too matchy-matchy though. what are your thoughts on having all one color furniture in the living room? would I get too grellowed out?
YoungHouseLove says
I would do a few painted pieces and a few dark stained ones (since that’s sort of like a neutral element that layers things so they don’t all look flat and the same). Dimension is key!
xo,
s
YoungHouseLove says
Ooh, that’s going to look awesome!
xo,
s
Jamie B says
You all have inspired the heck out me! You have no idea. I ran out this morning and got the Benjamin Moore paint in Sesame, and I have to tell you…it doesn’t look quite like your guys’. I think I would rename it “celery.” Would you agree? I know resolution quality on every computer is different. Would you say yours in more green, than yellow? Just wanted to pick your brain.
YoungHouseLove says
It’s a really hard color to photograph and definitely changes depending on the light. We’ve got fluorescent lights on one end of the kitchen and a soft white CFL lamp on the other end and it looks like two totally different colors. The fluorescent end is a very cool green, while the other end almost like a green-y gold. But either way, I’d definitely say it looks more green than yellow. When it’s really dim in there it almost looks apple green. Maybe they should call it “Chameleon!”
-John
Becky @ Paint SCENTsations says
I love the laundry room color with the white border. It’s so happy and would definitely make me want to do laundry. :)
Laurie says
I’m curious about the plywood base for the washer/dryer. Mine are not stacked, and I wouldn’t conceive of it the way the washer jumps around on both the tile house and now the vinyl floor house. Do you cut holes for the little legs to sit it to keep them in place, or why does it work?
Just discovered your site this week after The Nester mentioned you were being featured at a bloggervention. Never too late to get on board! You actually inspired me to get up and do some more on my kitchen reno that started last Aug! Thanks! Then I took a door off the hinges and trimmed it so it wouldn’t rub on the carpet anymore. Took all of 15 minutes, but it’s been bugging me for 11 months. Kudos again!
YoungHouseLove says
We just heard it stabolizes the floor since it touches three walls (the back wall and both side walls – it spans the whole corner) so perhaps there’s less give in the floor since the plywood adds thickness and heft, so it doesn’t jump as much? We didn’t cut holes, just slid it under and over a year later it’s still working well for us! And thanks for the kind words about our blog- so glad you found us!
xo,
s
Jill says
Love what you have done with this laundry room! I have very similar looking front loading washer & dryer and I never dreamed of stacking them. Are your washer & dryer meant to be stacked or was this something you guys just tried? Any problems with stacking them if not? Great idea! Love the color too… All I have to do is to figure out how to hide my hot water heater & furnace that shares a room with my washer & dryer. Any ideas? Thanks !!
YoungHouseLove says
Oh yes, they came with a stacking kit so it was an option. You could either put them side by side or buy the stacking kit to stack them securely. No issues with them, thank goodness! Oh and as for hiding your hot water heater and furnace, a pretty free-standing screen could be nice to hide them :)
xo
s