You down with ORB? Yeah you know me.
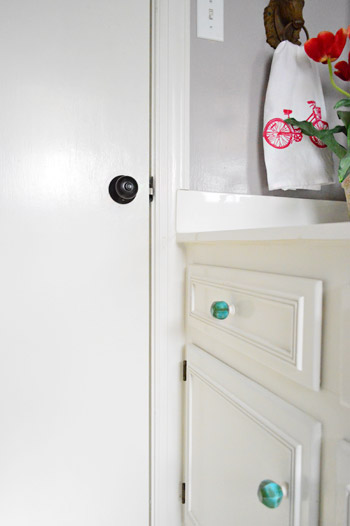
The deed has been done. After years (yes nearly two years!) of planning to upgrade every last old brass door knob in our entire house, we finally got ‘er done. Strike up the band! I can’t hear you. Can I at least get some cow bell?
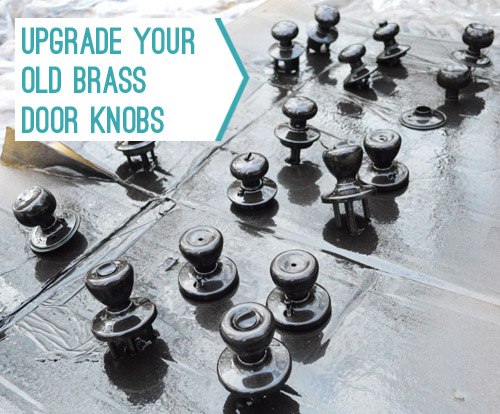
Yup, we removed 19 knobs with the intent of oil-rubbed bronzing (aka: ORBing) those babies. First we tried this method with a few exterior knobs, handles, and even a doorknocker a while back, just to see how they would hold up before doing the whole shebang (and I’m not gonna lie, I didn’t really have energy for the whole shebang up front). Baby steps.
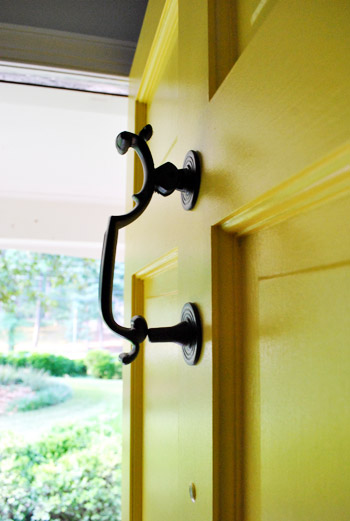
We figured that since those exterior knobs/handles/knockers still look great after a year and a half of being exposed to the elements (remember we did an update on them here?), that bodes well for all 18 (yes 18!) of the interior knobs that we finally got around to removing and ORBing. But we’re so happy with the results! Totally worth the trouble.
Here are the steps we followed:
- we removed all 18 knobs with a screwdriver, being careful to keep them paired up (we didn’t want to forget what went with what when we had to reinstall them)
- using super high grit paper (400) we sanded every last knob to rough them up so the paint would stick (if you see small scratches don’t worry, they’ll be covered with paint- but you definitely want to use high grit paper because low grit can leave deep/big scratches that show through)
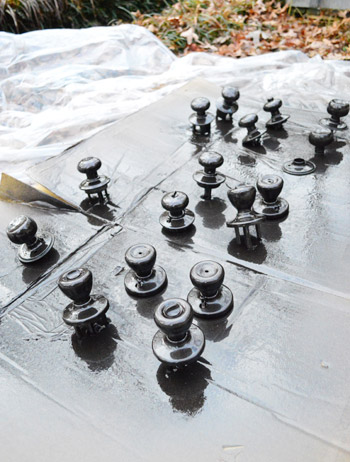
- then I wiped down each knob with liquid deglosser like this and laid them all out on a piece of cardboard (with them facing up, not lying on their sides – which sometimes meant piercing through the cardboard with their back parts to make them stand up).

- I used Universal All-Surface Spray Paint by Rostoleum in the oil-rubbed bronze finish. This has a built-in primer and sticks extremely well to things – especially metal – so if you’re contemplating using another brand, you might need to spring for a separate primer to apply first if it’s not already included.
- When it came to how I sprayed, I just misted everything from all angles. To avoid nasty drips and runny paint, doing several light coats with about 10 minutes of drying time between them was the charm. Mine were so thin it took five coats and I kept the can moving around the whole time – like you’d mist your mane with Aqua-Net. I also squatted on the ground from all sides to be sure I got all of the exposed parts of the knob completely covered.
- We let everything dry for a full 48 hours before reinstalling them (didn’t want to mark up the finish while wrestling them back into place). After 12 hours outside on a nice day (you don’t want to spray when it’s too cold – check the can for temperature guidelines) we brought them inside to the sunroom so they could continue curing for the rest of the time since it gets too cold outside at night for the paint to dry properly outside.
When it comes to a time breakdown, it took about thirty minutes to remove all the knobs, about two hours to sand and degloss them all, and about an hour to spray paint them. Then after 48 hours of drying time we reinstalled them in all in about half an hour. So the total time spent for what look like new ORB doors = 3 hours and 30 minutes (plus a few passive days of drying time).
And it only took one can of spray paint (actually less than that, since we were using an already-open leftover can). So that’s a lot cheaper than the $185 (!!!) we would have spent at Home Depot buying the exact same knobs in their oil-rubbed bronze finish. Our verdict: so happy with them. Wish we did this about two years sooner. Seriously it wasn’t even that big of a project (in our heads we kept putting it off because messing with every door in the house feels intimidating, but honestly you just remove a few screws, note which ones go together, and they’re all back in a few days later).
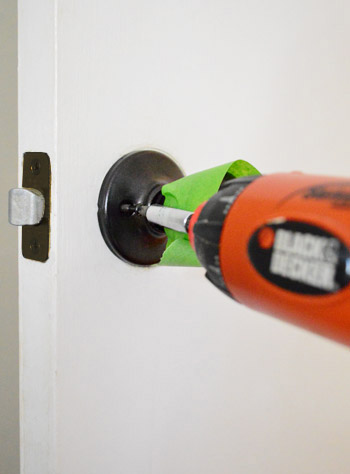
Oh and here’s an installation tip for ya: we found that using some painter’s tape while re-installng them kept us from scratching the newly applied finish (then just remove the tape when you’re done and it’s all good).
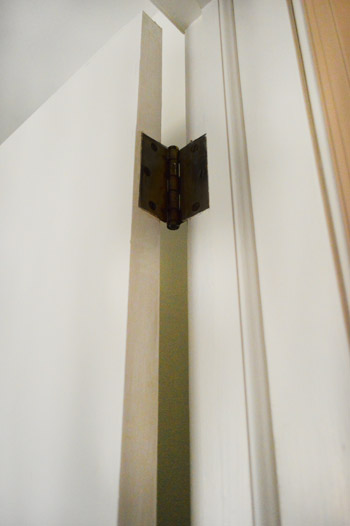
As for our door hinges, many of them already look ORBed (they’re old and darkened and not bright and shiny brass like the knobs were) or are painted over in white like the door from the previous owners, so we don’t have bright brass hinges clashing with the dark knobs or anything. But if you do you could probably switch them out for a few bucks per door. ORBed doorknobs are muuuch more expensive to buy than hinges or door plates, which is the good news (so I probably wouldn’t attempt to spray paint hinges like the doorknobs, since I’d worry all that grinding over time would make the paint peel and scrape off).
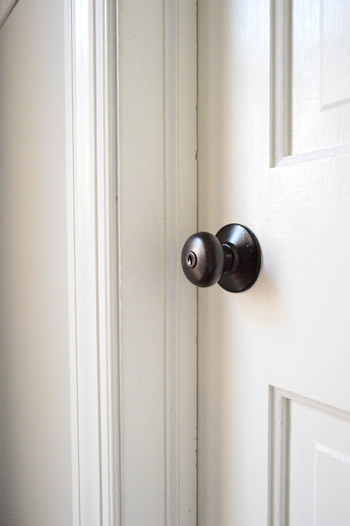
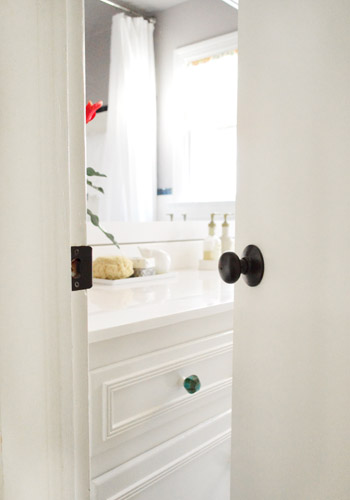
And as for the latch strike plates, a few of those already look ORBed like the hinges (just from darkening over time, which for some reason didn’t seem to happen to the shiiiiny brass knobs themselves) but a few were still brassy and bright, like this one:
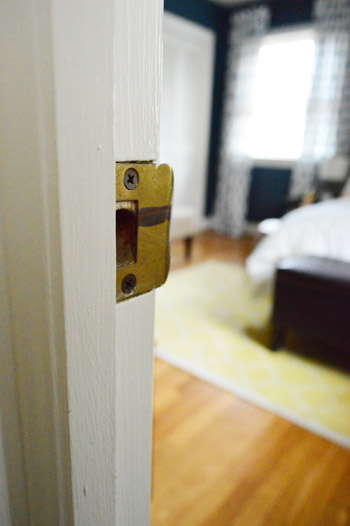
…so we picked four of them up from Home Depot for $5 total (they’re a whole lot cheaper than knobs!). Our reasoning for buying new ones to replace any super brassy ones that stood out instead of spray painting them ORB as well, was because the latch bangs against them a lot, so we thought they might scratch over time (whereas the knobs themselves don’t grind against anything else that’s metal, which must by why they hold up so well – even when they’re outside).
So there it is. A “dude get on that already” project that has been in the making for a long arse time. Feels pretty good to check that off! And just as I suspected, every single room/closet that we put them back on looked a little posher and less “ew, eighties brass”-ish than it did before. Hooray for small upgrades that make your whole house feel a little more crisp, new, and loved. What have you guys been checking off your to-do list? Does it involve paint? Sandpaper? A whole lotta procrastination beforehand?
Update – Wanna know where we got something in our house or what paint colors we used? Just click on this button:

*This post contains affiliate links to items we have purchased and love*

sue says
love the cowbell reference… i got a fever! ;)
Jennifer says
They look so clean and fresh!
We would ORB ours, but they are original to our 1968 house and the knobs have all kinds of pieces and parts and they don’t just screw off :( But we have replaced them as we go from room to room. $10 a pop :( However, they don’t fit in the side of the door hole (more drilling) and the strike plates don’t line up…more work which means this (should be an easy peasy) project is taking months, bc we don’t feel like dealing with it! And our hinges which kill me are mostly painted on, but there are only 2 per door and about 1/2″ wide on either side…can’t find them at the basic hardware places which means $$$, which means..skip in my book!
Glad to see you all agreed. It’s like my decision is justified now. ha ha
YoungHouseLove says
Haha, good luck Jennifer!
xo
s
Katie says
I have been seriously considering this ever since you did your sliding door hardware and I saw a couple posts on pinterest about painting hardware, but I’m torn between a brushed nickle finish and ORB.
We have a mix of both in our house – Our entry way and kitchen light fixtures are ORB, but our hallway and laundry room are nickle – plus we have stainless appliances. Any thoughts on how ORB looks with stainless/nickel? Is it OK to mix?
YoungHouseLove says
I love mixing! We typically have orb door knobs and curtain rods with brushed nickel cabinet pulls and table lamps, etc. Our lights are either or too (some are ORB like the pendants in our kitchen, while others are silver/brushed nickel). As long as it’s all layered and feels intentional (instead of all items being one tone and one stand-out thing being another) it seems to work!
xo
s
Kristin F says
You are totally brave to tackle 18 in one sitting. I did the knobs a few months ago all the knobs in one hallway (3) and haven’t taken the ORB out since. Had so much trouble with getting those 1950’s knobs OFF and then back ON the doors. The spraying was the easy part! You’ve forced me to count how many I have left now, only 6. Maybe I can do this after all!
YoungHouseLove says
You can do it Kristin!
xo
s
Katie Brown says
What do you think about spray painting a napkin holder? I have paranoid thoughts of storing paper napkins in there and having some toxic chemical transfusion when I wipe my mouth. I know that’s a pretty weird question haha.
YoungHouseLove says
Hmm, see that I wouldn’t do since it’s not food safe. Anything that touches things that go in/around your mouth I’d avoid, just to be safe.
xo
s
Stephanie says
Those look great!
We were thinking about doing this to our super ugly 1990 brass door levers until I realized two very important things:
1) I no longer want lockable doors for our two daughters’ rooms, because our older daughter (3 1/2) has locked us out on occasion, so we’d need new doorknobs for each of their rooms
and
2) I hate the shape of our door levers – they’re straight and plain, and I want a little curvature to them.
So yeah, I’m going to have to bite the bullet and spend a LOT more than the $185 you mentioned (we have many more doors – a total of probably 17 doors or upward of 34/35 levers).
Kenz @ Interiors By Kenz says
I have really been putting painting doors and door knobs off for a long time. Our doors are all faux wood grain. Ew. It’s bad. But I keep getting distracted with “fun” projects, and I never actually commit to the doors. It might take me 2 more years to get the gumption. Why are doors such a DRAG?! They always look a million times better when they are done. It’s some weird mind-block thing.
YoungHouseLove says
You’re totally right! They’re just not fun to think about at all- but well worth it when you do them!
xo
s
Sarah E. says
Love love love it!!! Thank you for doing this! I have been dying to paint our doors and trim bright white (instead of the uh,dull white they are) and it makes me want to change the doorknobs as well. I was planning to spray them but so nervous! I just need to get my hubby on board (I haven’t mentioned that idea to him yet!). I know you put an old key in your front door knob… what about the locks and keyholes on some of these? I was afraid of spray paint getting in the little space where the lock is and sticking there? Is that not something to worry about?
YoungHouseLove says
Oh yes, they still function well (turn, unlock, etc). They key is to mist them. Very thin coats. Nothing gunky or drippy! Hope it helps!
xo
s
Sarah E. says
Just found your reply to someone else about this! nm!
YoungHouseLove says
Sure thing!
xo
s
Sarah E. says
You’re fast! Thanks :)
Lindsey @ arkadian belle woods says
UGH! This is one of those ‘DUDE! Get on it already!’ projects at home! :-)
James Olsen @ Home 4 The Heart says
Wow! That looks great and cheap to boot, I actually tried to ORB some stools [wooden] for my kitchen a few months back and it didn’t go so well the stools came out more grey looking that ORB, I wonder if its because I primed them first?
YoungHouseLove says
Hmm, that sounds like you might have gotten a bad batch of spray paint! It really seems to go over primer well and usually looks brown/black (never had anything turn gray). Anyone else have ideas?
xo
s
James Olsen @ Home 4 The Heart says
I will have to post some pictures to my blog to give a better idea, they just have this wierd grey tinge instead of that nice black/bronze color…They could look worse but its still frustrating and makes me leery on the ORB Paint
YoungHouseLove says
So strange! We’d love to see pics!
xo
s
Ashley@AttemptsAtDomestication says
LOVE! I’m so glad this worked out for y’all because it’s on my to do list for our house too!
barbara says
Looks great!! We did a lot of remodling here at home, but I have to admit never got the courage and patience to touch the doors … or handles… and they do need some work!! Thanks for the inspiration!
Britt F. says
I’m sure you’ve already covered this, but do you wear a mask when spray painting?
YoungHouseLove says
Oh yeah, rubber gloves to keep it off my hands and a mask to keep it out of my mouth/nose!
xo
s
Lindsay B says
I did this too with our exterior doorknobs, and the paint started flaking off about 3 months later. I did all the steps you did too :( I hope you dont have the same problem because they look great!
YoungHouseLove says
Man, I wonder why! Maybe thinner coats will help it grab and not flake? Thicker usually peels/flakes more easily. I’m stumped. Or maybe you have crazier weather?
xo
s
Emily | Sparkle Meets Pop says
They look great! I’ve been meaning to do this to our knobs. I’m even hoping to do it to the faucets… do you think that would be an issue?
YoungHouseLove says
I’ve seen a few people do it and it seemed to work (DIY Showoff did it for her bathroom). Spray paint isn’t food/drink safe so I’d tape off the inside part for sure!
xo
s
Julie says
I’m so glad you posted this! I’ve been contemplating this very project since we moved into our new rental. We’ve got horrid brass lever doorknobs – ick!
And now, I can make the case to the hubs that no, the finish won’t gum up or scratch off or any of the other eleventy billion things he thinks will go wrong if I do this!
I think I’ll start with the front door and powder room, but I may need to speed up the drying on the front set with heat…
Emily E says
I’ve only done one of our exterior doornobs. That was smart about the painters tape! I totally scuffed it a little bit while reinstalling. Dang!
Erin says
This came at the perfect time, thank you!
After we moved into our house, we discovered that the previous owners spray painted some of the knobs/plates/hinges in various rooms – and not even in a complete way. Sometimes they did just exterior or just random interior, without taking them off the door! If you look behind each knob, it’s still brass….oye!
But my question is for the knobs with keyholes – have you noticed if there is any effect on those? Do the keys still fit/work just fine? Any sticking? (Sorry if this is a repeat, I don’t have the patience to scroll through all 200 comments!! There, now you know I’m lazy!)
This is definitely on our to-do list soon!! I was worried about replacing all 19 doors-worth of hardware!
YoungHouseLove says
No sticking, they work just fine!
xo
s
Anne says
That must feel great! And it looks great! Thanks for the tip on the deglosser. Do you guys have rules/tips on when to use that kind of product? You don’t use for all your spray paint projects….I don’t think? Just metal, maybe?
YoungHouseLove says
We usually prefer to spray paint metal (it takes this kind of spray paint really well) and we paint wood furniture with a small foam roller unless it’s really small/thin (like a high chair with rounded spindles) since spray gets in there better, but most larger wood furnishings come out better if you brush/roll them.
xo
s
Amber says
So question. I’m trying to do a small bathroom makeover on the cheap (I’ve got grander ideas for down the line, but for the time being I want to do some small fixes to get my bathroom out of builder grade). Have you guys ever considered spray painting a bathroom sink faucet? Would you follow the same process you did here? I figure so, because it’s spraying metal and the faucet get about the same use as a door knob, but I wanted to get the expert’s opinion.
YoungHouseLove says
We’ve seen others do it with what looked like success! I would just tape off the part water goes through on the inside since spray paint isn’t food/drink safe so you don’t want it in there.
xo
s
Valerie says
They look great! Had so much fun meeting you in Dallas and finding new inspiration in your book! My husband’s getting ready to graduate from grad school and we are excited to finally start on some long-awaited projects around the house. :)
I have a question about the deglosser – never used it before. I have an antique dresser that has a gloss finish. It looks like it may have several layers of different paint throughout the years. Would you sand first then degloss? I’m also worried about exposing lead paint, and want to do it the safest way possible. Thanks!
YoungHouseLove says
Eeks, I would do a lead test first to be sure. If it’s clean then I’d sand and then use a deglosser as you mentioned. If it has lead I would get a respirator and do all the other lead safe things you can (do it outdoors, wipe it down with TSP, etc) to make sure you’re not putting yourself in danger!
xo
s
heather says
If it is lead, also look into having a professional strip it for you. Lead abatement (even on just furniture) is pretty serious and requires a safe set up. We had a few table legs I’m turning into lamps and I ended up having a pro do it that was recommended. It cost about $40, was done safetly, and they look way better than I could have done them.
YoungHouseLove says
Great tip Heather!
xo
s
Teresa says
I think maybe the knobs stay shiny brass rather than developing a dark patina over time like the hinges and plates because they are “polished” every time you touch the knob!
YoungHouseLove says
Totally could be!
xo
s
Olivia says
Ahh! I JUST did this to all of my doors last week. Wish I would have seen the deglosser and sanding idea first. Woops!
YoungHouseLove says
Hope it holds up anyway :)
xo
s
Ethne @ Wom-Mom says
I’m a little afraid of ORB, and when I painted my dressers white this summer, I went with brushed nickel. But you’ll be super proud. I’m making a Santa key for my girls since our new house doesn’t have a fireplace and it came silver and I painted it ORB!!! Actually, the hubs is master of spray paint, so he did it with my supervision, but still, your inspiration! :) Good work Petersiks. Santa can come now.
YoungHouseLove says
Haha, you’re hilarious Ethne.
xo
s
Laurie says
I was quickly glancing through the post while taking my lunch at work. I read, “old brass knobs” as “badass knobs” in my glancing.
It gave me a good laugh. Hope you enjoy all your badass knobs :)
Rebecca S says
I am a huge fan of ORB, and I especially adore ORB spray paint. It is magic! My husband totally makes fun of me for it because my answer to many projects is to suggest spraying things ORB. We recently sprayed our really ugly cast iron Christmas tree stand (a hand me down that was a terrible brown-plum color) to nice ORB. It went from hideous to upscale in one coat. MAGIC! I don’t think there is much that ORB can’t fix!
Laura R. says
That was the first thing we did when we moved into our 90’s built home. We also did the plastic switch cover plates rather than buying all new. It updated the house by 15 years with just some time. Glad you’re enjoying the face lift!
YoungHouseLove says
So smart!
xo
s
Kelly David says
Sher-dog… Amazing. our little family of three will be moving into a new home this coming August and I have a feeling we will be ORB-ing not long after. there’s one thing I can’t stand and it’s gold door knobs through out an otherwise awesome home. thumbs way up sister. THANK YOU! Will you guys be in Philly any time soon?
YoungHouseLove says
We wish they would add a Philly leg to our tour! Will keep you posted!
xo
s
Meghan says
Looks great! You’ve converted me into an ORB lover. I rent my apartment, and actually have been there longer than my landlords. We have hideous a brass faucet and light fixture in our master bath. I’ve been thinking about ORB’ing them for a while, do you think it would work?
YoungHouseLove says
Definitely lights can be ORBed – and I’ve even seen faucets done by folks like the DIY Showoff. I would just check out what worked for her (and tape off the part where water goes on the inside since spray paint isn’t food/water safe so you just want it on the outside).
xo
s
Meghan says
Thanks!!
Sayward says
yes! I’m roof raising at my desk right now.
sooo… what was in the giant west elm cardboard box? (love me some west elm)
YoungHouseLove says
That was actually a box of our stuff that West Elm shipped to us after our last book signing with them (they shipped the stuff we couldn’t fit back in our suitcase, like our markers and bookplates, our blank book full of signatures, cute little cards/notes/treats people left for us, etc). Wish it was some juicy new West Elm purchase though, haha! But it was pretty fun to open the box at home and discover lots of sweet letters and things from people at signings :)
xo
s
Lisa Jones says
I just finished this same project in my house this weekend. Had over 22 door knobs and 5 deadbolts! I didn’t sand or clean any of the knobs but used Rust-Oleum automotive primer. It takes about 15-30 to dry and then I painted them with the Rust-Oleum ORB, 2-3 light coats. Let them dry for 48 hrs before reinstalling. They look great and I’ve had not nicks or scratches. I even did the kick plate and door bell on our front door. Total cost was about $15 for four cans of paint and it has made a great change to the look of our house.
YoungHouseLove says
That’s awesome! Love the tips Lisa!
xo
s
Steph H says
I’ve thought about doing this, only because we replaced one room worth of knobs (double door entry, bathroom, and closet) and I’ve been dreading the cost of finishing it out. My only concern is that the previous owners had several different knob styles, and now the few we’ve replaced are another style (couldn’t find ones to match). From your picture it looks like you might have a few different styles of knobs too? Are any of them doors right next to each other (ours are) and how do you think it looks? We know we’ll eventually have to sell and move so always try to keep that in mind. I wouldn’t want to do it if a few years from now I’ll have to go replace them all anyway for potential buyers. I’d appreciate any perspective you have on this. Thanks! :D
YoungHouseLove says
Oh yeah we had a ton of different knobs but unifying them with the same color definitely makes them look way more cohesive than they did before! So I’d say it’s definitely a step up! Hope it helps!
xo
s
Steph H says
Thanks, Sherry!
Beth says
Totally with you on that one! We have been working on ours and our light fixtures. Makes such a huge difference for so little $$$!
We even spray painted the fancy brass pulls on our master bath vanity to bronze and they are holding up a year later and looking great!
Marie says
It’s so funny, that you have knobs on all your doors in the US! I cannot think of a single door I know that has a knob (even though I’m pretty sure, I did use knobs a few times in my life). We have handles in Germany, which seems ‘handier’^^ to me, because you can open them with your elbow by pressing down when your hands are full : )
In case anyone is interested in this valuable cultural lesson: We do have knobs on the outside of outdoor doors (so you need a key from the outside, but when coming from inside its opened by a handle – only unhandy when the door falls closed behind you and you accidentally locked yourself out…) – Do your “outdoor door knobs” work the same?
Oh, and I nearly forgot about public toilet stalls – those have mostly knobs of course (regardless if there’s a latch or turn-the-knob-lock).
Wow, now I got all excited over door knobs as well, I surely wish you years of joy about your prettified ones!
YoungHouseLove says
So interesting! I love learning stuff like that!
xo
s
Joanna @ Our Freaking Budget says
It looks so good! I would be doing this yesterday if we weren’t in a rental. Maybe the landlord wouldn’t notice? ;)
Thanks for sharing. This is definitely going into my file of cheap home DIY ideas that do WONDERS.
Maggie says
Totally planning to do this to our kitchen cabinet knobs (only 14, so doable) and have been wondering what to do about the semi-exposed hinges. Sounds like others have had luck spraying them – our kitchen is pretty dang old, so I don’t know that they are even standard sizes! We rent, so “shhhh!” haha.
Adam says
Really wish I read this before replacing most of our knobs that year. Oh well, still a great tip for next time. Thanks!
Adam says
*last year
Roxanne M says
We just replaced doors upstairs, adding 6 panel doors. I hate that all new doors come with the brass hinges. So we did use that same Rustoleum spray paint in white to spray those, and they look outstanding! Not sure if they will rub off or not over time, but we are planning on selling the house anyway. Good to know about the door knobs!
Ashley says
This post is timed perfectly for me! I was just reviewing your last post on painting door hardware LAST NIGHT aas I will be attempting this in the very near future. So thanks so much for an update! I’ve also had troubles locating this liquid deglosser of which you speak. I’ll take another look at Home Depot. Could you tell me what section to look in? Would this be with Paints? Thanks so much for your help!
YoungHouseLove says
It’s usually in the aisle with the TSP and the liquid sandpaper and all the other solvents (mineral spirits, etc). Hope it helps!
xo
s
Terisia says
Love the look – and the inexpensive way to update the hardware. But when you replaced the striker plates and hinges, was there a problem with getting the new screws well set into the wood?
YoungHouseLove says
Thankfully they went right back in and grabbed. Nothing loose or shaky! I bet if you took them off ten times and put them back on you might have that issue though!
xo
s
Kim says
How did you do it so that the locks on the knobs don’t stick? I tried spray painting one of ours, and the lock got totally painted stuck, even though I had done thin coats. I ended up buying all new sets at Lowe’s (we only have 6 doors or so to replace), but that ended up even a bigger pain because the holes in the doors were smaller than all the new standard sized knobs, so we spent what seemed like hours cutting away with all the improper tools that we had around the house to make them fit!
YoungHouseLove says
Really? Hmm, I’m not sure why that happened. Did you use the same brand/type of spray? Some are thicker by nature (usually cheaper ones) but we love the stuff we use since it has primer built in and isn’t thick. All of our locks still function and the doors still turn. I just very very lightly misted them though! Five thin coats beat one or two thick drippy ones every time! Hope it helps.
xo
s
Molly says
I’ve so wanted to do that but I wondered if the spray paint would mess up a lock mechanism–especially on my exterior doors. Any thoughts on that?
YoungHouseLove says
We didn’t have any issues with that on our outside doors (which we lock and unlock regularly) and our inside doors that we just did (we checked and they all easily lock/unlock/turn/etc). The key really is five thin and even misty coats instead of 1-2 drippy and thick ones! You can spray exterior doors with a key in them just in case (a spare key) to keep paint out of the keyhole if you’re worried though!
xo
s
Jennifer Harrup says
Question! I spray paint a lot outside, I mean we all know it’s best for ventilation…BUT when I leave things out to dry for a long time it always seems like an errant leaf or blade of grass blows around and dings my finish before it dries, does that ever happen to you??
YoungHouseLove says
If you use thin enough coats, but the time something blows onto them it’ll be dry and it’ll bounce right off! Thin is the key! I also spray things in a clearing so it’s not under trees for tons of stuff to fall on the items as I go. Hope it helps!
xo
s
Jennifer harrup says
Thanks $herdog! :-)
Sarah says
Any thoughts/ experimentation with a clear coat afterwards? In particular on the hinges/ strike plates? I wonder if that would keep them looking any better? This is totally a project I want to take on in my house…ALL of the gold has GOT to go! (But I have to wait until not-winter-in-Oregon to do this in dry, nevermind warmer, weather). Love the look!
YoungHouseLove says
I like clear coats in theory but always worry they’ll gum things up and make turning or locking more difficult since it makes the finish thicker. Anyone had luck with it?
xo
s
Sarah says
if I get around to trying it, I’ll let you know ;) I’d probably only clear coat the hinges/ door plates…. Please do keep us updated on how your doors hold up :)
YoungHouseLove says
Oh yes, will do!
xo
s
qs777 says
Too funny! I walked into the house to check on your blog while I was waiting for my newly-bought (from HomeGoods on clearance) candelabra-thingy that I ORB-painted to dry and I see this! Obviously, great minds think alike. :)
YoungHouseLove says
Haha, I love it!
xo
s
Kate says
Looks awesome! I wish I had the courage to do that in my house, though I did spray paint our bathroom fixtures black last year to cover up the old pitting brassy color.
My current “cross it off the list” project is painting the nursery furniture. I’ve been procrastinating, but since our deadline is approaching in two months, I have to get on it! So far I’ve painted the drawers to the dresser and the nightstand, now I need to give the shell of the dresser/nightstand a fresh coat of white paint.
Kate says
Oh, and I know that people on here are always on the lookout for low/no VOC paint – the paint I’m using is Behr Premium Plus Zero VOC paint (in semi-gloss for the furniture). I’m not sure if it’s new, but I hadn’t seen it at our Home Depot before (and out nearest Lowe’s is about 90 minutes away, so I can’t use their zero VOC paint). I’m guessing that the colorant adds some VOC, but the fairly light shade of green I used had no odor to it at all. It covered well on the furniture and has built in primer. Not too pricey either!
YoungHouseLove says
So good to know Kate! Thanks for sharing!
xo
s
YoungHouseLove says
Aw, good luck Kate! Working on a nursery is so much fun!
xo
s
Steph says
I will be filing this away for when it’s nice enough to spray paint again.
I have all brass knobs in my house. And silly me, when I moved in and replaced the locks on the front and back door, didn’t tell them NOT to get brass. DUH.
Kristen says
They look awesome and way to get on that! Couple questions: Did you spray the heads of the screws too? Did you do anything to the locks to make sure the paint didn’t make them stick? Thanks for the inspiration!
YoungHouseLove says
We did spray the screws actually! You can see them in the hardware spraying pic. Seemed to work well! As for the locks, just going thin and light with the paint makes it work well.
xo
s
margaret says
I was just browsing another blog and saw your book prominently displayed in someone’s vignette: http://thesweetestdigs.com/2012/11/28/the-diy-files-mason-jar-faux-snow-globes/
I can’t wait to get my copy… I asked for one for Christmas, so we’ll see if Santa delivers!
YoungHouseLove says
Wahoooo! I love that!
xo
s
Amy says
Have you seen the amazing oval shaped pivot mirrors that they sell at Restoration Hardware and Pottery Barn? I’m kind of obsessed with them and want two for our new house, but I’m not willing to fork over the $700 that would cost. Our local Restoration Hardware outlet has the brass versions of the mirrors on super markdown for $30. Two questions. Do you think spraying the mirrors and finials would work? And have you ever tried a chrome-like spray paint? We’re going shiny! I’m nervous to waste $70 on non-returnable stuff if it doesn’t work.
YoungHouseLove says
Oh yes, I bet you can spray it! Many folks have taped off mirrors and glass and it works on the metal! We’ve never tried a chrome-like spray paint, but maybe someone who has can weigh in?
xo
s