Word up my fellow Pinterest playas. Hope you got down with some baking, crafting, painting, organizing, sewing, building, or knitting fun because it’s time to share this season’s (completely unofficial) Pinterest Challenge (not sponsored by Pinterest or anyone else, just dreamed up by Katie to make us stop pinning and start doing). The only rule is to pin something you’ve wanted to get done (big or small) and do it. You know, instead of sitting on your duff pinning other things… which I’ll admit happens a whole lot in my world.

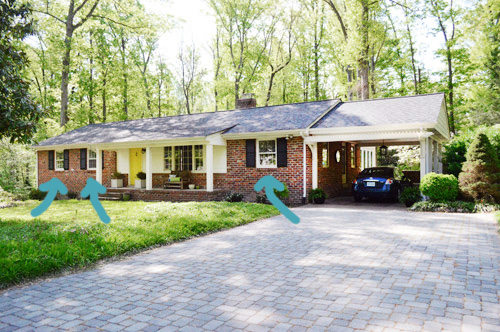
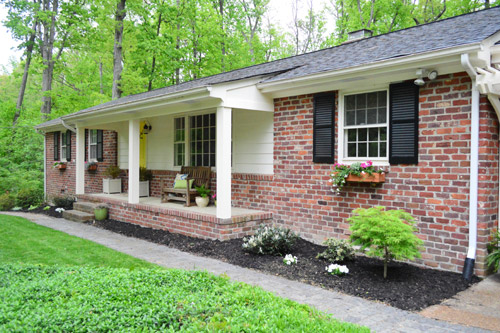
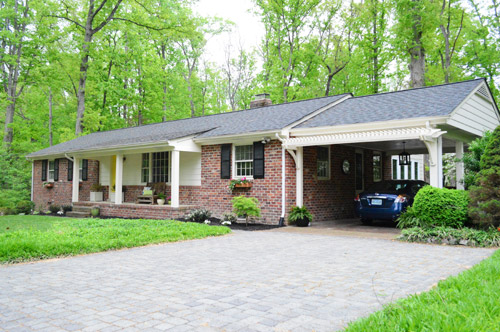
Our mission this season? Window boxes! I actually pinned two window-box related pics, this picture just for the eye candy of it (at $90+ bucks per box they’re purely for inspiration) and this tutorial for making them (which we planned to do if we couldn’t find ready-made ones in our price range). We thought they’d add some nice dimension and soft greenery to our long boxy ranch, and they’d been on our list for a while. They’re definitely not necessary for resale or anything, but we just couldn’t part with this house without seeing how cute they’d look. How’s that for being a weirdo? Anyway, here are the three windows that we thought could use some quaint greenery…
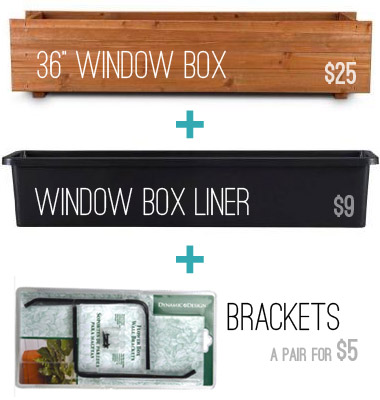
And here are the materials (the window boxes, liners and brackets) that we grabbed last week at Home Depot (we priced out building vs. buying and realized it was pretty close).
We loved that the planters were clean-lined and mid-century-ish (it was like they were made for a ranch). As for how to hang them, here’s what worked for our brick facade:
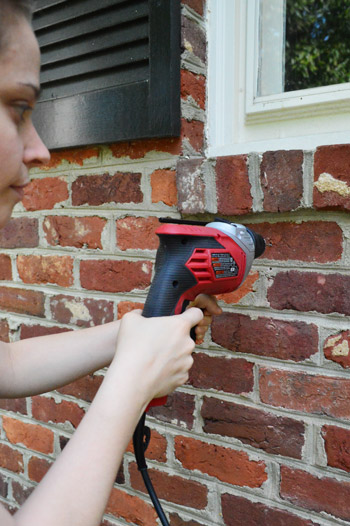
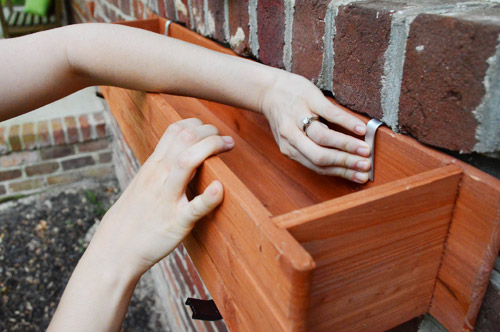
Step Numero Uno: Use a hammer drill to drill pilot holes for the screws for each bracket (after carefully marking where you want them to go by holding up the window box to make sure it’s centered).
Step Dos: Hang the brackets according to the package instructions (you’re essentially just drilling them into the pilot holes you make while adding that weird little metal thing up top (we’ll get into what that’s used for in a second). Oh but we made two mistakes for you, so now that we know what not to do, we wanted to spread the word:
- Don’t use the cheap/short/non-masonry screws that come with the kit! We had 2″ masonry tapcon screws that we had leftover from our fireplace project that worked really well.
- Don’t use a regular drill to get the screws in, be sure to use a hammer drill! It really got them in tighter and the ones we screwed with the regular drill were lose and needed to be redone.
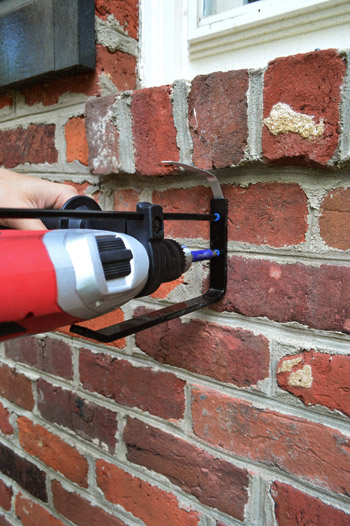
Step Tres: Once we got our method down, it was easy to get them in nice and tightly. And then the weird metal thing on the top of the bracket could be bent over the window box once it was placed onto the bracket, thereby locking it into place. The metal thing was so soft you could just bend it with your hand. Although I should have told you guys that it was crazy hard and the only reason I could do it with my bare hand is because The Hulk is my second cousin.
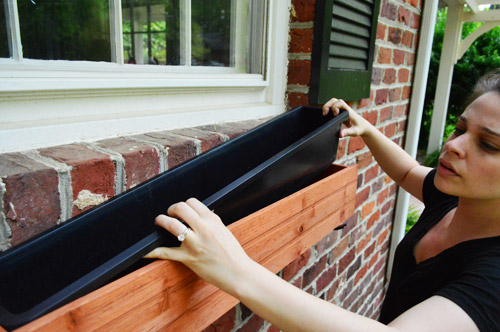
Step Four: Drop the plastic liner into the planter box while making a weird face (check). Oh and be sure to pop out the two drainage holes in the plastic liner beforehand (I used a house key to smash them out since they were slightly perforated but I couldn’t get them with my finger). The cool thing about the drainage holes in the plastic liner is that they line up with the pre-drilled drainage holes in the planter box, so that was nice planning on Home Depot’s part.
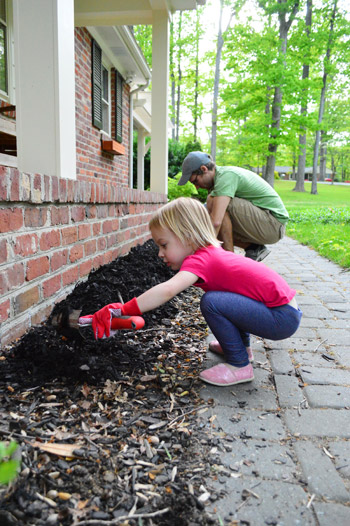
You might wonder what John and Clara were doing while I was on window box duty…
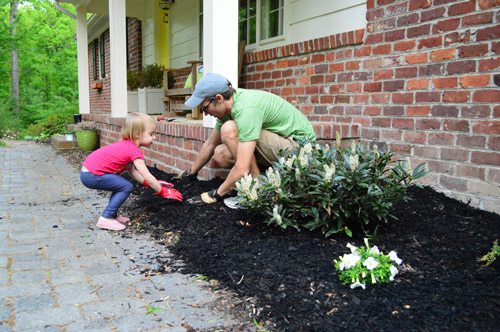
Yup, they were spreading mulch. And it was adorable. And we all had about 100 inch worms on us by the time we were done outside.
But back to the window boxes. I used an old “cheaper and already grown in” trick, which is to buy two hanging baskets from a local nursery (Great Big Greenhouse, here in Richmond, where I actually had a store credit so they didn’t cost me anything). The reason hanging baskets are so smart for window boxes is because they already spill down and appear to “drip” instead of the typical pots and flats that they sell for gardening. Hello, instant gratification!
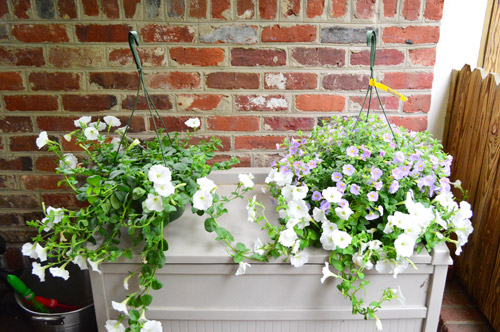
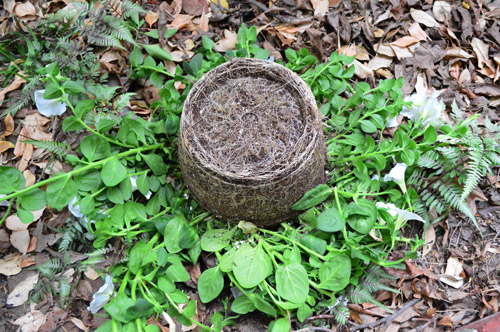
I just dumped them out and very very carefully divided them as gently as I could…
… and bam: I had a few spilling-over flowers for each window box, without having to play the waiting game while they grew over the edge.
Aren’t they cute? I have no idea what kind of flowers these are. I think the white and pink ones are petunias though. Maybe these purple guys are some other blend of mini ones?
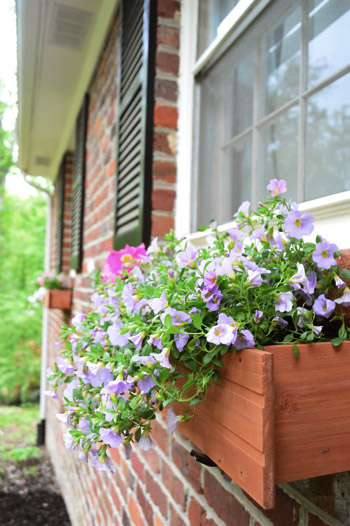
I think the window boxes are sweet little additions. Not giant and commanding, just casual and simple. I actually love that they’re the color of the brick so the flowers are the star and they don’t look too busy. And as they continue to fill in and spill out more I think they’ll look even better.

So there you go, three window boxes, some tips for what not to do while hanging them, and one way to find already-droopy flowers to fill them.
And just look at that fresh come-hither mulch. Me-ow.
Don’t forget to check in on Katie, Emily, and Renee to see what awesome projects they’ve whipped up (they’ll all be sharing theirs sometime today as well)!

And we’d love to hear what you guys did for this season’s challenge. If you’ve already blogged about it, just:
- click on the blue “Add Your Link” button with the odd cartoon head at the bottom of this post (you might have to do some scrolling, depending how many projects are added)
- add a link to your specific blog post about your project in the url field (not your home page)
- where it says “name” write a descriptive name for your project (ex: “Homemade Leaf Wreath”) as opposed to your actual name
- we’d also love if you could quickly link back over to our project posts within your own (here’s Katie’s, Emily’s and Renee’s) – it’s also nice to link to your inspiration project on Pinterest as well as to directly link to the original project/site, just so they get some love too.
And if you’d rather just link over to your project in the comment section, feel free to do that – or even add a link to a free photo sharing site like Flickr with your pics if you don’t have a blog (remember to set the gallery to public so we can all see it). I’m borderline too excited to see what you guys have been up to…

Kimberly says
I am super late in adding my project, but still wanted to contribute. I made a worm bin for composting! (http://onthistrail.com/2013/05/14/diy-worm-bin-for-40/) It was SO easy to make.
Thanks for hosting the Pinterest Challenge! Each season it gets me off my bum to actually get something done. Keep ’em coming!
jerrica says
What do you do with the planter boxes in the winter? Take them down? Cover them? Leave them the way they are?
YoungHouseLove says
Some neighbors of ours leave them up with evergreen boughs in them for the holidays :)
xo
s
Selina@CreativeJuicesDecor says
Hi Sherry and Jon! I know you guys haven’t done a pinterest challenge in a while and so I was just going to ask if you think you’ll still be doing them. I loved looking at all the fun ideas! Thanks :-)
YoungHouseLove says
Thanks Selina! We fell off when we moved to this house (can’t believe our last one was in the spring of 2013!) but it would be fun to resurrect them!
xo
s