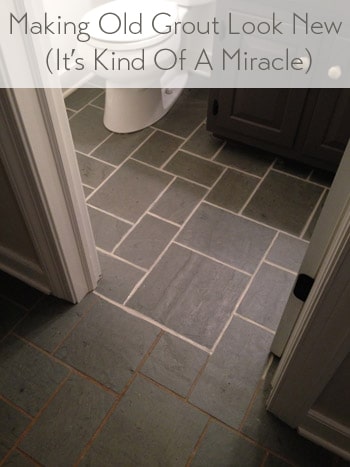
The discolored and dirt-stained grout in the tile floor of our foyer looked super old and gross, but after trying nearly a dozen cleaners and cleaning tricks we nearly gave up. Then we finally find THE SOLUTION to making the grout look white and clean again!
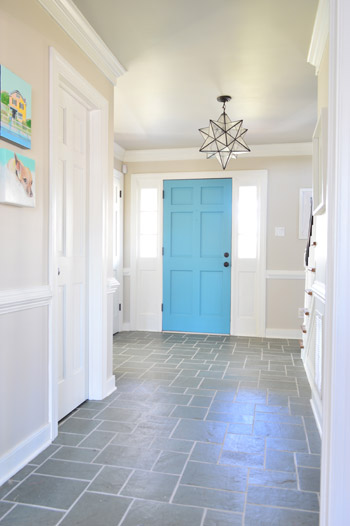
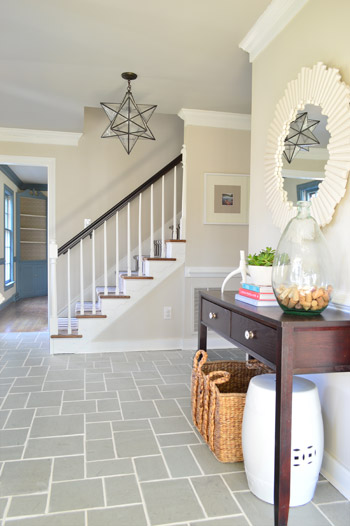
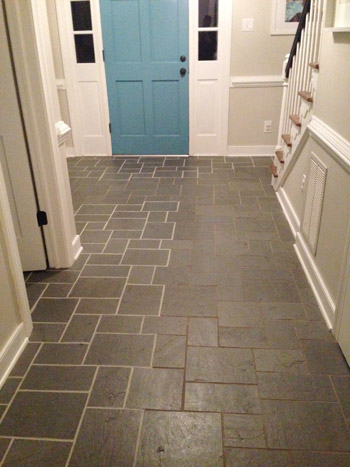
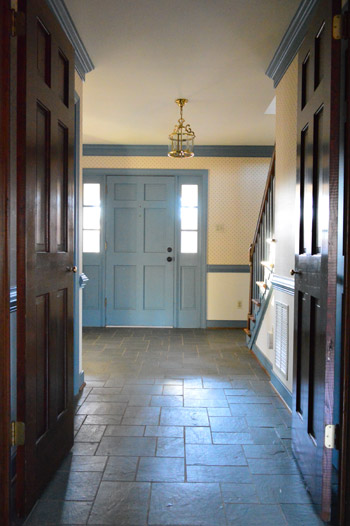
Now that we’re done, you can see how the view just got a heckova lot better around here. The crisp white grout lines play off the white trim and make the whole space feel newer and cleaner.
The funny thing is, it wasn’t actually cleaning that did the trick. So if you’ve got a similar issue with discolored or stain grout, here’s our official intervention: stop scrubbing! Well, maybe give scrubbing a fair shot, but don’t be discouraged if it gets you nowhere. There’s another way!
Cleaning Tricks That DIDN’T Work
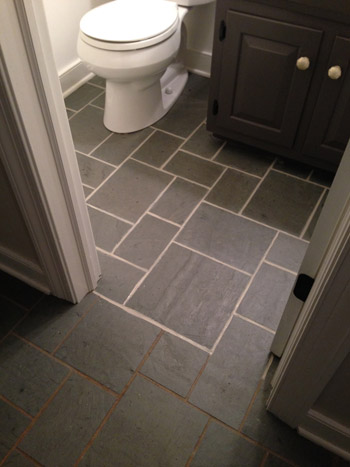
As you might recall, for the past six months that we’ve lived here, it has looked like this.
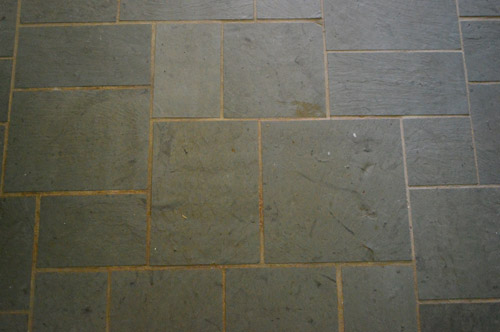
I gave nearly every method under the sun a shot to make that grout look clean. After repeatedly scrubbing the heck out of it, I knew that it was actually very (very, very) clean… it just was so discolored and stained in certain areas, that no amount of blood, sweat, tears, or elbow grease could make it look that way.
Some of my attempts to clean grout included (but weren’t limited to):
- various baking soda paste mixtures
- various white vinegar solutions
- copious magic erasers
- specialty grout cleaning floor sprays/potions/scrubs
- bleach pens
- oxygenating cleaners like Oxiclean
- Mrs. Meyers powdered cleanser + a wire brush
- Barkeeper’s Friend + a wire brush
- a borrowed steam mop
- scrubbing with a stiff bristle brush
- lots and lots of muttered cursing
The Solution To Getting White Grout Again
By this point I did what most people would do. I gave up and ignored it for another few days (what’s a few days after six months of no-dice results?). And then I finally faced facts. The grout either needed to be scraped out and regrouted entirely (which makes for a pretty messy job, especially in the main hallway of our house which connects the entire upstairs to each room downstairs) or it needed to be refinished.
Thankfully a few of you tipped me off to a product you’ve used with success called Polyblend Grout Renew. Let me just skip to the punchline: it worked, and I wish I had tried it before spending six months scrubbing my mind out.
The cost? A cool $12 from Home Depot. (Update: it’s closer to $20 now, but there are more affordable grout pen alternatives available.) Can I get a what what? Note: this might sound like an ad for the stuff, but Grout Renew doesn’t know us from Adam – I’m just beyond grateful that it worked.
Choose Your Grout Paint Color
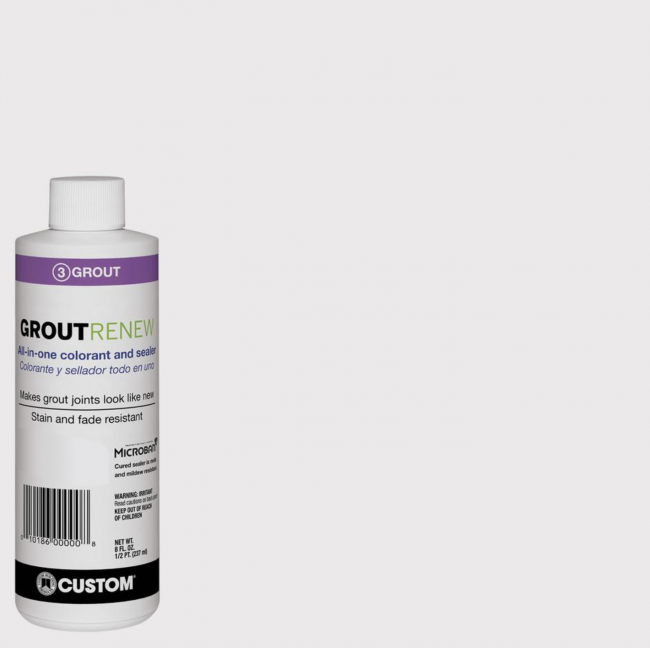
GroutRenew comes in several colors now – over 3 dozen, in fact, including several shades of white and off-white. So you may be tempted to go for the brightest white to get the cleanest, freshest look (that’s “Artic White” pictured below). However, just like paint colors, the brightest, whitest version may not be best for you.
Be sure to take some time to look at your room, your tile, and your lighting to make sure you’re choosing something that blends well with your space. You can always test out a few colors too before committing to one. John and I actually considered two colors – Natural Gray and Oyster Gray, which both look pretty dark compared to the brighter whites. We had seen a neighbor with darker grout in her slate floor, so we thought it was worth considering.

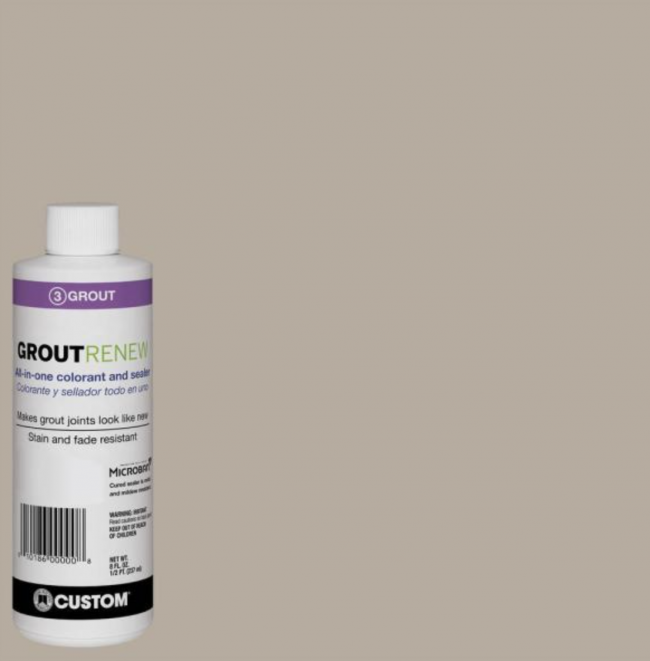
In the end we chose Oyster Gray (shown below) which is still a mid-tone Ivory color – definitely not a bright white. But it looked the most natural and still seemed very bright in contrast to the dark slate tile, without looking artificiall white. Any brighter and we worried it would look like someone in a Crest Whitstrips ad! You know, almost too blinding.
Oh and the Grout Renew was low odor and low-VOC, so this pregnant lady could get down with it. I did wear a respirator, along with opening windows, just because I’m into added ventilation and bad Bane impersonations.
GroutRenew Alternatives
This is the only product we’ve used, but there are some others on the market if this particular one is not available. Lowe’s sells a similar product by MAPEI that comes in a squeeze bottle. Amazon also has a well-reviewed Grout Pen product that comes in a white or beige option. Again, we haven’t personally tried those, but they may be some alternatives to consider if the PolyBlend is not available to you.
How To Apply Grout Paint
The downside to this solution is that it can be time intensive (and patience testing) depending on the size of your surface. For this floor, it took nearly eight hours to apply. But since I had easily spent 25 hours trying various stain lifting methods before resorting to this, well, eight hours with a bottle of Grout Renew was a small price to pay for VICTORY.
Step 1: Clean Your Tile & Grout
I know I said scrubbing wasn’t the solution, but it part of the process. I’ll pause while you laugh since I had already done that TEN MILLION TIMES. But like any surface you’ll be painting, you want to make sure it’s clean of dust and debris. So at least we’re not talking a heavy-duty scrubbing, just your regular washing to remove surface dirt should do.
Step 2: Pick Your Brush Or Application Tool
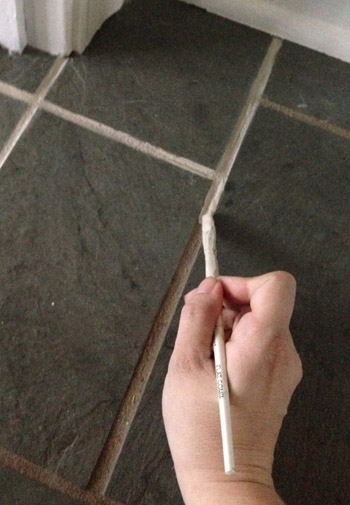
The instructions suggested using an old toothbrush to apply the GroutRenew it into the grout lines and then let it dry for 24 hours. I went with a thin craft brush instead because I had way more control (read: way less mess on the tile surface). The thin paint brush was also easy to dip directly into the bottle when I needed to load up with paint.
Step 3: Plan Your Starting Point & Exit Route
If you’re painting a floor, like we were, you’ll want to sure you don’t paint yourself into a corner (or at least if you do, you can carefully tiptoe across your tile without stepping on the cracks). I started in the half-bathroom because I figured I could work my way out of the room and close the door behind me so it could dry.
It was the opposite of fast. But it worked. Slowly I eked my way out from around the toilet and right out the door, which took about an hour and forty five minutes.
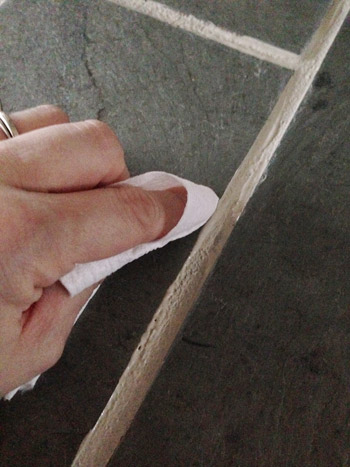
Step 4: Be Ready For Mistakes
Even with a small craft brush there were still times when it got on the surface of the tile, and there was a very short window for wiping it off before it set (and then had to be scrubbed with a fingernail, which was a huge pain) so I literally would do one or two cracks at a time and then quickly follow up to smooth both sides of the seam out with a small piece of toilet paper (this would remove any from the surface of the tile as well as make the sides of each seam nice and straight looking). A paper towel or clean cloth would work as well. That is, if toilet paper isn’t fancy enough for yo?u.
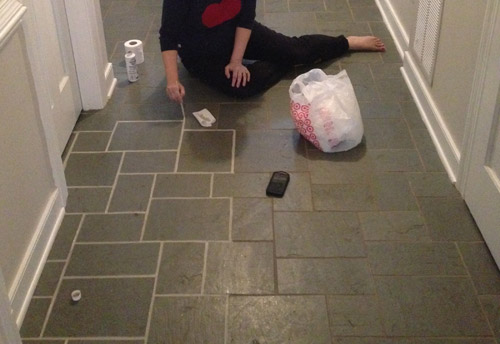
Step 5: Be Patient & Pace Yourself
Being pregnant, the bathroom was all I had energy for on Day 1. Day 2 involved three more hours of line painting and wiping, and I opted to do 50% of the foyer in a strategic way so we could all still walk on the other half of it. Here’s a shot to show you how hilarious John is. I said: ok, get creative with this picture so my giant respirator doesn’t look weird. I like his version of getting creative – just lop off the whole head area.
The second day was the hardest day by far, just because I was still kind of sore from contorting my pregnant body around in the small half bathroom the day before, and the little knobby parts of each of my ankles were dragging on the tile as I scooted around like a dog with fleas, but it was all worth it. Worth it and then some!
Day 3 was another three hour process, but it was the most exciting day because I could see the light at the end of the tunnel. The end of the longest-running house battle that I had ever waged was near. I just worked my way around the foyer doing the other half of those pathways that I had done the day before, and I ducked into that last closet while pausing occasionally to fist pump and work on my clean grout acceptance speech (“I’d like to thank the academy, and the grout gods who invented this cheap bottle of miracles and unicorns”).
Step 6: Let It Dry
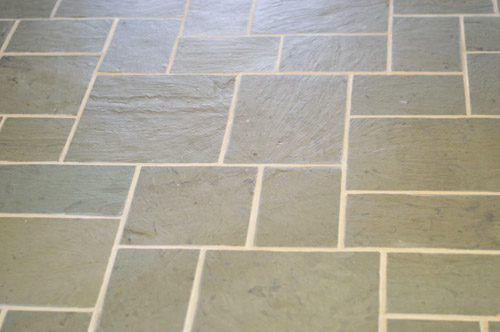
After each application process, we gave that section a full 24 hour drying period and made sure nothing got wet for 72 hours (since that was another warning on the bottle). It’s a good deal lighter than the old grout was, which still makes us say “whoa now” when we walk through the hallway, but we think it’s just our eyes adjusting. Maybe after 6 months our brains just can’t get over the fact that it finally looks clean!
We also had about 1/4 of a bottle left all of this, which was great in case we need some touch-ups down the line. I’ll definitely update you guys if anything funky happens, but so far it has been great. I mean, just look at how far it’s come from the before:
Update: After nearly two years of use, even with semi-frequent moppings, muddy shoes/paws, and a whole lot of foot traffic, our grout still looks identical to when I applied this stuff (you can see an updated picture that we shared after six months of use here). For the folks who can’t find it in stores, here’s an affiliate link to it on Home Depot.com. There are also alternatives like grout pens on Amazon.
Originally Published in 2014
Psst- Wanna know where we got something in our house or what paint color we used? Just click on this button:

*This post contains affiliate links to things we have actually purchased and love*

Katherine says
It looks fabulous!
How did you keep Clara and Burger away from it as it dried? Do you have any tips for doing this kind of project around pets and small children with limited impulse control?
YoungHouseLove says
Burger was just zoned in different parts of the house (barricaded so he had free run of the entire second floor, and I carried him down into the living room and blocked him in there if he wanted to come down. He sleeps 99% of the time, so he just slept in our bed and on the sofa for the most part and seemed unfazed! I think the “keeping them sectioned off” method would work with smaller kids too!
xo
s
Meg G. says
Looks beautiful!! Really transforms the floor- and makes it look pretty darn modern and cool!
I just recently undertook the baking soda and peroxide method for a MUCH smaller area in my rail-style kitchen- and I thought for a few days that it was as good as new, but later realized it was residual baking soda particles that I hadn’t wiped up making it look so white and sparkly. I will definitely need to try this out next!!
Nikki says
Bless your heart! I can’t imagine what a total, tedious pain this must of been. Looks wonderful!
elizabeth claire says
Looks GREAT! What color is that white semi gloss trim? I searched your project section and saw that Edgecomb Gray is the wall color. I must not have searched in the right location for the trim color. THANKS!
YoungHouseLove says
It’s Simply White by Ben Moore (in a semi-gloss finish).
xo
s
emily says
It is night and day with that!! LOVE IT!
Colette says
OMG, what an AMAZING different that makes! It looks like a brand new floor!
Alicia W. says
I love the difference that made! Whoa! and the way-back before shot comparison is amazing. I showed it to my hubs and he said “wow” (which is a MAJOR compliment) and then he said, “I like that star light. It is kind of like a star of David type thing. And if anyone breaks in it can be used as a weapon.” LMBO.
YoungHouseLove says
Haha!
xo
s
erica says
woah. I’m going to home depot to get me some of this grout renew!!!
n says
Guys – You are the music makers!!
Andrea says
I love this so much! Our kitchen grout is absolutely zero contrast with the tile — and the tile is definitely not something I would have chosen. Everything is just a wash out of beige-y-ness. This makes me feel like I just might not hate our tile as much if we could give it a shot! There is hope!
Kristy says
Wow, what an amazing difference! I hope I can find this in Canada – we have a fireplace with some horribly discoloured grout (around some even worse tile, but nevermind that). We want to re-do the entire fireplace but won’t be able to tackle that for a while. So nice to have such a great phase 1 solution to make things a little cleaner looking until a larger reno!
As a sidenote I love the “phase 1” and “phase 2” terminology for planning projects. I can’t believe I didn’t think of it before, it’s so simple but so useful! I need to feel like I have done something in order to stay motivated and our phase 2 goals are just so totally overwhelming. I love being able to break it up this way, so thanks for the great idea!
Monica D says
This may have just changed my life. We have plain white tile in the kitchen with dark brown grout (who in the heck picked that?) Do you have a good grout sealer to recommend?
YoungHouseLove says
I think sealers depend on your type of tile, so we’re going to look for one that says it’s good for slate and then do a little test area in the closet to make sure it’s a good match.
xo
s
Kristi @ Addicted 2 Decorating says
That looks great! So much better!!
I used Grout Renew in a shower in our condo that was built in 1984 and had been used as a rental until we bought seven years ago. The grout looked brand new when I was finished.
I also used it in another bathroom that I was redecorating. I put in new tile, grouted, and about two days later, I spilled an entire quart of oil-based wood stain on the floor, and it soaked right into the grout. I cleaned it up, let the grout dry, and fixed it with Grout Renew. Great product!
Lisa says
Thanks, YHL! Because you care enough to send the very best (and add yet another project to my list of 1,199,999 things to do). It looks SO yummy that I might scoot this to the top of the other 1,199,998 things. Gross kitchen floor grout BE GONE!
Kelly Guadalupe says
Looks amazing! ! Please tell me what paint colors are on the walls, trim and door. They are just perfect! !
YoungHouseLove says
Thanks! The door is Blue Lake, the trim and white doors are Simply White, the walls are Edgecomb Gray, and the ceiling is Revere Pewter (all by Ben Moore).
xo
s
Nevin says
WOW! What a difference – from beginning to now! What a lovely entrance into your home! Love what yu have done to the kitchen as well – I love how bright and open it now feels! More and more, I want to retire to an older home and transform it – that’s on my bucket list, Now, I am not that old! :)
Liz says
WOW, it looks great! I was totally not sold on that slate tile before, but now seeing it re-grouted I love it. It looks a lot more neutral, and the whole foyer looks much more put together now – so pretty!
I’m moving into a new condo at the end of this month and I just picked out my paint colours tonight… Benjamin Moore’s ‘Thunder’ and ‘Mauve Blush.’ I can’t wait to get the painting over with though! haha
Francie says
You go girl, running to get mine asap!
Jessica says
I did the same for two bathrooms recently( one of which was my childrens’). The stuff is a miracle product, possibly one of the best products on the market. on glazed tile , it acually easily scrubs off so you don’t have to be so careful in its application. Amd technically i believe a sealer as well. Your floor looks lovely. Clean looking grout makes a world of difference.
Lisa says
We have white tile. What color renew would you recommend?
YoungHouseLove says
Maybe light gray or tan, just for a little contrast?
xo
s
Galya says
I would recommend snow white or antique white.
Amanda says
I can’t believe how much of a difference it made – it looks fantastic! I definitely should try this in our entryway…would make the awful peach tile look a little less offensive if the grout wasn’t gross too!
Sara Blose says
What a difference!!
We have the same tile… and I have been looking for a solution. What is the distance on the tile spacing? Do you think this would work for wider grout lines? I think ours is a bit wider….
YoungHouseLove says
Yes, I think ours is sort of not-thin-and-not-thick, but this should work with thinner or thicker grout. The application might be easier as well!
xo
s
Melissa says
I am RUNNING out tomorrow to get this. I have tried every baking soda and steam trick in the book. Did you only need one bottle? How much did you have left?
YoungHouseLove says
Yup, I only needed one bottle and have about a fourth of it left.
xo
s
Andy says
Hi Sherry…. I swear I have the exact same slate and the same grout issue, so I am soooo thankful for this post. I can definitely relate to all the concoctions. I even had a Pinterest board for this. My slate looks identical and comes from Newfoundland. I understand most of it is shipped to Europe and the US… so possibly, it is from the same quarry. I love how resilient it is with any kind of beating it takes…. even scrapes and tire skids from my son racing around on his trikes. But, the grout was seriously bothering me. This post just made my day!
YoungHouseLove says
So glad Andy! Good luck!
xo
s
Mary says
This is the most amazing transformation i think, that you have shown. I’ve been looking at those floors and wondering what you were going to do with them. This completely updated them and made them make sense with that space (which they didn’t seem to before). And for a cheap price! And while it was a lot of work, it’s the type of work I (or anyone else not handy) could actually do and make a huge impact on any space. Thanks for posting!
YoungHouseLove says
Thanks Mary!
xo
s
Brittany says
WOW! This looks FANTASTIC! Great job!
Heather says
OMG, need I say more? Yes, I need. Love the floors, please keep them. And that before and after…give yourselves a huge pat on the back. Proof that gut-job renos aren’t always needed to love your home. Don’t ‘cha walk into the foyer now and scream OMG I LOVE OUR HOUSE. My husband and I are on the last leg of our main floor renovations and I totally do this every time!
YoungHouseLove says
Thanks so much Heather!
xo
s
Sharra says
I can vouch for the durability of this stuff like you wouldn’t believe! We painted the grout lines in a basement guestroom 9 years ago as we had effervescence and the color wasn’t quite what we were hoping. That room floods every time it rains hard. We’re not talking a little bit of water, but often several inches (which is why we put tile down in the first place). The grout remains the same color we painted it all those years ago. You have nothing to worry about in your dry entryway and half-bath. Plus, this is great news for all of you wanting to do your shower stalls!
YoungHouseLove says
Whoa, nine years of durability with so much water is AWESOME to hear!
xo
s
Sydnie F says
I’ve been working on our stained grout situation for months! THANK YOU for this post!!!! You deserve an award for sure, pregnant girl.
Smitha says
Thanks for this post. You have solved my biggest problem.
Holly says
It looks great! We have similar tile and have gotten stains out but they come back within a few months. I’m curious to see how long this works for you. Also where did you get the Moravian star light fixture?? I LOVE it!!
YoungHouseLove says
Thanks Holly! That was from a local place called The Decorating Outlet.
xo
s
Leah says
I love the light in your entryway! Where did you find it?
YoungHouseLove says
That was from a local shop called The Decorating Outlet, but I’ve seen them on amazon.com and joss & main.
xo
s
Kim P. says
This looks AMAZING!! Something so “simple” makes a huge difference! You did great.
Jamie says
Wow I can’t get over the dramatic difference but holy cow it looks amazing!! So bright and cheery. We recently purchased our first home (yay homeownership!) and it is ALL TILE. Yep, 1207 square feet of pure tile, baby. This is a great tip if it gets dingy any time soon, even though it would probably weeks to complete :)
Kim says
Oh my gosh, THANK YOU for posting this!!! My husband has been irked by the dingy grout in our hall bathroom. He was convinced we needed to get a diamond-blade saw to remove the grout and re-grout the whole floor. This sounds like a much cheaper and less complicated solution! A trip to Home Depot will be in store for this weekend! ;) Our master bath has been out of commission since we moved in due to a leaking shower pan, so hopefully we can keep the hall bathroom floors dry long enough.
Natalia says
Yay! I’m so happy for you guys. I know that the grout was really bugging you and it’s so frustrating to be in that phase of looking for a solution…and coming up short… It looks great, and you’ll be able to feel good about it for several years and not feel the least bit rushed into your big kitchen remodel. We are in the middle of a whole home DIY renovation, so I’ll keep this method in mind for our grout situations… although I’m 8mo pregnant now and cannot imagine doing 26 hours on the floor… in Jan… during a Polar Vortex. Trooper!
YoungHouseLove says
You’re so sweet Natalia! Thanks! And good luck with your reno!
xo
s
Nicole says
I am so glad you posted this. Our grout is AWFUL! I have been trying to get it clean and nothing works! Thanks for this post. I will be trying it this weekend!!
Elizabeth says
I don’t usually comment, but this is so gorgeous, I just had to. Your foyer looks amazing now! The transformation is incredible.
YoungHouseLove says
Thanks so much Elizabeth!
xo
s
Dani Brien says
MIND BLOWN!! you guys are amazing!!
xo
Cassie Dearborn says
Ah, good timing with this post. Whoever decided our bathroom should have black grout didn’t look at how terribly tiles were put in… For $12 and a few hours I will have to try it!
Jennifer Primrose says
Wow! Looks amazing! You guys always do such beautiful work (even in phase 1 projects). Your entryway was looking great and I kept wondering how you were going to improve the tile. What a difference! So fresh and so clean.
Krista says
I will literally give an award to anyone who can share a remedy for removing hard water residue from the following places: toilet bowls, shower walls, and the bathtub. It makes my poor bathroom feel dirty.
YoungHouseLove says
Anyone have tips for Krista? I’ve heard vinegar works on hard water (like you can soak the shower-head in a bag of it and it’ll unclog and spray nicely again).
xo
s
Debbie C says
The grout looks fabulous! But Sherry…preggo and moving all over the floor sounds so uncomfortable (I’m thinking of how I felt not too long ago when I was pregnant!). So impressed that you did it! But go easy too.
YoungHouseLove says
Thanks Debbie! I took lots of breaks and stretched and stuff! Mainly it was my little knobby ankles that took a beating – next time I’d pad them or wear thick socks or something!
xo
s
Ali says
Very timely – I’ve been battling grout stains lately, with no luck! I tried a similar product to the one you used here and it looked wonderful… and didn’t last. All that hard work down the drain. :/ What does the sealing process involve? If this works, I’m all over it! We have a looooot of tile to deal with, and the grout is nasty! Trying to find a better solution than having it redone by a pro (’cause I’m not doing it :)).
YoungHouseLove says
I’ll have to update you guys once I pick the right sealer for slate (they all involved slightly different application methods, but the last one we used on subway tile just got sprayed on and buffed off the face of the tiles so it remained in the cracks). Spraying and buffing is so much faster than grout line painting, so I hope it’s not too bad!
xo
s
Em Johnston says
So that tip about an OxyClean paste is bunk? Boo.
I would like to know what sealant holds up well on tile without making it shiny/slippery my tile has bonus texture (it was a good idea at the time?) … And I have an ENTIRE downstairs (1100 sq’) of grout to Refresh & then seal.
Wanna help?
I offer a full guest suite and bake like a semi-pro! ????
Oh… And San Diego climate.
????
YoungHouseLove says
We’ll definitely keep you guys posted on the sealer and the durability over time!
xo
s
Stacey says
Grout Gods! I NEED THIS!!! No really, you guys. . . I need this stuff! Does anybody know how I can get this to South Africa? I will pay ten times the price if necessary!
YoungHouseLove says
Maybe check if it’s on amazon? Anyone have tips for Stacey?
xo
s
Benita says
Wow! Must check if there’s a similar product available over here so I can attack the half bath floor!
Rachel @ Common To Moms says
Stunning!!! The grout really finishes that entry way off. I am so glad you added the before picture too- that entry way has come SUCH a long way. I am so impressed!!
Koen @ TownHouseHome says
That sure is a huge difference! I didn’t even know products like these exist, so I hope I’ll remember this post if and when I ever need it. I might have gone for a little less of a contrast, but you know what they say about tastes… Keep up the good work!
Kristen C says
This looks amazing!!! You have done amazing things to your houses over the years! I envy your thought process and your visions for your house!! Amazing, amazing, amazing! !!