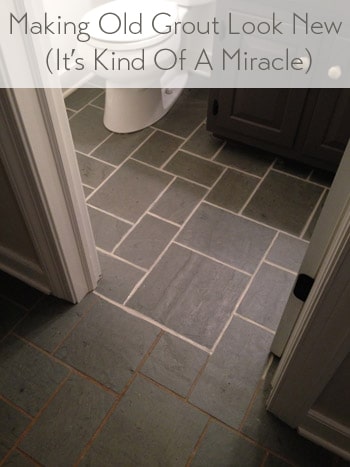
The discolored and dirt-stained grout in the tile floor of our foyer looked super old and gross, but after trying nearly a dozen cleaners and cleaning tricks we nearly gave up. Then we finally find THE SOLUTION to making the grout look white and clean again!
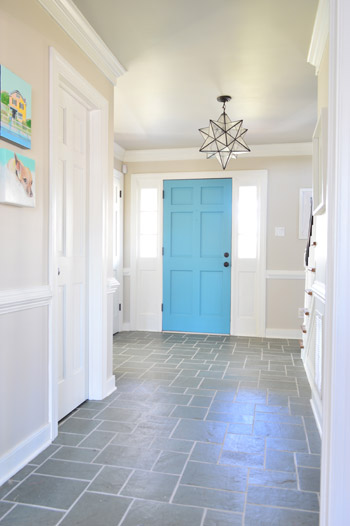
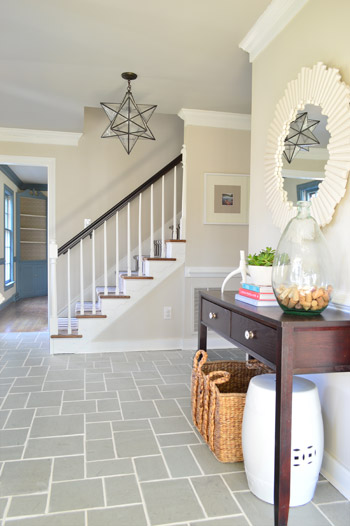
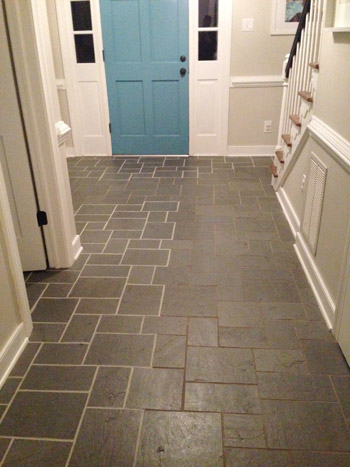
Now that we’re done, you can see how the view just got a heckova lot better around here. The crisp white grout lines play off the white trim and make the whole space feel newer and cleaner.
The funny thing is, it wasn’t actually cleaning that did the trick. So if you’ve got a similar issue with discolored or stain grout, here’s our official intervention: stop scrubbing! Well, maybe give scrubbing a fair shot, but don’t be discouraged if it gets you nowhere. There’s another way!
Cleaning Tricks That DIDN’T Work
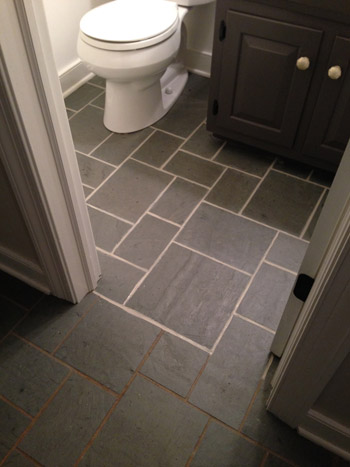
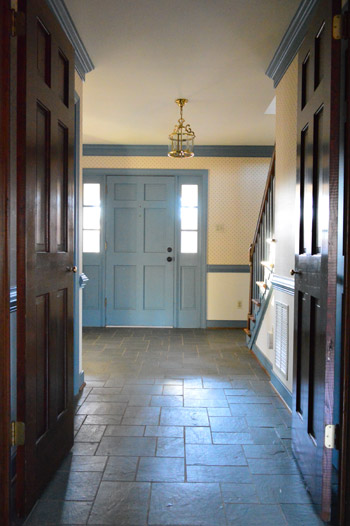
As you might recall, for the past six months that we’ve lived here, it has looked like this.
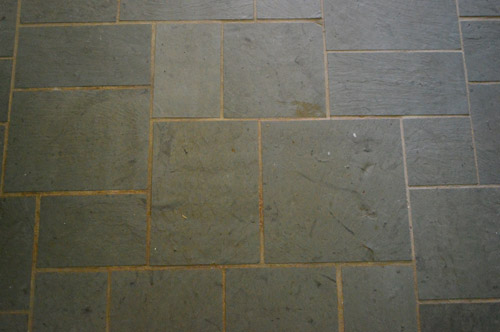
I gave nearly every method under the sun a shot to make that grout look clean. After repeatedly scrubbing the heck out of it, I knew that it was actually very (very, very) clean… it just was so discolored and stained in certain areas, that no amount of blood, sweat, tears, or elbow grease could make it look that way.
Some of my attempts to clean grout included (but weren’t limited to):
- various baking soda paste mixtures
- various white vinegar solutions
- copious magic erasers
- specialty grout cleaning floor sprays/potions/scrubs
- bleach pens
- oxygenating cleaners like Oxiclean
- Mrs. Meyers powdered cleanser + a wire brush
- Barkeeper’s Friend + a wire brush
- a borrowed steam mop
- scrubbing with a stiff bristle brush
- lots and lots of muttered cursing
The Solution To Getting White Grout Again
By this point I did what most people would do. I gave up and ignored it for another few days (what’s a few days after six months of no-dice results?). And then I finally faced facts. The grout either needed to be scraped out and regrouted entirely (which makes for a pretty messy job, especially in the main hallway of our house which connects the entire upstairs to each room downstairs) or it needed to be refinished.
Thankfully a few of you tipped me off to a product you’ve used with success called Polyblend Grout Renew. Let me just skip to the punchline: it worked, and I wish I had tried it before spending six months scrubbing my mind out.
The cost? A cool $12 from Home Depot. (Update: it’s closer to $20 now, but there are more affordable grout pen alternatives available.) Can I get a what what? Note: this might sound like an ad for the stuff, but Grout Renew doesn’t know us from Adam – I’m just beyond grateful that it worked.
Choose Your Grout Paint Color
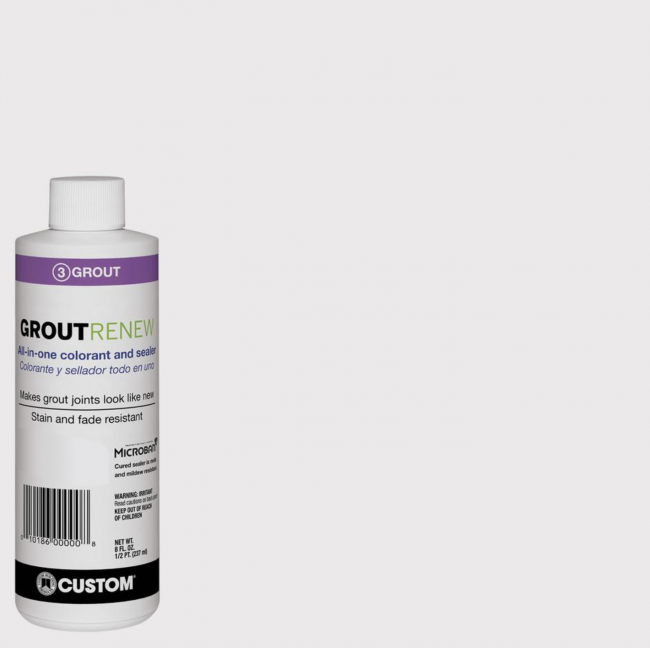
GroutRenew comes in several colors now – over 3 dozen, in fact, including several shades of white and off-white. So you may be tempted to go for the brightest white to get the cleanest, freshest look (that’s “Artic White” pictured below). However, just like paint colors, the brightest, whitest version may not be best for you.
Be sure to take some time to look at your room, your tile, and your lighting to make sure you’re choosing something that blends well with your space. You can always test out a few colors too before committing to one. John and I actually considered two colors – Natural Gray and Oyster Gray, which both look pretty dark compared to the brighter whites. We had seen a neighbor with darker grout in her slate floor, so we thought it was worth considering.

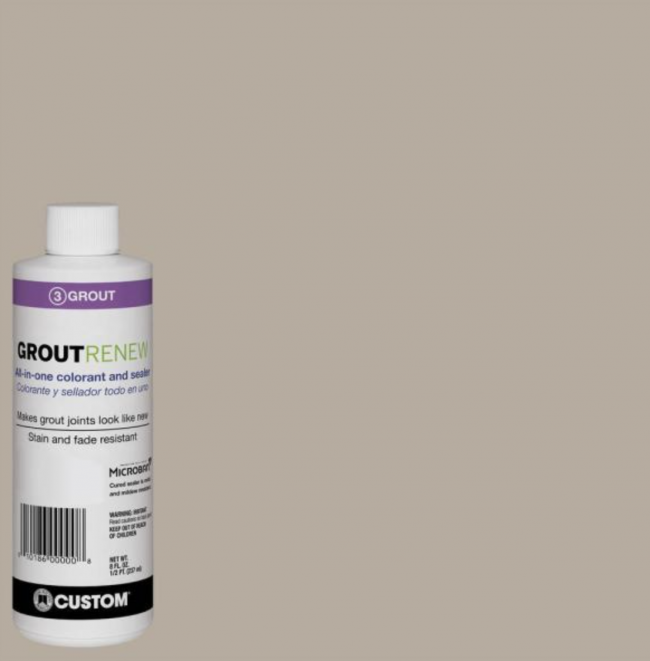
In the end we chose Oyster Gray (shown below) which is still a mid-tone Ivory color – definitely not a bright white. But it looked the most natural and still seemed very bright in contrast to the dark slate tile, without looking artificiall white. Any brighter and we worried it would look like someone in a Crest Whitstrips ad! You know, almost too blinding.
Oh and the Grout Renew was low odor and low-VOC, so this pregnant lady could get down with it. I did wear a respirator, along with opening windows, just because I’m into added ventilation and bad Bane impersonations.
GroutRenew Alternatives
This is the only product we’ve used, but there are some others on the market if this particular one is not available. Lowe’s sells a similar product by MAPEI that comes in a squeeze bottle. Amazon also has a well-reviewed Grout Pen product that comes in a white or beige option. Again, we haven’t personally tried those, but they may be some alternatives to consider if the PolyBlend is not available to you.
How To Apply Grout Paint
The downside to this solution is that it can be time intensive (and patience testing) depending on the size of your surface. For this floor, it took nearly eight hours to apply. But since I had easily spent 25 hours trying various stain lifting methods before resorting to this, well, eight hours with a bottle of Grout Renew was a small price to pay for VICTORY.
Step 1: Clean Your Tile & Grout
I know I said scrubbing wasn’t the solution, but it part of the process. I’ll pause while you laugh since I had already done that TEN MILLION TIMES. But like any surface you’ll be painting, you want to make sure it’s clean of dust and debris. So at least we’re not talking a heavy-duty scrubbing, just your regular washing to remove surface dirt should do.
Step 2: Pick Your Brush Or Application Tool
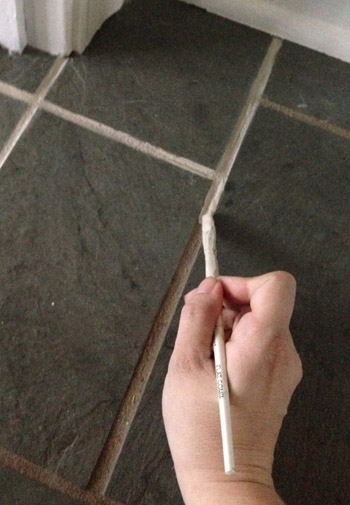
The instructions suggested using an old toothbrush to apply the GroutRenew it into the grout lines and then let it dry for 24 hours. I went with a thin craft brush instead because I had way more control (read: way less mess on the tile surface). The thin paint brush was also easy to dip directly into the bottle when I needed to load up with paint.
Step 3: Plan Your Starting Point & Exit Route
If you’re painting a floor, like we were, you’ll want to sure you don’t paint yourself into a corner (or at least if you do, you can carefully tiptoe across your tile without stepping on the cracks). I started in the half-bathroom because I figured I could work my way out of the room and close the door behind me so it could dry.
It was the opposite of fast. But it worked. Slowly I eked my way out from around the toilet and right out the door, which took about an hour and forty five minutes.
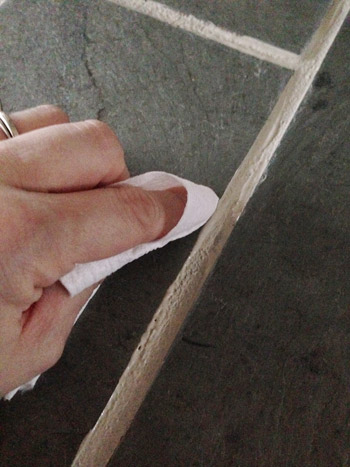
Step 4: Be Ready For Mistakes
Even with a small craft brush there were still times when it got on the surface of the tile, and there was a very short window for wiping it off before it set (and then had to be scrubbed with a fingernail, which was a huge pain) so I literally would do one or two cracks at a time and then quickly follow up to smooth both sides of the seam out with a small piece of toilet paper (this would remove any from the surface of the tile as well as make the sides of each seam nice and straight looking). A paper towel or clean cloth would work as well. That is, if toilet paper isn’t fancy enough for yo?u.
Step 5: Be Patient & Pace Yourself
Being pregnant, the bathroom was all I had energy for on Day 1. Day 2 involved three more hours of line painting and wiping, and I opted to do 50% of the foyer in a strategic way so we could all still walk on the other half of it. Here’s a shot to show you how hilarious John is. I said: ok, get creative with this picture so my giant respirator doesn’t look weird. I like his version of getting creative – just lop off the whole head area.
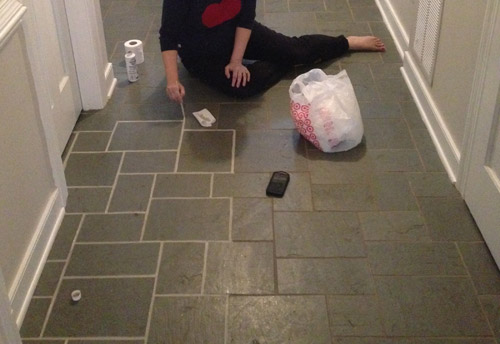
The second day was the hardest day by far, just because I was still kind of sore from contorting my pregnant body around in the small half bathroom the day before, and the little knobby parts of each of my ankles were dragging on the tile as I scooted around like a dog with fleas, but it was all worth it. Worth it and then some!
Day 3 was another three hour process, but it was the most exciting day because I could see the light at the end of the tunnel. The end of the longest-running house battle that I had ever waged was near. I just worked my way around the foyer doing the other half of those pathways that I had done the day before, and I ducked into that last closet while pausing occasionally to fist pump and work on my clean grout acceptance speech (“I’d like to thank the academy, and the grout gods who invented this cheap bottle of miracles and unicorns”).
Step 6: Let It Dry
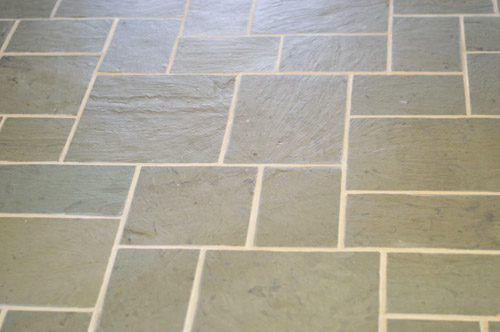
After each application process, we gave that section a full 24 hour drying period and made sure nothing got wet for 72 hours (since that was another warning on the bottle). It’s a good deal lighter than the old grout was, which still makes us say “whoa now” when we walk through the hallway, but we think it’s just our eyes adjusting. Maybe after 6 months our brains just can’t get over the fact that it finally looks clean!
We also had about 1/4 of a bottle left all of this, which was great in case we need some touch-ups down the line. I’ll definitely update you guys if anything funky happens, but so far it has been great. I mean, just look at how far it’s come from the before:
Update: After nearly two years of use, even with semi-frequent moppings, muddy shoes/paws, and a whole lot of foot traffic, our grout still looks identical to when I applied this stuff (you can see an updated picture that we shared after six months of use here). For the folks who can’t find it in stores, here’s an affiliate link to it on Home Depot.com. There are also alternatives like grout pens on Amazon.
Originally Published in 2014
Psst- Wanna know where we got something in our house or what paint color we used? Just click on this button:

*This post contains affiliate links to things we have actually purchased and love*

casey says
this is AMAZING! we have a rental property (a condo that we bought at the top of the market and couldn’t sell and are now renting it out) that has WHITE tile in the upstairs and downstairs bathrooms and like you, I tried EVERY.THING to get that grout clean. THANK you so much for this post – I will be going out and buying this stuff the next time I’m fixing the place up for a new tenant or getting it sell-ready.
Also, fellow Richmonder here…love following your blog!
YoungHouseLove says
Thanks so much Casey! Best of luck!
xo
s
Joanne says
Soooo worth it!!! Looks great! And, I think that’s the first I’ve seen the console table in your entry. SWEET STYLING, Sherry!!! Love it!
YoungHouseLove says
Thanks Joanne!
xo
s
Amber says
Looks amazing! Do you think this would work well with very skinny grout lines? What would you recommend applying it with?
YoungHouseLove says
I think it would be slower to apply, but as long as you wipe it off of the face of the tile as you go (probably just use a small brush and wipe the excess off every crack as you go) it could be awesome I think!
xo
s
Kara says
It’s like a breath of fresh air! It makes the layout of the tiles look fun and happy.
Megan says
Honestly – this is the best makeover on your house I have seen yet!! I know that sounds lame, but the before and after for a large space for less than $12 rocked my world! Off to buy some of this stuff for my bathroom!
Kate says
My mom used that a while ago on her fireplace surround since they hated the color of the grout. It worked really well. She eventually had the tile replaced since she hated the tile as well, but it worked well as a “Phase 1” project (as you guys would say!) to help her like it better until she had it replaced. It held up just fine surrounding a gas fireplace!
Katie says
What is the size of your star pendant? I’m ordering one online but having a hard time choosing the size.
Thanks!
YoungHouseLove says
I think ours is 18″
xo
s
Laura says
Wow! I guess I never realized how dingy the grout was before, but now it looks great. It’s a shame it took so long, but it’s nice to know there is an inexpensive product that can have such a huge impact. I really like the tile in your hallway and I think this makes it pop even more. I’m glad something finally worked for you!
Allison says
WHAT it looks amazing! I’m so excited and it’s not even my floor! LOL
Heather @ What Does She Do All Day? says
It looks great! I’m going to have to try this without my bathroom grout. No amounts of scrubbing have restored the white grout.
Carly S says
I can’t express how much I love you for this post. I spent hours of last weekend with a steam cleaner with an attachment to blast steam at the grout. It kind of worked. Kind of.
Thank you thank you thank you for giving me a solution! I can’t wait to revitalize my floors!
Larissa says
I seriously cannot believe how much better this looks. Usually when you do something that requires as much time/labor as that did I think to myself there’s no way I’d work that hard. But this result is totally worth it even for a lazy-bones like me! I can only imagine what a huge sigh of relief it must be for you. Way to go!
Kelli says
Funny that you should ask; yes, I am waging a similar house battle. We bought our current house last summer. It has engineered hardwoods (which are supposedly more durable but can only be refinished once), and the previous owner applied polish to them while they were dirty. Every day during the littles’ combined nap time, I spend thirty minutes or so scrubbing another four square feet of them with Bona Polish Remover (which isn’t cheap). 48 square feet down, 1126 to go. But who’s counting?
YoungHouseLove says
Oh no! That’s so frustrating! Good luck Kelli!
xo
s
Mellisa says
Oooooh, that looks so lovely. We have really icky grout around the slate tiles in our living room and dining room, and I am so going to try this. Thank you, thank you for the review.
Gen says
I’ve actually been researching this stuff for the grout in our downstairs bath. We have white square tiles with white grout, thats really more of a yellow and I want to use the gray as well to renew the grout. This gives me hope that its possible!!!
Brenda says
Woah, crazy how much brighter the foyer seems. Just when I think you’ve already brightened it up as much as possible, it gets even brighter and better! Discolored grout (especially when it’s uneven, like where high traffic areas are) drives me nuts. At my old apartment the management had to replace the tile in my bathroom. While it was a nightmare process (no warning and came home late to an unusable bathroom), the clean grout and fresh tile looked so good.
Michelle says
Would this stuff work if you wanted to change the color of your existing grout? The grout we used with our backsplash is way too light in color. Darkening the grout would be an easy fix instead of replacing the whole darn thing.
YoungHouseLove says
Yes, I think it’s made to change the color or hide stains!
xo
s
Kristen says
http://www.youtube.com/watch?v=lcWVL4B-4pI
This ^^^ was literally all heard while looking at those blindingly beautiful “after” shots. The results are so incredibly gorgeous!The space was transformed; looks lighter, brighter, and even more stunning! Great job!
Now, no more crawling around on your knees for 8 hours Mrs.Third Trimester Pregnant Lady!!!
YoungHouseLove says
Haha! I love the song. Had a little dance break over here on the tile. Victory dances can span over a course of days, right?
xo
s
Amy says
I had never heard of this product. Mind blown.
Nikki says
I don’t know if you have a before picture from that same angle but it would be great to see the contrast…because your foyer has really come a long way! It looks awesome! I love the contrast and I always loved the slate…glad you get to keep it.
YoungHouseLove says
Yes, I have one! Someone else asked for that too. Maybe I’ll update the post and toss that in!
xo
s
Heidi says
Oh my word! We have the same slate/tile in our entryway and have the same problem. I think I see a future bottle of this stuff in our lives! Just probably can’t get it done until well after the kitchen renovation since we’re making a massive mess all over the house right now.
Amanda says
Wow AMAZING transformation! It brightens up the house so much more! Looks great!
Renee says
OMG. I am so doing this…I have the same problem, but it’s my shower floor in our only bathroom. FIVE YEARS I have worked on it to try and get it clean. My latest thing has worked the best….Dawn mixed with baking soda, scrub and rinse, a layer of Lime Away, rinse, followed by Clorox Cleanup. Repeat, repeat, repeat. The dirt, soap scum, mildew ect. goes on in layers, so you need to take it off the same way. It’s looking the best it has since I bought the house (a foreclosure) five years ago…but it still looks a little stained. ……off to Home Depot TODAY!
Danielle Rogers says
AMAZING. Thanks for yet another helpful tip! As we’ve been doing projects around our very first home (after living in rentals for over 10 years) I consult your website daily! Thanks guys. Good work!
Emma says
Nice work! This is one of my favorite updates that you have done at this house.
Theresa says
Wow! I can’t believe what a difference that made! Incredible! We live in an old flat in San Francisco, and I can’t get our vintage pink bathroom tile/grout clean for the life of me! I think I am running to home depot to try this stuff! My only problem would be that it’s a 1 bathroom house and if that says it can’t get wet for 24 hours, it could be tricky with the shower…Amazing before and afters, looks like a new floor! Worth the long hours and effort you put in.
Olivia says
Ok, this is amazing. I’m doing this. Like this weekend. We have the same slate flooring that you do, but it runs the entire length of our MCM ranch. All the bedrooms, bathrooms, kitchen and entries touch it. Do you think if I tackled it one night after the kid goes to sleep it would be good to walk on in the AM? Like 12 hours? He’s too small to teach him to only walk on one side… :/
YoungHouseLove says
I think it might be (probably depends on the humidity, etc) but you also could do what we did with Burger (we blocked him into certain areas of the house so we could hang out there, and didn’t seem to mind).
xo
s
Stacey says
this stuff is EXACTLY what our bathroom grout needs – I am SO excited! We remodeled our bathroom last year with little white “vintage-esque” tiles and WHITE grout. ever since, that white grout has been my worst enemy! It looked fabulous at first, but I feel that EVERY piece of dirt and scum has stuck to it like a magnet ever since! I will be buying some of this magic product TODAY and this will be my weekend project. yipee :)
Harper says
Totally changes the room!! It all looks so cohesive and pretty-fied now. Love it!
Lori says
I have tile…grew up with tile. I have to say that if you dont clean the grout each year you will end up with black feet syndrome. Mopping usually move the dirt into the grout. So easy maintenance of cleaning the grout and resealing each each year has helped me keep it clean. that being said…didnt know to do that and lived in a house for about 20 years without maintaining it…guess what…over the years that almond color grout turned black (and you dont notice the gradual change!) I have invested in a mc cullough heavy duty steam cleaner with attachments and i steam the dirt out of the grout…then follow up with a sealer. If the grout is super stubborn i let the baking soda/vinegar paste sit on the grout for a few minutes then use the steam cleaner…its the only thing that ever worked. A regular steam cleaner mop doesnt work. you need one of those steam cleaners with a small nozzle attachment to really put the pressure in.
YoungHouseLove says
Great tips!
xo
s
Jenny says
Wow! My home is an older one with original tiles in the bathroom. NO amount of cleaning will work on the grout but you’ve inspired me to give this a try. Thank you!
Kristen @ LoveK Blog says
Wow! What a big improvement! The entire space looks brighter without the dingy grout.
Jamie says
Looks SO great! What a before & after! In love with the entire entryway! Where is your giant Moravian star pendant from? It’s gorgeous!
YoungHouseLove says
Thanks! Got it from a local shop called The Decorating Outlet.
xo
s
Sandy says
Okay, I seriously want to kiss your feet right now! I’m thinking this is the brilliant solution to our bathroom tile grout. I’m wondering about working in the shower, but it looks like some other commenters used it that way and have had luck with it. For $12 may just have to give it a try.
It sure made a beautiful difference in your entry. Love it!
Kristin F says
That looks amazing! I debated on buying that the other day as the grout in our kitchen looks dingy as well. But I wasn’t sure if it needed to be the exact color of the existing (original color) of the grout and since I’m not quite sure what that is…I didn’t get it. It seems you’re basically painting the grout, is that a fair assessment? So I could go with a lighter color if I wanted to? We’re stuck with this tile for a while, and since I’m putting white marble as backsplash I’d love to lighten up the beige-y tile floor.
YoungHouseLove says
Yup, it has special polymers in it to stick better than regular paint would, but you’re essentially painting this new color right on top and it sticks like heck when it’s dry. You could choose any color and it would hopefully work for ya (we went way lighter than our grout and it sat right on top).
xo
s
Kara says
I.Love.This.
Seriously–absolutely gorgeous! What a difference!
Rose says
Whoa. That is brilliant. This is my favorite project you’ve ever done I think, because I did not know what you saw in that slate floor. I couldn’t get past it. It looked like something out of a haunted house. Now I know it was just the ugly grout holding it back. This looks amazing!
Cristina says
This looks fantastic! I actually just used this product in my bathroom last weekend and I’m SO happy with the results. One tip I read about this week that has worked extremely well for removing any excess Grout Renew that got stuck on the top of your tiles: a rub with a q-tip dipped in regular vinegar completely takes any of the product off unwanted areas.
My job wasn’t as clean as yours since I tried a million different techniques to apply the product. At first I was upset by the residue on the top of the tiles, but the vinegar completely took it off!
YoungHouseLove says
That’s an awesome tip!!
xo
s
Ashley says
Ok, I won’t lie. I was starting to wonder why you were showing so much love to that tile and not mentioning any plans to change it soon – but this grout reno has changed my heart!!! It looks gorgeous!!! Thanks for sharing this!
Sally says
Hi – could you do this in a shower? Our grout is miserable looking :(
YoungHouseLove says
A few others have said they used it in the shower and it worked, but I’d read the bottle/website to be sure!
xo
s
Christie Stearns says
Look FANTASTIC! I absolutely love it. My personal war right now is trying to get a whole bottle of purple ZzzQuil out of my carpet. It’s now a big red stain. I have tried everything.
YoungHouseLove says
Oh man! Anyone have tips for Christie!
xo
s
Cindy @Made2Style says
Oh dear God I can’t wait to try this! I’ve done the oxiclean method in my bathroom and while it works my floor is slanted so the solution won’t ever reach a certain area and I hate the smell of bleach so the bleach pen was never an option! Very excited girl over here!!
Mary Jo says
Don’t know how the grout is feelin’ ya … but I LIKE you plenty! Thanks for this post since ceramic tile and grout are in my future for my basement floor. PLEASE keep us up-to-date on whatever sealer you choose. And – I’m sure everyone says this … but tell Clara that your stories about HER stories are my favorite! I live my young mommie days vicariously through you & it’s a blast!
YoungHouseLove says
Aw, thanks Mary Jo!
xo
s
Jenny says
I looked at using this product but all the colors were too light. I used simple acrylic paint (less than $5 for the really big bottle at Michael’s) to fix my problem. I also sealed the grout lines. So far this solution has been down for over six months and shows no sign of wear even in the high traffic areas. Check it out here –> Painted Grout Lines
YoungHouseLove says
Wow! That’s amazing!
xo
s
kim says
Holy Grout Master! It looks so clean and fresh!
I think you might need a ankle massage! ;)
Diane says
Are you sure that’s not you dancing in that video…with joy after you saw the results of that grout!! Holy cow! I could hardly believe my eyes it was such a difference. The whole foyer looks complete now..and a little glowy!!
My husband was strangely silent as I showed him todays blog he knows the jig is up on the bathroom tile!!!
YoungHouseLove says
Haha, ok, that was me. I’m secretly Justin Timberlake (you should see my “man-barbie in a box on strings” impression).
xo
s
Tiffany says
SOLD!
Dana Stewart says
Wow, great job! The lighter grout makes the tile look beautiful, and I wasn’t expecting that! That’s some serious hard work, so kudos to you, Sherry! *Thumbs up*
Brigitte says
Thank you so much for this post! Now I know what I’ll be doing over the weekend! And I didn’t even know the grout in my bathroom was bugging me until just now! Love your blog! ;)
erin says
I can’t believe the transformation! This project couldn’t have come at a better time: we’re rethinking the grout in our bathroom. You said, “commenters who’ve used this and had awesome results with occasional sealing it.” What do you mean by “occasional” sealing it?
YoungHouseLove says
They didn’t go into details, but I would say that three times a year or even twice would be plenty! I used to seal the white subway tile in our bathroom that way (we had white grout) and I never had to clean it once, just from twice a year spray sealing!
xo
s
Beth says
They guy at Home Depot told me to use the spray application sealer every 6 months. If it means I don’t have to repaint, it’s worth it!
YoungHouseLove says
Amen!
xo
s