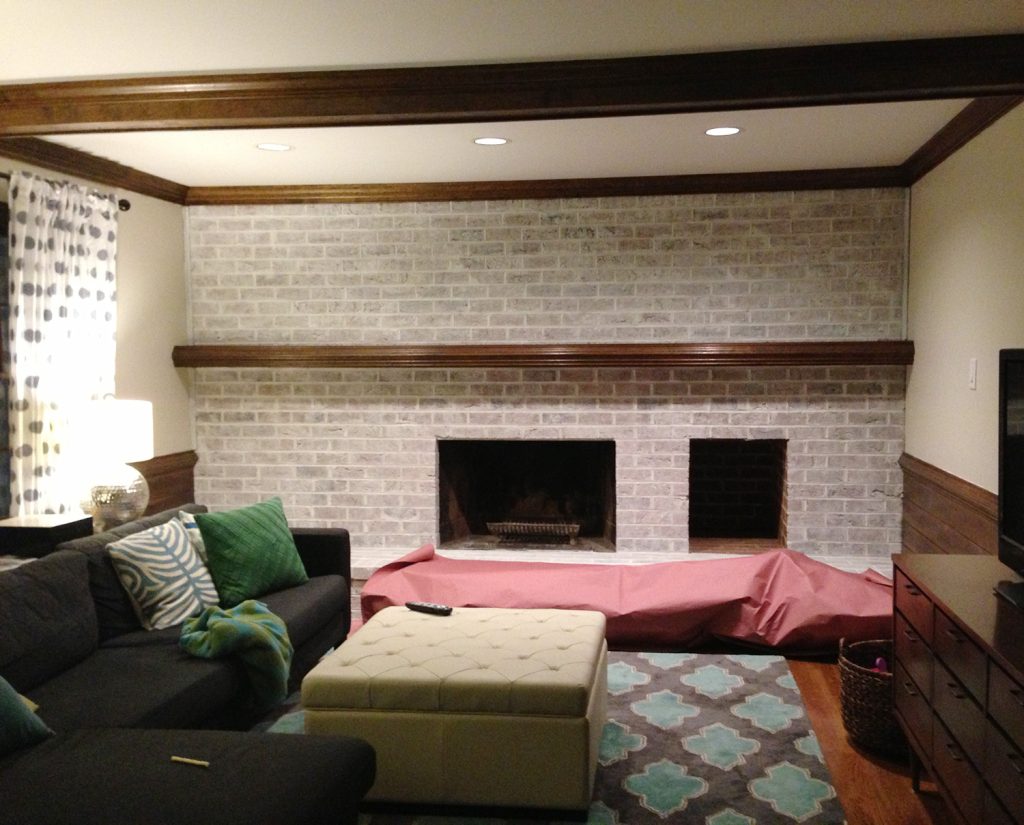
Did you know you can give your whitewash your brick fireplace with paint you already have around the house? We were able to give our fireplace wall a fresh look in under a day and with no money spent!
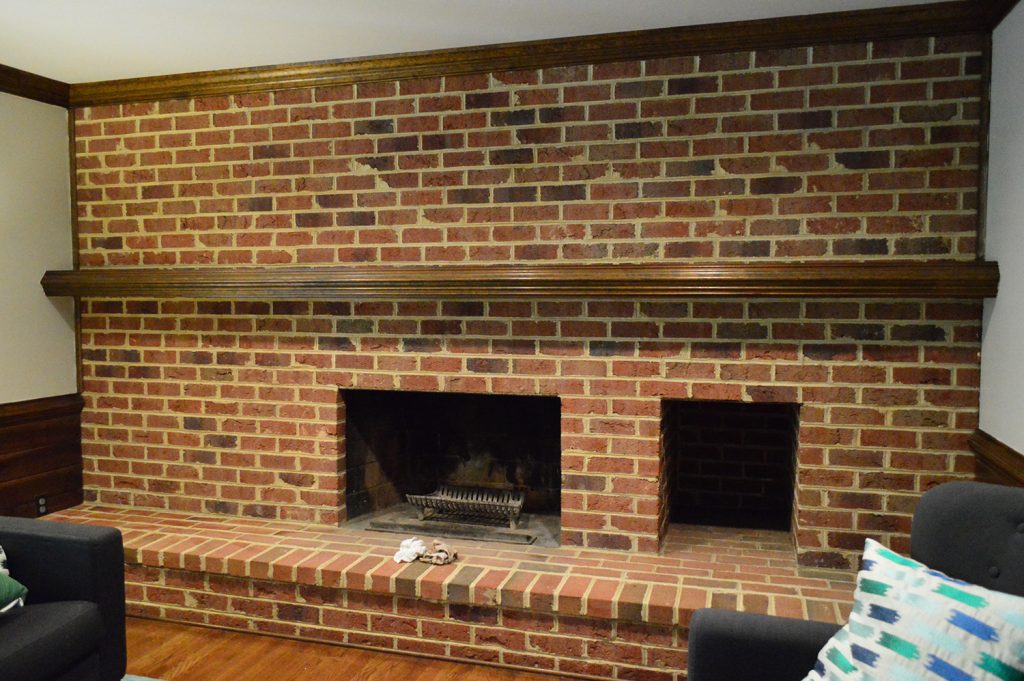
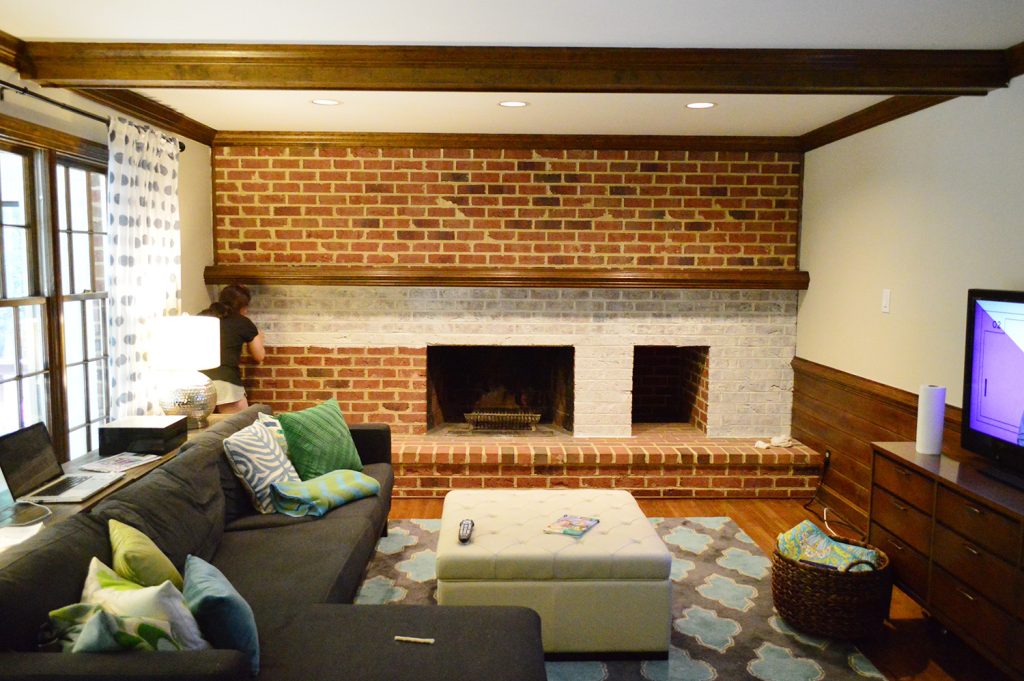
We don’t mind unpainted, exposed brick, but in all of our houses it’s been an unattractive orangey-brown brick – not that pretty rustic red brick you find in New York apartments. So in previous homes we’ve straight-up painted those walls because we LOVE the look and texture of painted brick. But after seeing a few whitewashed brick walls over on Pinterest and reading a few tutorials online, we decided to give whitewashing a spin this time. We figured if we didn’t like it we could always just paint over it!
Luckily, we really like it! The room is far from done, and it might not be a forever thing, but for a day of work and a total cost of $0 we’re really pleased with the outcome.
Materials Needed For Whitewashing Your Brick
This supply list is short & sweet and probably includes a lot of things you have leftover from other painting projects:
- Regular white latex paint
- Paint pail or other container for mixing
- Paint stir stick, spoon, or other mixing device
- Paint brush
- Water
- Rags or old t-shirts
- Drop cloth and/or rosin paper
- Scrub brush or wire brush (optional)
They do make special whitewash paints and even more durable limewash applications for exterior use (similar to the paint we used when we painted our home’s brick exterior white), but for a simple interior project like this it’s fine to save your money and use regular paint you’ve used on your walls.
And, like the material list, the steps are pretty easy too. Here’s how I knocked it out in a day.
Step 1: Clean Your Brick
First, I wiped down the brick to make sure there weren’t cobwebs and old soot all over it – just a good once over with an old rag did the trick. However, depending on the condition of your brick, you may want to use a scrub brush or wire brush to remove any loose material or dirt.
Step 2: Create Your Whitewash Mixture
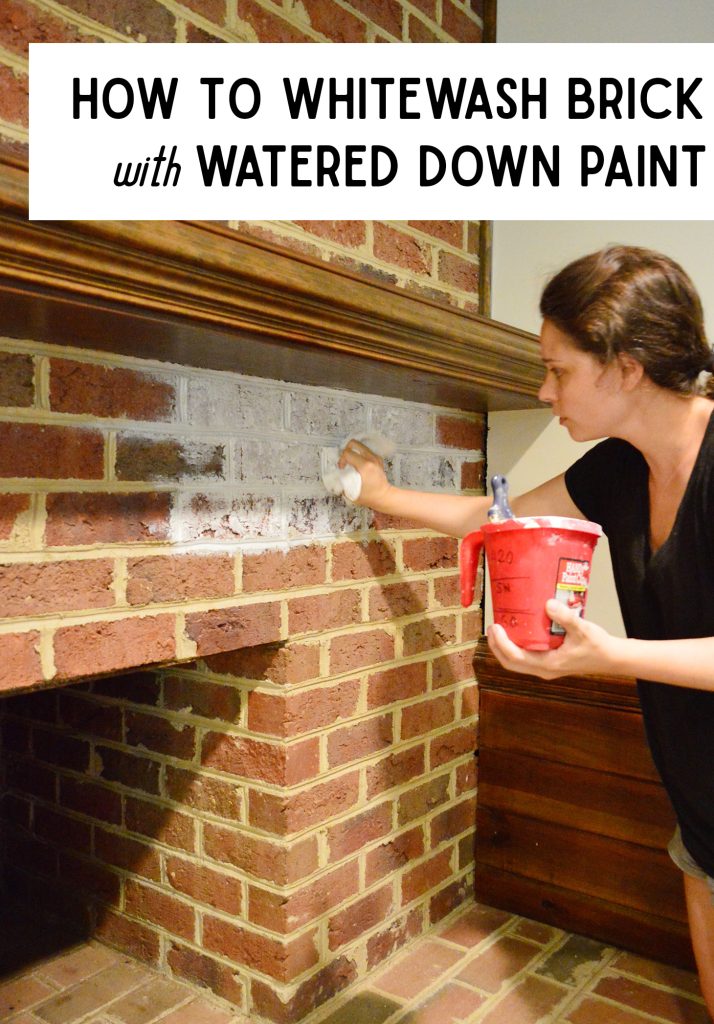
Next I mixed up a mixture of one part water + one part paint in my paint pail. I used Simply White by Benjamin Moore in an eggshell finish since had some leftover from a previous project. But any of these best white paint colors would work. The consistency was pretty drippy and watery. Imagine taking a gallon of paint and pouring out half of it and refilling that half with water.
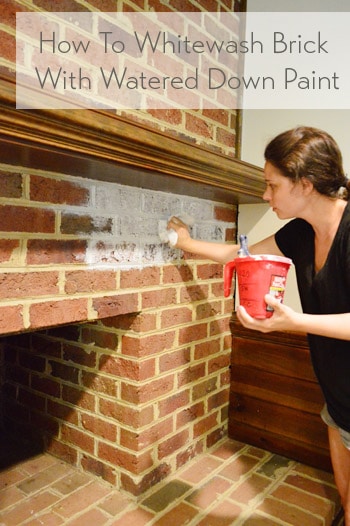
Step 3: Apply With A Brush & Rag Technique
I used a regular paint brush to “wash” on a thin layer of this watery mixture over the whole surface, brick by brick, including the mortar. I moved quickly and sort of smeared it onto each brick with the brush, and then dabbed over it with a rag – just to remove any excess paint and absorb any drips (since it was so runny those popped up from time to time).
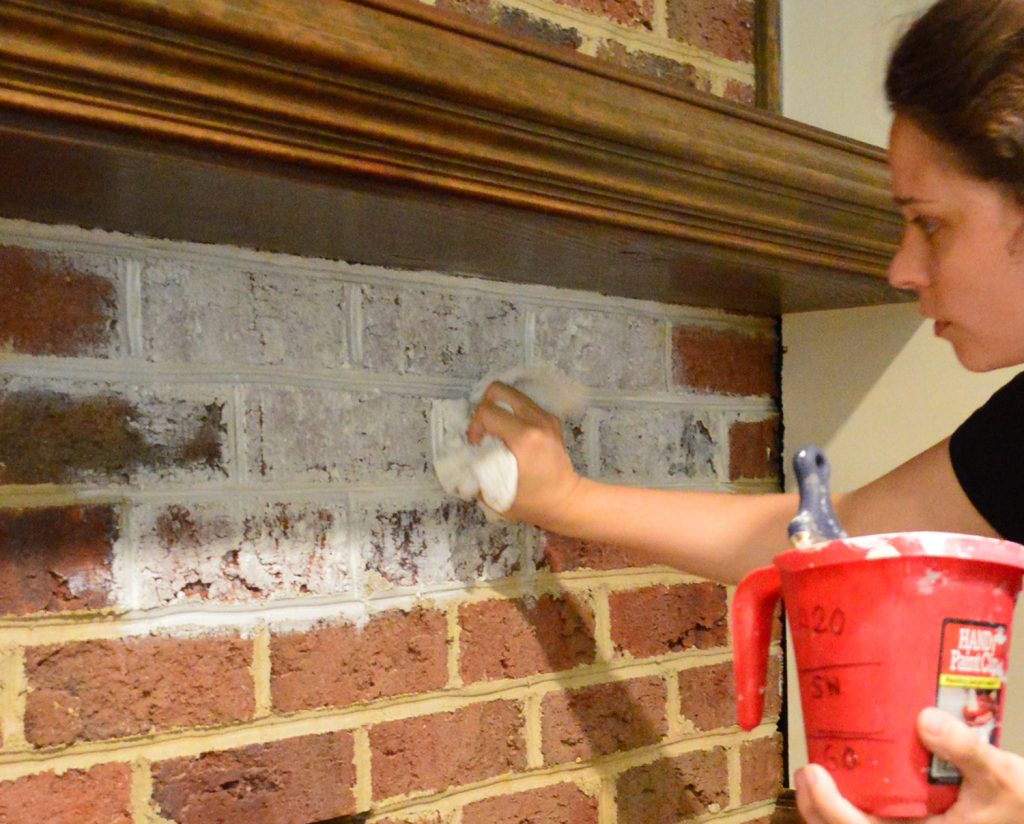
The dabbing took more arm strength than the washing-with-the-brush step, and I tried to work as fast as I could – just because I had heard that it could go pretty quickly and I couldn’t wait to step back and survey a larger area to see how it looked.
Here’s a quick video of the process for ya:
Note: You can also watch this video on YouTube.
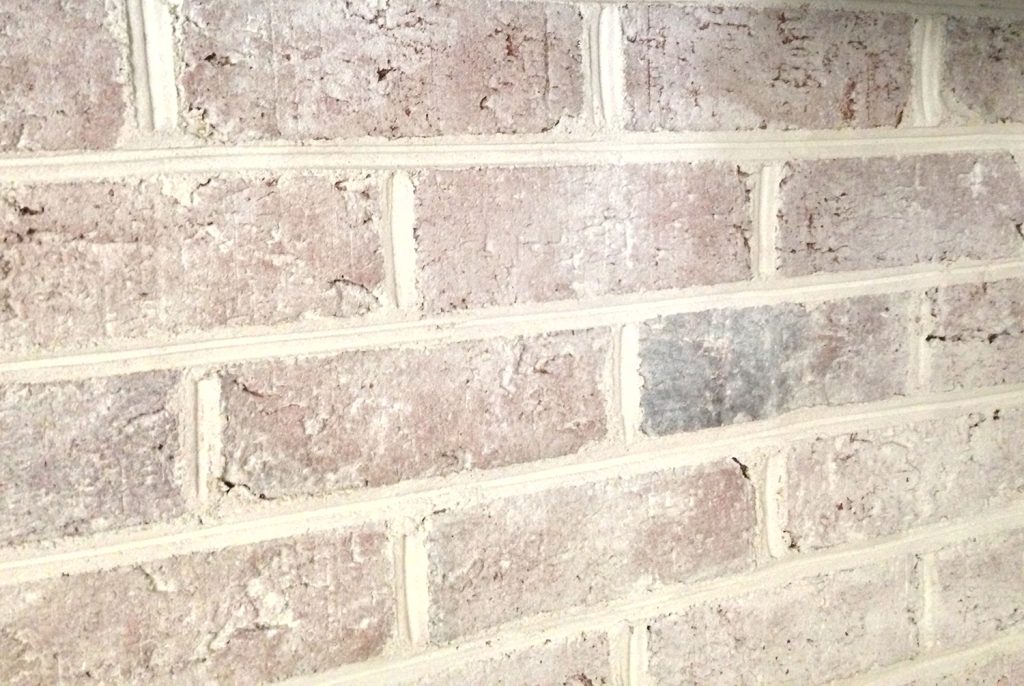
The bricks soak up the wash pretty quickly. When you first run your brush over them it may seem like you’ve straight up painted them white. But after you dab and the paint has a chance to soak in, the brick’s coloring comes oozing through.
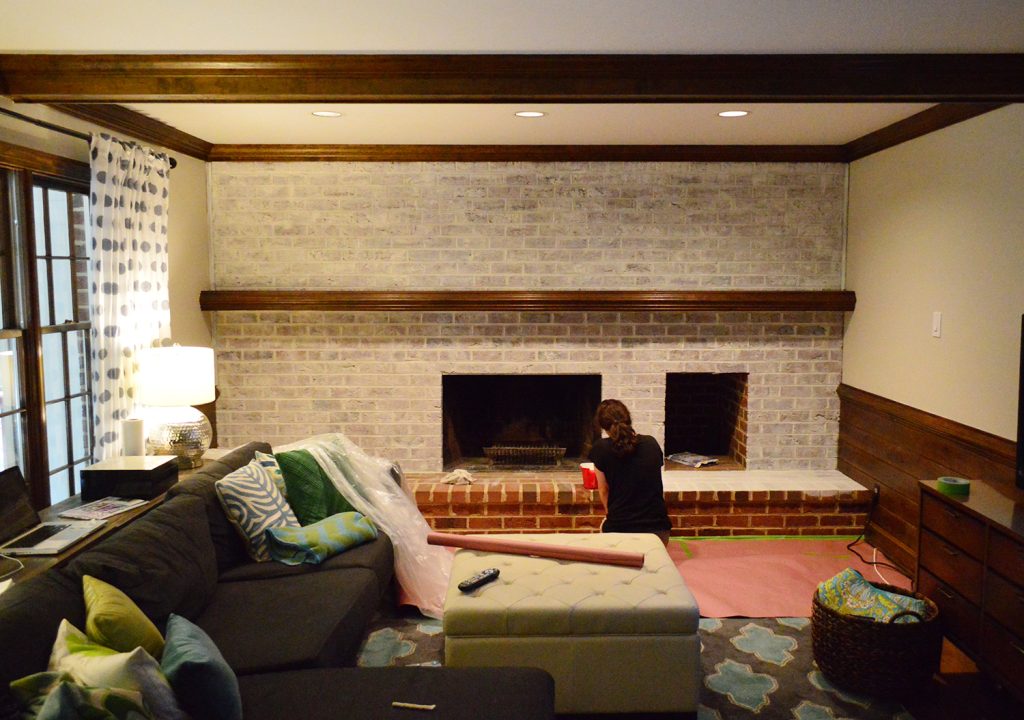
After finishing my first coat on the wall, I moved to the hearth and realized I was about to get drippy paint-water all over our wood floors. Oops! So I took a second to tape off the floor with rosin paper. It’s waterproof, which is nice because I didn’t have to worry about any drips soaking through to the floor.
Step 4: Let Dry & Evaluate
It probably took me about two hours to do the first wash and by then most of it had soaked in and dried. So, I stepped back and was faced with the question: should I leave it or do another pass? That’s the beauty of this technique – you can apply additional coats to make your whitewash more solid / opaque if you don’t like the original results.
I decided that in person too much dark red and brown was still showing through in a few areas (it’s harder to tell in these photos) so I decided to go for a second coat.
Step 5: Apply Additional Coats As Needed
For my second coat, I mixed up an even waterier second wash and then went over the wall again – just to add a bit more haze. So if my first whitewash mixture was equal parts paint and water, this second mix was more like one-third paint + two-thirds water.
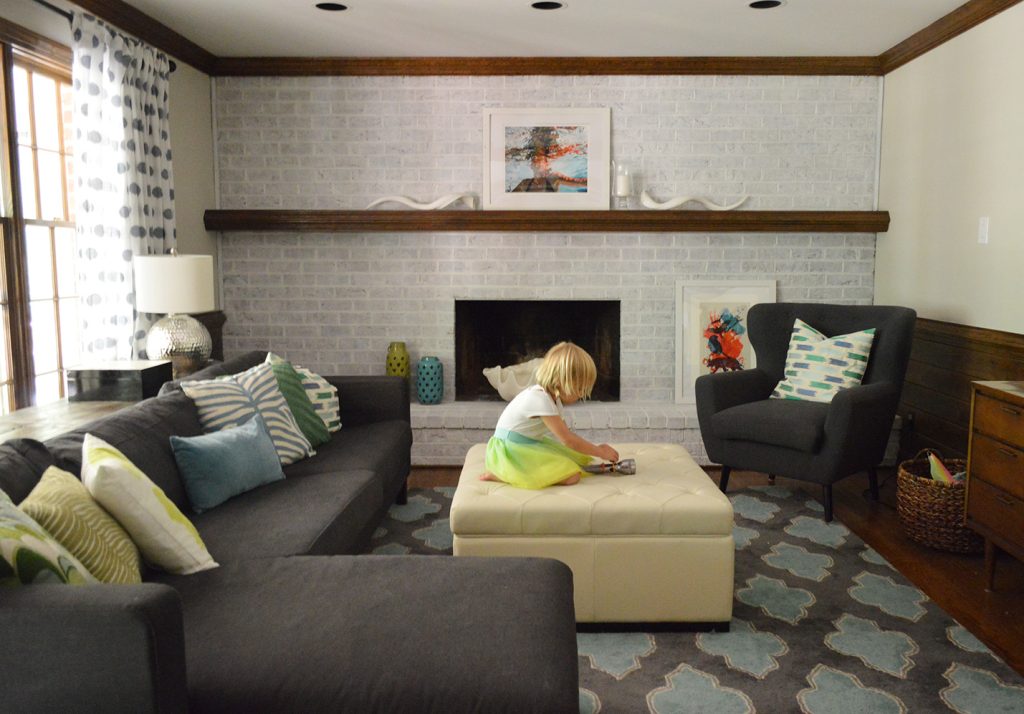
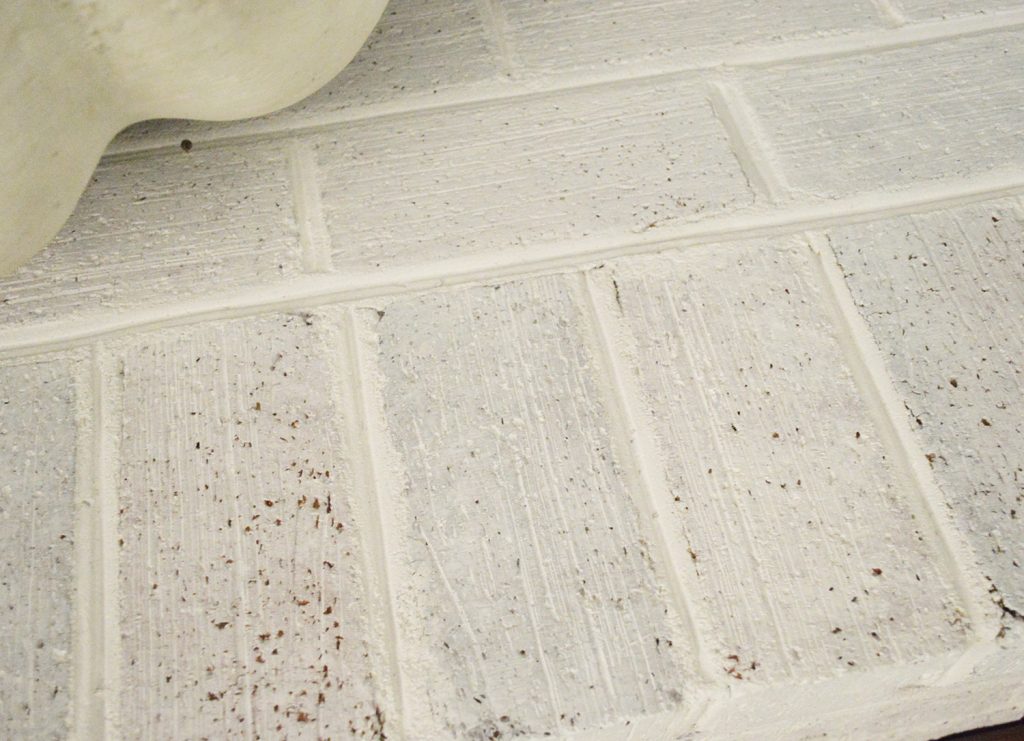
That coat was much faster – maybe an hour, tops. After that second pass, I was really happy with it. The room no longer felt as dark and cavernous, but the brick still had a lot of texture and detail in person (this photo makes it a bit harder to see than in person, unfortunately). I love the weathered effect that it gives without feeling too “faux finished” or “Medieval Times” (not that I didn’t love that place as a kid).
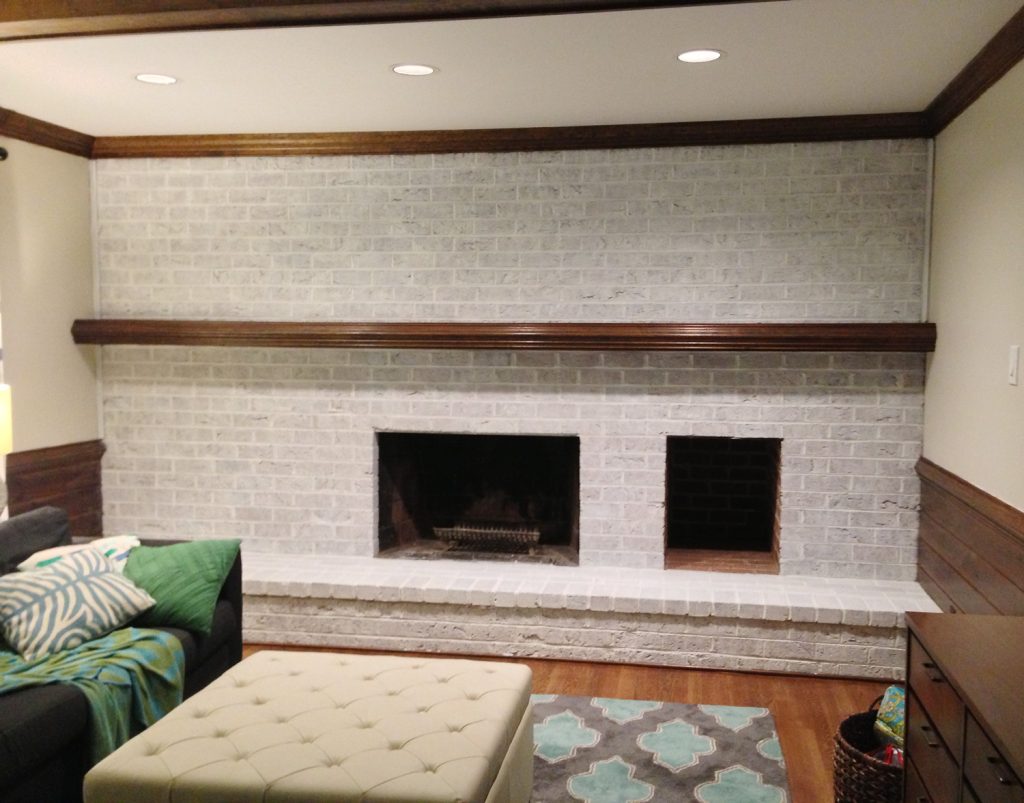
From afar the wall looks sort of chalky and textured and varied – as opposed to the glossy and super white result we would’ve gotten from painting it normally. When you get closer you see more of the pretty details of each brick. Some are a bit lighter. Some are darker. Some are craggier. It’s a nice mix.
We still have a long ways to go in this room, but whitewashing this once dark wall was a HUGE help in making the space feel brighter and less cavernous (which is tough, since it gets the least natural light of any spot in our house).

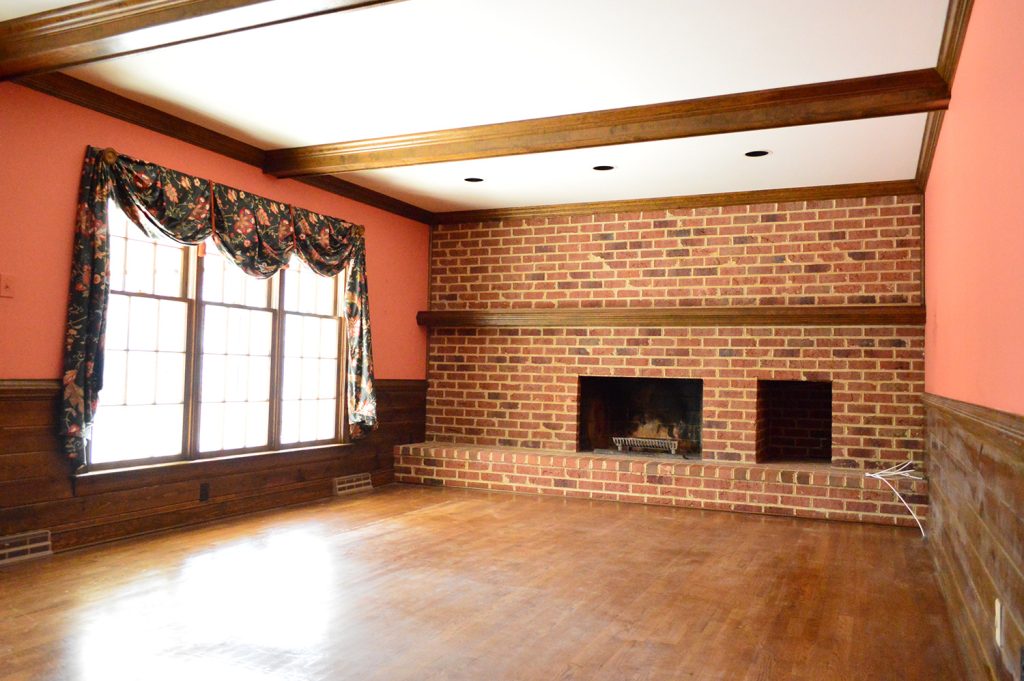
Either way, I’m glad the room is looking decidedly less salmon these days.
Some folks have asked if we’ve considered painting the wood beams, wainscotting, and mantle. We’re definitely leaning towards it, but we don’t want to rush into anything. I always say never to paint brick or wood unless you are 100% sure you’ll like it since it’s so hard to undo! Basically, wait until you can’t stand waiting another second to paint it and only then should you grab a brush.
Update: We Painted It!
After a few years of living with the whitewashed brick, we decided we needed to significantly lighting up the living room even more. So using a paint sprayer with painted the brick and wood Benjamin Moore Simply White, and it did wonders for the room.
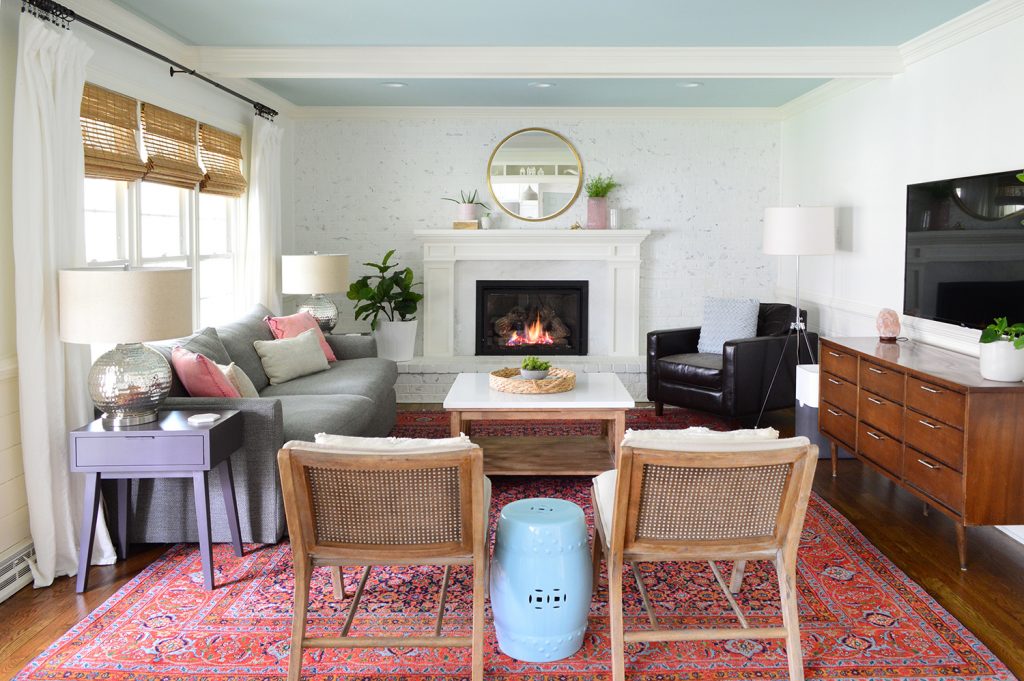
A whole lot else evolved in the room over the 7 years between the original whitewashing and when the above was taken (we constructed a new mantle, changed out some furnishings, etc), but we’re grateful that the whitewashing project gave us the confidence to make major changes to this space.
Update- We finally created this Shop Our House page to help you hunt down any furniture/accessories that you see in our house, along with all of our paint colors.

Leave a Reply