How much wood could a woodchuck chuck if a woodchuck could chuck wood? What do I look like, a woodchuck expert? I have no idea. But I do know the answer to a related yet far lesser known riddle: how many pallet planks could a Petersik pry free if a Petersik could pry free pallet planks? You practice saying that five times fast while I walk you through the answer.
You know by now that the plan for our mondo 12′ long DIY console table (last shared here and here) was to build a rustic weathered-looking top out of some old pallets left in our yard by the previous owners (spotted in the background of this post).
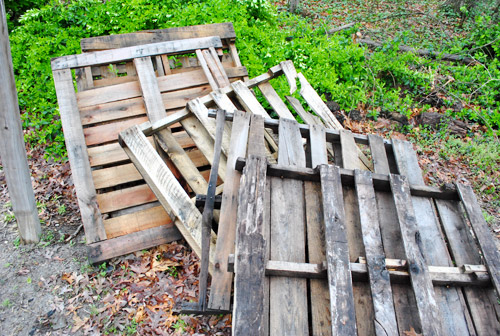
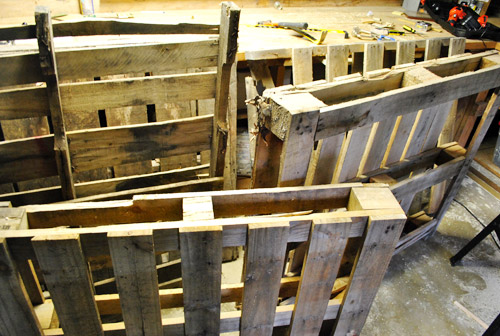
So last week I lugged them into my basement lair workshop so they’d dry off (“lugged” is the operative word because after a few days of rain, the heavy soaked wood made it quite a back-breaker). But since rain this time of year is frequent and sometimes unpredictable, I wanted to get them inside so I didn’t have to worry about a sudden spring shower thwarting my plans and soaking them all over again.
There were five pallets in total. Considering how much wood is on each one, I quickly thought to myself “self, this is way more material than I need.” Somewhere in the distance the universe began laughing at me behind my back. Hold on, we’ll get to that.
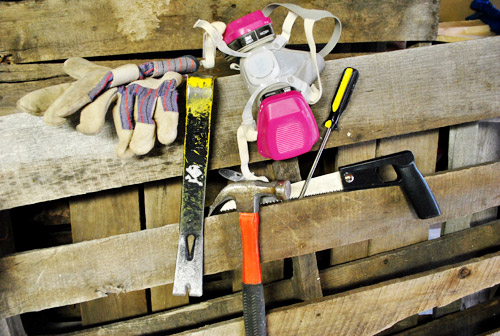
After a few days of drying out, Clara went down for a nap and I took my cue to start breaking down the pallets so I could start building our giant 140″ long console table top. My tools included work gloves, a crowbar, a hammer, a hand saw, a flat head screw driver, and a mask (since pallet sawdust isn’t thought to be part of a healthy diet and my wife is a worry wart like that).
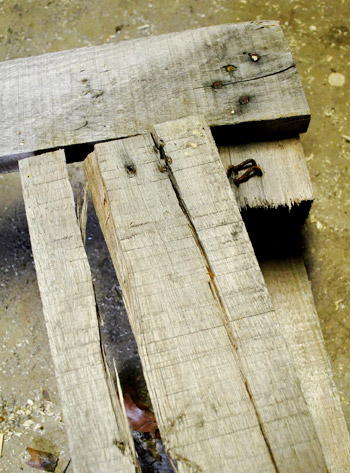
It didn’t take long to figure out this would be harder than I thought. Mostly because each plank was nailed (or stapled) in three spots, and each spot apparently required 3 – 5 nails or staples to keep it in place. I first attempted to cut boards off with a hand saw, but since they were stapled on each end and in the middle, it left me with dinky little unusable pieces, so prying was a better bet. But it took a lot of effort to pry off a piece – and the process frequently resulted in cracking the wood (which pretty quickly rendered the entire piece useless since we wanted long-ish boards to work with and not small slivers).
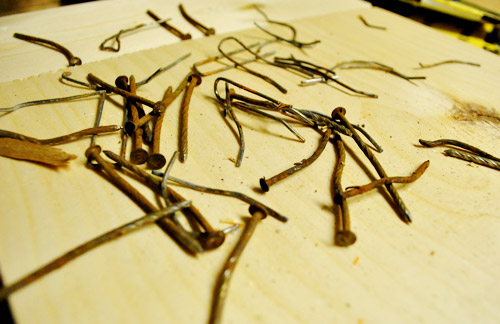
I’m no stranger to elbow grease so I stuck with it for the length of Clara’s nap (about 90 minutes). In that time, my nail and staple pile grew to look a little something like this:
And my pile of usable pieces of wood looked like this:
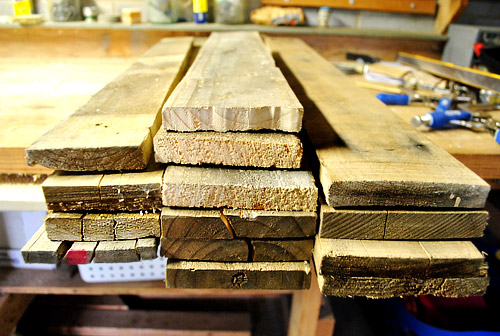
Fourteen usable pieces in 90 minutes wasn’t that discouraging at first… but then I looked closer at my definition of “usable.”
Notice how each piece of wood is a slightly different width? Since my tabletop would be comprised of 4 or 5 planks laid side-by-side, I realized that inconsistency would make achieving a consistent width across all 140 inches of tabletop very difficult – especially when I was looking for a very specific width (and don’t own a tablesaw to help me achieve that width artificially by cutting the boards lengthwise).
But I gave it a try and was able to find 5 pieces that gave me exactly what I was looking for (16 and 7/8″ of consistent width if you’re wondering):
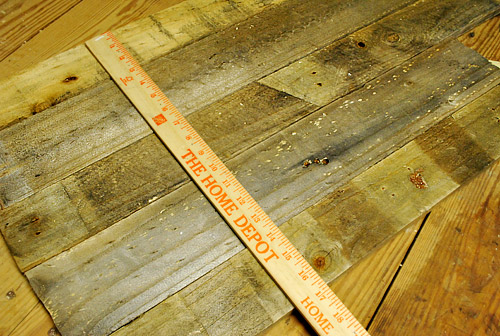
But only 5 pieces of the 14 that I fought tooth and nail (literally) to free would work to create that width. Meaning that in one and a half hours I had only wrestled enough wood to make about two feet of tabletop. Wop wop. By my math, that means it’d take me about 9 hours to get all 12 feet of tabletop free. And that’s only if my 5 pallets actually contained enough “perfect” pieces to provide all of the wood I needed to get the exact same width all the way down the 140″ countertop (an unlikely scenario considering I had already stripped one palette entirely to get these 14 5 usable pieces).
So as much as I loved the whole “reclaimed pallet wood” idea, all signs were pointing to “give up on it already.” And when I told Sherry about my doubts – how much time it would require, how much wood was cracking and breaking, how difficult it was to achieve the right width (only around a 33% success rate), and how I was running out of material – she basically said the same thing: “oh well, you tried – give up on it already so we can figure out a plan B.” Plus she added that it might have been a sign from the universe since there are more and more health concerns over the sometimes-toxic chemicals found in pallet wood (some contain formaldehyde, which is a known carcinogen) so although we planned to seal the wood with an eco-safe poly (by Safecoat) to keep things baby-and-rest-of-the-family friendly, the whole leave-the-pallets-alone-and-move-on-to-Plan-B thing was probably for the best.
And happyily, Plan B is already underway. We’re hitting up a few local places in search of reclaimed wood and might even use store-bought white wood like we did for the entire console base if our search for something “recycled” backfires (hooray for consistent sizes and no prying necessary!). Heck, if we went with the same wood that we already used for the console base, we could even beat the heck out of it distress it ourselves (I’m not gonna lie, the idea of “testing” a number of techniques involving hammers, screws, and crowbars appeals to me). It’s not quite as cool – or as free – as the original plan, but at least we gave the pallets the ol’ college try. And who knows, I might end up using them for something else or giving them a second life thanks to freecycle or craigslist.
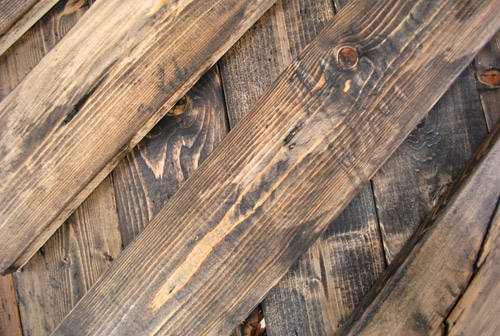
Update: We’ve made great distressed wood progress in lieu of pallets for the console top. Here’s a quick sneak peek. We’ll share waaaay more info/details/videos about that process when we put everything together and reveal the finished console. Hopefully before Christmas. Just kidding, hopefully by early next week (is it just me or is this project taaaaking forevvvvvver?).
In other news – we (and by we I mean Sherry) finished staining the exposed sides of each console. You know the ones that have little shelves for easy-access storage that were last seen here.
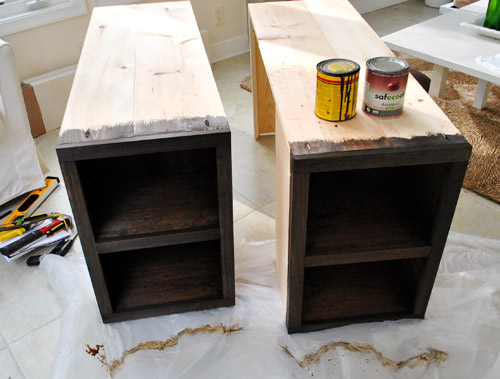
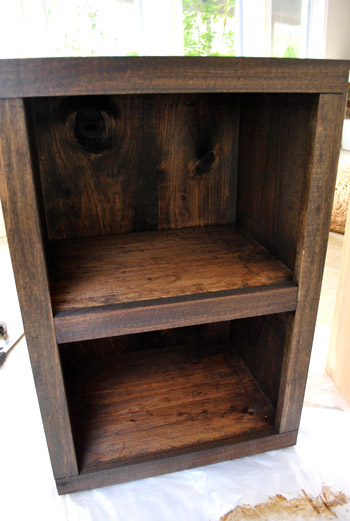
That picture above is a little dark just thanks to the angle. Here’s a more true to life shot. Yummy and warm, right? Wait, are grown men allowed to say type yummy?
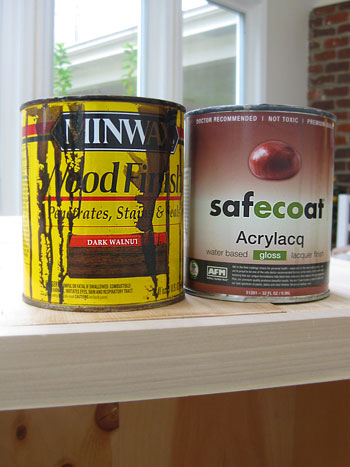
The staining part of the project was 100% free since Sherry was able to use leftover materials that we already had on hand: Minwax stain in “Dark Walnut” and Safecoat Acrlacq (which is basically the water-based eco version of polyurethane).
Since most of the console will be hidden behind Karl or under the eventually-completed tabletop, the only thing that needed to be stained was the shelves on the two exposed ends (once it all gets put together all the other exposed parts will be stained as well). So Sherry parked herself in the sunroom – which is sealed off from the rest of the house so she doesn’t have to worry about Clara inhaling anything – and did two coats of stain (which she applied with a foam brush and wiped off five minutes later with an old rag). Find more how-to-stain details here.
Then the next day she added two “thin and even” (her favorite words to describe anything involving paint or stain – she stressed them like you wouldn’t believe because they can make or break things) coats of the Safecoat Acrlacq with a brush. This seals in all the gross stain fumes and creates a water-based low-VOC and non-toxic “shell” that protects the wood and blocks off-gassing (as opposed to high-VOC oil-based poly) so it’s nice and kid friendly. You might remember that we (Sherry) also used it to refinish Clara’s dresser here.
We’re glad that the wood grain shows through for a varied and rustic look. Since the living room is a bit more modern than we’d like, adding hefty pieces with “authenticity” like this will help balance things out.
So we’ll hopefully be back with a big the-console-is-fiiiiiiinally-finished post as soon as we make some headway on the top. In the meantime I can be found murmuring sweet nothings at those freshly stained shelves. Seriously, can my wife work some serious magic with a rag and some stain or what?
Pssst- Confused by the console? Learn how we built it here and here. And of course we’ll share even more details when we finally piece this thing together and call it done. Soon hopefully, because I am so ready to stick a fork in this baby.

Leave a Reply