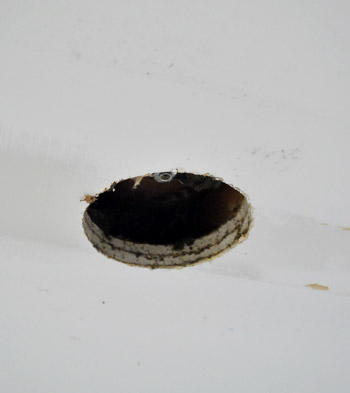
Holey moley. Our ceiling was having a little hole problem after some electrical wizork last week (warning: $herdog is in full effect in this post)…
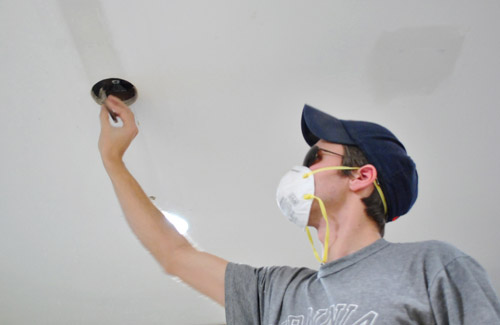
So we did the normal thing and donned sunglasses and hats along with breathing masks. Why? Because we can’t find our safety glasses (book shoots = can’t really find anything). And ceiling dust is gross when it’s up your nizzle.

Then we got our patch on. I’m the designated Spackle Wench in our family, but John has longer arms, so he helped me by doing step one: lightly sanding the outside of the holes we were patching.
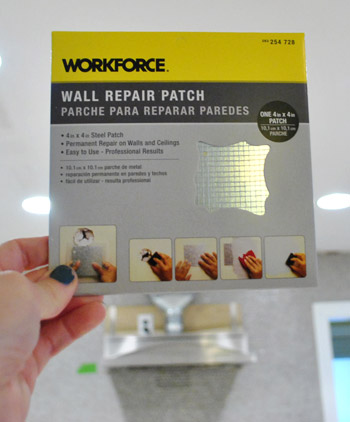
Then it was time for these guys from Home Depot. They’re basically a wire mesh patch that’s stuck to sticky paper. You stick it on the hole firmly, spackle over it, sand things down, and paint. Das it. They really make things pretty easy – even on a ceiling (the most notoriously annoying plane to work on in any room). Hardest part: gravity. More on that later (there’s video evidence of my struggle).
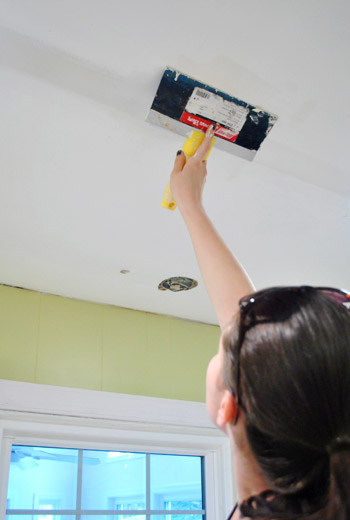
After the mesh patch is stuck up on the wall (darn, no pics of that, but that’s all in the video), just get some spackle on the biggest putty knife you have and squish it all over the mesh pad. Smooth it as much as you can with the spackle knife, but know that sanding everything down afterwards is when you’ll get the finished look you’re going for (so it’s always better to build things up slightly more than you need since you can always sand it down).
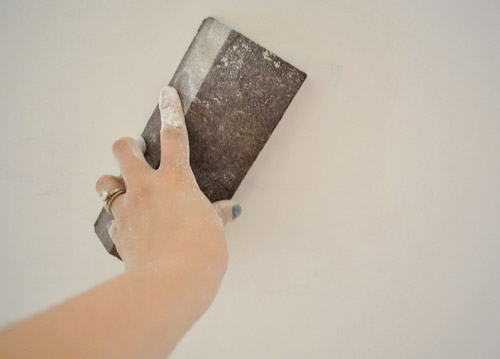
Then just wait the recommended drying time and get to sanding. I like to use a sanding block when it comes to sanding large planes like walls and ceilings, just because it keeps things straight (sandpaper is so floppy that it’s hard to keep things as rigid in this case, but it’s great for sanding furniture since it flexes to follow the lines of those items, like the legs of a chair).
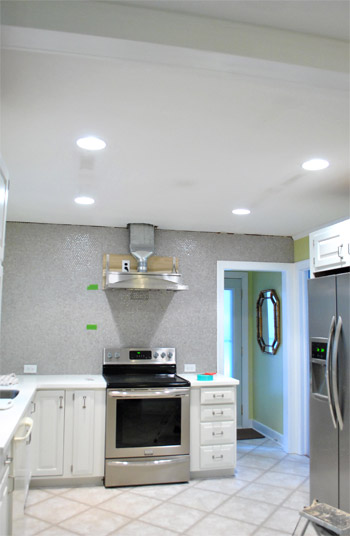
After sanding everything (and sweeping/vacuuming/showering to get the white powder off of everythingintheentirekitchen-urgh!) it hopefully looks like this. See the three dark-ish areas where those holes used to be? They just need some paint (along with other dirty areas of the ceiling that got grunged up under the old fluorescent lights).
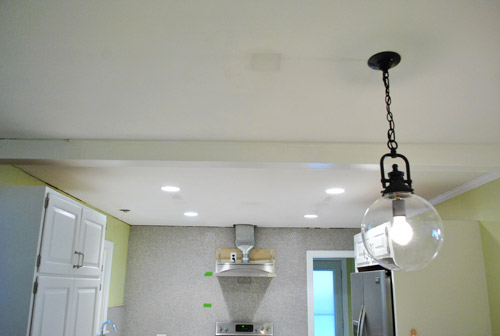
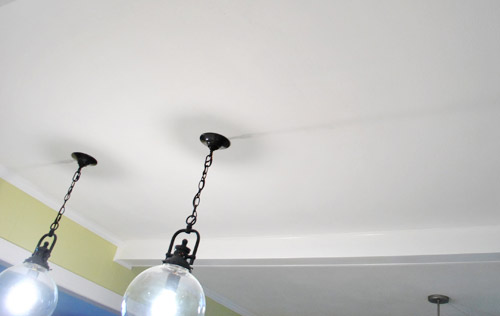
Here’s the hole next to the new pendant lights that we patched too. Oh and see the one over the sink- that’s still waiting for a fixture, so it stays. We’re on the hunt so we’ll keep you posted when we plug that guy up with something light and pretty.
Two coats of ceiling paint later (bless the previous owners for leaving that behind for us), any evidence of those old holes were history:
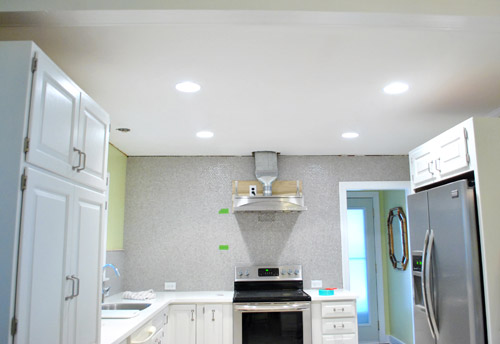
Here’s the other former-hole next to the pendants after paint. See it? Me either. Huzzah!
And here’s a video. Admittedly, things got a little wonky (falling spackle, shrieking Sherry, an offhanded mention of a slug, etc). Yes, there are outtakes right in the middle of the thing. But it kind of perfectly captures the whole process. You’re gonna get messy, and it might take a few tries to get things to stick. But in the end, you can totally get ‘er done. As in, this is about a 2 on the difficulty scale. So put on your Brave Girl Underoos and get ‘er done! Or your Brave Boy Underoos if you’ve got those.
Hope that comes in handy for ya. Next up in the kitch: shelf planning and hood painting. Hootie hoo. Then floors. Momma’s excited. Bring on the colorful plates and bowls! Ah accessorizing, the best phase of every project. And the cork – that’ll be a room-changer for sure. What are you guys up to this week? Any hole patching? Shelf building? Painting? Secret project-ing? Spackle-dodging? Tell $herdog all about it.

Nathalie says
Hi guys, I love how you transformed your kitchen into such a beauty, it’s really inspiring. Being a little perfectionist myself I could not help but notice something though: why is the shadow that the hood is throwing not symmetric? Since the lamps built into the ceiling are positioned on both sides of it, it should be the same on both sides, right? But the shadow has a larger angle on the right side than on the left. Or maybe I am just being ridiculous. Anyways, please keep going I am looking forward to so many more cool projects to get inspired from :-) Nathalie
YoungHouseLove says
We noticed that too. The stove isn’t centered on that wall, actually, so it isn’t centered on the can lights either. That’s why the shadow isn’t casting equally either.
-John
minda says
you guys seriously crack me up…thanks for posting the “real video” and providing reassurance that even pros like you end up with building materials in unexpected places sometimes.
Alison says
Brave Girl Underoos! I died reading that, going to be saying that to myself all week now :)
We have crazy holes in like every room of the apt after doing some electrical work, and I’ve been waiting (soooo patiently for soooooo long) for my husband to take care of them but after reading/watching this I’m thinking I can just don the underoos and do it myself, so thanks!
YoungHouseLove says
Aw, you’re welcome and good luck!
xo,
s
Lisa says
Thanks for the Holy Moly tutorial! I watched your video, took notes and then went to work patching a hole left behind in our ceiling after my husband repositioned our ceiling fan a few months ago. It was my first time using spackle! Love your site – thanks for all of your hard work.
Ashley says
I’m a little late to this party but you just reposted this link from your bathroom breakdown! I definitely need to patch a piece of missing plaster on my wall. Way to go seller’s for leaving that mess! Anywho, that wall patch looks like an awesome place to start. I looked it up and it says no sanding… but you sanded? It lived through the sanding?
You guys are awesome – and I probably would have putty eyebrows if I had to put it on the ceiling. :D
Ashley
YoungHouseLove says
Oh yes, I put the spackle on a bit thick so I could sand it all smooth! It looks great. Good luck!
xo,
s
Ashley says
Yay! Thanks!
snosie says
I have to say, perhaps this (and your grouting post) have been the most useful (as in, I took in what you said, and did it! rather than took it in, and went, yep, that’s crazy and I’ll avoid that like the plague!) So thanks… I’m now the expert in the aisles of Bunnings (Australia’s version of Home Depot I think) and the poor Bunnings man just looks bewildered whilst I confidently answer questions bahahaha
Ashley (A Different One Than Above)) says
Hey guys! I followed the link from the bathroom post, too. We’re also buying a house, and it ALSO has a lot of holes in the plaster (weird coincidence!). But the biggest problem is a large hole that’s about a foot wide and 8 inches high. Do you think I’d be able to patch something that large with this method? Assuming I could find a patch big enough, that is.
YoungHouseLove says
With something that large you might be better off putting a piece of drywall in its place, rather than relying on a patch (since over that large of a space it might sag). We dealt with a similar sized hole in our bathroom that you can read about here: https://www.younghouselove.com/2012/04/blue-light-special/
-John
Ashley (A Different One Than Above)) says
Would we have to pull out the wooden lath boards so we could attach the drywall to the studs? Or could we put the drywall over the lath and then just spackle until it’s even?
YoungHouseLove says
I think you could drywall over the lath. Never tackled it though, so maybe google around to be sure!
xo,
s
Ashley (A Different One Than Above)) says
Cool. Thanks for the help guys! :-D
PennySmith says
Consider yourself lucky you don’t live in a house/area where the ceilings are textured! I swear they do it to keep dry walkers busy, it’s this texture that is created by splattering compounding, and troweling about, or something, subtle, but not all that simple! Flat would be grand!
Cathy says
This is a note for anyone reading comments after the fact—consider using a damp sponge (I found the Magic Eraser type to work great) to smooth the mud after it’s dried a bit to minimize the amount of sanding required. I learned this tip from my father-in-law, and it works like a charm! I can’t recommend this technique enough!
YoungHouseLove says
Smart!
xo
s
deltaskye says
Just discovered your blog thanks to the 11/8/2012 Washington Post Living section. Love it! Want to ask a question about ceilings and hope this is the right place.
Any recommendations for temporarily covering some ceiling damage? Water damaged my bedroom ceiling, which consists of the plywood base plus a very old ceiling tile system. (This is a 1970s 2nd story addition to a 1923 bungalow.) Replacement ceiling tiles are no longer available, so I’d like to remove the tile system and re-cover the plywood ceiling base. In another year or so I’ll do major renovations and put in a permanent solution. (I’ve repaired the water leak.)
I’ve thought of all kinds of temporary covers short of installing another ceiling tile system – big butcher paper sheets, bit sheets of heavy cardboard, even fabric. These would be cheaper than the tiles but I’m wondering if they would be just as labor intensive. Maybe leave up the wood tile infrastructure (grid) and attach something to it?
Perhaps you or your readers have solved a similar problem.
Thank you.
YoungHouseLove says
Hmm, maybe you could use those ceiling medallions to cover it? Or fabric tacked up at four corners? I would just try a few things and see what looks best. Good luck!
xo
s
Tiffany says
Thanks so much for this post! Just had to share this last week I patched 14 holes in my ceiling!! I am also the spackle wench, maybe it’s a girl thing?… My electrician brother put in 10 potlights (and he ran into issues with our oddly constructed home, hence many more holes). He looked at me crazy when I said I planned on patching them. All done and it looks great! We used the leftover drywall circles instead of the mesh to cut costs. Gotta love having an electrician for a brother I can pay with pizza. :) Thanks guys!
Vanessa says
Question- maybel along the same lines. We are a little over a year in my hubby & I’s first home. The 2nd floor was an addition and noticed now that it’s settling..there is a crack , super thin going across the ceiling. We were told it’s bc of the settling…is this something that spackle and sanding can fix because let me tell you..right now , it looks uggggly!
YoungHouseLove says
I think you could give it a try! I’d sand it lightly, and then try using spackle to fill it (then sand that, respackle, sand again, and paint). Hope it helps!
xo
s
chloe says
After finding this video, I decided to tackle the few holes left in our walls & ceilings from having some electrical work done. You made it look like a manageable project (which it is!) and I knew what materials & which tools to buy before hand. Now I don’t have to wait (& pay) for a plaster guy to come do it before we paint our whole place. Thanks so much for taking the time to make & share videos like this!
YoungHouseLove says
So glad to help!
xo
s