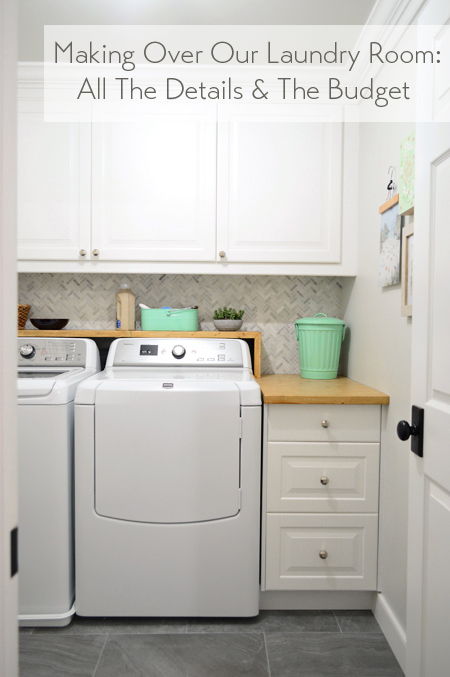
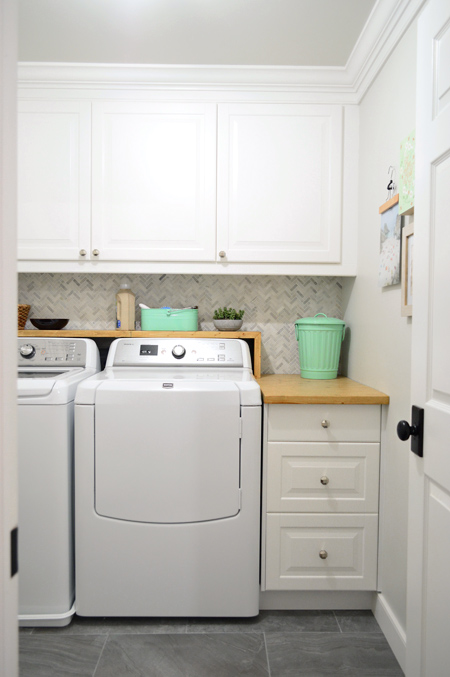
The laundry room’s finished!
And we could kiss Lesley for her idea of carving out a new dedicated laundry room. It’s like it was always there! (Plus a new glass door at the end of a formerly dark hallway with light streaming in = angels singing sound effect to us).
When we last checked in, things were looking a little unfinished, but it’s amazing what that last 10% can do for a room. Our first steps were to add the missing filler, baseboard, toe kick, and crown that we had accounted for when we installed the cabinets (to bridge those gaps on the side, top, and bottom). Then it was on to adding the missing door casing, baseboards, and the new doorknob that ties into the rest of ours. Lastly, we had a party and the under-cabinet lights were invited (and installed).
Can I just say that the under-cabinet lights are my new favorite thing? I want to cover my house with them. I want to put on some R&B and bathe in a tub full of under cabinet lights.
They currently plug in behind the washer – you might be able to see the small white cord snaking down the left corner of the room above the washer – but we have a call in to our electrician to add a switch for them on the wall by the door. That way we can flick them on when we walk in instead of using the toggle switch on the cord.
They were sort of an impulse update back when we were buying our cabinets and they were TOTALLY WORTH THE IMPULSE. I know I’m type shouting at you but I mean it. If I were talking to you in person my voice would be raised and my hands would be flapping around. It was all thanks to a reader who mentioned it was easier to see stains and spot treat them before tossing them into the wash after she added some. In summary: Twinkies are not always worth the impulse, but under cabinet lights? DO IT.
When they’re off the room is still nice and bright from the overhead light, although we’d love to add a skylight or a some solar-tube someday.
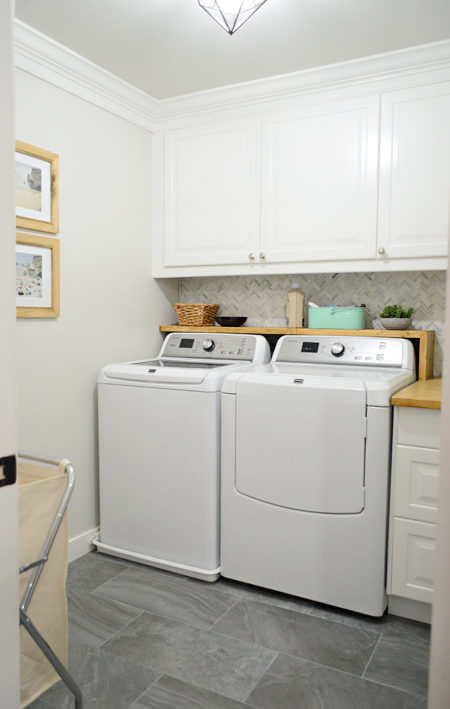
After our finishing trims, fillers, and lights were in, it was momma’s favorite part. THE THINGS! Like the drying rack, the ironing board, some art, a laundry sorter, and everything that I got to basket up and stack and pile into the cabinets and drawers.
The laundry room wants to hug it out. Look at those outstretched arms.
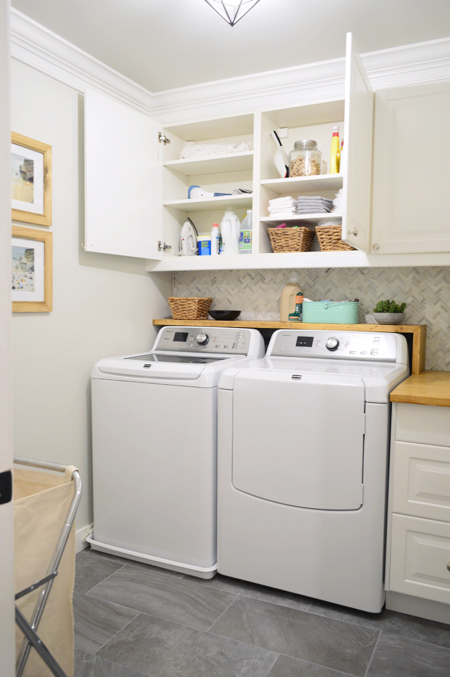
We thought things on the shelf should largely have simple functions to make life easier, so there’s a basket for lost socks (currently housing a few of Clara’s) and a dish for change and other random stuff we find in pockets before things go into the wash (if you’re a certain aforementioned member of our family that might mean Legos, mom’s earrings, and and a few crayons for good measure). We also like the idea of keeping our everyday detergent out on the shelf so it’s easy to grab (you can see that in the wider shot a few photos back).
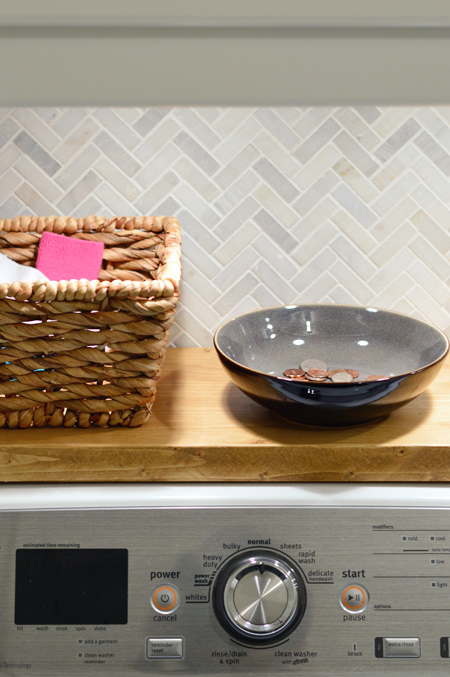
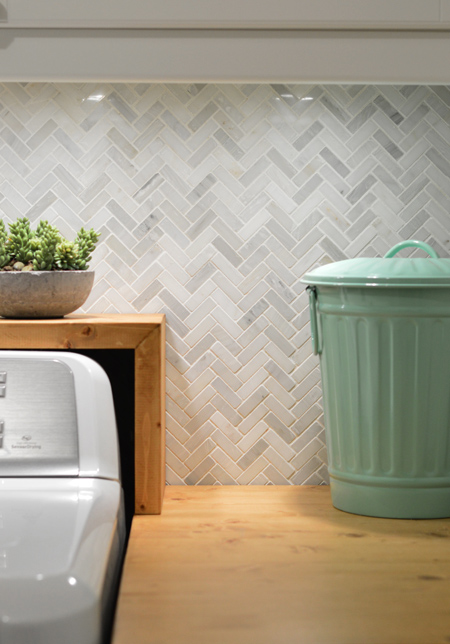
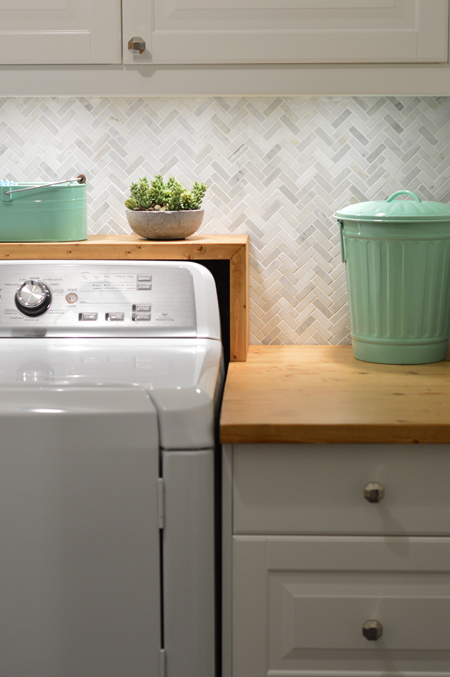
There’s also a mint green caddy to store things like lint rollers and dryer balls along with a mint green trash can which we ended up putting right on the counter for small things like balls of lint and tags from clothing or old washed-papers-from-pockets. The little fake-o succulent is just there’s to add some life to the laundry room – even if it’s faux real.
If you spin around to the wall opposite the washer, we have a drying rack. And it’s kind of a game changer. We used to just lay things outside on the daybed to air dry (or in the extra deep windowsill in the living room of our last house) so to have a devoted pull-out drying rack for hanging or draping things (or clipping them up) is pretty great.
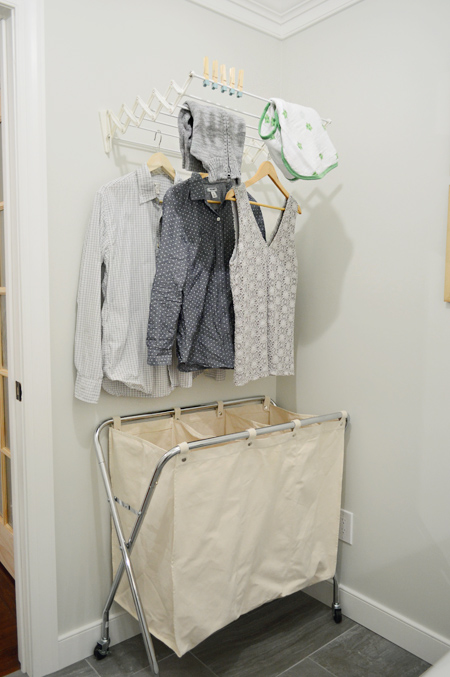
I was leaning towards ordering one from The Container Store but then I saw someone saying it was meh and I saw this one on amazon with a ton of good reviews that swayed us. It boasts over 12 square-feet of drying space for hanging or laying items thanks to the pull out design that extends two feet out from the wall. It’s so nice to have this much hanging and draping real estate. I’m officially on the drying rack train now guys. High fives! I feel like we need a secret handshake or something.
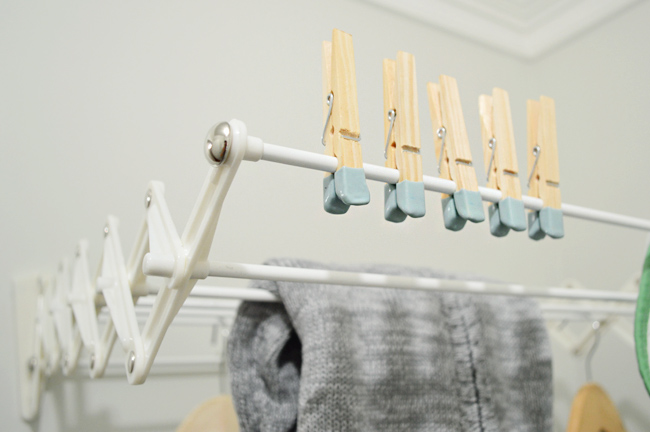
Oh and it closes up like this when it’s not in use. Stealth mode.

Underneath it we have a three-bin laundry sorter from Crate & Barrel. John’s sister grabbed one a few weeks ago and raved about it so we took the plunge. It has only been a few days but we’re drinking the same laundry sorter Cool-aid. Picture us sipping it while cruising along on The Drying Rack Express with spare under-cabinet lights in my purse.
For the ironing board we debated everything from a mini-pull-out or fold-down wall or drawer mounted one but I prefer a full sized board and I like it to be out of the way, but portable. Sometimes I just like to iron in front of the TV. We’ve used this system of two large wall hooks secured with anchors to hold it up off the floor in our last laundry area, which worked well (remember our ironing board wars? They are so ON).
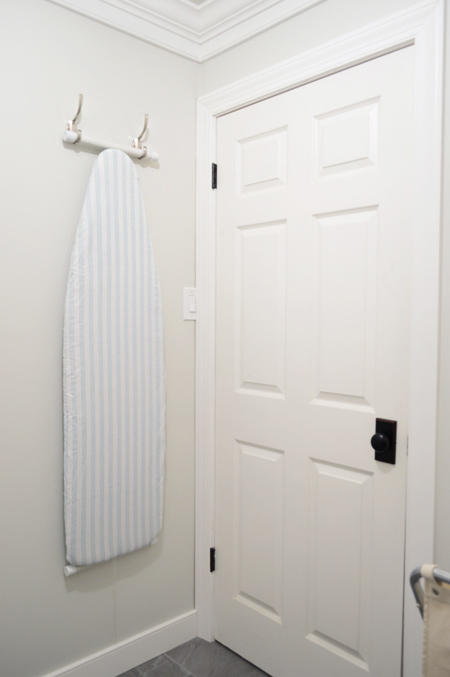
We decided to hang it behind the door on the wall (not the door itself since we worried that might rattle). The hooks stick out a little and would otherwise get slammed by the door so we got one of those small white doorstop things for the back of the door. Ignore that light switch near the door though (it’s the old hall light that we debated keeping just in case but it’s ridiculous back there so we’re going to terminate it when our electrician comes to add a switch for the under-cabinet lights).
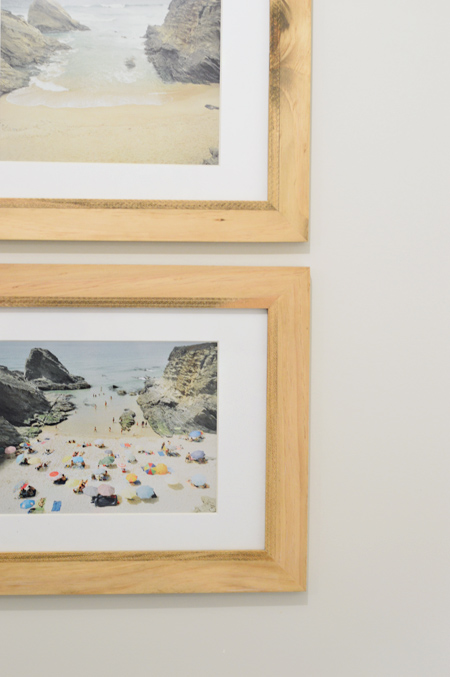
For now the art on the left side of the room is just framed pages from a book called Time & Tide by Christian Chaize (it’s full of gorgeous photography). I still have my eye on something like this by Emily Jeffords though, so there might be some musical frames going on.
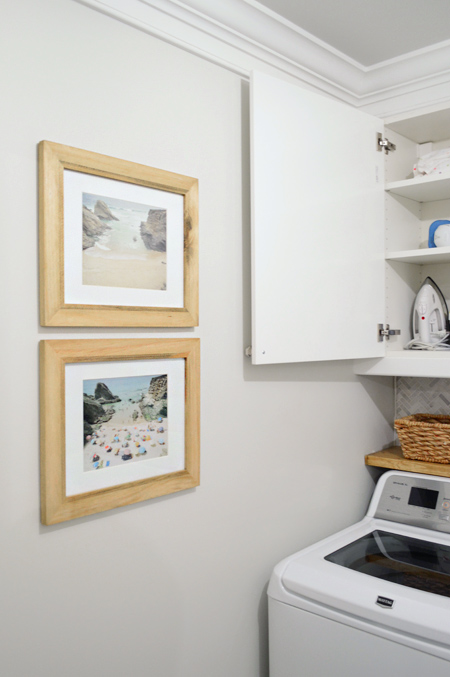
Speaking of the frames, they’re from Target. We loved that the wood tone tied into our baskets and the laundry shelf and counter, so home they came.
The other side of the room has a little more art – like a wood canvas from Help Ink that I love (it says Bee Kind with bees having a blast all over it). I also hung one of my favorite pieces of fabric (it’s an old handkerchief that a friend of mine found with the name Clara embroidered on it). Something about the old linen fabric and the embroidery whispered laundry room to me.
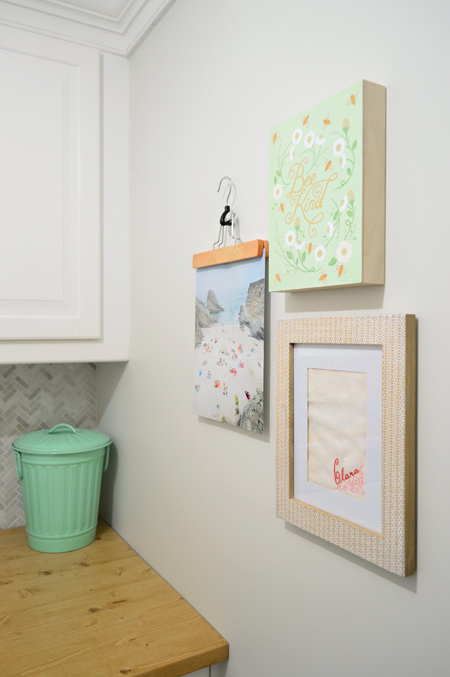
There’s also another print from my Tide & Time book that I clipped up with a wooden pants hanger. Seemed laundry-room appropriate. I’d love to clip up a Clara painting eventually, so we might have a little crafternoon bonanza ahead of us.

In my mood board I also had a printing press drawer (Clara and I collect heart rocks and I thought it would be so cute to display them in an old wooden drawer with all those tiny compartments for them) but we haven’t come across any that would work yet. They’re totally one of those I-see-them-in-every-antique-store-when-I’m-not-looking-for-them-but-they’re-sneaky-like-a-snake-when-I-am-on-the-hunt.
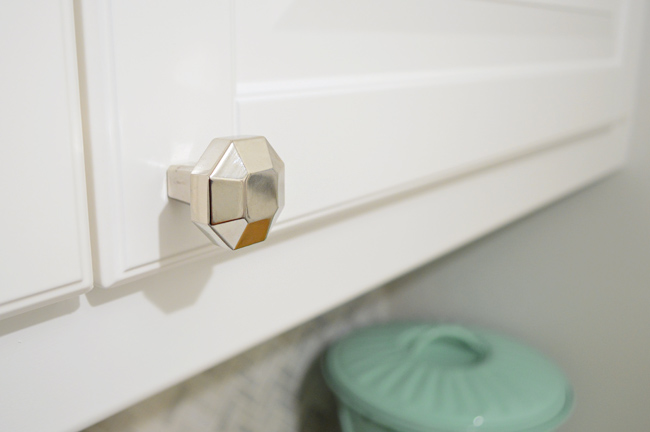
For the cabinet hardware we went with these simple octagon pulls from Lowe’s. We actually grabbed a bunch of options from Anthropologie (Fashion Show! Fashion Show! Fashion Show At Lunch!) but after holding them all up the simplicity and the nice heavy feeling of the Lowe’s ones won us over. We have two metals going on in here (I like a mix as long as each of them are present enough times to look intentional), so these guys are sporting the polished chrome look along with things like the rolling cart and the knobs on the washer & dryer.
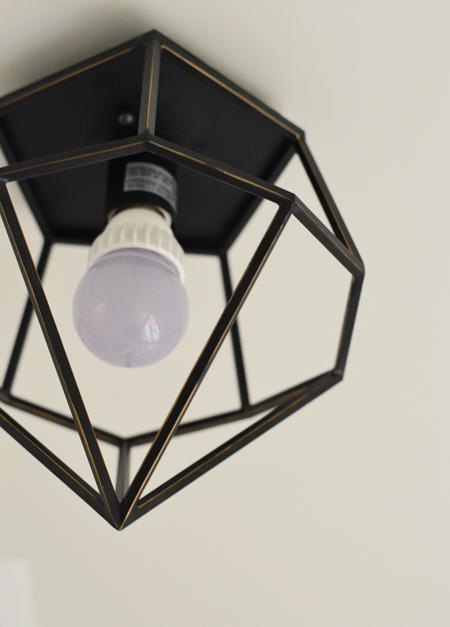
On the ceiling we went with a flush mount light from our Shades of Light collection.
We had a whiter/cooler light bulb dangling from the fixture box before we installed this light, but switched it out for a warmer LED one that makes the room feel less cold (it brings out the honey tones in the shelf, frames, and baskets – and zaps some of the starkness out of the white cabinets).
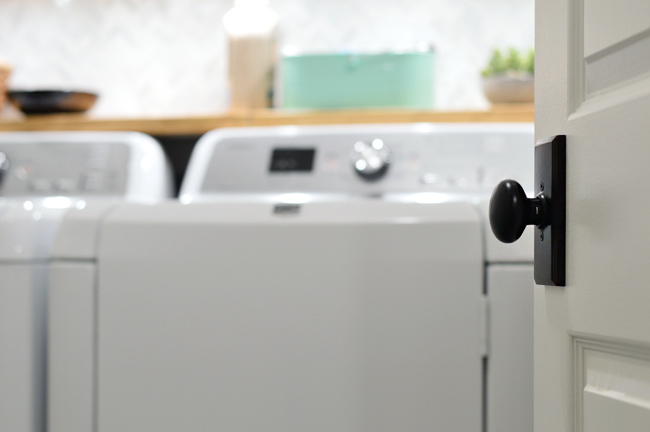
The oil-rubbed bronze doorknob and similar coloring on the washer and dryer tied it in – especially since the washer and dryer also have chrome on them – so they’re sort of a bridge between those two metals that we mixed throughout the room.
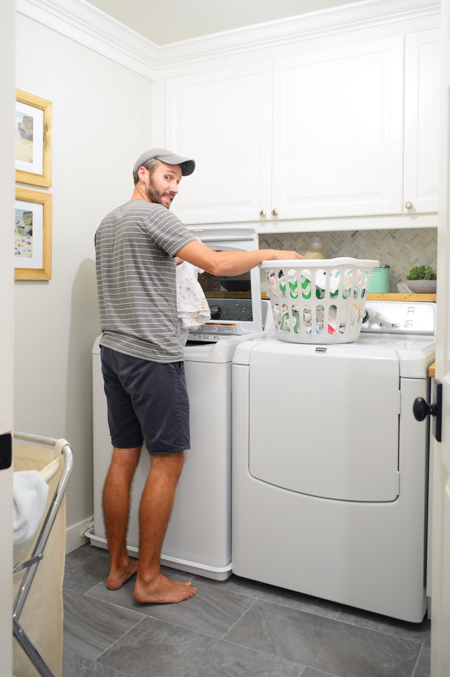
Look at John modeling the new laundry room. You’d almost believe he likes laundry…
Budget breakdown:
- Framing (labor & materials): $360
- Electric (labor & materials): $400
- Plumbing (labor & materials): $375
- New dryer vent: $87
- New HVAC vent: $59
- Drywall & insulation: $298
- Drywall mudding: $84
- Sub-floor materials: $30
- Tiled floor: $451
- Ikea cabinets, filler pieces, toe kick, and under-cabinet lighting:
$862$802 (we went with single puck LEDs instead of the long strip ones we originally got) - Appliance re-install: $15
- Tiled marble accent wall: $281
- Shelf & counter (including stain testers & stain): $97
- A new glass door for the hallway + framing and hanging two doors: $297 (new tools included)
- Trim, crown, baseboard and door casings for both doors + two new doorknobs: $268
- Function/organization stuff (including baskets, our laundry sorter, the drying rack, hooks to hang ironing board, etc): $112
- Finishing touches (like the overhead light, cabinet hardware, wood frames, etc): $176
- TOTAL: $4,192
We think it would be really fun to have a realtor come and estimate what she might list our house for so we can see how much value this reno may have added (along with the other stuff we’ve done over the past year).
And since we’re listing stuff, I think our favorite functional updates are the laundry sorting cart, the drying rack, all the storage in the cabinets and drawers, and the added countertop/shelf surface we’ve gained. When it comes to things that make it feel the most upgraded, the tile backsplash, under cabinet lights, crown molding, and soft-close doors and drawers definitely elevated the room for us (so if you have a laundry zone that could use a little love, those might be nice add-ons).
Couldn’t leave without a little before & after action. Remember when this was our laundry area back when we moved in?
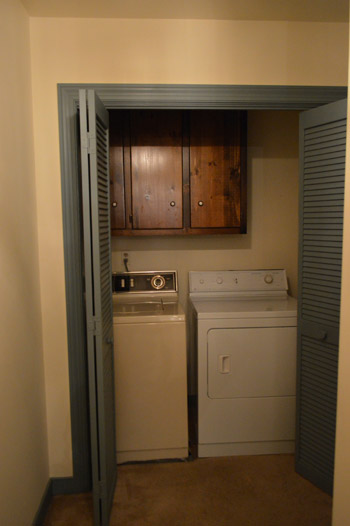
So. Much. Better.
Thanks for coming along on this winding and long-winded laundry room renovation, guys! It’s one of our favorite house changes so far since it’s literally a room that didn’t exist before. We’re more gleeful than… I don’t know… a pigeon with a hotdog? A dog with a blog? A kid in a candy store without adult supervision and unlimited funds? It’s up there.
Psst- Wanna know where we got something in our house or what paint color we used? Just click on this button:


Laura says
I have been so excited to watch this project unfold and love the finished product. Congrats you guys! I really admire you for taking this bold step when the laundry room wasn’t even really on your radar. You executed to perfection. Bravo! I’m keeping these ideas on the back burner for when I redo my laundry closet (although mine is destined to stay a laundry closet – no space to create a baller laundry room like this).
Smitha says
Did you chalk paint the cloth pins? They look unique. The whole project is amazing.
YoungHouseLove says
They’re from Bed Bath & Beyond (those tips are rubber so they grip things better :)
xo
s
Raisa says
This. is. awesome. ..and everything great everyone before me already said :-)
Question: How did you construct the toe kick? We are updating our kitchen (taking points from you guys for cheap easy amazing DIY upgrades/updates) and some of our toe kick is missing at the bottom of our cabinets that meet in a corner. I don’t know. It’s strange to me. What material did you guys use? and how did you add it to the base of your cabinets? Thanks.
You guys rock!
Erica Ginnett says
Whoa, whoa, whoa! What do you mean Twinkies aren’t always worth the impulses?! Okay, okay. Maybe not always with Twinkies but Swiss Rolls….chocolate and cream? Chocolate cake and cream rolled and dipped in chocolate? Totally worth the impulses every time!
Oh and PS…Such an awesome job with it. I agree about a full size ironing board. I think a nice woven rug would look nice too, but I total get the wait until the floor is too cold. Cold floor are nice for bare feet in summer time. (Bare feet for summer and Bear feet for winter!)
Whitney says
It looks gorgeous! I might actually not hate doing laundry if I did it in a place that looked a quarter as nice :)
Melanie P says
Major improvement. I love having a second floor laundry room, and when you first revealed house #3, I had high hopes that you would do something amazing to brighten yours. You definitely exceeded my expectations by building the room out and adding that door. Well done!
Kendra says
Dude, you built a room! That’s awesome!!
Rob B says
Where are the shut off valves for the washer? What type did you use? I’m interested in remodeling laundry/service porch area. Would like to install valves that shut off when the washer is off. It would take the pressure off of the water lines.
How difficult are the valves to get to? Really like the maple countertop. I take it you have a raised foundation so you can drain the washer in case of an overflow?
Was it necessary to drill through the floor tile, or does the drain from the pan go out the back wall?
Would enjoy hearing your response.
Cassidy says
1) Some posts, especially the carpentry ones, are very technical. I breeze through them, but always admire the before and afters. I can see how some specific readers would appreciate the details, though. Maybe leave the photos, budget breakdowns, lessons learned and funny mishaps in the main post, then have a technical file where people can click to get the step by step? Then, the “tech specs” can be more direct/instructional instead of a wordy narrative — probably easier and quicker for you to write, too. Maybe make them into printable .pdf’s?
2)What about guest writers? Up-and-coming bloggers who could use your mentorship and traffic?
3) What about hiring an assistant?
4) I wonder if you have a lot of time to read or interact other/new blogs to get ideas (maybe this is something an assistant could do?) Or, have you ever thought about taking a professional design class or attending a conference? I think you two are marketing GENIUSES and your personalities are so awesome and your writing/photos are great and your carpentry/sewing/modgepodge skillz are dynamite . . . you’re the best of the best at what you do, but maybe you’re tired because you’ve stopped learning new things?
AJ says
Love the under cabinet lights (definitely putting those in when we finish up our laundry room). Oh, and I have that same drying rack! It’s awesome, especially for my cloth diaper covers. We put ours on the wall right next to the washer so I can let things drip straight into the washer tub.
Nelle says
I love it! What a gorgeous space! I want to do laundry in there too! So light and bright!
Shey says
What I did with my under cabinet lights is much simpler than the electrician. Target sells a remote for lamps. I plugged my lights into the remote wall socket, then used double stick foam tape to attach the remote to the wall right beside my light switch. Cost only $10, and I think it’s great!
Becca B says
YOU GUYS! This laundry room looks fly! I’m in love with the light wood accents; plus we have the same printed frame, which just makes me happy :)
Nikki says
Just amazing! You guys are awesome! Cant wait until we do our laundry room… one step at a time though!
http://www.endlesshouseaffair.com
Nancy G says
I’m having trouble figuring out where you stole this space from. Would love to see the before and after floorplan. Maybe I have space in my house which I’m not even aware of! Maybe I need to go dig through old posts?
wendy says
Wow… seriously crazy before-and-after! It looks AMAZING! My poor laundry room needs some serious help. Thanks for the inspiration.
sharon says
I LOOOOOVE this room! It is beautiful and functional and amazing. My laundry room looks almost exactly (minus the blue) like your before picture :) I’d love new cupboards in our closet laundry for storage, yours are a great option. So awesome guys!
Dina B says
Nice share :) I want to get a drying rack like that on the picture. It’s kinda cool!
Erika says
Love it! And I may have to get myself one of those hanging racks so I can stop hanging my stuff all over the house to dry!
Jody says
Amazing transformation, I love the “after”! I absolutely love the mintgree. trash can and container! It really adds a pop of color to the room. I hope I’m not overlooking the answer to this somewhere, but where did you find them?
Amelia says
laundry envy!
Viola says
Its beautiful:))) good job :)
Callie says
This might be one of my favorite projects (tied with the deck on the 2nd house) you guys have ever done!
(Oh actually, I guess the laundry room and deck should be tied for 2nd. Clara and Teddy are tied for 1st place of all your DIYs.)
Nikki says
Looks great! Do you mind if I ask why you opted for no sink in the laundry room?
Thanks!
http://www.endlesshouseaffair.com
Amanda says
It looks fantastic!!!!
I’m not sure if you considered a new ironing board cover — when I redecorated my laundry room last year, I threw a new cover on my ironing board and it made a world of difference! (There’s something about the covers that ironing boards come with that feels dated to me — mine looked like something I would find in my grandmother’s basement!)
Not that its current color isn’t charming — it has a relaxed beach house feel which totally goes with the room.
Amanda Smith says
I love your blog and the work you put into it. The laundry room is beautiful and refreshing. I also love all the little details you added to the room.
dana says
Are those Weslock Elegance doorknobs by chance? I am looking at those to replace our brass ones, but in nickel. Do you like them?
Ashley B says
This looks amazing! I don’t have that big of a budget for a laundry redo but there are so many things I could use for inspiration. Our laundry is actually in a “back” hallway. So we also have our entry from the garage in the same hallway. Bonus of not having to add or remove any walls.
Julie says
I’m so jealous of your laundry room right now. Our washer/dryer is set up in the garage underneath a flickering light that makes you feel like you’re in a disco (and it truly makes me nauseous).
Oh and I love that little green garbage can on the counter. It’s freakin’ adorable! Where did you get it at?
Carla Kohkwes says
I am sad you are gone. I loved whatever and whenever you chose to post. Loved the ideas you gave me for my hone and the homes of my children. Loved watching the progress of your home. My favorite blog is gone. Sad, sad, sad. :(
Shelley Fosse says
k. First, love your blog. Love your posts. Recognize it is hard to make money blogging and keep the same blog. This seems to happen to all the blogs I fall in love with and then they get “big” and sort of lose something. But whatever, success comes with a price. I’m sure you will find a way to navigate this well.
Now for the real comment-thanks for the reminder that the last 10% makes a huge difference! It’s where I often fall down, get distracted and want to move to the next thing before I’m 100% done with the last one. Here I solemnly promise to finish the two tiny details of my kitchen update before I can paint my dining room table!
Skye B. says
The rooms looks great. It’s got a very clean look. Ever think about painting the ceiling a different color? Mint green maybe?? :)
Sarah says
Not sure if you’re reading the comments during your break, but I have to say this either way. This lovely little room may be my most favorite thing you guys have done. That wood! Those tiles! The art! It is all just so charming. Swoon.
Nancy says
I love this. I was only going to paint the walls in our crusty basement laundry room but watching your room go up was inspirational. Now, my husband has put in a bead board ceiling, I put up a super snazzy light fixture, we fixed the walls so they are not so shredded, and we are putting down new flooring! and real moldings and baseboards! We have a weird window that keeps us from installing cabinets and this waterfall shelf allows for some storage I can actually reach, I love it. And you know what? I’m really happy you blog and hope y’all can run your business and your family how you like. I don’t have time to read something everyday. There’s a comment way up there by Cas, I agree with her, I don’t want to repeat it all.
God bless us all.
Catherine says
The whole room is amazing, but the pants hanger is my favorite! I am definitely going to do this to tack up some of my daughter’s artwork in the laundry room. Your old clothespin chandelier is also on my to do list for my rather unfinished laundry room too :)
Evemarie says
Your blog is in that small percentage that garnered business opportunities. Good for you! It still shocks me when successful bloggers are trounced by once admiring readers. Many of us are so happy for your family. You don’t owe us anything. Post when the creative juices flow and you can. Your life has changed so why do people expect the blog not to? Also remember as you grow, some info ceases to be safe to put out there the second it is happening. Don’t apologize for that. Bottom line is family first and all that encompasses it.
Tracy says
I really have enjoyed all your posts! Thank you for sharing your family and homes!
Holly says
Ahh! I knew the mint green tiny trash can was one I had seen somewhere recently :) I love it!
Stacy {Woodsy Weddings} says
So pretty! I really like the pop of mint green and the knobs on your cabinets!
Tardevil says
Missing your blog.????????
Kate says
I don’t think I’ve ever been jealous of someone’s laundry room… until now.
Linda says
Oh! LOVE! This is my dream laundry room and I like everything you did to it. The tile really is a beautiful touch that I had not thought about.
I am a new reader and found you through Pinterest. I am going to make your no sew window panels from Pinterest.
Debbie @ PinkTexasChick says
Big wow! As always you guys do such an awesome-after for an eeeeesh-before. I’ve been wanting a drying rack myself but am hesitant because of various reviews I read. Looks like I’ll be ordering the one you guys bought.
Hannah says
I’m not sure if you’ve already answered this do i apologize if you have.. But can I ask where you got the backsplash from? Or what it’s called?
Valentine says
Hannah, I’m not sure what the link is exactly, but they did mention it in one of their previous posts leading up to the finished room (I’m thinking late spring or early summer).
Abi =) says
I absolutely love the end result of the laundry room. What color did you painted the walls? Can you please tell me the brand name, color name, and where you bought it. I been trying to find this color, I LOVE IT!!
Becca @ Somehumbleblog says
Great job! I know alot of hard work went into this, and the tile is stunning, but I am particularly partial to the small touches. They make all the difference. The addition of mint is so refereshing and pretty, and it’s very clever to hang artwork on a hanger in a laundry room :)
Robin says
Just found your blog and love your ideas!!! Thank you!!! Just wondering what paint color you used for your laundry room! I’m obsessed with this room and the feel of it! Every laundry room should feel so clean! Thanks
The Art of Being Human says
Yesterday in the space of 10 minutes (or less), I randomly found your blog, fell in love with your laundry room, discovered you had a book on Amazon, and purchased said book.
Sad to see you’re taking a break from blogging – it looks like you’ve created something amazing here. I can’t wait to read your book, and I’m looking forward to getting chance to read back through past blog entries.
Seriously though, your laundry room is like the most beautiful thing I’ve ever seen, and I hate laundry. if I had a room like this, I’d purposefully be soiling my clothes just so I could spend time in it! ;)
Meghan says
What kind of lighting did you use under the cabinets? Are they the new LED lights? LOVE!
Elv says
I love your new laundry room, it looks pretty and fresh. I would love to turn my landry room aka, the laundry dungeon, in something equally fab! Well done! :D