Parking our car got a little more scenic this weekend with the completion of our carport pergola. Or, cargola (pergolaport?) if you will.
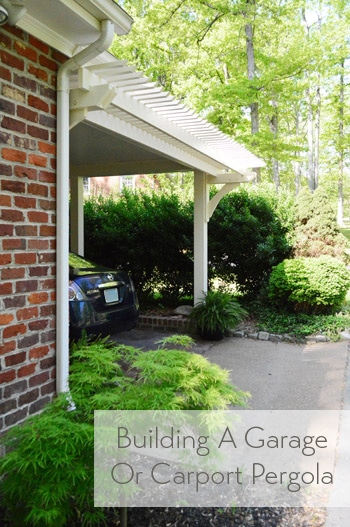
Last week we talked about dressing up our carport with the help of some pergola plans from Workbench Magazine. The plans took a lot of the guesswork out of it, but there was still plenty of actual work. All-in-all it took about 4.5 days of work (the half day was spent picking up the materials, which we talked about here) but I’m gonna boil it down to one simple post. So here we go.

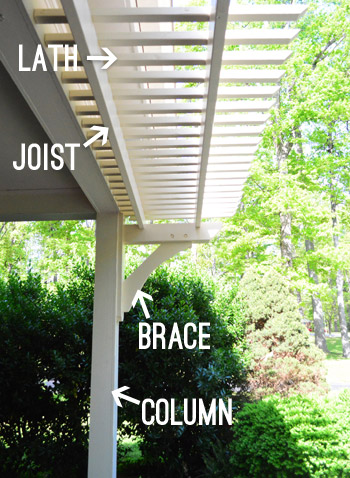
What you need to know is that there were four main parts to this building project: 1) the column, 2) the braces, 3) the joists, and 4) the lath.
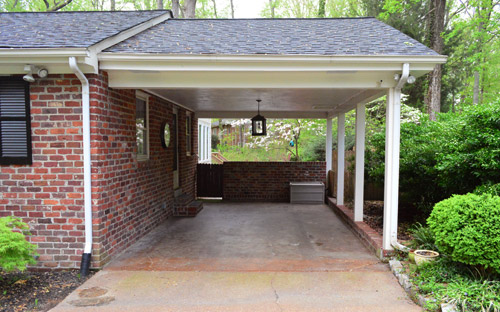
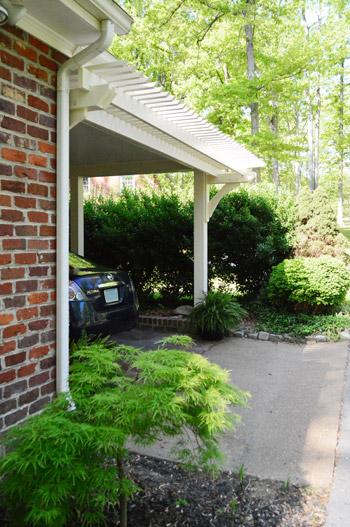
Most attached pergolas don’t have the column in the equation (they just attach to the walls beside or above a garage door or a french door), but because our carport only had posts on the left side (see below) our first assignment was to add one on the right to add symmetry and create a place for the pergola to attach.
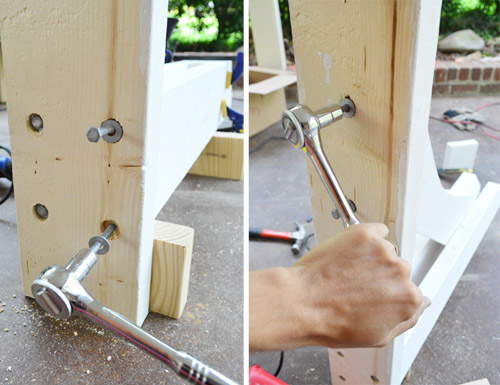
To attach a post to our concrete floor, we used this post base which is built for situations like this. And I got to break out my hammer drill to make a pilot hole for the concrete anchor, which was a good time. I bought the hammer drill back when I was starting the deck, but never ended up using it, so I’m glad I had it around because I needed it’s drill-plus-hammer motion to get through the concrete. Then I hammered in a wedge anchor and tightened the nut to keep it in place.
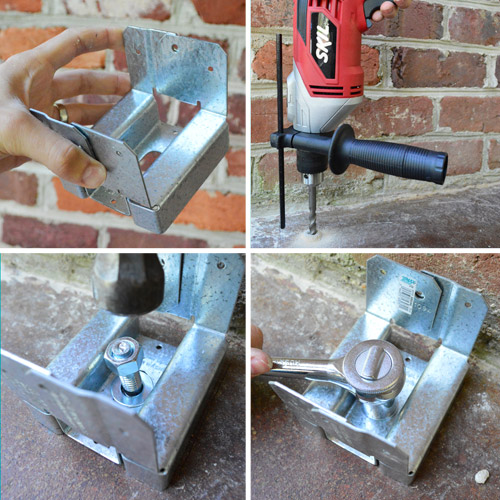
I attached another metal post base on the ceiling (this time just using heavy-duty screws) so that we could slide a 4 x 4″ post right in there and nail it into place.
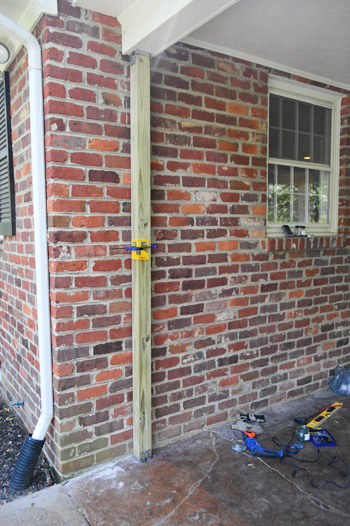
Since that post is neither very attractive or big enough, we used the same method as we did when we beefed up our porch columns. They didn’t sell any pre-primed pine in long enough boards, so we primed and painted the two 1 x 6″ and one 1 x 4″ boards before hanging them. Here I am using our nail gun to attach the boards in place and give the column a chunkier look.
After we caulked the seams and added some touch-up paint, our first of four steps was officially checked off the list. And I should add that this took me the better part of my first day (with occasional “hold this with me” and “take a picture of this step” and “help me paint while Clara naps” assistance from Sherry).
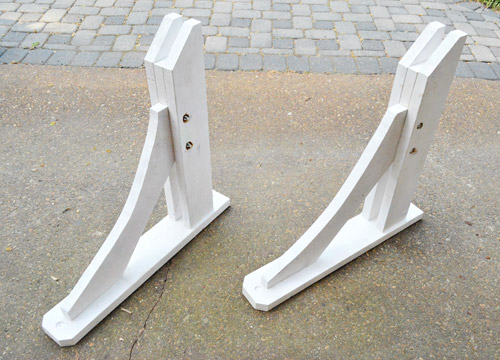
The other part of day one was spent getting started on my braces (or “knee braces” if I’m feeling formal). These were by far the most complicated of all four steps, since there were four sub-step when it came to building each one. We originally hoped to purchase these pre-made, but we couldn’t find any in the size that we needed. In the end, I’m glad I made them because it was much cheaper.
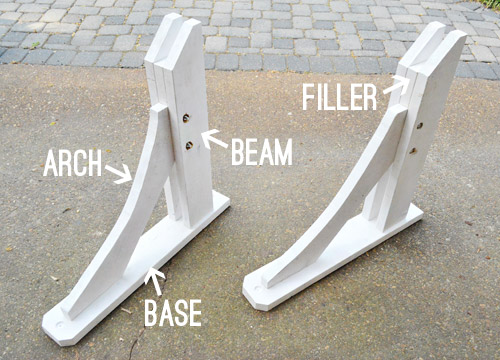
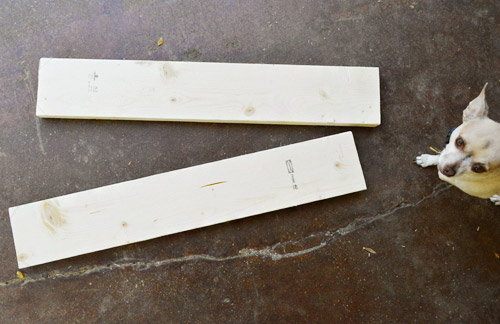
Some of the braces that I saw online were going for $50 – $100 a piece, depending on the size. Each of mine were made from one single 12 ft piece of 2 x 6″ and a few bolts, making mine about $22 each. So the first step was to cut my 2 x 6″ into the lengths that my plans called for. Burger double-checked my work.
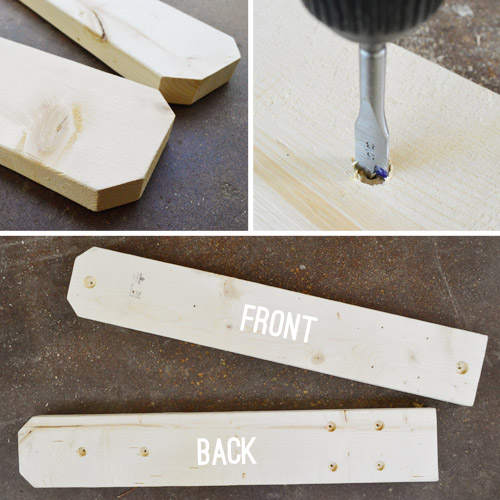
First up was what I’m calling the “base” (the part that rests against the column). They were pretty straightforward. I cut some decorative notches on the bottom with my miter saw and then used some hole-boring bits to make a few places on each side to countersink my bolts. Again, my plan took a lot of the mystery out of what to do, but it was still a bit tedious.
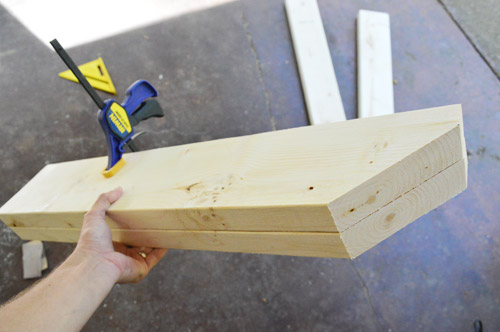
The next pieces I tackled were the “beams” – the parts that would stick out from the base at a 90° angle. They were really easy, which was lucky because I had to make four of them. I actually clamped two together when I made the cut so that I’d be sure the beams that got paired together on the same brace were absolutely identical.
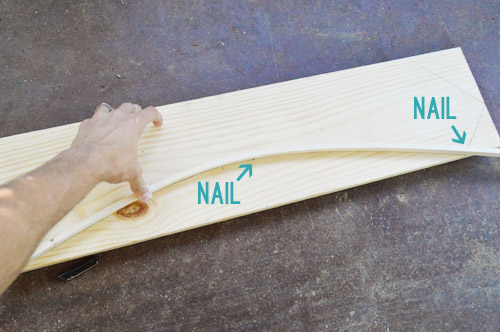
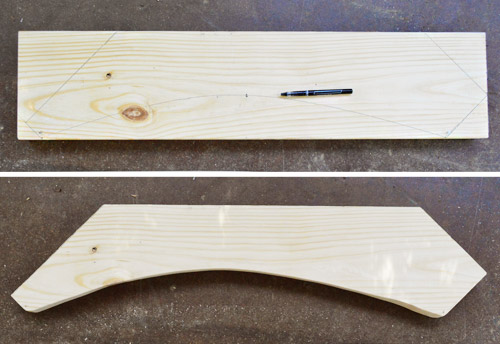
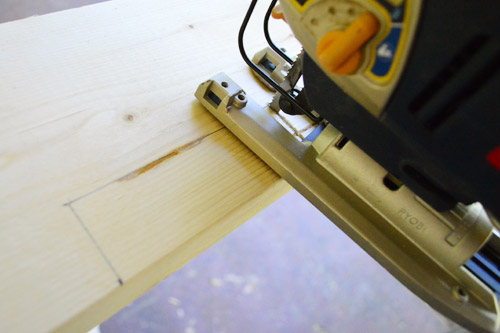
With the easy stuff out of the way, I turned my attention to the “arch.” Yes, a dreaded curved cut. Cue the dramatic music. To mark my curved line, I tapped some temporary nails into the wood at both ends and at the middle/top of my curve. Then I used a thin piece of scrap wood (a small piece of PVC works too) and bent it over my nails to create an arched shape. That held long enough for me to mark the curved line between my two nail-points.
Next was the challenge of actually cutting that line. Since I don’t own a scroll saw, I had to rely on my jigsaw. It did the job okay, but since it’s sometimes hard to keep the blade perfectly vertical, my arch had a couple of wonky spots (not majorly wonky, but wonky enough that I noticed them) so we sanded the heck out of it to try to smooth things out.
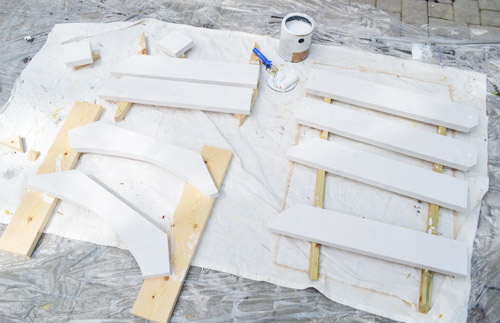
After some vigorous sanding they were a lot better looking, and some primer further cleaned things up (we primed all of our brace pieces together once they were all cut out).
Then we had to assemble them. It was a tricky system of clamps, temporary nail gun nails, and balancing on scrap wood pieces to get it done, so don’t even try to make sense of this picture (it’s upside down, if that helps).
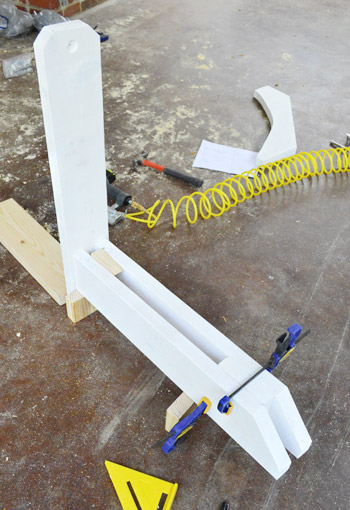
Basically we had to get both of the beams and the single arch piece aligned (and centered and level) and then screw them to the base using some 3″ lag bolts. It took a bit of finesse to get it all done without attaching something slightly crooked, but eventually we got the job done.
Then we had to drive some bolts through two beams (and the portion of the arch that sat between them). It sounds very straightforward, but the process took me a while and the rest of the day was spent rerouting a gutter and outdoor light fixture. So by the end of day two we had built two braces, but I couldn’t call this step complete since they were neither painted (that happened the next morning) nor hung (which also got done the next day).
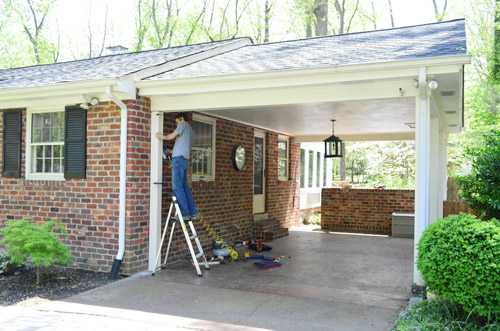
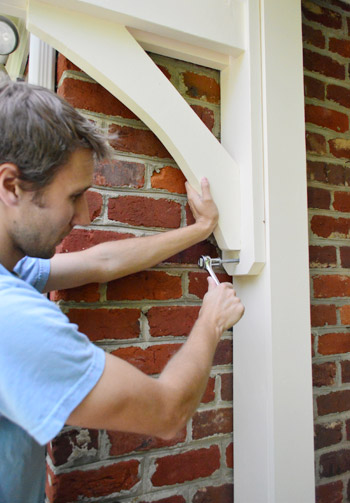
Hanging them took some finesse too, mostly because one of us had to hold the weight of it while the other checked that it was level and temporarily nailed it into place. There’s no way brad nails would support the weight of it over time, but they kept each brace in place long enough for us to drive a lag bolt into the top and bottom of each one, which secured it for the long haul.
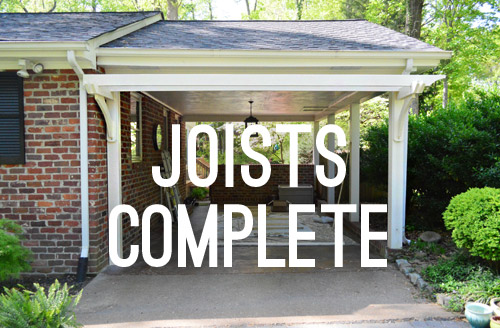
By noon on day three we were finally ready to move on to step 3.

Step 3 was the joists. You know, those two long pieces that would rest on each of the braces. These were again made from 2 x 6″ board and again they required a decorative curved cut (marked below). We did the curve on just the left side since on the right side they’d butt up against the side of the house.
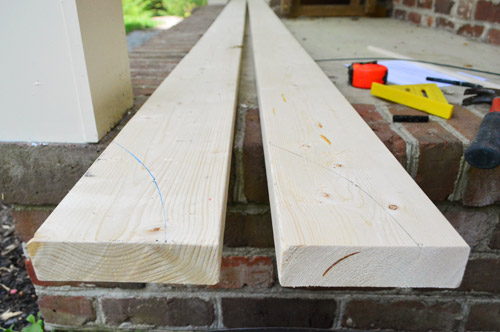
Once they were cut, we hoisted them into place and marked the exact spot where they rested on the braces.
These marks showed me where we needed to cut notches in the joists so they’d sit tight on the braces. And while we had them down, we also primed and painted them.
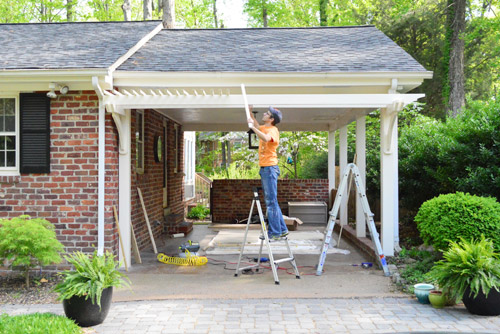
While the paint dried I got started on step 4, so it wasn’t until the next morning that we could actually hoist them into place. As for how we screwed them into place, we basically drilled a long pilot hole through the top of each joist and used a long drill bit to screw right through the top of the joist and into the brace’s beam below.
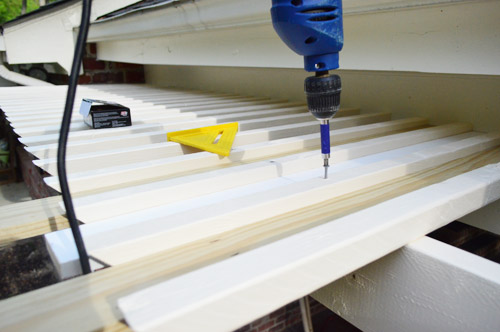
The last step was the lath, or the small strips that create the rail across the top. Since we were going to paint ours I couldn’t use the pre-cut pressure treated 2 x 2″ pieces that they sell pre-cut for deck railings (they say pressure treated lumber should be allowed to “dry out” for a number of weeks before paint or stain traps the treatment’s moisture in – and we wanted to paint things right away). So we bought regular 2 x 2″ boards that were 8 feet long and cut them down at home. This ended up being substantially cheaper, but we needed 50 of them (including a few just-in-case extras) so cutting and sanding them took me a good two hours. It was not exactly fun, but it was nice and mindless. Then came priming and painting all. those. pieces.
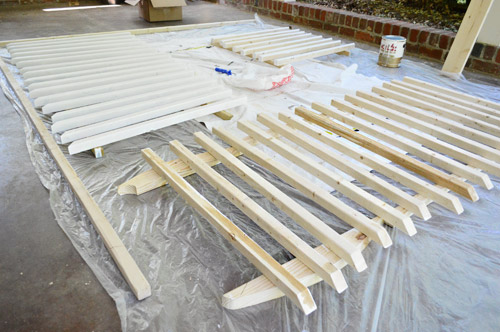
We had to cover all four sides of them since they’d all be seen, so thank goodness the paint had good coverage and it only took one coat (it’s Benjamin Moore Exterior paint leftover from the previous owners). Once everything was dry, we could start putting the lath into place on top of the joists.
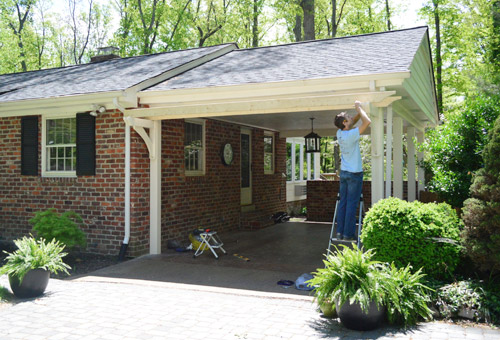
This was the point that we both started to get giddy because the pergola was actually starting to look like a pergola. Oh and we cut a few 3-inch wide “spacers”out of scrap wood to help us keep our gaps even so we could screw them into place as quickly as possible (see the two longer unpainted boards in the picture below?).
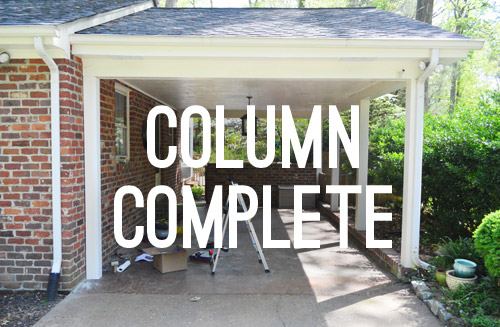
By the end of day four, step four was 100% done.
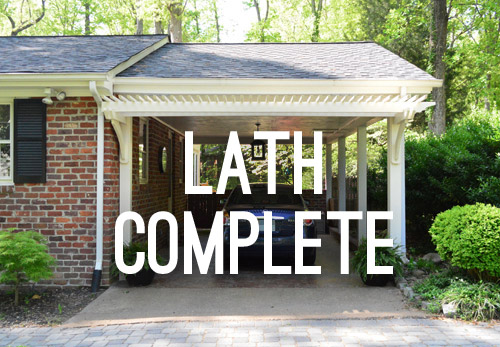
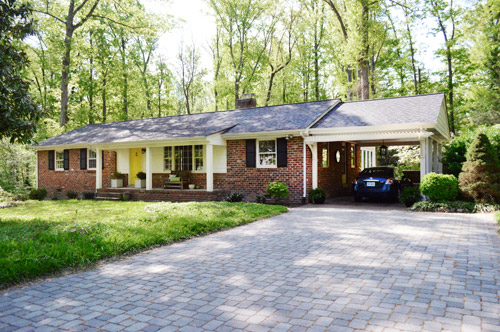
And with that, we could step back and enjoy our gussied-up carport. How YOU doin?
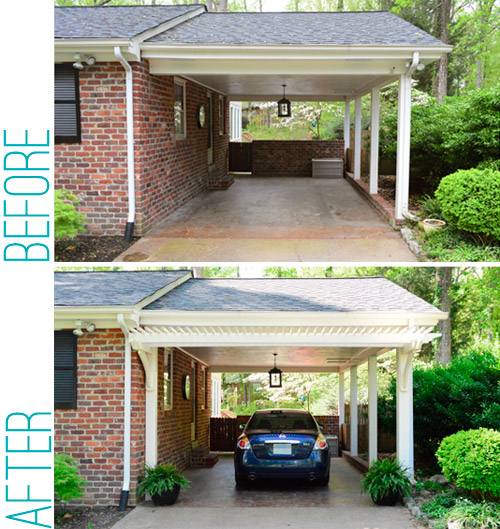
We’re both crazy happy with how it turned out. We were nervous (well, I was nervous) because it wasn’t the most conventional spot for a pergola – but it really is a huge upgrade. Suddenly that parking space tacked on the end of our house has some character. It has actually turned two anti-carport people (remember we almost didn’t look at this house just because it had one) into carport lovers. Well, cargola lovers.
Despite being a bit tedious, none of the labor was really that back-breaking. And the DIY price can’t be beat – especially when we heard that custom attached pergola kits are being sold for over 2K! Here’s where ours wound up:
- Truck rental (to get materials home): $19
- Lumber: $112
- Post bases: $23
- Nuts, bolts, & screws: $46
- Materials to reroute gutter & light: $14
- Paint & primer: Already owned
- TOTAL: $214
Oh and if you have a carport that already has two columns (or a garage with outside walls to rest the braces on) and you buy the braces instead of building them it would be about 50% easier (and should cut out around 2 days of work). So that’s an awesome option for anyone who wants to instantly cut four steps down to two.
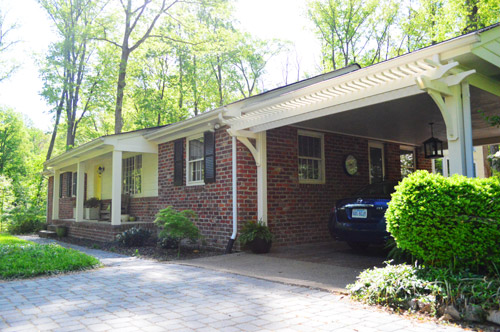
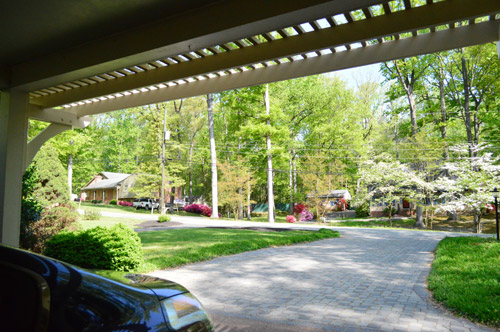
I feel like the new pergola gives our house a bit of “quaintness” (if that’s a word). We especially like how it frames the view of our street, which is currently blooming like crazy. Either way, it definitely adds some nice dimension to our flat ranch.
So yeah, between this and our beefed up porch columns, we’re falling in love with the front of our house all over again. And can you just imagine some flowering vines growing up those posts and across the top of the pergola? Holy charming, batman.
What’s on your outdoor agenda these days?

Necole @seriouslysassymama says
So very pretty. I favorite part is the braces. They just look so cool and classic. This makes me wish I had a pergola over my patio.
Betty says
what flowering vines are you thinking of putting there, and will you have them hanging down at all or keep them trained up on the pergola, and can you please put pics up when you have something like that up on there, and it’s “quaintness” if you say it’s “quaintness”!
YoungHouseLove says
We’d love to train something leafy and flowery up the posts and across the top eventually (although it might take a while for something to grow that large, and we haven’t landed on the exact vine we’ll use yet). But we’ll be sure spill those details and share pics when it happens :)
xo,
s
Laura L. says
That is just beautiful! I love how brave you guys are… you go from idea to careful planning to actual execution so easily (it seems!). I never get past the planning stage!
Heidi P. says
Wow! It looks amazing! Another home run John! It makes the garage look so balanced with the extra beam! Who’da thunk?
Kayla says
When you guys announced this project I didn’t know what to expect. But this is officially one of my favorite projects you’ve ever done! Nailed it!
YoungHouseLove says
Thanks so much Kayla!
xo
s
Michelle says
Looks fantastic! Love following your outdoor projects.
SW says
Your patience astounds me. Looks fantastic!
Nicole says
Well done! Huge bang for your buck, it looks very expensive and adds tons of architecture and character!!!
kristi@SimplePrettyThings says
I have such a love for pergolas! We want to add one onto part of our deck but that might not happen until next year. I was wondering if vines near houses are really a good thing? When we bought our current home (it was a foreclosure and a mess) the inspector said to take down the vines crawling around or it will cause damage to the house. Might want to look into that so it doesn’t mess up the house.
YoungHouseLove says
I think certain ones (like ivy) can bore into brick and cause the mortar to crumble (bad!!) but certain vines are not invasive and don’t have those grippy little feet that disturb brick, so those are ok to use around arbors and pergolas and houses in general :)
xo
s
Ruth says
Lovely! It is “just enough” and certainly pretty. Nice job.
Lauren says
I think you should add the pergola to the side of the garage as well. That would make it feel more like a gazebo!
Meredith @ La Buena Vida says
What would you guys use for materials if you COULDN’T use pressure treated pine? We were given a few established grape vines, and so we plan to build a pergola for them…but we DEFINITELY don’t want grapes hanging out on pressure treated wood. So, I’d love to hear what you all would do! Cedar?
YoungHouseLove says
Hmm, probably cedar or could you just use regular pine and prime & paint it? Does that leech? I’m not sure how that works outside with fruit vines on painted wood…
xo
s
Jennie says
Cedar is a great option (ours are on cedar). Osage Orange is also good at withstanding the elements! Some farmers in our area also use high tension wire for grapes, or even metal poles. just use something sturdy … Grapes need a fair amount of support!
Liz says
Wow, it looks awesome!
Londen@sixtyfifthavenue says
It looks awesome guys!! Its the perfect addition to bring it all together beautifully!
Trellis and brackets turned our very ugly house into a craftsman cottage. Check it out here if you would like.
http://sixtyfifthavenue.blogspot.com/2011/11/craftsman-style-cottage.html
YoungHouseLove says
Oh my gosh it’s crazy charming! I LOOVE it!!
xo
s
Felie H. says
Wow! What a big difference! We have a carport as well and it screams “I need a little love!” Maybe we’ll be tackling this sooner than we thought! Great job guys! You always make it look so easy!!
~Felie
Jeanna says
I like the way it blends more with your beefed up porch columns :) Very nice job!
YoungHouseLove says
Yes, it’s so nice not to have three curvy colonial columns and four square carport ones!
xo
s
Kat says
Lovin’ the character you guys are adding. We have a pretty basic rancher too that we’re trying to add some charm to. We beefed up our porch columns a while back and now we’re ready for some landscaping. Can’t wait to add some curb appeal! Here’s where we’re at if you wanna check it out. Can’t wait to see what else you got up your sleeve. http://www.mapleleavessycamoretrees.com/2013/04/heres-plan-stan.html
YoungHouseLove says
Ooh I love the plan for a curved pathway! Can’t wait to see how that turns out!
xo
s
Susan (Between Naps on the Porch) says
Love this! Really adds so much to your home…what a great look!
erin moria says
YHL is KILLIN IT!!! son!
YoungHouseLove says
Hahahahaha, thanks Erin!
xo
s
Shell says
I think it is really cool that yall read and reply to these comments. Very nice for readers to feel connected! And impressive, considering yall have 165+ comments on a carport-ugula (or however you spell it)
Great post!
YoungHouseLove says
Aw thanks Shell! We love our readers!
xo
s
Abby says
Love the idea of the pergola! You may need to keep tabs on the deflection of your 2×6 “joists”. They are holding up all your little 2x2s, and they are spanning quite a ways, so they could start to sag over time. You may eventually want to beef them up to 2x8s and maybe use a couple of 2x4s in place of some of your 2x2s to give a little bit of hierarchy and break things up-may also give some better overall proportions. A definite upgrade though, and I am impressed with the brackets y’all made!!
YoungHouseLove says
Thanks Abby!
xo
s
Karla@{TheClassyWoman} says
I love this detail! Your carport really looks dressed up! It hadn’t even occurred to me to do something like that. We also have a carport but it’s seen from the side as we have a curved driveway. I think it has much more impact when viewing it from the front.
Samantha says
Wow, looks AMAZING! I really really love it!!!!! Great work!
Kai says
John, you are seriously becoming quite the outdoor handyman! I think Clara might need a playhouse soon…
Shannon says
Not that anyone asked, but I vote for window boxes! Everything is so pretty in RVA this time of year. With that yellow door and your new columns, well… let’s just say rrrrrrrrrrhhhhhhhrrrrrr.
YoungHouseLove says
Oh yes, did you see me mention those on the first page of comments?! We’re so excited to bring more dimension (and blooming beauties) in with them :)
xo
s
Kate says
Looks awesome! Have you thought about adding white wood paneling to the ceiling?
YoungHouseLove says
Ooh some white (or even soft blue) beadboard up there would be awesome.
xo
s
Jessica says
It looks GORGEOUS! I am so impressed. I bet every time you see it you feel super proud :) What does Clara think?
YoungHouseLove says
She has called it a bunch of hilarious things (a castle! a ladder! a spikey thing!) so she’s cracking us up. I think she loves being outside and playing, so anytime we tackle something outdoors she loves it :)
xo
s
jessica says
Love it! Now I’m trying to figure out where we could put one in our house because it is that awesome!!
Kelly says
looks great! can’t wait to see it with some vines/flowers!
Anna in Ohio says
“Pergoport” for sure! Looks great!
YoungHouseLove says
Haha, anyone who works that into normal conversation gets 10 points.
xo
s
Katie says
Hi John, This looks awesome and is perfect timing. My hubby and I want to this exact project. We’re not as handy as you guys, so would be interested in buying pre-made knee braces. I’m having trouble finding them online… where did you look when you were considering pre-made knee braces?
Thanks a bunch!
YoungHouseLove says
We searched for “pergola knee braces” and “pergola brackets” and then sometimes we click on “images” and just see what comes up and click through to see who’s selling them. Hope it helps!
xo
s
Carley says
Seriously, this is an amazing upgrade. I can’t believe how the addition makes the house look amazing and what was a carport pop with some class! I wouldn’t be surprised if other people in your neighborhood decide to add some Pergola love to their homes as well. :)
YoungHouseLove says
Wahoo! We’d love some contagious pergolas!
xo
s
Shanna says
Love this addition! Did you have to seal the would first, or does the exterior primer/paint you used protect it from the elements?
YoungHouseLove says
The exterior primer + paint do all that for us. It holds up really well actually (it’s the same method we used for woodwork we added to our porch at our first house 5 years back and it still looks great :)
xo
s
JC says
Nice! I finally figured out why I couldn’t see any of your photos. For some odd reason my ad-blocker was hiding them. No idea why.
YoungHouseLove says
So glad they’re back! We hear that sometimes those pesky ad blockers do that. No idea why, but eventually they pop back up (maybe once it realizes they’re not ads?!). Haha!
xo
s
Katrina says
Looks pretty~ We’ve been thinking about adding a mini pergola over our garage area & one above our french doors off our bedroom…..
Melissa L. says
I’d love to see an old fashioned climbing rose on the pergola. My favorite low maintenance climber is ‘Cecile Brunner’ climbing rose (it also has an upright form) which is a pale pink and smells like carnations. I’ve seen it growing well in the DC area so it should do well in Richmond. A red rose might be more striking, but I don’t know any particular low maintenance variety for the southeast. You could probably find out at your garden center. Roses are non-invasive and edible by all small children and pets.
YoungHouseLove says
Sounds beautiful!
xo
s
orangesugar says
Soooo what kind of wood did you use? Just regular 2×4’s? Not cedar and not pressure treated? Our yard is already fenced-in but I need to fence off an my garden and area behind the shed so that the dogs can’t get in these areas. Trying to do it cheaply and was thinking of using regular 2×4’s but even primed and painted I wondered how long it would take for them to rot.
YoungHouseLove says
Hmm, unless you’re going to prime and paint the whole thing with exterior paint (that protects it much like pressure treated chemicals do) I’d go the pressure treated route because I’d worry that your fence would get rotten over time if you left it natural or just used a sealer instead of something heavier to really make it impervious (like PT additives or a few thick coats of primer + paint).
xo
s
Krystal @ Arapahoe Ave says
That looks so good! We have SO much landscaping to do, this year I hope to tackle some window boxes and possibly a patio! We shall see :)
Barbara says
Getting seriously worried about the “John Can Do Anything” factor. I fear that soon he will decide to conquer the world, and we will be hard-pressed to do anything about it.
YoungHouseLove says
It’s true! And with Burger The Wonderpup in the mix, the men in this household are unstoppable.
xo
s
Jennie says
Looks great you guys! What a fun upgrade :) Did someone say curb appeal?
Ashley says
Love it! You should add one to the patio side. You know, just like that! *snaps fingers*
YoungHouseLove says
Haha, I wish I could just wiggle my nose like Genie.
xo
s
hannah says
looks great… and i’m sure you know about this already but i was looking for curtains online today and IT’S finally OUT! Jonathan Adler at JCPenney :)
http://www.jcpenney.com/dotcom/for-the-home/shop-brands/view-all-brands/happy-chic-by-jonathan-adler/cat.jump?id=cat1002350013
YoungHouseLove says
Wahoooooooo!
xo
s
Megan says
I LOVE IT! I kept thinking about this project while I stared out of my kitchen window to our detached garage that lacks major character, wondering what my husband and dad (our go to builder, he’s had over 30 years in construction) would think if I mentioned it. MAYBE after we get the rest of the projects done (remodeling two rooms down to the studs, new windows, etc., bathroom, deck, fencing a garden or two), and then we can talk. But it’d look so pretty!
Lynn @ Our Useful Hands says
Another great project completed by them there hands! You guys are seriously doing a “step ya game up” dance off move to the rest of the neighborhood. (Unless you guys are the ones who had to step your game up? :) This new cargola is sending your curb appeal through the roof! It’s just so purdy… I have figured out a spot where to put ours (if ever we get to it) and I’m just picturing me having Ladies Lunches there. I doooo declaaaare!
My best, Lynn
YoungHouseLove says
Haha! I don’t say “I do declare” nearly enough. Gotta work that in there.
xo
s
Caroline Betcher says
You had me at the added column! Love it! Nice job!
YoungHouseLove says
Haha!
xo
s
caroline [the diy nurse] says
Wow! What a difference this makes! It really completes the exterior and makes it part of the house. We want to do this over our garage but we’re still dealing with… garage doors that don’t work. And it’s one of those things I really need to get on. I never understood people with garages that parked outside and now I’m one of them. The shame!
Emily says
looks great guys. I finally bought your book and it arrived yesterday. Yippie.
just wondering if you have thought about painting the down pipe that same red color that your have painted other items. it might make it pop less.
oh and I’m typing this on my mobile, in the rickety train on my way to work so if there are spelling or grammar errors, is the trains fault.
toot toot
YoungHouseLove says
Oh yes, I’d love to camouflage that! I hate how it pops out so much!
xo
s
mary @ bgjournals says
so super sweet guys, i love this! can’t wait to see some lovely greenery wrapping itself around that, please keep us updated on how you ending finagling some plant life around those :)
Rachel says
Great job. It looks fantastic.
I love your posts after the weekend.
Madeline says
This looks fantastic!!