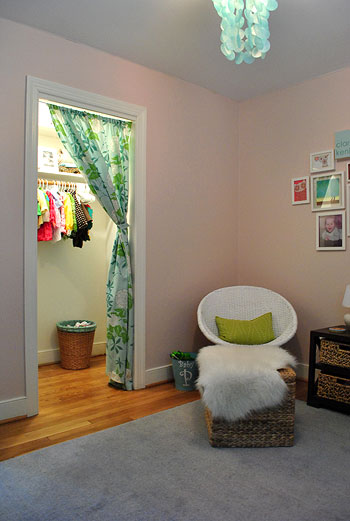
After admiring various ribbon chandeliers in baby stores, catalogs, magazines, and even over on Pintrest, I decided to try my hand at one for Clara’s closet. Her closet is actually big enough to become a little reading nook when she’s a little older (I have visions of making her a beanbag for chillaxing on the floor with a book). And I love that the closet has its own light but it’s one of those fugly bare bulb ones that you tug on a piece of string to turn on and off. So I thought a happy little ribbon chandy could pretty things up.
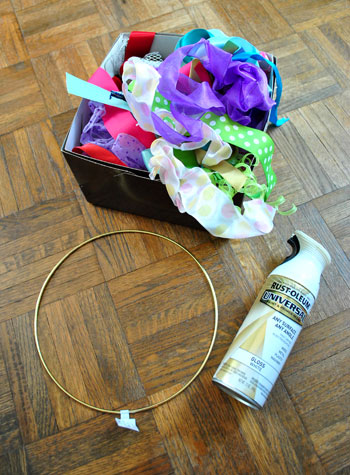
So I spent $2 for an embroidery hoop (with a 10″ diameter from Ben Franklin) and used some white spray paint and a box full of old ribbons that I already had (I save them like gift bags to recycle them ’cause I’m cool cheap like that).
So the total project cost was just two dolla. Holla. (Yup, that’s the second holla I’ve used today- and yup, I’m counting).
Anyway, first I went outside and spray painted my big metal embroidery ring thing with white paint on a piece of cardboard. While it was drying I went through all of the old ribbon scraps that I have and picked out the ones I wanted to use. Then I popped back outside to flip my ring over with a stick so I could spray the other side.
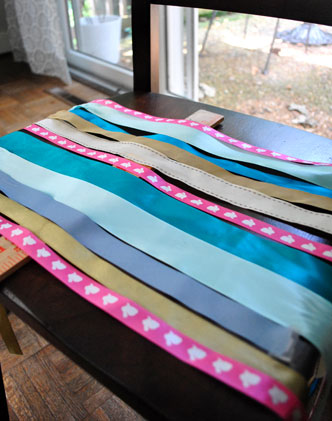
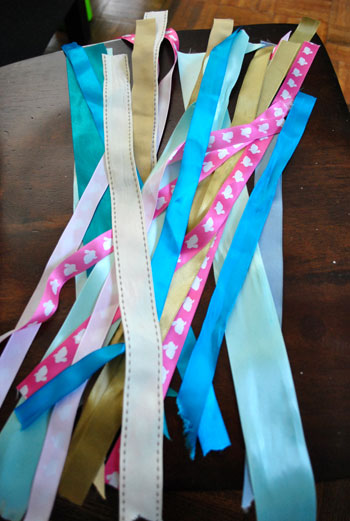
Then it was back inside while it dried to cut 16″ lengths of ribbon from all of the ones I picked to use. Here are most of them cut and ready to glue to my drying ring (I still had a few more hot pink ones to be added to the mix). Oh and I should note that I wasn’t exact about my cutting at all. If I wanted to use a strand of ribbon that I could almost get two lengths out of, I’d cut it in half (even if each piece was only 14″ instead of 16″). Yeah, call me Loosey Goosey. Wait, that sounds bad. Don’t.
Here’s where I’d show you a few photos of me and my handy glue gun as I glued each ribbon to the now-white-and-dry metal embroidery hoop. I just curled it over the top and glued the ribbon to itself in the inside of the hoop and worked my way around the top, just gluing each ribbon in place next to the other one with about an eight of an inch of space between them so they didn’t get all up in each other’s area. And I burned my fingers approximately fifteen times, which might be why there are no photos. But it was worth it. No pain, no gain. Sidenote: I accidentally typed “no paint, no gain” at first, but upon thinking about it, I also believe that’s true.
Here’s the bare bulb we’re dealing with in Clara’s closet. And I only realized as I took this photo that we never switched it out for a CFL. Probably because we never actually turn it on, but still – shame on us. It has been rectified. And the old bulb betta recognize. I’m in a weird mood today, huh?
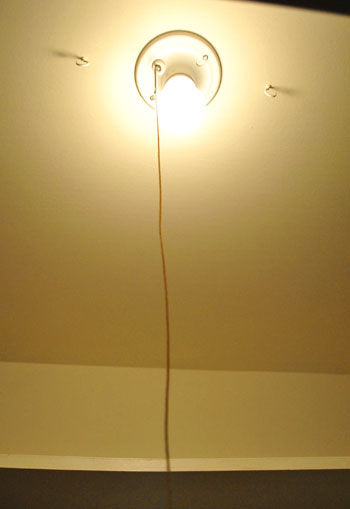
See those hooks on either side of it? We had those in the ol’ tool drawer, and I thought they’d come in handy for stringing up my ribbon chandy. I was going to use fishing wire but I couldn’t find it so I went with white string (you know, sewing machine string?). Wait I mean thread. Anyway, it worked like a charm.
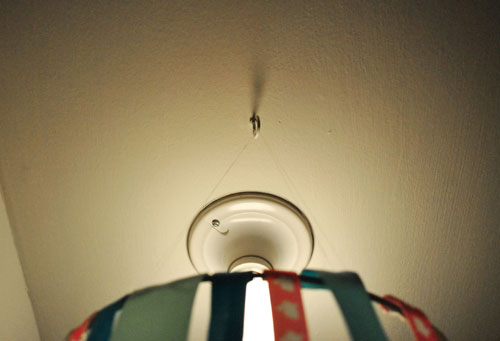
I just made four loops of white thread at four even intervals around the ring and looped them up over the two hooks so they sort of pulled from four points and stabilized the hoop o’ ribbon. Here’s what I was left with:

Cute, right? When Clara woke up from her nap I couldn’t wait to hang it slash show it to her. She loves it. And that my friends (as Martha would say) is a good thing. Oh and I totally should have ironed the ribbons before gluing but I was feeling lazy. I figured I can always take it down (it’s just hanging on those little hooks) and iron it if the urge ever strikes. Not that I’m counting on it. For now I look at it like wavy hair. There’s a place for it.
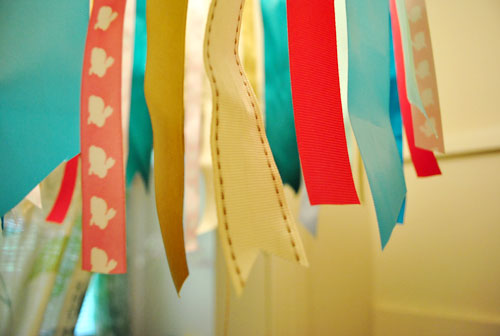
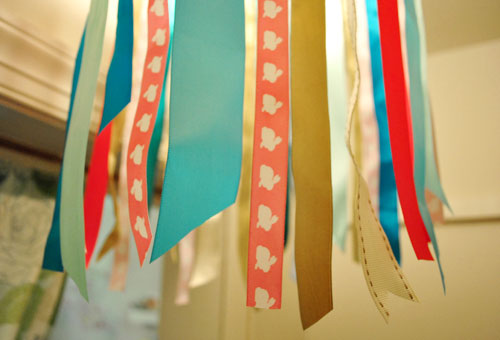
See that cute pink ribbon with the bunnies on it? It’s from this Easter basket we made her a while back. Memories. Oh and note that the bottom of the ribbons are random and staggered and some are cut at an angle or dove-tailed (is that what it’s called or did I make that up?). I went with the keep-it-casual approach.
As for how it looks from the rest of the room, I love how it just sort of peeks out from behind the curtain like her bright little dresses. So you don’t really know what’s going on until you get closer…
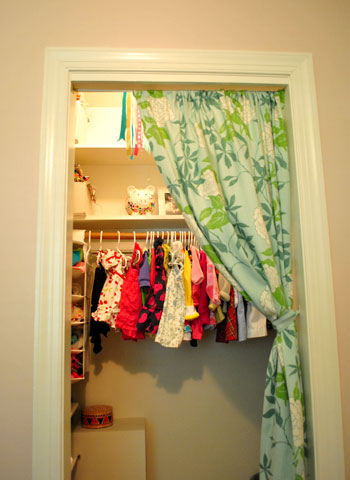
… and peer up to see those fun little ribbons.
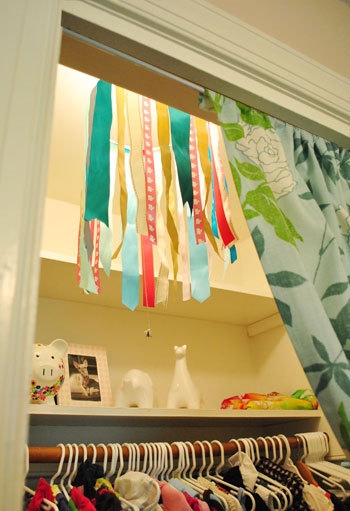
So there you have it. A $2 project that the ceramic animals in Clara’s closet get to enjoy (they’re up there because they’re breakable and now that Clara is toddling around they were in constant peril on her dresser and side table- so up they went. And yes, that’s a framed photo of Burger. Clara’s quite fond of him.
Oh and when I showed John he said “how’s it hanging?” and I said “har-har very funny” and he said “no, I’m asking you a question- how is it hanging from the ceiling?” and I explained it while trying not to wet myself. Maybe you had to be there though.
Anyone else making things out of ribbon? Or dressing up a bare bulb in another way? Tell $herdog all about it.
Psst- Don’t burn your house down! Many lamp shades are made from fabric and paper, so ribbon is cool. Just make sure it’s not even close to the bulb (and definitely not pressing against it). Our 10″ hoop offered lots of space for the heat to escape, and using CFLs helps too since they burn cooler than the regular guys. In some places exposed bulbs in closets aren’t even to code (glass domes are recommended, which could still be covered with a fun little ribbon chandy to dress them up).

Caitlin says
Loving the chirpy, cheerful mood you’re in $herdog! The ribbons are super cute, and I’m sure by the time you decide (or not!) to iron them the wrinkles will have dropped out by then anyway! Hi 5’s to you from a fellow ribbon hoarder!
Carla says
This is the cutest thing I’ve seen you do in a long time. I have one recessed light in my ceiling directly above my bed. It’s bright and kind of awkward up there all by its lonesome. This project would be so lovely suspended below that light, and as a broke person (no money for fun), this is something I can actually afford. The second-hand shops almost always have hoops for sale and lots of ribbons and whatnots. You really inspire me to beautify my humble one-room cottage. I just painted and antiqued my vintage bookcase made from maple. I’m nostalgic, so I felt like I was somehow betraying the previous owners, but the smooth antique white finish and slight sanding of the edges looks so fresh and comfy in my little home. And now I’m doing a pine desk that my dad and I made together, and I’m painting my mismatched vintage wood chairs in a cheery lime green. Thanks so much for the inspiration.
sarah says
Great Idea! I’ve never actually seen one before! My daughter’s closet is almost the exact same! What a GREAT idea to make it a little reading nook for her!! I’m totally stealing that idea when she gets big enough!!! :P As always thanks for the inspiration with a dose of silliness!
Carla says
P.S. I’m going to intersperse small crystals on clear fishing line between the bits of ribbon. It would be so much fun if you were to have a page (as if you have time for this) of projects you provide tutorials for, where you could feature photos submitted by your fans of their take on the project. Okay, off and running to the thrift stores!!
YoungHouseLove says
Sounds fun! Post pics on Facebook so we can check it out if you’d like!
xo,
s
Emma says
Lovely! It was very responsible of you to offer some Fire Marshal Bill tips because you’re right – one has to be careful. Your tips ensure that any DIY chandys will though. Thanks!
allison says
They’re definitely $$, but one of these bad boys might make your exposed bulb look neat-o: http://plumen.com/
YoungHouseLove says
I love those! My friend Noah sent me a link to those a week ago and I lay in bed dreaming about them!
xo,
s
Donita says
That is so cute. This started my “creative juices” flowing. Have you ever had one of those lamp shades that you put on first, then screw the light bulb in? I was thinking, take the fabric/paper, whatever, off the wire part of the shade. THEN glue the ribbons on the wired. Put the shade up, then the bulb. Does that make sense? I can totally see it in my “creative juice” mind. hee hee. I will take pics WHEN mine is done. I have to find an old lamp shade first……actually, I have one, from the 40/50’s that is broken. HMMMM where is that!!!
YoungHouseLove says
Oh yeah- that sounds awesome! Send pics if you do it!
xo,
s
Jenna says
LOL, you guys, idk where anyone got ‘freakishly ugly’ from. But that’s sort of cute :)
http://www.urbandictionary.com/define.php?term=fugly
YoungHouseLove says
My eyes! Myyyy eyyyyyes!
xo,
s
gk says
i didn’t know either! i like the g-rated version in my head better. (hooray for naivete!)
Alissa says
If I’m honest, I’ll admit that I’m actually more impressed by the fact that all of Clara’s clothes are up on hangers. :) For itty-bitty toddler clothes, I’d be much more likely to toss things in baskets – tops, bottoms, dresses, etc – and call it good.
Calypso says
TOO CUTE!! What a great way to reuse the ribbons. I like to keep all my gift bags, paper, and ribbons too. Except.. I go into a wierd cleaning frenzy every couple months and if I haven’t used it, thought about it, or tagged it for something it goes out the door. My motto on these OCD days: SHOW NO MERCY. I think I threw all my ribbons away.. I’ll send them your way next time…
Oh, I thought you’d LOVE this for Clara..
http://www.etsy.com/shop/rosebudlips
I have a broach that I go gaga over EVERY TIME I pull it from my jewelry collection. I get the MOST compliments from it.
YoungHouseLove says
So pretty!
xo,
s
Heather {ModernMealsforTwo} says
You are cracking me up today!
It’s a super cute project! I love anything that uses ribbon. I could see using this idea for fun party decorations. Maybe when Clara turns 2? :)
YoungHouseLove says
You never know! I do love collecting ribbons. Haha.
xo,
s
Erin says
I made one of these for my daughter’s room when I saw it on Martha’s website over a year ago. Very cute.
But was it really worth it’s own YHL post, though? Like you said, they’re everywhere these days, and not hard to figure out. Sometimes I think you guys pad blog content for advertisers and what not (pressure to post x number of times per week, etc.?) I hate to say it, but it seems like YHL is jumping the shark :( or at least turning into a lifestyle blog instead of a home deco/reno blog…..
YoungHouseLove says
We can’t not post about a $2 light makeover on a home improvement blog can we?! It seems like 170ish commenters are enjoying this project, so we’re psyched. We’ve always shared projects both big & small w/ a splash of real life (ex: our engagement, our wedding, our travel, our dog)! We’re proud to say that our site has grown so much thanks to blogging the way that we have been from day one – so we’re sticking to it. Oh and our sponsors pay a flat monthly fee and aren’t guaranteed any amount of traffic or posts, so there’s never anything in it for us or them when it comes to the number of posts we write. Hope it helps!
xo,
s
Heather W. says
Oh Geez not another one!!!!! I mean seriously isn’t this blog about inexpensive ways you can makeover a room, piece of furniture or LIGHT fixture????? We are in a RECESSION if you haven’t noticed and we all can’t do entire room makeovers every other day. Are Sherry and John supposed to move into a new house every other year or what. I love the little inexpensive or free ideas to improve a space keep’em coming. There are enough blogs out there to get your fill if this one is boring you today. So rude! Off to make my ribbon light decoration Thanks Sherry!!!!!
Meredith says
This reminds me of a project in my house that I could use some help with. Our attic is a finished living area, and will soon be converted into our 1 year old’s bedroom/play area. The ceiling is about 6.5 ft tall in the center, but immediately slopes down. They only lights up there are currently two exposed bulbs hanging right from the peak of the ceiling, one at either end of the attic. They need “something” to make them look more finished off, but we can’t fit any standard store bought fixture, and can’t have something that hangs too far or we’ll bump into it. Any ideas?? Beyond the ribbon chandelier (which is an option)?
YoungHouseLove says
Maybe some small paper lanterns would look airy and fun? They’re really affordable at places like Ikea and World Market. Good luck!
xo,
s
Casey @ Pocket Full of Sunshine says
Haha love your writing style. :) Beautiful photos as usual!
Janet says
I like the ribbons loose and messy. If they were ironed they wouldn’t seem so lively and whimsical…well at least to me. :) This is such a cute idea.
Haley says
This is in the top 5 of the cutest DIY projects that I have ever seen! Do you think you could sophisticate it up for other rooms? love love love it! AND 2 dollars? you can’t beat that!
Anna says
Totally random, Sherdog, I know, but can you invite me on Pintrest? I’ve been waiting for my invitation forever…
YoungHouseLove says
Pop over to our Facebook page and ask for an invite! Folks are so sweet about sharing them speedily (and I am terrible at getting mine to go through). Happy pinning!
xo,
s
Heather W. says
Do this! I did and had two invites within minutes. In fact if you want I will invite you if I can figure it out. Lol.
momo says
Love your posts $herdog! Head on over to http://www.theinspiredroom.net for reasons NOT to iron – funny video!
Jennifer Brunder says
I think this idea is super cute and I love your site. I am glad you added the note about the fire hazard and leaving lots of room for the bulb. The one thing I would mention is that a bare bulb in a closet doesn’t even meet code in our city. It’s considered a fire hazard itself. I would definitely change to a CFL if you do this.
YoungHouseLove says
Wow- really. We have lights in nearly all of our closets. But we don’t ever leave them on when we’re not popping in there for a second. So that’s good to remember!
xo,
s
Danielle says
This is an adorable project! The colors work so well with Clara’s room. Oh and I’ll let you in on a little secret, hair straighteners work wonders on straightening out little kinks in ribbon. Just run it through like you would your hair. They are just the perfect temperature for not burning them too! Good luck and congrats on a job well done! :)
Megan says
I like the ribbon chandy. I did a ribbon mobile for my daughter that was very similar but it didn’t hide a naked bulb! :)
And just because you said Clara likes Burger, I thought you might like the recent events in our house – our 2 year old daughter playing with our 3 year old Chihuahua… http://thependletonhouse.blogspot.com/2011/07/friends.html Beefy, the dog, has been super good with Lily and definitely doesn’t fit the typical Chihuahua mold of being bite-y and energetic.
Amber says
Love it! I may just have to make one for my baby girl’s room. :)
Brooke says
I think it’s funny how concerned some people are bout you not ironing the ribbon! :) People must be really bored at work or something because this is not a crisis! ;-) hehe
Tamrah Ryan says
Lovely! I also love the idea of making a reading nook in the closet. When I was a kid I turned my very small closet into an “office” complete with a desk (a dresser that was in there), flashlight hanging from the hanger bar for a light, and a little chair. I spent hours in there writing and drawing. It was a fabulous way to get away from my 3 siblings (especially my sister — I shared a room with her). Ha!
colleen says
Super cute.
But just thought I’d share a little safety tip I got from my home inspector… you should never have exposed bulbs in closets. There’s a risk it’ll shatter and all the fine glass will end up all over the place, including clothes… not good!!
YoungHouseLove says
Thanks for the tip! We have them all over our house- uh oh. We just turn on the light for a second when we’re in there though. Maybe the risk of shattering is if they get too hot? And using cool burning CFLs might help that too? Off to google more.
xo,
s
Beth Ann says
Love it! I think this could make a cute sort-of-mobile (without a light) too for a nursery. ?! I may try my hand at it! Too bad I don’t have any saved up ribbon. Oh, also, you could probably just take a straight iron/flat iron/you know, hair straightener…LOL…and slide it down the ribbons really quickly to straighten them out. (I have used this “method” for shirt collars, ties on shirts, etc). Sounds easier than ironing to me…but I avoid an iron and ironing board like the plague. Always love reading your posts!
YoungHouseLove says
I’m dying at how many people have come up with the flat iron idea. You’re all geniuses!
xo,
s
Babbling Little Booties says
Hi Sherry,
This idea is so amazing. Ribbons look so cute.
How did you come up with this brilliant idea? hmmm, I’ll better try this at home…
Thanks a lot!
Niña
Haley says
Hey Sherry!
Love the ribbon chandy! Do you think there is a way to make a more sophisticated looking one for someone older or in a different space? I love the idea, but I don’t have a child (Clara’s room is super cute!) or a light bulb in my closet! Any ideas?
YoungHouseLove says
Oh yes! Use pretty ribbon in colors that feel sophisticated. Like champagne and cream and white- all dreamy and airy. Or cream and celery and chocolate for something richer. Just play around with ribbon at the craft store to see what combinations look high-end and adult-ish!
xo,
s
Katie says
Do you think it would hang straight if you took another hoop and glued the end of the ribbon to it? Kind of like a flexible drum shade but for cheap?
YoungHouseLove says
That sounds fun! I’m not sure if it would wiggle around a bit but if anyone does it we’d love to hear how it goes/see a pic!
xo,
s
Julie says
Cute! Did you consider using another ring at the bottom and gluing the botton of the ribbon around that like you did at the top to create more of a lampshade look (and it would keep the ribbon pulled tight so that a breeze couldn’t blow them up against the bulb)? Just wondering. Thought that might look cute, too.
YoungHouseLove says
That would be cute! I like mine all wispy and free-spirited for now, but if anyone tries it I’d love to see how it turns out!
xo,
s
Ruth says
I think you should change things so that your posts say “Posted by $herdog” instead of “Posted by Sherry”
Also you might want to starts signing your replies
xo,
$
YoungHouseLove says
Hahahahahahahahahahahahahhah. Comment of the day goes to Ruth!!
xo,
s
robyn says
Just a tip about ironing the ribbon, if your bunny ribbon is a stamped image you will have pink with little blobs instead of bunnies. Yeah they will melt. I’m thinking that is not the look you would be going for. Anyhow, as soon as my daughter has a closet with a light, we are doing one of these. Cause I have more ribbon than brains, and I consider myself a smart girl!
YoungHouseLove says
Oh no! I’m not sure if he is. Maybe I’ll have to test the iron on a spare piece of bunny ribbon (yes, there’s more). If I ever break out the iron (or flatiron). Haha.
xo,
s
LARY says
Love it!!!!! Great job $herdog!
Eliza says
i dunno, i thought your exchange with john was pretty hilarious! lovely ribbon shandy, bee tee dubs. ^_^
Elaine says
That’s precious! Too much for my laundry room? ;)
YoungHouseLove says
No, do it! Ooh or make one out of those socks who lost their partners. Haha.
xo,
s
Harinee says
Haha! I’d totally appreciate anyone who actually did that in their laundry room!
Rad Designing says
Not sure if anyone else let you know, but you can “iron” ribbons with a hair straightener… works pretty well!
Taylor Duran says
Oh to have a sweet little girl for whom you can do sweet little girl-y projects! Somehow I don’t think this would work quite as well with my rough, tough six-year-old guy. And, for that matter, do they even make Star Wars ribbon?! Sigh. For now I’ll just love what you do for your cutie patootie and store it in the memory for a future niece. :)
hi-d says
Very sweet!
Hey, do you mind telling me where you got that capiz shell fixture in the picture? So pretty!
Thanks!
hi-d
YoungHouseLove says
That’s from a local lighting outlet called The Decorating Outlet here in Richmond. Only 50 bucks!
xo,
s
Lisa T. says
Hey Sherry,
My son’s fiance is using the same ribbon and embroidery hoop idea for their upcoming wedding reception, threading guest namecards on the ribbons. She’ll use 3 large hoops and they will hang where you enter the reception. I can’t wait to see how it all comes together.
YoungHouseLove says
Wow- that sounds so pretty! Send us pics if you can! We’d love to see it.
xo,
s
amanda says
I actually like the ribbons a little wavy. it makes it look a little more relaxed ;)
Abigayle says
very cute chandy! i recently made a ribbon wreath after seeing about a million on pinterest. i love it and plan on eventually hanging on our door for our september wedding, but for now it resides on our fire place. i plan on making some for christmas now. i love ribbon!
Stephanie Phillips says
I love it! I was looking at it’s prettiness, though, and thinking that maybe you (or somebody trying it) could use the white string to suspend a second, smaller ring 2/3 of the length of your ribbons to hang some shorter ribbon lengths. A two tier effect?
YoungHouseLove says
That could be really fun! You’d just have to be sure the smaller ring doesn’t crowd the bulb for fire hazard reasons! But we’ve seen some awesome two-tiered ones and loved them too!
xo,
s
Lindaroo says
Hmmm, I wonder what you could do to the end of the pull chain to finish this charming project?
YoungHouseLove says
There are pretty little silver pull chains with pretty glass pulls on the end, so maybe we could try that?
xo,
s
Brooke says
I’m still giggling over the “How’s it hanging?” part. HILARIOUS!!!
Randa says
I personally really like your ribbon chandelier just the way it is, un-ironed. I’m sure it would look good ironed too, but it looks so cute and “organic” just like it is.
Ang D says
Love it, as usual!! Wasn’t nearly as hard as it sounded like it would be.
Christina says
Absolutely adorable! You are so crafty. I love it so much I’m pinning it to my DIY board :)
Holly@Country Girl says
Alright so I love the ribbon chandelier and it looks sooo cute in her closet! But I’m totally jealous that you still have a Ben Franklin!?!?! Ours closed years ago and I didn’t even know they still existed. Miss that store!
YoungHouseLove says
Oh yeah- ours just got cash registers (they used to write the receipts by hands). Hope they’re here to stay!
xo,
s
RachelSD says
Your ribbon concoction is really cute and a neat way to spruce up that closet! I just finished a ribbon chandelier yesterday in preparation for my sister’s baby shower on Saturday- she asked for “disgustingly pink” as a theme, but I think my hot pink, pale pink, and ivory creation is cute rather than disgusting. :)
Erin says
i recently made a homemade lampshade for my nursery. i found the idea in parents mag. You can buy a light kit on a cord from ikea or world market for around 10 bucks. then you take a ball of yarn and soak it in fabric hardener. while the yarn is all wet and gooey you wrap it all over a beach ball in criss-cross patterns. my husband had to help because four hands are better than one for this project. be sure to tape a paper dessert plate over the beach ball’s plug and avoid the entire plate as you wrap the ball. this will let you deflate the ball to pull it out and it will be the permanent hole that points down at the ground so you can change the light bulb. i liked the look of leaving some triangle-like shaped gaps and not filling the yarn over the entire surface of the ball. you then let it dry for 24 hours. FINALLY when the yarn is completely hard and dry you deflate the beach ball (i had to pop mine because i was too excited to see what it looked like). it turned out so great! the fabric hardener was about 7 dollars and the yarn was 4 so the project was about 22 bucks. i’m slightly concerned that it’s a fire hazard so i only keep the light on while i’m in the room.
YoungHouseLove says
Oooh it sounds so cool! I’d love to make one of those big yarn balls someday!
xo,
s