Yesterday you saw Day Numero Uno of what I lovingly call “Operation Granny Chic.” Mission: update my Granny’s bathroom over three whirlwind days. So with all of the prep work done, our day-by-day play-by-play continues with painting and new floors. Except for one minor step that stood in our way…
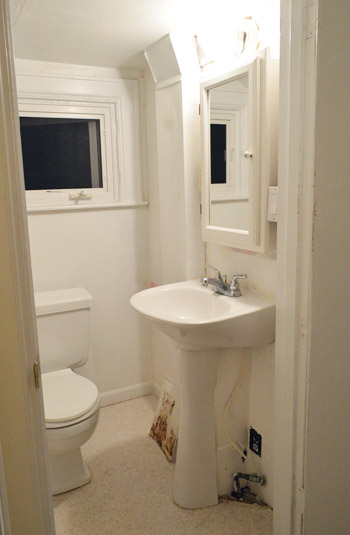
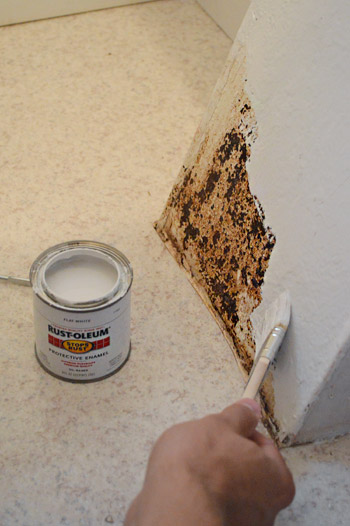
Notice that giant rust spot on the air duct near the floor? Since there’s no way paint would fix that on its own (it would bleed right through), we slapped some Rustoleum on that puppy before breaking out the paint cans. It was amazing how one fast coat worked like a charm.
The paint color we chose for the room is “Hint of Violet” by Benjamin Moore, which is a soft violet with some subtle gray undertones. Granny is such a colorful person (and often wears purple) so we knew had to do something cheery for her, but since the room is so small we didn’t want anything that would knock you over the head or make the space feel more cramped than it already is, so the plan was to bring in more pops of bolder color with the accessories, window fabric, etc.
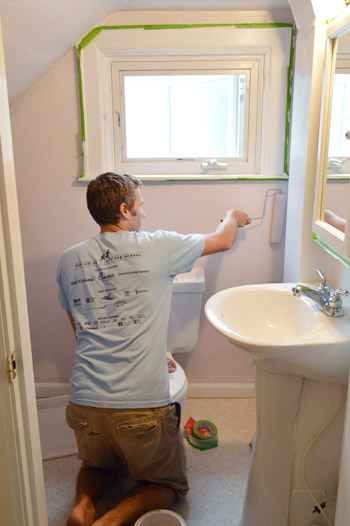
The new wall color went on in two quick coats, including the slanted ceiling (in small spaces like bathrooms we love doing the ceiling the same color as the walls since it feels less chopped up and more open), so by lunch we were ready to tackle the floor.
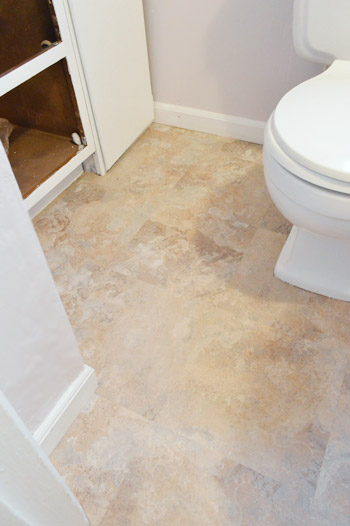
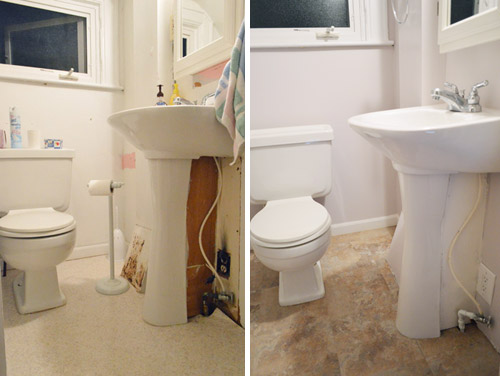
Oh the floor. The existing floor was one of those old sheets of laminate. It was actually in decent shape considering it’s age and it was neutral enough to not offend. But Granny (who doesn’t ask for much specifically) wanted a new, more updated floor in the form of those individual vinyl tiles with a lot more texture, so that was a must for our to-do list.
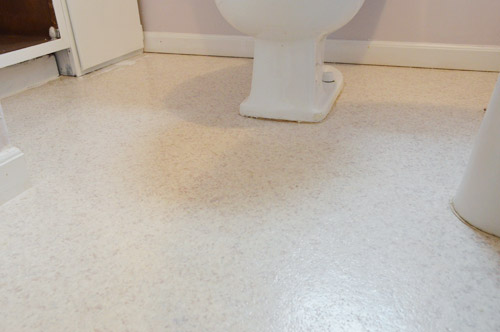
We would’ve loved to give Granny some kick-butt hex tile or something else with a vintage vibe, but given the time and money constraints of the project we had one obvious option: those vinyl stick tiles that Granny had requested. Plus my parents suggested that we not risk any major plumbing issues – which would grind our makeover to an immediate halt – by attempting a sink or toilet removal considering the age of the pipes in this older home, so we were happy to oblige.
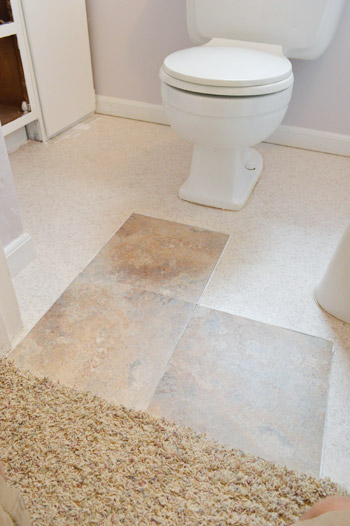
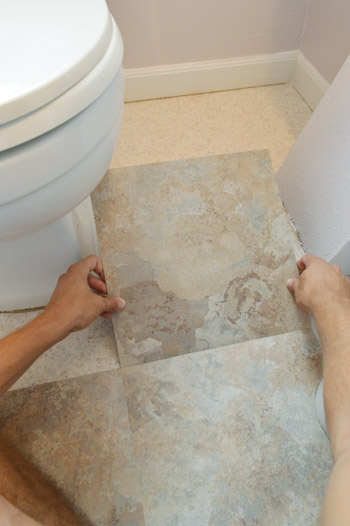
Sherry and I actually installed vinyl tiles about 6 years ago in our old kitchen, so we were a little rusty but we were quick to find our groove. The nice thing about this type of flooring is that it goes down super easy, doesn’t necessitate a wet saw or any sort of thinset/grout, and is über affordable (we got these from Home Depot for 99-cents per tile). The key is to make sure each tile is set very (very very) snugly against the others so you don’t get any seams, so we really pressed each tile firmly into the edge of the previous tile before sticking it down.
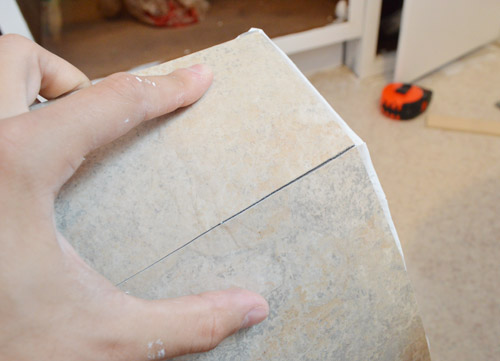
The other thing I love about these guys is that they’re crazy easy to cut. All it takes is a quick score with a utility knife and then it (I can’t believe I’m about to make a Legally Blonde reference) bends and snaps. Though unlike Elle Woods, it then breaks apart.
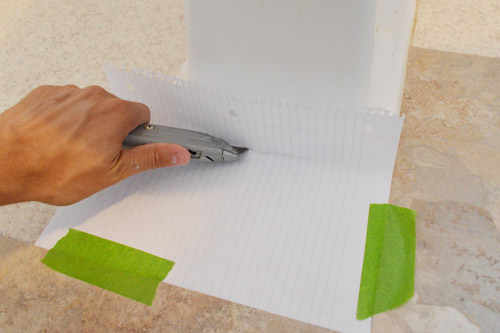
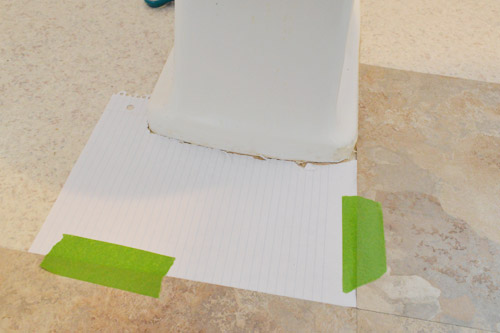
Granny’s itty bitty bathroom would’ve been a cinch to complete except that there were so. many. dang. edges. to cut. It’s not the hardest task – just time consuming. Again, since I was advised not to remove the sink or toilet – I had to cut around them (but we left Granny a bunch of spare tiles to bridge any potential gaps in case the toilet is eventually replaced). I started each cut by making a paper template. Typically I’d use a stiffer paper like cardstock, but Granny just had a spiral notebook handy – so I taped it into place and used my knife to cut right along the edge of (in this case) the toilet.
Gorgeous, no?
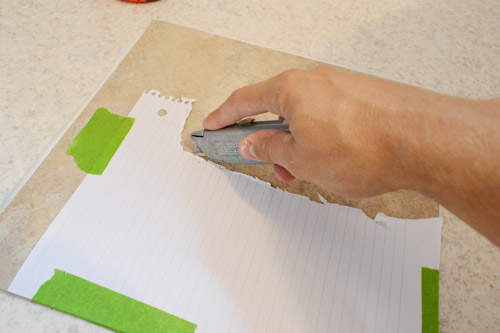
Then I taped my template on the to-be-cut tile and slowly sliced along the edge of the template.
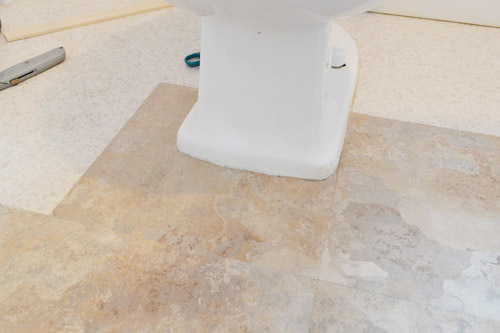
Once I bent-and-snapped out the section that would interfere with the toilet – and did a test placement with the protective backing still on – it was ready to be stuck down. Voila:
By the end of about 23 tiles and 4 hours it was completely done. And it was definitely a huge upgrade from the old sheet o’ vinyl that was there before. Again, if we had the luxury of time I would’ve loved to remove the sink and toilet to go under them (so for those of you at home who do, I’d recommend it), but leaving Granny seven spare tiles was the next best thing – so if she ever has a plumber replace the toilet or sink, she can fix any gaps if either fixture happens to have a smaller footprint.
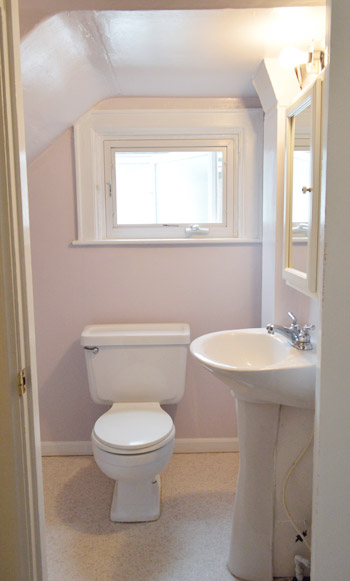
It was amazing how much the new flooring updated the room… especially in person since it has some great texture. And it looks pretty darn good with those soft violet walls.
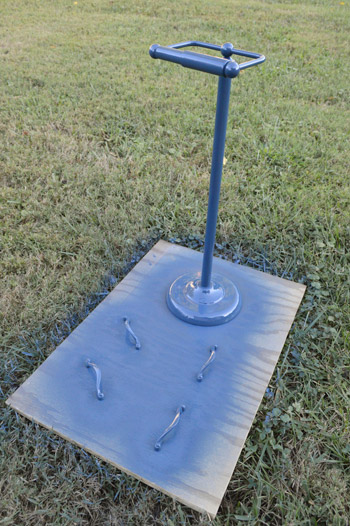
With the paint and flooring done, most of our major projects were checked off for the day, so it was just on to prepping a few more finishing touches – like breathing some new life into some of Granny’s old cabinet hardware (which we think was added sometime in the 80s or 90s, but had since peeled a bit). Enter Valspar’s Indigo Streamer in Satin to the rescue (it looks kind of bright here, but it’s a true deep navy in person).
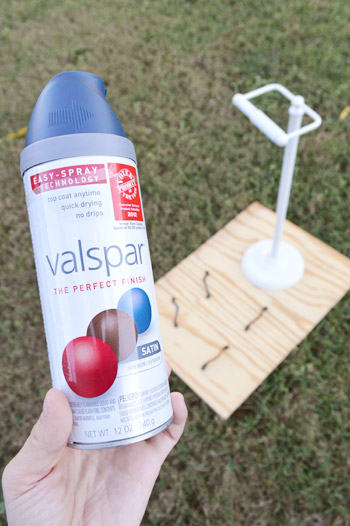
First we sanded them smooth and then it was spray-time. We had originally hoped to replace Granny’s cabinet hardware with some new shiny chrome versions, but the existing holes weren’t a standard size. That ended up being a blessing in disguise because not only did we get to reuse what she had, but we also got to make them a fun and less expected color. Navy definitely beats worn-and-peeling brass and adds tons of interest to an old white toilet paper holder.
So with our spray painted items drying outside for the evening, the room was looking like this by the end of Day 2 (pardon the terrible picture, it was late at night, so the floor looks Frito-orange and you can hardly see the voilet color on the walls).
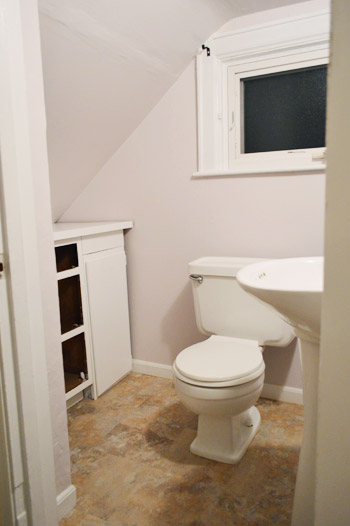
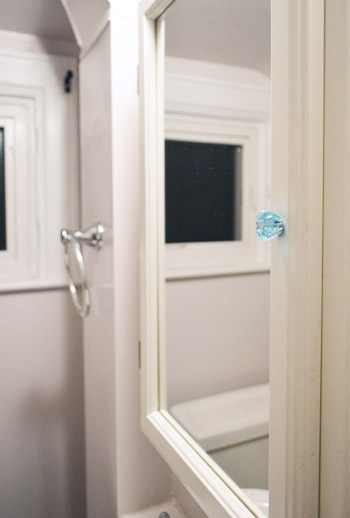
Oh but we were able to tackle a few other minor items in preparation for Day 3’s big reveal – like giving Granny a playful blue glass knob on her medicine cabinet, and hanging a towel ring into some existing holes on the duct (we worried hanging something on the duct might be a bad call, but Granny said it used to hang there for years and since my dad also said it shouldn’t be an issue, we used the old holes that were there and plugged them up with a shiny new towel ring).
Oh yeah, and we replaced a couple of her outlets – including the burned one on the floor – so they were all new and white and up to today’s safety standards (an electrician had looked a them prior to our little makeover to ensure they were nice & safe before we messed with them).

Isn’t this little problem area by her sink already looking worlds better? That was definitely one of the more satisfying views of Day 2. Although for some reason the soft violet walls are really hard to see in these late night shots.
Happily after a day of painting, changing up the flooring, and doing a few little updates to get a jump on things, our to-do list was looking like this:
Brainstorm colors & go shopping for accessories (Day 1)Spackle/sand/caulk everything to prep the room for paint (Day 1)Rebuild the cabinets a bit so they look more balanced (Day 1)Prime and paint the cabinets for a more updated and open look (Day 1 & 2)Paint the entire room, including the ceiling (Day 2)Fix a few issues, like a rusted duct and an old dingy corner below the sink (Day 2)Redo the floors, which were that old sheet laminate stuff (Day 2)Revive some hardware/accessories with a fresh finish (Day 2)- Make & hang curtains to add some charm (Day 3)
- Bring in some meaningful art (Day 3)
- Add some functional/personal accessories to finish things off (Day 3)
- Reveal the whole shebang for Granny (Day 3)
We’ll have all of the official before & afters in tomorrow’s post about our final day of upgrading the room and – the best part – video and photos of us revealing it to Granny. We’ll also have a full budget breakdown for you (we just have some receipt-math and photo-uploading to do). In the meantime, is anyone else out there using peel & stick tiles for a super affordable upgrade? Did you make paper templates too? Or did you use some other method to size them?

Jessica says
Did you let the tile go to the edge of the baseboard trim or did you tuck/push it under the baseboard trim? Thinking of doing this in my hall bath.
YoungHouseLove says
We just went up to the baseboard (you can add quarter round for an even more polished look if you’d like, but if you keep your cuts straight it should look really finished even without it).
xo
s
Ashley says
I can’t wait until tomorrow!!!
Caitlin @ Desert Domicile says
It’s looking great so far! Indigo Streamer has become my go-to blue. I’ve used it on three different projects so far and am going to be using it on a fourth this weekend! Glad to see you like it too :)
Chyenne says
In our entryway we have gray/black tile, it is textured and grouted. Do you know if peel and stick tiles will actually stick to that? It kills me when ever I walk in the door.
YoungHouseLove says
Hmm, I think you might need to remove that and get the floor nice and flat before adding it (ex: onto flat wood subfloor).
xo
s
Sarah says
Ha! The irony of this post is that I painted lamps with the very same spray paint this past weekend. Love the color! It’s such a pretty navy. :)
YoungHouseLove says
So funny!
xo,
s
Laura says
We used the same peel and stick tiles in our vacation home we bought last year. I just love them! We plan to redo the house eventually and I didn’t want to spend a lot of money. We replaced old brown carpet with the tiles, and painted all of the old brown paneling Hawthorne Yellow. Which I chose from your recommended paint colors. I love it! The tile is easy to keep clean and people are surprised to find out it’s peel and stick. It just makes me happy every time I go into the house! I hope she enjoys her beautiful bathroom makeover!
YoungHouseLove says
Sounds so sweet!
xo
s
Carla says
I’m loving this project so much. Such simple but lovely changes that anyone can do. The paint color looks so pretty next to that beautiful white trim, and I love the little blue knob. She’s going to be really happy when she sees her new bathroom. This is really fun!!
Liz R. says
What kind of paint is best to use in bathrooms since it gets moisture in there?
YoungHouseLove says
Anything in satin or semi-gloss is usually great. They also have stuff specifically for bathrooms.
xo,
s
Joanna says
When I first heard about peel and stick tiles, I loved the idea. BUT. We have them in the rental house we are now and they are terrible!!! About once a month I use a paint scraper to scrape gunk that comes out of the seams and then the floor is still sticky. I have resorted to wearing flip flops whenever I have to walk in the kitchen or dining room. The ones in the bathroom have the same problem, except a couple of them are peeling up. I think moisture has probably gotten under them. I’d love to know if anyone else has had this experience or if our were just put in poorly.
YoungHouseLove says
Eeks! Has anyone else had this issue? We had them in our laundry area and kitchen for a few years (installed them ourselves) but didn’t have that issue. Anyone?
xo,
s
Sarah says
I LOVE this! I’m so excited to see the big reveal! She is so lucky to have such wonderful people like you helping her out! :-)
Kim says
Love those peel and sticks! I’ve wanted to do it in my rental since I saw this on Apartment Therapy!
http://www.apartmenttherapy.com/before-after-gemmas-under-200-kitchen-spruce-up-165505
I love how the tiles are kind of retro but the stripes make it so modern. :)
YoungHouseLove says
Fun!
xo,
s
marbella says
Love you guys, and this is a fab little renovation for Granny. I totally understand budget constraints in this project an in those of commenters looking to do something similar on a budget. However, I just want to point out to readers that environmentally speaking, PVC is one of the worst types of flooring you can choose. The production of it is highly toxic to workers and the environment, it uses petroleum, it off-gasses after installation and is extremely difficult to dispose of in a non-harmful way. They typically don’t have a long life either, so will end up being ripped out and thrown in landfill fairly quickly. If you don’t HAVE to use vinyl tile in a space, please consider something else – stained concrete, linoleum, tile, cork? I wouldn’t post this but I know you do like to keep things sustainable usually. Link for those looking for more info on flooring sustainability: http://greenhomeguide.com/know-how/article/navigating-the-flooring-thicket-find-the-greenest-way-to-meet-your-needs
YoungHouseLove says
Thanks for the info!
xo,
s
how2home says
things are looking really good! I love the turquoise knob on the medicine cabinet.
Diane says
The suspense is killing me!
Amanda says
I’m so impressed with how you are actually getting done each day what you planned to get done! No matter how much time or how few to do items I have, I never quite get everything accomplished in one day. Way to go good planners!
YoungHouseLove says
We were so nervous about falling behind since it totally happens to us too! Granny must have been our lucky charm.
xo,
s
McKayla says
We had a lot of luck with the peel and stick in our bathroom, but not so much in our kitchen (which was only a temporary solution, anyway). I bet the bathroom sees less traffic than the kitchen, so she’ll probably be ok!
Laura says
Peel and stick tiles are such a great, economical solution for an upgrade! We currently have an old beige tile floor in our bathroom that I hate. I know you mentioned that the floor beneath the peel & stick tiles needs to be smooth-can you put peel & stick tiles over preexisting tile, or is that surface not smooth enough? Thanks!
YoungHouseLove says
It’s great over existing laminate or vinyl, but over grouted tile it’s too bumpy I think!
xo
s
Lynn @ Our Useful Hands says
It’s coming together so nicely. We finally set the date for our housewarming party and last night we were updating our “Must Get Done Before People See the House” list and on it was finding some decent peel and stick vinyl for the guest bathroom. I like how you put your old house kitchen tiles on a diagonal because it really does make it seem more spacious. Off to Home Depot I go to do some pricing this afternoon. Can’t wait for Day 3 and the big reveal.
My best, Lynn
Seriously Sassy Mama says
I really like the wall color. Perfect for a sweet granny.
Jocelyn Pascall says
Loving the progress and DYING to see the final outcome!!
Vanessa L says
Did you do anything special to granny’s floor before you put down the peel and stick? Clean the existing floor in a special way? And if you had more time would you have pulled up the existing vinyl or is it better to put the peel and stick on top? Thanks for the tips – it’s looking great!
YoungHouseLove says
We just swept it and wiped it down with a microfiber cloth to get up any sawdust or other little specs of things for maximum adhesion.
xo
s
Jub says
I’m sorry to say that I prefer the first floor…
It seems the new one is too much present in the room, and the room doesn’t makes you feel comfy like with the previous colors (floor included).
Leanne says
that burn mark above the outlet is HILARIOUS! i don’t know why that is making me laugh. I can just see that outlet with 8-12 plugs in it, hot rollers, curling iron, hair dryer and the smell of AquaNet straight out of the 80’s. Then POP! fire! I hope someone’s bangs didn’t get singed !
Chrissy Sparks (Brush Dance) says
We bought our home several years ago…we still have not gotten around to replacing our bathroom flooring, but it needs it! I will have to keep this in mind for the day that we actually get around to doing it! haha Thanks!!
Jessica says
A great way we found to “finish” the edges was by using a tiny piece of pvc trim that Lowes sells. It works like shoe molding, adds some decorative charm, and is white to match the baseboards. It allows you also to caulk around edge. We did our whole house in the Allure flooring that looks like wood- it even has grooves in it and has been super flexible in a Texas house that moves with the fluid soil and frequent foundation shift. And Cutco scissors are miracle workers when it comes to the edges/door frames. With a child that has allergies, this was a huge improvement over carpet without the cost of hardwood floors.
YoungHouseLove says
So smart! I love that tip!
xo
s
Amanda C says
Lol, the suspense is killing me! Who’d of thought Granny’s bathroom would do that to me? Haha. It’s gotta be because this is coming after that adorable family reunion post. Well, it goes without saying but.. I can’t wait till tomorrow! My fingers are crossed for a video of Granny’s reaction, but the room is so teeny tiny, so, you know, I won’t hold my breath or anything :D Great job so far guys!
Annie says
Your love for Granny makes my heart smile. You guys rock my socks!
Emily says
It’s crazy how much whiter the toilet and sink look with the new floors and paint!
Christy Niebaum says
In our peel and stick tile experience, I’ve found that most tiles can be cut with a simple pair of kitchen shears. Easy peasy. Hey, girl, hey!
YoungHouseLove says
Great tip!
xo
s
Nicole P. says
We used peel and stck tiles in our closet laundry and pantry areas. For some reason the previous homeowner didn’t carry the new tile into those spaces, so there was some super nasty and stained linoleum in there. Peel and stick worked like a dream!
Erin says
I used those same peel and stick tiles from HD to do a quick upgrade in our old bathroom before we put our condo on the market. I thought they were awesome to work with! I was impressed by the texture. I definitely do not recommend trying to do a diagonal pattern with them in a small space, though. I don’t know what I was thinking!
For templating, I actually used the peel-off backs of some of the tiles after I’d laid them.
I cut around the toilet and sink/vanity too.
YoungHouseLove says
So smart!
xo,
s
Mia B says
We haven’t done peel and stick, but when we were tiling a bathroom floor with a tub that was not a straight profile, we blew through a lot of travertine trying to guess the shape. Later, I saw an awesome tool that I wish I’d had at the time. Since you all do a lot of projects, I can see that it would come in handy for you too – google a “profile gauge” and I think it would be one of those things that is money well spent in time saved!
YoungHouseLove says
Ooh thanks for the tip!
xo
s
frankie @ real estate realist says
Loving your work here guys. Some really good inspiration!
m @ random musings says
I have (old) vinyl tile on my main floor, and though the tiles themselves are in good shape, they have shrunk? over the years so there are tiny gaps (~1/32″) between the tile. I now see at big orange that you can grout vinyl tile! Is that something y’all considered for this bath?
YoungHouseLove says
I think some of the older models do have more over-time issues with shrinking and not sticking, but lately they seem to have 50 year warranties and really come formulated to last a nice long time. We added stick tiles to our first kitchen and laundry hallway/half bath and we really liked them! We definitely look for the ones with long-term warranties on the box.
xo
s
Jaye @ Just Trying to Make Cents of it All says
I use paper templates when cutting any kind of tile, vinyl or ceramic. I find Freezer paper is the best! That teeny bathroom is looking so adorable! The funky glass knob on her medicine cabinet is classic “Young House Love”!
KellyJo says
Since you didn’t pull Granny’s toilet, I’d love to know your secret for painting behind it? I’ve been putting off painting my basement bathroom for this very reason. Thanks so much!
YoungHouseLove says
We always take the top of the tank off (it just gives you more space to roll behind it or use a small brush to get back there). Hope it helps!
xo
s
Robert says
Great job! It’s nice to see how you can make some great changes to a space without spending a fortune.
Emily @ Our Waldo Bungie says
Funny story, I also recently re-did a bathroom in 48 hours for my parents. Seriously, 48 hours is a whirlwind amount of time for a bathroom reno…even if it is a tiny bathroom!
http://www.ourwaldobungie.com/2012/09/06/renovating-a-bathroom-for-600-or-less/
YoungHouseLove says
Wow- you did a gorgeous job! Looks so new and crisp in there!
xo
s
lyndie says
thank you SO much for the tip on cutting tile to fit around curved edges. this was indispensable info when installing peel and stick tiles in my old and not-properly-squared bathroom. thank goodness pinterest led me to you! keep up the super work! :)
YoungHouseLove says
So glad!
xo
s