As if our bathroom didn’t already make it abundantly clear during the demo process, the act of putting things back together certainly proved that renovating an old bathroom is a lot of work. And it’s almost always full of surprises. Nothing we couldn’t handle though. Let’s just say we were kept on our toes.
As you may recall from this post, my dad just DIYed two separate bathroom remodels this year in his own home and kindly volunteered his time, expertise and tools to help us with ours (hooray free labor – although there was some obligatory feeding involved). So I took two days off of work to give the three of us a four-day-long-mega-weekend to whip our room back into shape. And yes, once again, the bathroom whipped us right back in return.
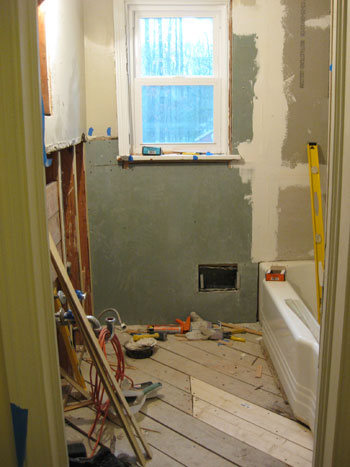
You may remember that that bathroom looked like this after my weekend o’ destruction:
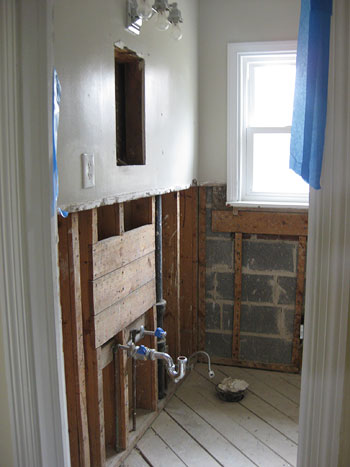

The plan for the following weekend was to begin putting everything back together: install new drywall on the walls, hang backerboard wherever tile was going, repair the rot in the floor, and tile both the shower/tub surround and the floor. My dad was actually able to hang drywall in both of his bathrooms in just a few hours and spent another day or two tiling them so Sherry (the most ambitious of the group) had big dreams that the room would be ready for showering and, um, other unmentionables by Day Four. I, on the other hand, just wanted to not die from exhaustion. Spoiler alert: only one out of the two goals were accomplished.
So here’s how it all went down- er, up.
***********************************************************
Day Zero / Shopping Day (Thursday night): My dad arrived shortly after I got home from work and a’shopping we went with list and room measurements in hand. Key items on our list included: enough hardibacker (aka cement board, aka backerboard, aka Durock) to cover the shower surround and floor, greenboard (which is moisture-resistant drywall) for the other walls, 3/4″ plywood to lay a super sturdy subfloor and some new 2x4s to repair the rotted floor planks that we uncovered. Plus some other little things like cedar shims, a couple of boxes of 2″ and 3″ drywall screws and a masonry blade for my dad’s circular saw (to cut the plywood and hardibacker – we were buying 1/2″ hardibacker, which is pretty hard to score and snap).
Here’s where we met hitch-in-the-plan #1: both the greenboard and plywood were too big to fit in my dad’s giant minivan. We were all shocked. Shark farts (30 Rock anyone?). No worries, Home Depot rents a truck for $19 for 75 minutes – plenty of time to get home and back. However it was 15 minutes ’til closing and HD didn’t trust us to keep the truck overnight. So the greenboard and plywood got to spend the night at the store while everything else came home with us.
***********************************************************
Day One (Friday): Our first full day kicks off with me and Sherry retrieving the oversized purchases thanks to the $19 Home Depot truck rental. Bonus: it’s also great for transporting a breakfast of Einstein bagels.

Along with the greenboard, plywood and bagels – we also picked up a bunch of furring strips to beef up our studs (hmmm, maybe in the future I should avoid using fur, beef and studs in the same sentence for search engine purposes). Anyway, the furring strips would help us solve hitch-in-the-plan #2. One challenge we didn’t think through was the fact that we would have to make sure the new walls matched up perfectly with the old walls. And the walls in our bomb shelter of a bathroom were inches of insane mortar, plaster and metal-mesh, which made them extra thick. It wasn’t an option to set the walls back a few inches to gain the space since we were keeping our tub, so the new walls had to come out and meet the edge of the tub just as the old walls had. Hmm…
And because our extra thick hardibacker was still only 1/2″ thick, we couldn’t screw it directly onto the studs because that would set it back about 2.5″ from the edge of the tub and the rest of the walls in the room. Instead, I had to securely nail two layers of furring strips to every single stud before screwing the hardibacker into place to beef things up so the hardibacker would be even with the walls and tubs. Oh and here’s a tip, we used super long screws that could pass through both added furring strips and into the studs/existing furring strips so everything was secured together with one long corrosion resistant screw. This way things can’t wiggle loose as they would if you only secured one furring strip to the other which was attached to the stud with a separate short screw. It’s all about sandwiching everything together for a secure and super deep hold.
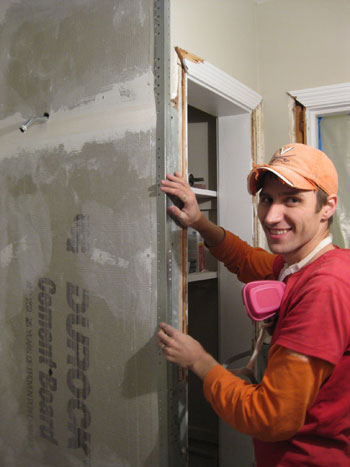
All this furring strip action wasn’t a hard task, it just ended up being extremely time consuming. In fact it was still early afternoon by the time we got our first board in place:
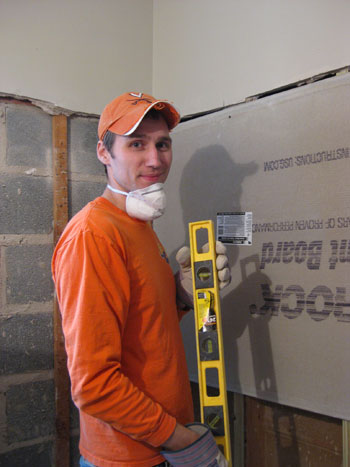
See that look on my face? That’s blissful ignorance. That’s because it’s before we realized our big oversight. Sherry and I always talked about running our subway tile all the way up to the ceiling. But that requires hardibacker being placed all the way up to the ceiling too. And as you can tell in the photo above – I hadn’t demo’d those top two feet of plaster/mortar/metal-mesh because we assumed we’d just line up the backerboard and tile everything. Baaaad idea.
After consulting more than a few experts – including people at my dad’s tile shop and the folks at True Value – our fears were confirmed: tiling over painted plaster and mortar is a big no-no (unless we heavily scored the paint and bought a special kind of latex- based mortar which was still an “iffy” short cut according to many). Call it hitch-in-the-plan #3 if you will.
So off came that first piece of hardibacker that we had so proudly attached. And then a couple of hours were dedicated to demolishing the remaining plaster, mortar and metal-mesh walls around the top of the shower (and cleaning it up). For a look back at how serious that demo gets, check out this post. Fortunately, even after all of that tearing-apart, there were still a couple of hours left in the day (and a few ounces of energy left in us) so we were able to get most of the hardiboard around the shower installed. And in the end we were glad we didn’t take any shortcuts like trying to tile over the old painted mortar and plaster walls. We’re all about making this bathroom last for the long haul.
Then we ordered Chinese food. Nothing like a fortune cookie to end a busy day.
***********************************************************
Day Two (Saturday): On Saturday morning my dad and I threw our dusty clothes back on and got right to work finishing the hardibacker in the shower (yes, I will admit upfront that I wore the same outfit for four days straight without a proper shower- there was lots of sink hair-washing and washcloth bathing). Well, actually, if I’m being honest – that was after an early morning trip to the store to get more furring strips, some extra screws and a few other miscellaneous items. Running out to grab a few miscellaneous items is par for the course in most renovations, especially of this scale (the official count: four trips at this point in the weekend already).
With that done we could finally turn our attention to hanging greenboard on the remaining walls under the window and behind the toilet & sink that will be tile-free. I’ll spare you gory details, except to say that it was easier to cut than the hardibacker (hooray for just scoring and snapping!) but it involved lots more math and measuring (cutting around the window, heating vents, etc.) And lest we forget all the furring that was required before any piece went up to keep things flush?
Fortunately, although time consuming, the walls were pretty much a one man job. That meant it left one of us – my dad – to finally stop ignoring that rotten spot in the floor.
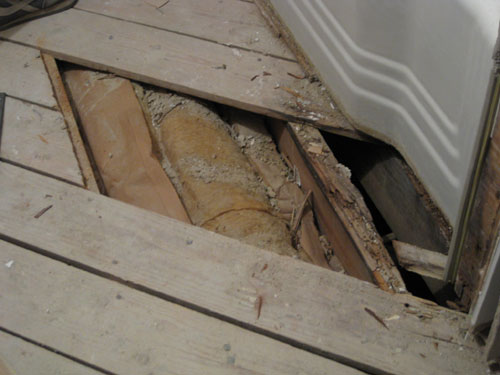
The rot only affected two planks and the top of two joists (one under the edge of the tub). So it was a relatively straightforward task of replacing the planks and reinforcing the joists. Here’s what it looked like with the nasty planks cut out and removed.
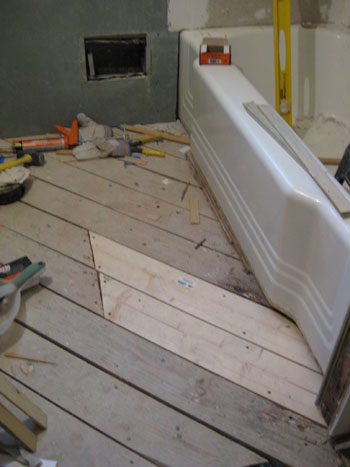
From there, my dad cut some 2×4’s that he could Liquid Nails and then screw into the side of the rotted joists (fortunately it was just the tops. Basically, since we couldn’t rest the new planks on the old uneven joists, we had to create new, solid joists that sat parallel to them. Once those were in place (and boy were they solid!) my dad installed fresh planks where the old ones had been. And voila – the crazy old diagonal subfloor was as good as new:
So we wrapped up Day Two by taping and mudding the shower surround so that it would be dry in time to begin tiling on Day Three… despite the fact that we still had one long wall left to install greenboard on (see the one on the bottom left?), not to mention a piece of plywood to install on the floor to reinforce everything and bring it up to a height that matches the rest of the house. So yeah, maybe tiling on Day Three was a lofty goal…
***********************************************************
Day Three (Sunday): Like the days before it, Sunday kicked off with a miscellaneous supply trip to the home improvement store – this one included things like paper towels, a metal corner fitting, some extra mudding tools and (yes) more furring strips. Oh, and we grabbed a few plastic drop cloths because Mother Nature wasn’t cooperating. Heavy rain + cutting drywall in a detached garage = the need for some way to transport things into the house without allowing everything to get drenched.
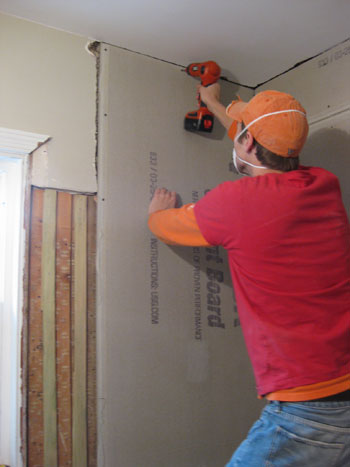
The third day included simple tasks, like fastening the metal corner fitting to the wall:
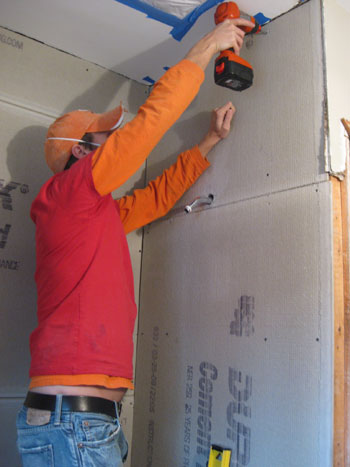
And not so simple tasks, like installing our biggest piece of greenboard yet (about 8ft by 4ft) – which involved cutting four perfectly placed fixture holes. It actually wasn’t that difficult (thank goodness mathiness runs in my family). But then we hit hitch-in-the-plan #4. I noticed a pipe leaking in the wall. Crud. It wasn’t a big leak, but enough that it made me grateful to be discovering it before installing new moisture resistant drywall over it (it’s not like the stuff’s water proof- and nobody wants a leak in their walls!). So at least we saw it before sealing things up.
After some investigation, my guess/fear that we knocked something loose during demolition was wrong. It was actually a tiny leak in our roof (the pipe extended all the way up the wall and through the roof) that was dribbling down the outside of the pipe behind the wall. We’re not sure how long it had being doing it but, again, we felt lucky to be noticing it at the perfect time to take care of it. Apparently the heavy rainstorm that day was a blessing in disguise!
So off I went to the store (trip #6) to get some silicone caulk to plug up the leak in the roof from the interior for the short term (the long term solution will involve getting up on the roof with some tar). Who would’ve guessed that our bathroom remodel would be sending me squeezing into the narrowest section of our attic – oh the “pleasant” surprises of home improvement. At least it solved the problem (though I do have a trip onto the roof in my near future to solve the problem more permanently).
And speaking of surprises, Sherry and I thought we’d leave one in the wall for whomever renovates this bathroom next. Before placing the last piece of greenboard on the wall behind the sink, she scrawled this note onto one of the boards: “John & Sherry (& Baby P) were here on Dec 13th, 2009. The question is: who will find this note? Someone else? Or us in 50 years when we’re renovating again?”

At least if it’s us finding it again we’ll be better prepared for what’s required to get ‘er done in this crazy high-maintenance bathroom of ours. And if it’s not us, hopefully that person will be grateful it’s just simple greenboard between them and the studs instead of inches of mortar and metal-mesh.
With Day Three quickly coming to a close (and still not having even touched tile thanks to various time-consuming set-backs) we managed to find time to at least lay the new plywood subfloor that my dad and I had measured and cut earlier in the day (it only took three tries to get it perfect – a victory considering the fact that our tub is curved). And we were really happy with our decisison to use 3/4″plywood over the 1/4″ stuff. It really made the floor super solid (less flex= longer lasting tiles that don’t crack) and raised it up to be level with the rest of the house so there wasn’t a tiny step down into the bathroom. Things might be taking forever but at least we were being thorough. Oh and in case you’re wondering, our trip count to the home improvement store was at seven at this point. Yes seven trips in a little over 72 hours.
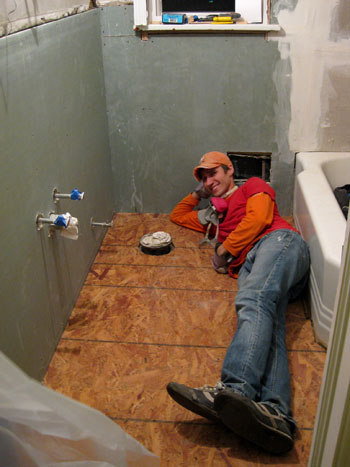
Here I am enjoying our new, super-solid subfloor. And yes I realize my head is right next to the “toilet hole” (again, that’s a technical term).
***********************************************************
Day Four (Monday): Let’s just say that by this point things start to get a bit blurry. After three long days of construction, our brains weren’t working at 100% anymore – but we were more determined than ever to open a box of tiles. And luckily there was only one task standing in our way: cutting the hardibacker for the floor. (Oh, and trip #8 to the hardware store took place. I have no memory of what we bought since by this time the shopping trips were blurring together).
The good news is that cutting the hardibacker to fit the floor was relatively painless. We just used our cut plywood to trace the shape onto our hardibacker so it would go in perfectly. Then, in a shocking turn of events (I’m kidding, nothing was shocking at this point) we decided to not install it, since we worried that days of walking over it would just lead to crumbly and dusty cement board with dings and drips on it (i.e. not a good surface for laying tile). After all, we still had to finish all of the tiling, mudding, sanding, priming and painting before introducing our pretty new marble tiles into the room.
So with the hardibacker for the floor cut and laid to the side for later installation, what was next? TILING! Yes, it was lunchtime on day #4 and we could finally bust out the wet saw and thinset so that we could start getting those subway tiles on the wall. But you know what, that’s a topic for another day. We actually have a full tiling play by play in the hopper for ya. But for now, let’s just say some tiling was completed… and despite all of the rigorous and exhausting work, we still ended the four-day weekend with smiles on our faces (and all sorts of dirt under our fingernails).
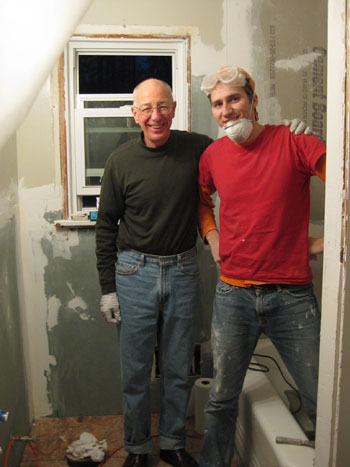
And, of course, we owe a HUGE thank you to my dad for imparting all of his fatherly knowledge and remodely ninja skills on us. And for being so patient and helpful when it came to all the challenges and unforseen curveballs thrown our way by this old-but-loveable house of ours. We figure all of these hitches will just make our big victory in the end that much sweeter…
Psst- Wanna read about the first two chapters of the big bathroom makeover? Check out Chapter One right here and Chapter Two over here.

Leave a Reply