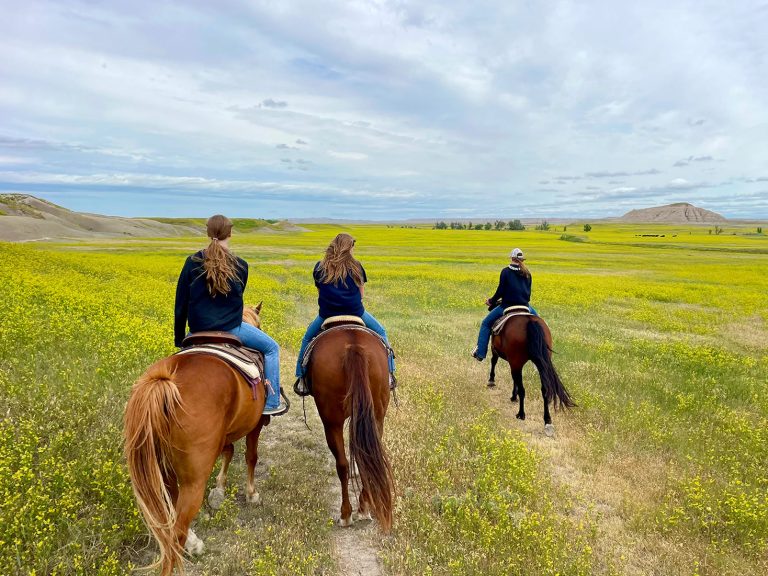
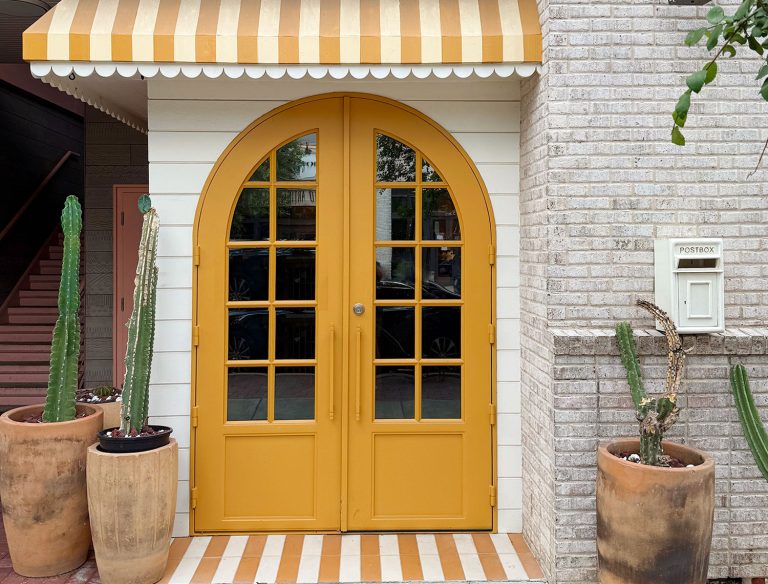
Author Archive
Fab Freebie: Roses Are Red
It’s almost Valentine’s Day and to show our love for you, we’re giving you flowers. Well, actually Teleflora is giving you flowers. And technically just one of you. But not just any flowers – $100 worth of flowers! So hopefully all the ladies reading are psyched at the sheer volume of flowers that could add up to (like something straight out of The Notebook). And to all the dudes reading, I’m secretly gunning for you because I know I’d like to look like the high roller who splurged to the tune of 100 beans on his other half this year (or just sat around enjoying them myself). So go get ‘em.
- PRIZE: A $100 gift card to Teleflora
- TO ENTER: Comment on this post with the words “ROSES ARE RED” and continue…
- BONUS QUESTION: … with your own favorite or original spin on the classic saying (mine would be: Roses are red, violets are blue, I can’t enter this freebie, so I’m jealous of you).
- GIVEAWAY CLOSES: Wednesday, February 8th at 8pm EST or at 10,000 entries (whichever comes first)
- NUMBER OF WINNERS: One
- PRIZE SHIPS: The United States or Canada (although we do try to wrangle as many international giveaways as possible)
- USUAL STUFF: One entry per e-mail address is permitted. The winners will be selected using random.org and announced on Thursday as an update to this post. That’s right, come right back here on Thursday for the announcement of our winner. Good luck…
Note: We aren’t paid or perked for hosting these giveaways, we just do ‘em to thank you awesome folks for stopping in. See our Giveaway FAQ page for more info. Pics courtesy of Teleflora.
Thems The Brackets
Okay, let’s get some open shelves up in this mother.

With the hood cover now built, we could finally put the shelves in around it. We were originally going to build true floating shelves (maybe even breaking out Ana White’s instructions) but after looking at some of our inspiration pics again, we decided to open ourselves to the idea of using brackets instead. Note: For anyone wondering how the whole dust/grease situation is with open shelves, check out this post (we’re crazy so we did our research). Apparently the consensus is that if you have a great range hood (check!) and put dishes you use often up there (soon-to-be-checked!) it’s all good. Rarely used items stored inside of cabinets get dusty too, so the key seems to be to have a good hood and to rotate things and use them a lot when they’re out in the open. We’ll definitely tell you how it goes for us.


Besides just liking the look of them, brackets would also make us less concerned about things ripping out of our wall o’ tile (and you already know that stresses us out). Plus, we had heard that Home Depot had some pretty good and affordable options for brackets. Here are the ones I found – actually this is the photo I texted to Sherry to ask which one she liked best since she was at home with Clara and the photoshoot crew.

We both agreed the last one was BY FAR our favorite, so I picked up 12 of ‘em along with some 12″ framing lumber to act as our shelves. A few of you had said this 12″ framing lumber + brackets system worked well in your kitchens (and we had good luck with them making our office desk) so why not, right?

Well, one “why not” would be that they’re not wide enough for our plates. We have 12″ dinner plates and since 12″ in lumber terms is really closer to 11.25″, we realized we’d have some plate overhang-age. Which is never a good look:

After briefly contemplating getting smaller plates, we devised this solution instead: adding some 1 x 2″ trim around the end (just like we did to finish the top of our homemade console table in the living room).

Not only would it solve our shelf depth issue, but it’d also mean I could cover up the rough end of each board with a nice smooth piece of wood. A win-win, dontcha think?

With all of our materials purchased our total came to about $116 (for brackets) + $15 (for the shelf boards) + $10 (for the smaller boards to frame out the larger shelves) = $141. Which isn’t exactly cheap, but we knew we’d essentially get four shelves worth of storage (two big and two smaller ones) which is about the equivalent of three upper cabinets (which usually go for around $300+ total). And thanks to saving money with things like reusing our original cabinets, building our fridge cabinet, our self-installed wall of tile, and our craigslist range hood we were ok with a semi-splurge in the shelving category (plus we already have the paint and primer we’ll be using).
Next we began marking and measuring everything. We used the same weighted-thread-hanging-from-marks-on-ceiling method for indicating where my studs were (which we used here to hang our range hood). Ends up they’re pretty awesomely placed to get even looking brackets – except for the two on the end of the long side (that stud is being used by the hood, remember?). But we figured we’d just use heavy duty anchors on the other two (sunk into tile we knew they’d be nice and strong).

We also used this moment to measure and cut our shelves too. I know it may look short on that one end, but remember we’re gonna trim it with a 1 x 2″ board, so that’s intentional. Oh and see those subtle gray lines in the photo above and below? Those are our hanging pieces of thread to mark the studs. Just didn’t want anyone to wonder if we drew on the tile or anything.

We decided to just trim the exposed sides so each shelf had a slightly different configuration. The long shelf on top would have the wall and hood on both ends, so it only needed trim on the front. But the short shelf on the bottom would be exposed everywhere but the back side (the one on the top right would run into the hood and the one on the bottom left would run into the wall). I know it might seem strange not to just trim them all out in the same way, but we knew from building our console table that once it was all put together and painted it would look great this way. And of course we cut the framing lumber to different sizes to account for the trim, so they’ll all be the same finished length and depth.

We attached the trim with some wood glue and finish nails. You’ll notice we also have some pre-drilled pocket holes on the top. I was thinking it might be nice to screw the shelves directly into the wall (in addition to screwing them to the brackets).

That night I also broke out the wood filler to make the thin seam between the trim and 12″ board completely disappear. It was a small detail, but we thought once primed and painted it would really help make it feel like one solid board. See how even in the photo below (without primer and paint) you can’t tell that some are trimmed out on one side while others are trimmed out on two? We’re actually glad our plates didn’t fit on the boards alone since the trimmed out result is so much more finished looking.

While all that was happening, we also started getting ready to attach the brackets to the wall. We leveled and taped up some 1 x 2″ scraps to act as our placeholder shelves so that we’d know exactly where the top of the bracket needed to sit.

The brackets came with two metal hooks on the back, so I used my favorite paper template method to help figure out where I needed to drill corresponding holes on the wall. The strip of paper is taped to the bracket on the top and bottom, but the tape on the sides is facing out to stick to the wall. And the two holes are punctured right where the notches are.

Then I put it in place on the wall, pressed the side pieces of tape against the tile, and carefully peeled the bracket away…

…leaving my paper template in place so that I could mark through the holes.

See? Easy right? Now just pretend it wasn’t super tedious to do it 11 more times.

And since I still cringe at the sight of our tile getting drilled into (especially 24 times!) I couldn’t bear to photograph it again, let alone share it here. But here’s some of the final product – a dozen pairs of screws waiting for brackets to be hung on them. That my friends, as subtle as it may look, is the look of progress.

Here’s a sense of how everything will hang. We did a test run of hanging one side to make sure the screws weren’t in or out too far, and to make sure they felt secure. They did! Phew. True to form, Sherry can’t wait to load them up with dishes and plates galore.

But as excited as we were to just get the darn stuff hung, we knew it would behoove us to do all of our priming/painting beforehand – (that way we wouldn’t have to worry about taping off the wall or getting paint on our grout). So this is where our shelf-hanging tale ends for now. Waiiiiiting for our primer to dry so we can apply two coats of paint (the same color that we used for our cabinets) and then hang it all up once it’s nice and cured. Oh yes, and we’re priming and painting the hood too, so that should look nice and crisp the next time you see it.

Once dried, it should be pretty quick to get everything hung so we should should have “after” pics for you by Wednesday, barring any unforeseen craziness (who are we kidding, it’s week two of three for our in-home book shoots and we live in Crazyville, but it would take a pack of wild boars running through the house for us to slow down on our shelves). What did you guys do this weekend? Any lumber stuff? Priming? Drilling through tile? Prepping 35 more secret projects to shoot for your book while your daughter ran amok and your chihuahua ate various crumbs leftover from the past week of visitors?
Psst- The inspiration pics in this post were found at The Inspired Room and You Paid More Than Me.
January Superlatives
January was one of those you-sneeze-and-you’ll-miss-it months for us. It just flew by! Is it really already February? Crazyville. So before our behind-the-scenes-book-stuff threatens to completely erase our memory of this month, we like to take a moment to look back on all that we’ve done at a glance (and gather all the links in one handy place for ya). And of course we tossed in some never-before-seen stuff for kicks. This month we were all over the place as usual, but focused a lot of our time on the kitchen along with making a mini kitchen for Clara and tackling some random stuff that we’ve been hoarding in the playroom in what we affectionately like to call our “Dude, Get On That Already” Challenge. So let’s take a walk down memory lane, with yearbook-esque superlatives, shall we?
Future Top Chef: Clara, considering the amount of time she spends using the play kitchen we made for her for Christmas. Although the thing she “cooks” most is a bunch of toy animals (they also get lots of fake baths in the sink).
Most Gifted: Us, at least when it comes to recapping all of our Christmas gifts – like earrings, art, art supplies, buttons and this cheeky t-shirt.
Most Secretive: All of the lady-bloggers (including Sherry) who participated in a Secret Santa gift exchange last month. January meant they could finally reveal their identities and the deets behind the gifts.
Most Likely To Be In The Dark: Clara, thanks to her new blackout curtains. They’re still not officially sewed, but that doesn’t keep us from getting some rock star naps lately! Thank goodness. It’s like she knows we’re trying to knock out five secret book shots in a two hour period so she gives us an extra half hour just to be sweet.
Most Artistic: The wall in our living room, which got a small little art switcheroo (color mats became more muted linen ones). Oh and we shared a behind-the-scenes glimpse into our ottoman. Our over-sharing spirit knows no bounds, apparently.
Class Stud: This stool that we made over for a feature in a recent issue of Do It Yourself magazine (after we gave it a little paint and fabric update with some nail heads).
Most Deranged Re-Arranged: Clara’s room, which is on its third layout in one year. I guess that’s what you get when you try to configure furniture meant for a smaller differently-shaped room into a new space.
Best Couple: The new sheer curtain panels that joined the existing printed panels (well, half panels) in our living room to beef up their visual presence a bit.
Book Worm: Our family yearbooks! Our big photobook featuring all of the highlights from 2011 arrived in January (and Clara has already learned to request “look at pictures” to go through it together – awwww).
Most Faux-Real: The antlers we sprayed white and hung atop Sherry’s noggin in the kitchen as our first “Dude, Get On That Already” project where we have vowed to use things or lose them donate/craigslist them.
Best Tour Guide: Burger, for showing you around his “room” in our post about hanging a new light fixture in our master closet.
Least Upright: Me, while snagging a few new closet chandelier pics while Burger supervised.

Most Dramatic: The transformation of our cabinets, having (finally) gotten their paint makeover.
Most Tedious: Installing our penny tile in the kitchen, which required a fair bit of time and concentration – so much so that the process spanned three whole posts. Including this one (where we covered how we figured out how to cut the penny tile)…
… this one all about how we planned and executed our first (small) wall of tile…
… and this one about finishing up the whole thing (including a video of the thinsetting process). Fortunately it was all totally worth it in the end. We still find ourselves petting it every now and then.
Most Annoying: Me, for getting a Tears for Fears song stuck in lots of your heads thanks to my post entitled “Grout, Grout, Let It All Out.” Uh oh, did I just do it again?
Most Swiss Cheese-esque: The ceiling in our kitchen, which was rocking quite a few holes following a visit from the electrician.
Most Well-Rounded: Our new globe pendant lights over the peninsula in the kitchen.
Little Miss Perfect Award: Definitely not Sherry, who owned up to the fact that life isn’t always rainbows and unicorns at Chez Petersik in her “The Real $her-dog” post. But that’s why we love her.

Mr. Mom: me (I’m feeling better about accepting this title thanks to lots of encouraging comments on my “The Real J-Boom” post where I talked about my insecurity about being a work-at-home-dad). Aw, shucks.
Cheapest: Our Jenn-Air range hood found on Craigslist for $60 (after we talked them down from 65). I’d say it’s our best deal of the year, but it doesn’t mean much considering we’re just one month in. It’s like seeing a movie preview these days that says “Critics are calling it the best film of the year.”
Most Supported: The aforementioned vent hood, which you saw us hang earlier this week (and a bit later – though technically in February – you saw it get all covered up too).
Most Commented: Our post about how we handle less-than-kind feedback (wowsa, it wracked up over 1000 comments in one weekend). Must have been this picture…
Most Chaotic: Our house, as the perfect storm of kitchen renovations and book photo shoots converge in one typhoon of craziness. Hey, on the bright side – one week of three is officially complete! And we have over 35 projects fully shot (before, progress, and afters) and in the can. Go team!
Biggest Chicken: Jarvis, the oversized ceramic rooster that we amped up with some aubergine spray paint.
Most Dated: Our page o’ monthly round ups that we finally organized (so you can see virtually all our 2011 projects in 12 posts). Guess we gotta go add this guy now…
What did you guys squeak out in the first month of 2012? Have you ever made a list of accomplishments to look back on? Feel free to use the comment section of this post to list what you’ve done (or just toss out a few highlights). It’s so nice to take a break from adding things to the to-do list for a second, just to look back and appreciate the things you can mark “done!”
Reader Redesign: A Light In The Attic
When I was growing up and my parents would take us to open houses for fun, my little sister and I always picked the most interesting room as “ours”: the one with the secret compartment, the one with the biggest windows, etc. If we were to tour Kristin’s house, I’m sure the attic they transformed into their daughter Ella’s bedroom would take the cake by a landslide… and quickly turn into a big fight between my sister and I about who had “dibs.” Here’s Kristin’s letter all about it:
Hi guys! I’ve been torn for a while about which project to submit, but I’m going to go with my daughter Ella’s room because a) the story involves dead pigeons – and what good renovation story doesn’t? – and b) it’s not a kitchen – our kitchen still kind of stinks – and c) you seem to enjoy a good kid’s room with lots of play value and the flexibility to change things up. So here’s the story.
When we first saw our home, we were drawn to the mansard roof and the attic beyond. Undeterred by the deteriorated brick walls, the water damaged wood, or the pigeon remains, we saw the possibility in that attic for a treetop bedroom and we were sold.
Demolition began and we removed the rotted pine flooring and salvaged a single wall made of tongue and groove pine.
Then we designed wardrobes (we had them fabricated at a local millwork shop) that went in, providing storage and a hiding place for the ductwork that serves this floor and the one below. Next, we covered the exposed rafters and installed beadboard in between.
The best part? Those old pine boards were installed on the front wall, adding texture to a wall that has become an ever-changing activity and display wall for our daughter’s creativity.
See the map sitting in front of those boards on that angled wall? They’re hard to notice in the photos but are really great in real life. The view of the Gateway Arch and the summer fireworks from that dormer are just icing on the cake.
I’ll include a before and after of the mansard we rebuilt (well, mostly my husband did since I was pregnant and then we had a newborn. The mansard is an integral part of her room, but was an expensive necessity! So I always joked to Ella that she had the most expensive nursery on the block (slate and copper ain’t cheap, but our own labor is!) Enjoy! – Kristin
If you wanna read and see more of Kristin’s makeover, hit up her blog for the full scoop on what a lucky girl that little Ella is. Thanks for sharing Kristin! Now, who wants to fight me for that room?
I Gotcha Covered
Even though I’m sure you figured we’d just grow to love the look of our crazy exposed hood (“oooh, it’s so unfinished chic”) we were ready to get this hood-covering train in motion. Oh and as for the height of the range hood, we just followed the manufacturer’s recommendations (the JennAir website offered a range and we went right in the middle of that range at 34″ above the counter).

As for the hood cover, the first thing we did was use photoshop to mock up two different options to figure out what we thought would look best. This was our original thought, since it looks most like a lot of the hoods in our inspiration pictures. The squares on the front are supposed to be panels we’d make using trim.

But it looked a bit top-heavy to us, so we tried this version instead:

We liked that much better, so I took some measurements and drew up a “technical” drawing of the plan. I roughly sketched the hood to scale (using some graph paper under this white sheet) with pen and then used a thicker marker to design the cover around it.

And in the other corner you can see where I started to figure out what sort of wood I would need to actually build this thing. I’m not going to even try to explain what this means now, since it will become clearer as you see the actual cover come together. But just know my goals with this thing were to:
- Make it sturdy (and use moisture/steam/grease resistant plywood so it would last)
- Make it as light as possible (I didn’t need worry about another heavy thing falling off of the wall)
- Make it pretty

When I returned from the store with some plywood panels and 1 x 2″ boards in hand, I got right to building. I was going to build from the bottom up so I started off by building a frame and cutting some plywood panels to size:

The frame is basically three pieces of 1 x 2″ screwed together in a U-shape using my Kreg Jig. To attach it to the wall, I made a couple more holes with my jig so that I could screw it tightly to the wood plank that we used to mount the hood (see, I told you that weird overhang would make sense!).

It looked a little something like this. Note that it’s not touching the actual hood at all, so our cover will essentially float around the entire thing (our high-efficiency range hood should have no issue directing moisture/steam up into the hood and up the vent, and our wood surround should stand up to everyday use like many wood hood surrounds built by various cabinetmakers and handymen/handywomen). We’ve heard from a ton of folks in blogland who have built or hired out wood covers since revealing our crush on them and we’re happy to report that everyone seems to have had a great experience with them (no moisture or steam issues with the wood around the hood). It actually makes sense since non-covered range hoods usually have wood cabinets against either side of them and they don’t typically have issues with those sort of things either.
Note: these pics were taken before we realized we should use metal foil tape and not duct tape for those vent joints, but we’ve since swapped it out and will share those pics in another update post about other things we have to share, like how we patched our giant honking ceiling holes, etc).

With the frame in place I started nailing the thin plywood panels in place.

Here’s what it looked like with the first three sides done.

Remember the reason that there’s a small gap around the outside is to leave room for us to reach the control buttons on the front of the hood. There’s enough room for our fingers to slip in, without being a totally garish amount of space.

And if you’re Sherry’s height (or me slightly ducking) you can even see the buttons so you don’t have to wonder what you’re pressing (to see any buttons on the underside of a hood you usually have to duck a bit to see them, so we like that ours are just as accessible, albeit slyly hidden).

To add the next “tier” to our cover, I had to build a slightly smaller version of the previous 1 x 2″ frame. Since this would be the one against which the sloped part of the cover would sit, I ran it through my table saw at an angle to make it easier for the angled piece of plywood to lay against it. I didn’t measure or anything to make the angle perfect – it was just an educated guess since I figured anything would be an improvement over it meeting the original square edge.

Here it is attached to the upper portion of the hood.

Even though the next set of plywood panels would sit just fine on the top edge of the previous set, I did add a small piece of 1 x 2″ to give me a place to secure them with a nail. And yes, I gave it another guesstimated angled cut to help that sloped piece sit better.

This picture should help make more sense out of this. See the sloped plywood panel in place?

The next two sides would be on only non-rectangular pieces of plywood. Since this angle had to be exact, I held the piece in place so I could mark the exact line that I had to cut.

Then I ran them through my table saw to get these fun little quadrilaterals. Wow, I don’t think I’ve used that term since Mrs. Miller’s 9th grade geometry glass. That’s the class where I decided I should wear my glasses during tests because they would help me feel smarter (even though I just needed them to read the blackboard). Nerd alert.

Anyways, here are those two panels attached on the sides. It’s starting to look like something, no? Of course it’s still very clunky and unfinished looking without trim, but we’ll get there in a minute…

For the third and final tier, we had to cover the vent pipe with the section I affectionately called “the chimney.” First I cut my tiniest 1 x 2″ frame to date. Ain’t he cute?

And then I screwed him straight into the ceiling (hitting nice firm wood that I knew would hold it nice and snug – you never want to drill up into nothing- that hollow feeling is the worst). The only problem was that I hadn’t accounted for how gargantuan the hole was for that vent pipe. Guess we’ve got more patching to do (Sherry’s my spackling queen). And we’ll eventually be installing crown molding around all of this too, so it’ll look nice and polished in the end.

Here’s the chimney covered with the plywood panel, essentially completing the major construction phase of this project.

So here’s what it looked like at that point. Hood is sufficiently covered. We still have access to the buttons. It’s plenty secure and we’re happy with the shape of it. It’s just looking a smidge unfinished. Okay, maybe more than a smidge.

This is where trim comes in. And I’m telling you, it’s one of those “details make the difference” things. I decided to make the trimming portion on this fairly easy on myself. In keeping with the theme of “make it light weight” I decided to use some super lightweight plywood. And to minimize nail holes (and having to hammer against the cover) I opted to glue everything in place. This method should definitely hold up to heat and moisture and all other kitchen loveliness (grease!) – especially once it’s primed and painted with the same super durable Benjamin Moore Advance paint that we used on our cabinets – so we’ll keep you posted.

We also ditched the idea of doing panels across the front and sides (as shown in our original renderings) because we kinda liked the clean look better (and worried smaller boxy panels might not jive with our existing cabinets). It also made my job a bit faster, meaning I had the first row of trim cut and glued into place in no time.

I did like working with the LiquidNails because it gave you a bit of play for the first 10 minutes (hence the tape above to stop it from moving when playtime was over). But I ran out about halfway through (it was an old tube leftover from something else) so I started using this leftover tube of Loctite instead… and kinda wished I had used it from the start. I wasn’t able to wiggle things into place as much (I had to peel it off and restick it instead) but things really stayed in place – meaning no more green tape was needed.

The top portion of trim took me a bit longer (especially because I ran out of wood and had to run out for more in the middle of everything), but by the end of the day I had it looking like this:

The angled cuts on the side took a bit of time too. We opted not to put trim on the chimney part because it’s not really supposed to be a “decorative” part of the hood. Plus there weren’t any open seams between the plywood or anything that needed “finishing.” Once we patch that ugly ceiling hole and add crown molding around the entire top of that wall (and hood) we think it’ll look swankypants indeed.

It’s not 100% perfect. For one, it needs to be primed and painted (we’ll do that when we prime and paint the open shelves we’re about to build) and it needs some caulk in a few places just to make it 100% seamless. But I’m just proud that I accomplished my three goals. It’s sturdy and durable. It’s lightweight. And it looks pretty (if I do say so myself).

Now of course it doesn’t have some of the bells and whistles that a professional hood might have, but once it’s primed and painted it should perform just as well as a painted cabinet would next to or above a hood. And it certainly was cheaper than the $3 – 4K price tag we saw some places (check out this post to see a price that had Sherry spitting liquid at her laptop). In the end it cost me about $90 to complete, mainly because I didn’t realize how much wood/trim I’d need. So I think that brings our total for the hood up to $150 (since the hood itself was $60 thanks to craigslist). Wait, that doesn’t include brackets/wood to hang it, so make that around $175. Still not bad considering we paid $250 for our last kitchen’s stainless steel hood (and it wasn’t an industrial strength JennAir one like the beauty we scored this time).

Even though it’s still a big, tan-colored box on the wall – I did take some “after” photos of the kitchen for ya. Mainly because with book photoshoots starting in our house this week I wasn’t sure of the next time our kitchen would look this clean again. It’s definitely still looking pretty raw in there (we need crown molding, shelves, a ton of color that Sherry can’t wait to add with art and accessories, new floors, an installed dishwasher, a light over the sink, etc) but we’re getting there.

As much as it’s kinda weird for us to see something hanging from this wall that’s been empty for two months, we do like that we’re starting to break up the sea of tile a bit. In some ways it just draws your eye more to that wall so you can stand there drooling. Not that we do that. Much.

It mainly just makes us eager to get that thing painted, get the ceiling patches sanded and painted, and get those open shelves hung. Sounds like a good project to talk about next, eh?

In the meantime, let’s talk about range hoods. Ever built one? If not, I never had either until a few days ago, so you never know what you might find yourself doing down the road…
  Leave a comment


