I realize four months isn’t an eternity, but it was about 3.9 months longer than we wanted to spend with the last vestiges of the old carpet upstairs. Especially since it was in our bathroom. Ah, carpeted bathrooms.
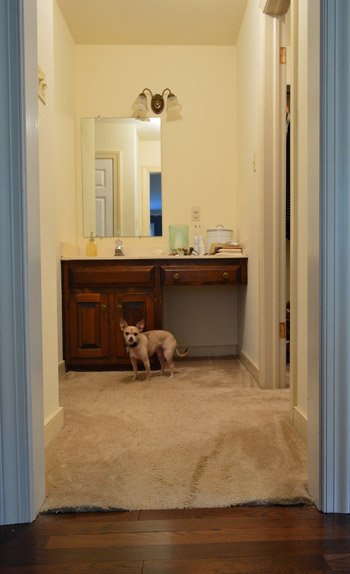
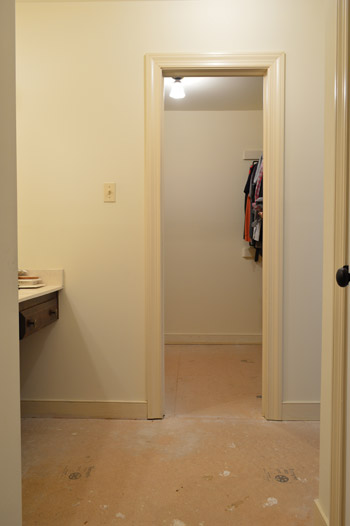
We didn’t remove it – or the portion that extended into our closet – back when we removed the rest of the upstairs carpet because we knew we didn’t want hardwood floors in the bathroom. So, in the absence of a new flooring decision, we just left the old stuff. The old, wrinkly, creamy stuff that blended right in with the creamy walls and creamy trim.

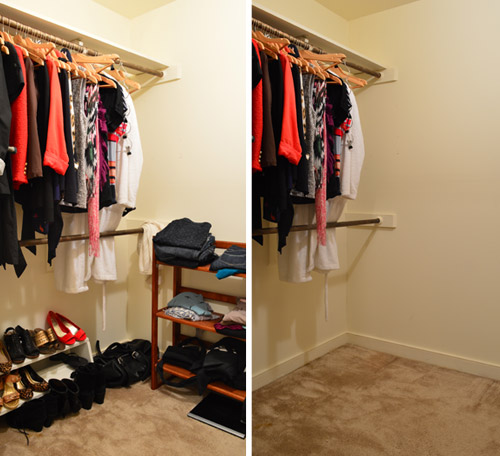
But yesterday morning (yup, about 24 hours ago!) we decided to oust the carpet for good. So we cleared out the floor of our messy closet for full flooring access.
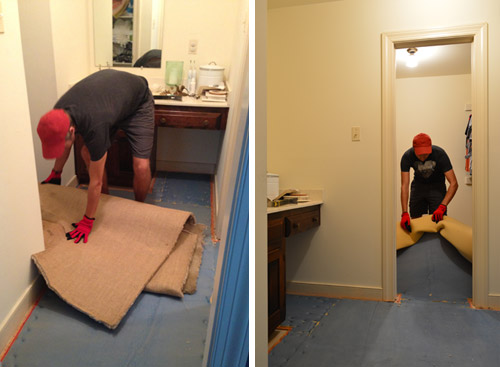
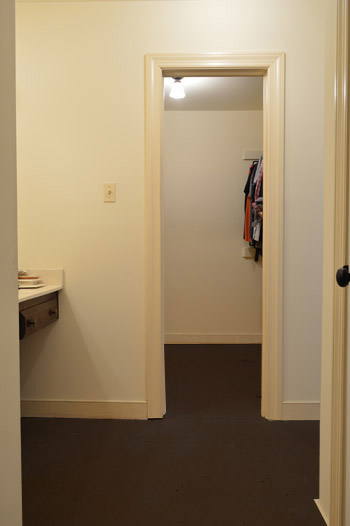
We covered the steps for removing our carpet in this video, but here’s a quick recap of how it went down came up. First we yanked the carpet loose from the tack strips that held it in place along each wall, then rolled it up and removed it. Next went the blue foam padding, which easily tore up from the staples that kept it down. These were the fast and easy parts.
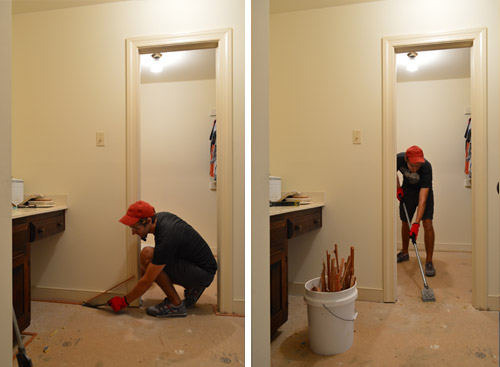
Next was the get-sweaty phase: prying up all of the tack strips with a crowbar and then using a floor scraper to pop all of the staples out. This, plus sweeping and shopvac-ing the whole space clean took me a solid hour.
Meanwhile Sherry was in the garage getting something else done (weekend naptime = a mad dash at as many projects as we can squeeze in) but we’ll get to that in a second.
Now’s the part where you probably expect us to tell you about our plan for new flooring… buuuuut we don’t really have one yet. Well, I mean, long term we want to tile the bathroom area, but that first involves lots of demo so that we can combine the sink area with the shower/toilet area for a nice big open space (we don’t need two single sinks separated by a wall, and much prefer one larger bathroom instead of two smaller choppy rooms). We may eventually end up putting hardwood in the closet, or maybe a wall-to-wall low-pile jute rug or something. We have enough leftover wood flooring to make that call later, but big bathroom & closet reconfigurations are things we like to do after we live in a house for a nice long time before rushing into stuff, so they’re not now plans, they’re later plans.
We’re pretty sure our “for now” plan is to paint the particle board with a floor paint so it at least looks a bit more finished and doesn’t feel as, I dunno, dusty? Then we can toss down a few sheepskins or area rugs/runners to cozy things up in the meantime before making any much-harder-to-redo decisions like knocking down walls and tiling floors.
We also debated peel and stick floor tiles or buying a large seagrass rug and cutting it to lay it wall-to-wall in both spaces, but we both thinking paint + area rugs will serve us well in the short term without being a whole lot of money/effort that we’ll later end up undoing. Since our future tiling plans would require us to rip this stuff up and put backer board in place anyway (you can’t tile over particle board since it’s not a secure base – even if you screw backer board on top of it) there’s no harm in slapping some paint on it in the interim.
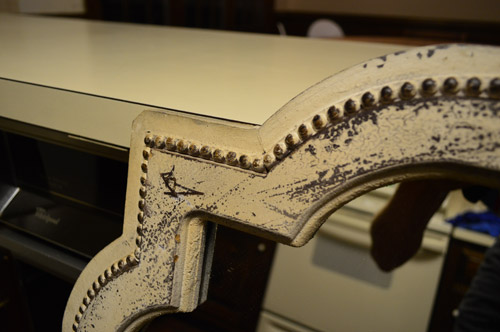
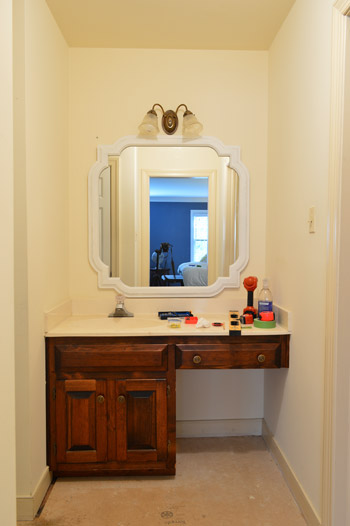
But this post isn’t just to tell you about our somewhat short-sighted “must get this carpet out of here!” adventure yesterday. It’s also to tell you about this mirror that we spotted at HomeGoods last week. As soon as we saw it, it gave us flashbacks of the quatrefoil mirror that we hung above the sink in our last bathroom. I should clarify: these are the good kind of flashbacks.

So since we were in desperate need of a bigger mirror over the vanity (see the first photo in this post for proof) and we knew it would bounce a whole lot of light around our closed off little sink nook (while sort of mimicking the look of a nice big window) we were sold. It was huge (over 40 inches wide!) so we thought $89 (down from $299) for such a large mirror with an interesting shape was a good deal, too.
We also liked the little beaded detail around the border, but the rustic paint job wasn’t doing it for us.
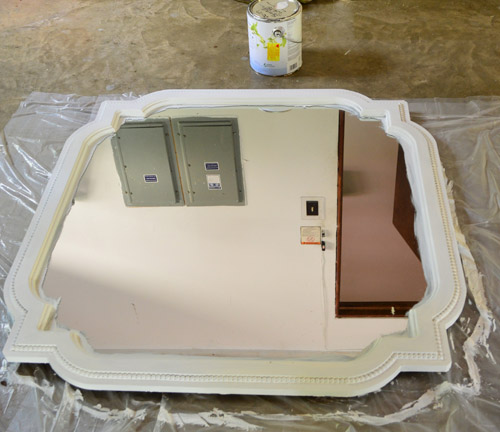
That’s actually what Sherry was doing in the garage while I yanked up the old carpet. She laid out our new mirror on a dropcloth and primed and painted it. It ended up needing one coat of primer + two coats of white paint (she used eggshell Simply White paint leftover from Clara’s bedroom walls because we thought a less glossy finish would be nice with the textured detailing). We debated going with a color instead (and even considered the dark blue tone from our nearby bedroom walls) but decided we’d rather do something on the walls or the vanity before going bold with the mirror. That way it would still look window-ish with a big ol’ pane of glass + a white almost-rectangular frame around it.
Removing the frameless half mirror upstairs was nice and easy, thanks to no adhesive behind it (thank goodness). We just had to loosen the clips that were screwed in on the top and bottom and out it came. No shattering. No seven years of bad luck.
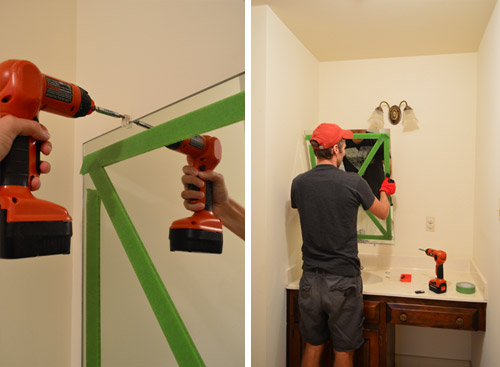
Then we hung the new mirror… and it looked ridiculously cramped. Harumph. Our measurements told us it’d be tight, but we didn’t expect it to look this “cozy.”
After throwing a brief and solemn pity party, we figured out a pretty simple solution. Nix the light fixture – just for now. There are two lights in this little nook (a ceiling light and the one that was mysteriously not-at-all-centered over the old mirror, so we decided we could safely cap the wires and install a fixture box cover – that way we could hang the mirror higher. Then once we find a fixture that we love for above the mirror it’ll be easy to move the fixture box about a foot higher to sit nicely above the new mirror without cramping it and install a new light fixture (since the wires to the fixture box come down from the attic, moving it up should be a really simple process). We just want to wait to see what light fixture we find before moving the fixture box prematurely, since the measurements of the light will inform where we place the new fixture box.
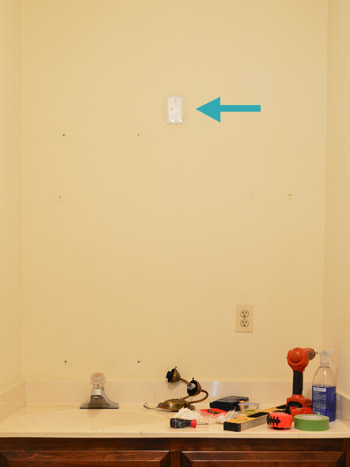
With the fixture box safely sealed off, we could raise the mirror to exactly where we wanted it – about 6″ above the top of the counter (rather than nearly resting on it like it was doing before). It actually completely conceals the covered fixture (we also temporarily capped and covered an outlet, which is also on our to-be-moved list). But future electrical-to-do-lists aside, we’re very pleased with the progress that our bathroom made yesterday. The floors may not be prettier yet, but the mirror makes the space feel much bigger already, and even though the vanity is a lot heavier on one side, the nook is already feeling more balanced.

And because impatience (to get rid of the carpet) and serendipity (finding that mirror) kind of got the mental wheels spinning about this room, we’re starting to formulate a vision for some other quick and easy updates to tide us over until we work up enough steam and funds for a full gut job down the line. Sherry even Photoshopped a bit of what’s swirling around in our brains right now. Warning: we’re still in the “changing our minds every second” phase of this project since we just started it 24 hours ago, so who knows where we’ll really end up.
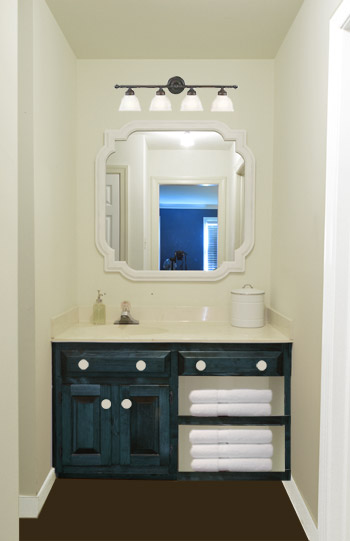
Obviously there’ll be wall and trim painting (so don’t mind the unchanged wall color above – we just have no idea where we’ll end up yet, so we’ll have to get swatches and see what we think). We’re also planning some sort of paint or stain on the vanity (maybe a muted grayed out navy?) plus some new knobs for contrast. The floor will likely get the aforementioned paint treatment, and I thought we could make use of the dead space on the right side by building some open shelves for towel storage (although we have also debated just closing that in and trying to locate matching doors for a completely-concealed front. And of course we want to move up the capped fixture box and add a vanity light after we find one that we like.
But for now, we’re just excited to be rid of the old carpet and to be diving into a new corner of the house. What did you guys do this weekend?

Leave a Reply