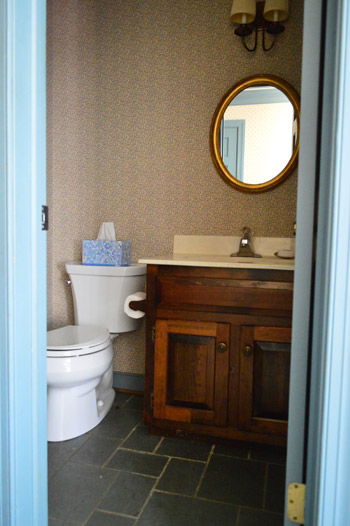
Let’s talk about vanity, shall we? Specifically the sink vanity that we last left off as primed in this post.
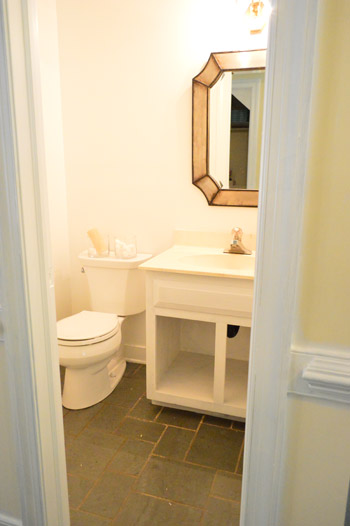
This is one of those real-life stories where we painstakingly stared at about fifty swatches before carefully choosing a pretty kelly green tone that we thought would be awesome. A fun pop of color in a white room (sort of like this). So off to the store we went and grabbed a quart of Baby Fern by Benjamin Moore in their semi-gloss Natura paint. And after one coat – even though we gave it two in the hope that the second one would work a miracle – we knew…
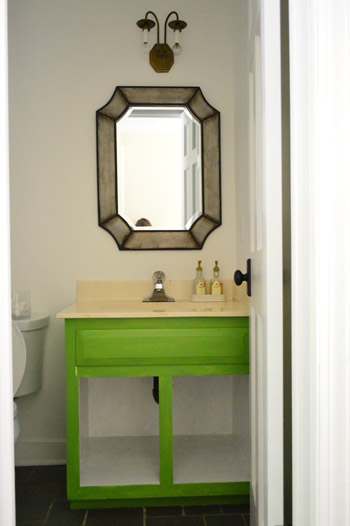
Baaaaaaad call.
Seriously, at one point Clara said it was the same color as Kermit The Frog. How did this happen?
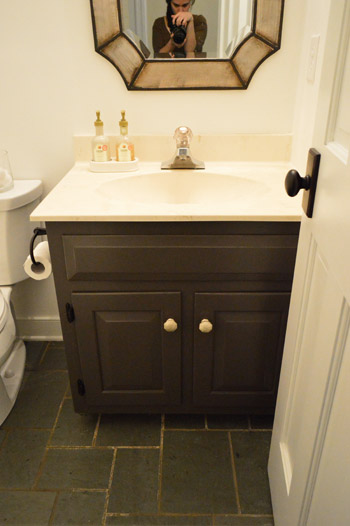
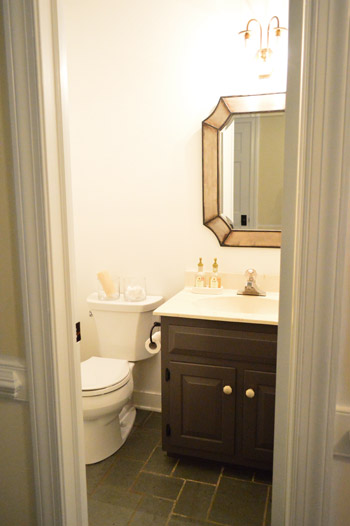
So we did what any self respecting DIYer would do and we whined a little and then we laughed for a while and then we went out to the garage and stared at all of the paint cans that we have sitting around and finally found the one we were looking for: Silhouette. It’s an awesome moody brown/gray tone with the slightest plum undertones. Really, photos of it hardly do it justice but we first used it for a bunch of book projects and fell in love, so it’s no surprise it was our “rebound guy.” We didn’t want our hearts broken again, and we thought it would be really sophisticated with the slate too. And happily, it was:
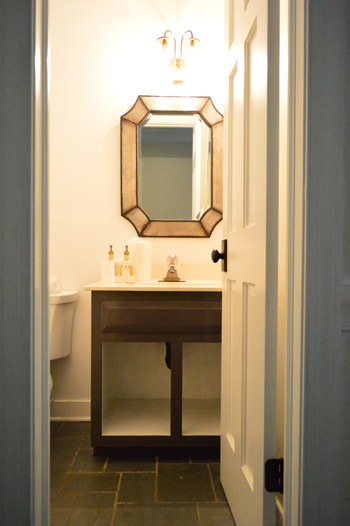
Now instead of the white bathroom with the colorful vanity, it’s shaping up to be the chic little black and white bathroom (ok, it’s not really black, but it’s close enough to give it that vibe). We especially love how it looks with the dark doorknob and hinges.
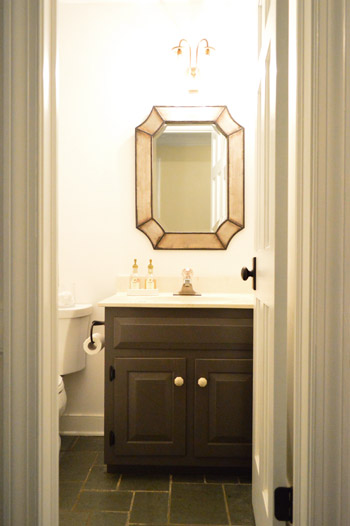
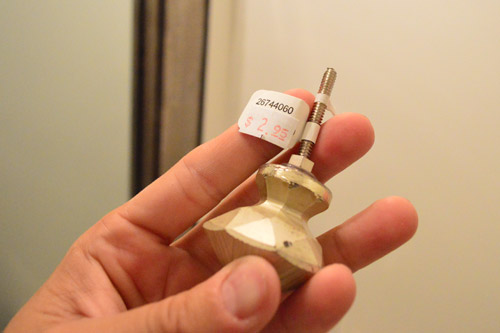
And although we did have some need-to-repaint bad luck, when it came to the knobs the universe threw us a bone. We went to Anthropologie just to look around (sometimes we fall in love with $14 a knob items, which are a little too steep for us) and these cool faceted knobs were marked down to $2.95!
One of my favorite things about their octagonal shape is that they mimic the angles of the mirror, which also has the same tone in it.
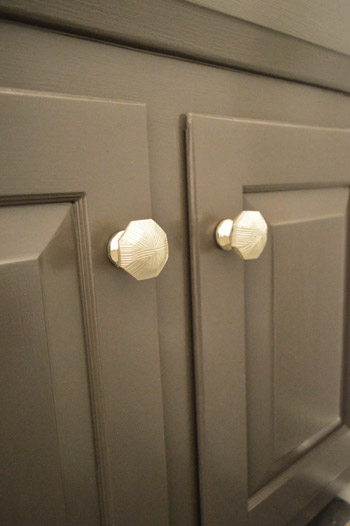
How lucky is that?
And we also grabbed this toilet paper holder from Lowe’s on clearance to replace the old wood one we had there before.
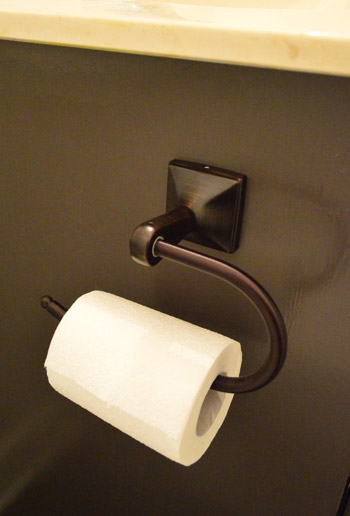
Remember this guy?
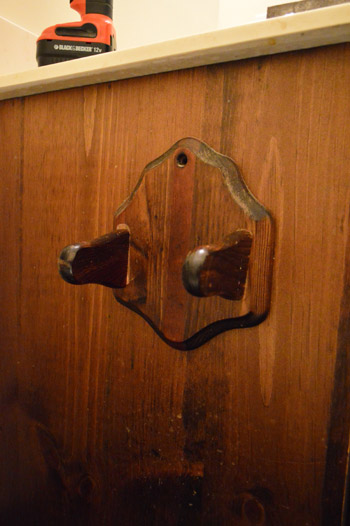
Definitely an upgrade.
You’ve come a long way, half bathroom.
So that’s the story of gaining a little vanity va-va-voom, with one of those surprise DIY speedbumps along the way. I think the lesson is that you win some and you lose some, but as long as you keep on trucking – and course correcting as you go – things usually work out OK.
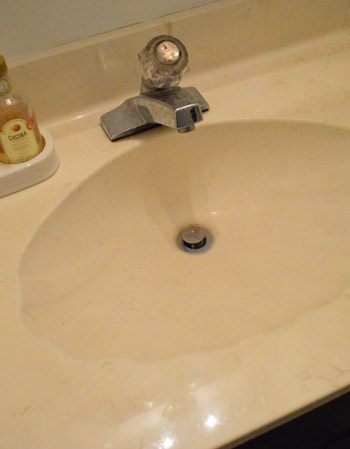
Next up I have to scrub or replace the grout, and switch out this leaky faucet.
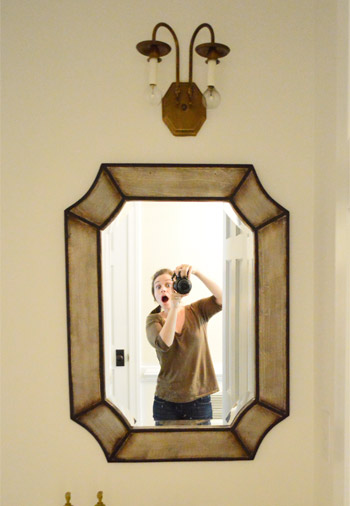
And we can’t forget our upside down light (remember I turned it around here to allow for a bigger mirror?). Doesn’t it look like two beady little eyes and the mirror is the mouth? Like the bathroom’s making the same face I’m making in this super flattering picture?
The light is a smidge off-centered from the mirror. The issue is that the faucet and the light don’t line up, so if we centered the mirror on the light it would be really off compared to the faucet, so we sort of split the difference so it’s less noticeable for now.
So yeah, there are a few more things that we’d love to do in here for this Phase 1 update – mainly some grout fixing, light updating, and a new faucet. I’m weirdly excited about light shopping (and completely avoiding the grout project – so we’ll see how long I can go). Even though we have plans for a more major bathroom upgrade down the line (grasscloth wallpaper? tiled accent wall? pedestal sink?), it definitely feels nice to make some cheap tweaks to make it more welcoming in the meantime. Anyone else working on a half bathroom update? How goes it?

Tall Tee says
It makes me super sad when I have something all picked out and ready to go and it just doesn’t work. I painted my kitchen countertops (long story, lol) and they were beautiful–but not for THAT kitchen, lol.
After a ton of stripdown and repaint, I let go of the sense of loss. You just have to know when you can’t make “fetch” work (Mean Girls reference, Mean Girls reference!)
Margaret Critz says
Looking good! I had a similar toilet paper holder…the curved piece just sat in the base (wasn’t screwed down) and one day my dog must’ve knocked it into the trash because I managed to toss it out somehow! Granted, my dog was a 125 lb Moose and not a little Burger, but you gotta watch those canines! :)
YoungHouseLove says
Aw, my dog growing up used to unroll the tp all the time!
xo
s
Betsy says
I’m with Maggie,(…and anyone else who mentioned it), only got to hers.
I love it with the floor! This is an accidental score. Maybe it’s the photo, but it is such a rich pick-up.
I know sometimes we want our floor to recede, but this time it pulls it together wonderfully.
I can’t wait to see what art and interesting shades/light you choose.
This will be tremendous.
Bailey says
Everytime I see a before/after pic of these rooms I always just think, “WHAT were the previous owners thinking?!” Some of the simpler changes you guys make (like removing the wallpaper – though I know that wasn’t exactly a “simple” change!) have made such a huge difference that it’s a wonder the previous owners never tried them!
xox
Bailey
http://akabailey.blogspot.com
bannon says
Love it! It almost makes you forget about the seashell sink! Our first house had the same sinks, but ours were even more amazing – gold streaks and flecks running through the sink and counters.
Michaela says
I call these mini upgrades a “facelift”. Worth it every time !
Mary T. says
Have you considered granite tops for the vanity?
The hubs and I live in Church hill/Union hill and recently (aka over 2 years) redid our bathrooms upstairs. Very small bathrooms BUT we made a template of vanity top with poster board, took it to the granite wholesale place that sells remnants, they cut, we picked it up 3 days later and installed ourselves. Cost $200 (2 diff pieces, slightly diff sizes, both cost the same) and includes under-mount sink. They have some purty swanky granite pieces if you only need a small section.
I can provide pics or further details if you’re interested.
YoungHouseLove says
That’s awesome! Love that tip!
xo
s
Dusa says
Thank you for remembering to get a shot of the upside down light fixture! You rock (and Grover was always my favorite, but I think you have enough blue in your life right now!)
YoungHouseLove says
Haha!
xo
s
Jennifer says
We just bought our dream home and are having a blast showing the house some love and making it ours but our 1/2 bath (affectionately called the Harry Potter bathroom since its under the stairs) is at a crossroads. We had a ginormous builders grade mirror that went across the whole wall. We were able to remove the mirror but behind the mirror there is no texture on the walls- just sheet rock. So if we are going to do the framed mirror above the sink with shelves above the toilet like we would like to, we have to figure out what to do about the textured/nontextured walls. Any tips?
YoungHouseLove says
We’ve never tackled that. Anyone have tips for Jennifer?
xo
s
Debi says
Jennifer, You can buy spray on texture. Use the internet to decide what kind of texture you have (orange peel, knock down, etc). You can spray on the texture (looks like a spray paint can) and maybe sand it down a bit when it dries, if it doesn’t match perfectly. Then paint over. Good luck!
Jenni says
Wanted to pass along a nice grout cleaning trick that is worth a little elbow grease. If you mix up a solution of oxyclean and water (you can google the ratio) and use a foam paintbrush you can brush it on the grout lines. Try not to get it on the tile. It bubbles and actually oxidizes the cruddy old dirty grout in the most satisfying way. I tried it on my grout that had never been sealed. Best way I have ever cleaned besides the back breaking hands and knees scrubbing fest with poor results. The only drawback is it will leave a white haze from the peroxide but if you go over it several times it cleans up. I used white vinegar to clean the floors and get the residue off. For sure it is time consuming but the results are fantastic. I did not seal it because it was an experiment to clean the tile since I was listing my house for sale. If I was staying long term I would have sealed the grout.
As far as your lovely pop of color maybe you can add a nice accessory or hand towel and the colors you chose look smart classic and timeless!
YoungHouseLove says
Thanks for the tip Jenni! Love it!
xo
s
Ashlyn says
I thought about your blue floor last week while I was at the Ritz Carlton Club in Vail (I work for Marriott so I get a discount otherwise wouldn’t be vacationing there.) The flooring in their lobby looked so much like yours and it was beautiful. I’m excited to see how the foyer turns out once the walls are painted, the stairs are complete and whatever else you dream up!
Laura says
Although I definitely agree that the brown looks much nicer, why didn’t you try another shade of green? The inspiration you linked to is gorgeous, and there are a lot of shades between Kermit-the-Frog-Green and your inspiration pic.
YoungHouseLove says
All green tones = yellow + blue, so we worried any tone of green would fail (by bringing out the yellow in the sink). Especially since we don’t have natural light in there to help paint colors read as less neon-y. We already had Silhouette on hand so we went for it. We still have the entire house left to paint, so I’m sure we’ll find a great green accent color to use somewhere else!
xo,
s
Renee says
OMG it’s like we did the exact same bathroom. Only not.
But I picked a really bad shade of green for my vanity too! Behr’s caterpiller looked a lot better in my head than it did on the cabinet. Grey saved the day. Again.
http://diysxse.blogspot.com/2013/07/powder-room-in-progress.html
YoungHouseLove says
Your stencil is amazing! And so hilarious about the vanity. Looks exactly the same color!
xo
s
Amanda says
What brand paint is silhouette and what finish did you use? It’s exactly what I’ve been looking for?
YoungHouseLove says
Thanks Amanda! It’s Benjamin Moore and we had semi-gloss.
xo
s
Andrea says
My unsolicited opinion of the day is this: I can’t wrap my head around that off-white countertop. I know you guys probably don’t want to throw a ton of money at this bathroom just yet, but if you buy a faucet to fit that sink, then down the line you decide to upgrade to an entirely new sink and countertop, are you going to lose money there?
Here’s what I would do (I’m sorry — bear with me): would there be a way to DIY a new countertop from wood, and place a vessel sink on top? I’m imagining it with a thick, dark wood counterop with a beautiful oil sheen to it. Something like this http://pinterest.com/pin/95490454569522016/ but darker.
It’s just a thought. I bought a beautiful vessel sink a couple years ago for $35 at one of those model home consignment stores — the ones that sell leftovers from model homes and home stagings.
I also think a wood countertop would look so great with that shade of grey and the grasscloth wallpaper.
Love the knobs, and the color you ended up with!
CC says
Think hard about a pedestal sink. I wanted one forever and finally got one in the half bath in our new house. The problem? Nowhere to store anything! Extra TP, soap, towels, cleaning stuff- and fewer possibilities for fun color changes! I’m seriously considering replacing ours – if we do, you can have our pedestal (DC isn’t too far)!!
Andrea says
and a sink like this… http://www.homedepot.com/p/Vigo-Golds-and-Browns-Copper-Shapes-Vessel-Sink-in-Multicolors-VG07024/202934400#.Ue3If9LQqmU
Okay, I’ll stop now.
YoungHouseLove says
Thanks for the links Andrea! My dream is to get a leggy sink like this or this someday, which would be expensive but maybe we could find a secondhand one or a clearanced out/craigslist one? So if we can find a faucet for cheap (at the restore for example) it’s a nice bandaid for now until the dream vanity comes along in a year or two when we have budget for a bigger redo. I completely agree that if we were dumping more money than just a quart of paint and a cheap faucet it might make sense to get a new counter or even replace the whole vanity but we’re not quite ready for that…
xo
s
Dani says
I love the darker vanity, but it feels like it makes the walls just look so bland and boring to look at.
YoungHouseLove says
We’re hoping once we add art and a new light things will turn a corner in there :)
xo
s
susan says
Sherry I hope you will teach how to re-grout tile floor so it look white again. I learn from you cleaning your hardwood floors.
Villa Cabinetry says
I love the bathroom mirror and cabinets. I love darker colors on bathroom appliances. Also, I love how the door knob and toilet paper holder are the exact same color. I am planning on designing my own bathroom this way! Beautiful job
Diane D. says
Definitely the off-white/beige vanity top did you in. While the green was really …. well, an extreme green, it would have probably worked with a white or black countertop. In our half bath, my new fixture budget went down the drain quite literally (a sewer pipe break in the basement) so I painted the vanity black with some dark brown highlights, which really came to life when we later replaced the beige top with a stone-look composite. The driving force was the dripping faucet – it made sense to change both at the same time. We had the exact same old faucet! Wait, we still have another upstairs!! It’s somewhere on the list!
Lisa says
We recently worked on our half-bath. The half-bath came equipped with holes in the wall from when the previous owner began a renovation project by ripping out the ceramic towel bar and t-paper holders. Dry wall repair was the first step in the project. Check it out here – http://www.atimeforhome.com/drywall-repair-time/
Christine says
I love that you share every step…. or misstep along the way. I love that you are willing to make those bold choices like the green. And I love the way it turned out in the end!
Kelly says
We had the same problem of the light fixture not lining up with the faucet in our powder room too. Just move the light box, right? Wrong! There was a big pipe that ran down the center behind the drywall. So I got one of those oval shaped wood plaques from michaels, painted it the same color as the wall, drilled some big holes through it to pull the wires through. Then mounted it to the wall, with the light fixture atop it. Kinda hard to describe, but it allowed the light to be centered with the faucet and mirror! Anyway your bathroom looks great and love the mirror and knobs combo : )
YoungHouseLove says
Sounds smart!
xo
s
Christine | Life in a Dress says
You guys always make these little tweaks that change your spaces so much. Love what you have done so far!
Tirsa says
That green is actually very pretty. It just doesn’t work with the top. Thankfully you were able to come up with a beautiful solution. I really hope to see something in that gorgeous green around your house sometime in the future. It’s a lovely pop of color.
annie @ anniehearts says
That powder room is going to kill it when you’re done!
We just finished our powder room and It’s such a satisfying room to finish because it’s quick and easy.
Can’t wait to see the finished product!
Annie XO
lacey says
That green color seriously looked the vanity was covered in frog tape! I’m glad you gave it the boot.
Marisa says
When I first saw the green vanity I thought you had covered it with painters tape. It’s the exact same colour. Love the redo in brown looks great!
I am excited for the grout cleaning post as I am having some issues with grout in our new bathroom that was not sealed well enough and now has some water staining. :(
Debi says
I might be alone, but I Love the black slate floors!! I hope that some grout work and other wall paint jobs will make them seem more desirable. Would also be nice not to have to deal with the cost and mess of replacing them.
I have black slate in my mudroom. I love that it seems to “naturally” go with the mud. :-)
Lolly says
I love the color, and am now considering it for my new house’s master vanity.
Also, just FYI (and I’m guessing you know this and you just don’t feel up to tackling the grout), my 11 year old son and tackled cleaning the grout in the foyer at our old house just after we listed it. We live in Denver so imagine the 10+ years of snowy nonsense that had accumulated. With an old toothbrush, a glass bowl full of peroxide and a few drops of Dawn dish soap, we brought our dingy grout to its original pristine cream color in about 20 minutes of scrubbing. It was super easy, and 24 hours later it was dry enough to seal.
YoungHouseLove says
That’s awesome Lolly! Thanks for the tip!
xo
s
Steph says
I absolutely love that you included the paint mistake! This post reminds me of early days YHL, and I love that you don’t mind sharing things that go wrong, especially the decorating stuff! It’s not always easy to get it right, so well done on having a crack and showing us the results :)
Sandy@montreal hotel bar lounge says
I always wanted my comfort room and bathroom renovated but I just do not know how and when to start it because the room is pretty small. Seems like you are enjoying with the redecoration, good for you.
Lee says
Love how you guys aren’t afraid to show um…boo boos.
Paint colors are fickle critters
Amazing what effort plus paint plus a little switcheroo of lights and mirrors can do.
The house as it was reminds me of a home where a family was raised, they were busy living life and didn’t change the decor. ( kinda like my house ) The diff before and after is like walking into a dark room and opening the blinds flipping on the lights.
Beautiful job
Jenifer says
Oh boy, that was some “happy” green there!
I love how you guys will go out on a limb and try something different.
I was really hoping for a toned down coral :)
But I love the dark. Great choice.
Loving these new house updates!
Malissa says
Are you going with all orb finishes in the bathroom? I want to do orb lights in our master (bc that’s what we have everywhere else) but don’t want all other metal finish to be orb. Advice? Btw looks great!
YoungHouseLove says
I like mixing metals, so we might go with orb for the light and brushed nickel for the faucet or vice versa (since both colors are in the mirror it helps to tie them together).
xo
s
leatitia says
I saw that green vanity and though: Painter’s tape! :)
Melissa says
PLEEEEEEEEASE paint it green again! It was such a happy fun green.
Allie says
Wow, what a difference a little paint can make! You’ve given me hope that just switching out a few key items and adding some paint can go a LONG way. We are in the prep process of completely renovating our basement, which includes a full bath…with pink tiles. Gotta love those pink bathrooms!
courtney says
I tried painting the kitchen in our first house granny smith apple green. It looked TERRIBLE! It came out to bright, and highlighted the dingy-ness of the not so white anymore circa 1978 kitchen cabinets. Soft airy blue was a much better choice.
andrea says
have you guys considered grout paint? better results than cleaning, and sooo much easier than replacing the grout. used it for my powder room “spruce up” last year – lots of elbow grease – but I love it!
YoungHouseLove says
Thanks for the tip Andrea!
xo
s
Susan J. says
@Andrea, was your grout paint the same color as the original grout, or did you grout in a different color?I am looking for a way to change the color of my really ugly, rusty-brown grout (blech). I was hoping to avoid re-grouting.
Sassafras says
I was thinking the green looked rather ‘Incredible Hulkish’, but the new color is very sophisticated looking. What I really love is that the blue door trim outside is gone!!! Yeah you!!
judianni says
Love the new color. I once painted the furniture in my kids room almost that shade of green. Loved it for a few years until I started hating it!!! BTW, have I missed a post….or are you waiting to tell us about the mirror? It it absolutely perfect and I’d love to know where to find it. Thanks so much for sharing your wonderful adventures in DYI with us all!!!
YoungHouseLove says
Thanks Judianni! It’s from HomeGoods!
xo
s
foobella says
Do you own a tripod? If so, use it and you’ll get much better pictures with just natural light.
YoungHouseLove says
Thanks Foobella! We have one somewhere in the storage room (unpacked chaos = our storage room). Just have to find it and dig it out!
xo
s
Susan J. says
After spending most of my summer vacation scrubbing grout (seriously, I have bleach stains over half my wardrobe) I found a great little item at Target. It’s battery-operated scrub mini-brush for cleaning grout. it’s made by Rubbermaid and it’s AWESOME. I can’t even tell you. It’s sort of like an electric toothbrush, but way more useful:) I came upon it pretty late in my project, which is a bummer, but I have it now. And my favorite activity is to wander around my house and find other ways to use it. Great for cleaning out the sliding door tracks, for example. I swear, I am not a paid spokesman!
YoungHouseLove says
Thanks so much for the tip Susan!
xo
s
Stephanie says
Oh the irony of the song in your title… the song really IS about you!!
Stephanie says
PS – Your BFF K-Bo has the *perfect* kelly green on the bookshelf in her office. She’s pretty much a genius.
YoungHouseLove says
She picks the best colors!
xo
s
heyruthie says
what would happen if you took the old shades from the light fixture (if you didn’t throw them out already) and wrapped them with jute twine or burlap something and put them back on upside down? that could add a textural element and update the light for free…..
YoungHouseLove says
That could be fun! They’re a little stained/crunched, but we’re hoping to hit a few secondhand stores/thrift shops to see what we find!
xo
s
Shannon [Our Home Notebook] says
I love the colour you ended up with – it looks so sharp. I’m glad to know I’m not the only one who has to repaint sometimes :)
Sally says
I second (or third?)the Polyblend Grout Renew. It is called “Colorsealing” your grout and it will permanently seal and waterproof it forever(as opposed to sealing every 6 months, etc)! I bought my color sealer at Home Depot for just over $10.xx. This was the perfect solution for all my bathroom floors and a house full of boys! Need I say more :-) This has been the most satisfying Pinterest project I have done yet, floors look better than when they were brand new, seriously! I am OCD about grout and have tried every cleaner/sealer out there and I realized that some grout is just never going to look “clean” because it was not sealed or the grout color was off and not mixed well to begin with (the case with our house). I used this tutorial: http://www.theyellowcapecod.com/2011/10/31-days-of-character-building-easy-tile.html
YoungHouseLove says
Thanks Sally!
xo
s
Karyn says
Wow! This post totally resonates with me…and the green you tried looks exactly like the green I tried on walls in the upstairs landing! Great in small pops here and there, horrible on walls…or vanities ;) My walls kept reminding me of a cartoon-inspired kids’ room…soothing subtle taupe covered it all up and I am happy! I love how your powder room turned out!