“Who has two thumbs, an Instagram addiction, and just bought a bunch of jewel cases?” I think we all know the answer. THIS GUY had a little art project up his sleeves.
Ever since jumping on the Insta-wagon back in April, I’ve been itching to get some of our photos printed. We just never had a place for them and were always a little wary of the quality through various printers. But a few weeks ago when I spotted a Facebook coupon for five free Instagram prints using Picplum, I ordered away (nothing to lose, right?) and I was pretty impressed with my handful of free 5×5″ prints… so, like the sucker they hoped I’d be, I purchased a bunch more for $1 per print.
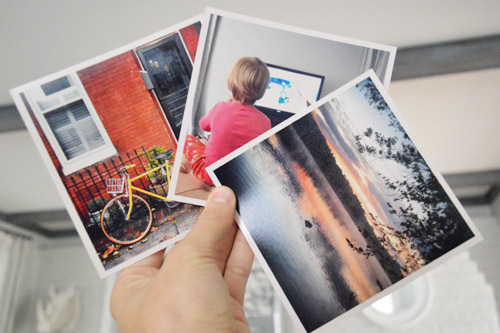
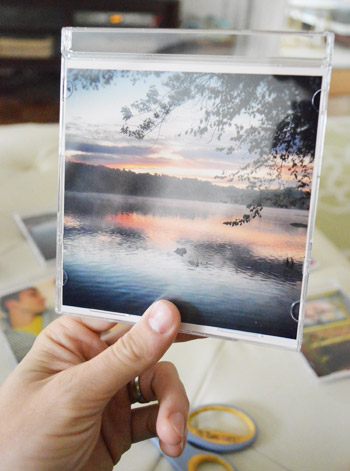
My paid order was fueled by the fact that I stumbled upon something completely accidental. With a tiny trim on two sides, these square prints fit pretty darn perfectly into the front of a jewel case (you know, the clear plastic cases that CDs come in… used to come in?… do I need to refresh everyone on what a CD is?). The only reason I ever discovered this is because my five free prints were sitting on my desk on top of an old CD case, and I realized they were basically the same size.
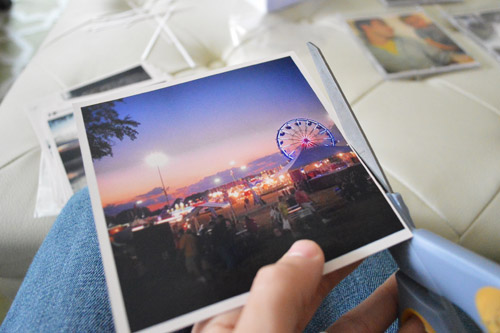
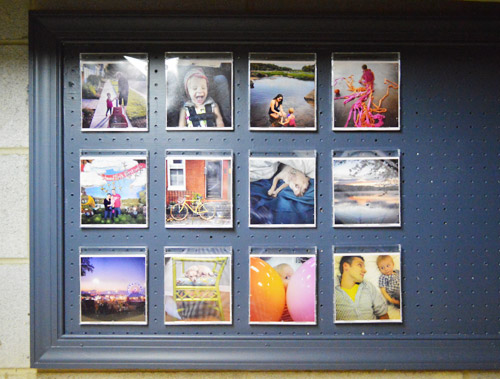
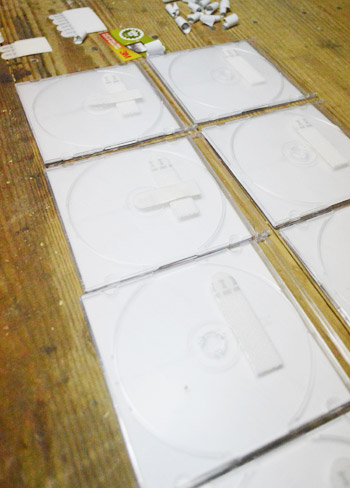
So I swung by Office Depot and snagged a $10 bulk pack of slim jewel cases (there were 30 of them in the pack, and I didn’t need that many, but it was the smallest pack of thin ones, and I thought thin cases would look the best). Then I just slid some of my favorite prints inside twelve of them.
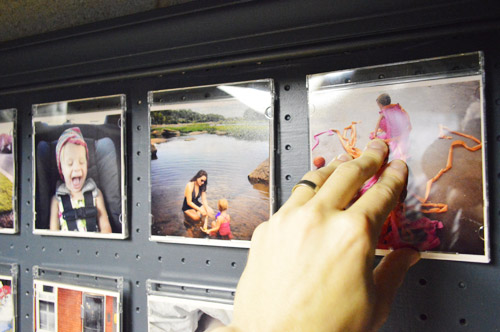
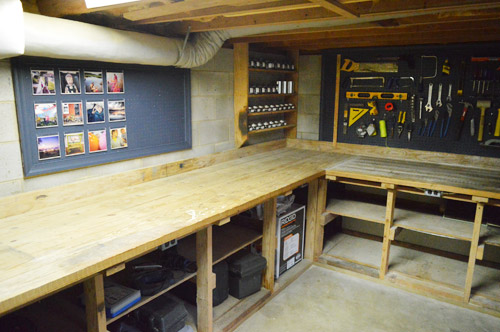
As you may have guessed from that first picture, I’m not designing homemade covers for some stocking stuffer mixed CDs or anything (although I guess this would work for that too). I actually thought they made for a cool way to display photos in my Man Cave Complete With Pegboards as I’ve lovingly come to call the basement these days. Because nothing too precious makes sense down there with pieces of wood and sawdust flying everywhere – but something to cover photos that I want to display (thereby protecting them from said sawdust) might just be handy, right?
It’s certainly not very fancy or overly fussy, but I really like how easy this was and how stress-free it feels. If a rogue screw cracks a “frame” it’ll cost less than a dollar to replace. Plus they look pretty great against my navy pegboard, amIright?
Total cost for each “frame” including the art inside = $1.30. Can’t buy much other framed art for that price, right? And you know Sherry loves to say that geek is the new black. CD cases are bound to be the next mixed tape/eight-track, right?
To hang my grid I just used 3m Command strips (the velcro kind for “damage free” picture hanging). I actually like to use the strips perpendicular to one another (rather than right on top of each other) – that way I have more flexibility to move things around once both strips are stuck in place (I can shift things up and down or side to side a bit that way).
And fortunately the holes on my pegboard made for a great guide when I was pressing them into place.
Ta-dah!

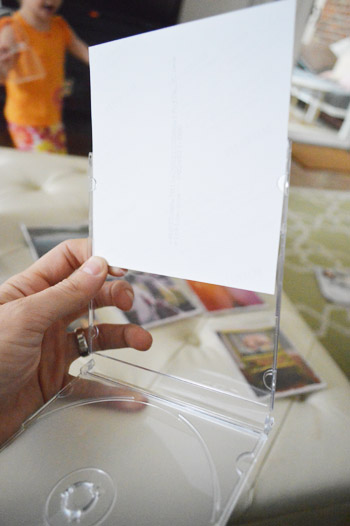
Wanna know a secret? I actually tucked an extra photo or two behind some of them. So if I ever want to mix things up I can just hinge the case open, swap the photos, and call it a day.
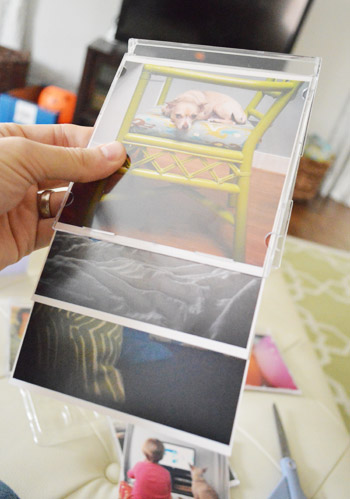
And since I have extra photos and extra cases, I can always expand my super classy inexpensive art installation across the whole board down there. But for now I’m leaving it open so I can hang some other non-Instagrammy item on the right. Ya never know when I might come across something else to dude things up down here. Although I’m surrounded by hammers and drills and saws, so I’m a pretty happy guy already.
Oh and every time we share pics we realize that we should mention a few other things on the basement agenda, so here they are:
- stain some of the wood going on down there (like that burned shelf and the dusty and less-forgiving-because-they’re-so-light counters)
- possibly stain the concrete floors (since they’re pretty light and not-too-forgiving either)
- paint the old scratched up door that leads to the basement (yellow like the front door)
- hopefully deal with the exposed ceilings (although there are things like plumbing and duct-work that hang down, making it less simple than just screwing up some drywall)
In the meantime, does anyone else have Instagram art projects up their sleeves? I’d love to hear ’em – especially if you know of other cool places to get them printed on paper, canvas, etc. Oh yeah, and if you want to follow us on Instagram you can find us at (you’ll never guess) @younghouselove.
Psst- We hear the Cultivate quiz from yesterday’s giveaway is still running very slowly/crashing. Looks like they weren’t quite ready for all of you quiz-loving folks! So sorry about that, guys. We hope they get all the kinks worked out soon… and there’s still a $200 gift card for one lucky winner (whether you take the quiz or not), so that’s the good news!

Kim says
I use PostalPix and it’s 29 cents for a 4×4 and 89 cents for 5×5. (You can also print grids and regular pics). I used them this year for Christmas tags. I had a pic of the person and me! So much fun.
Jen says
wonderful idea. I love that you care about photos. Something many men (like mine) do not!
Definitely will have to check out the instagram printing site (picplum) thank you for the link!!!
Katie says
I just wanted to let you know, I ordered a few pictures from PicPlum (because you had mentioned it in this post!) almost 3 weeks ago and they charged my card and never sent me the pictures. I’ve been e-mailing (they conveniently don’t have a contact phone number) and no one will return my e-mail. I’ve also noticed that people are having issues with this company via their Instagram page (upset comments). Now, I have to contact my bank and try to get my money back. I just wanted you to be aware of their customer service since you are promoting them on the blog! Oh, and just saw your BOY announcement! Sooo excited for you guys!
YoungHouseLove says
Boo! Thanks so much for the tip Katie! I wonder if they’re under new management or something since we had such a good experience? So sorry for the trouble!
xo
s
meggan says
very curious (since this is a 2012 post) if you’d still use them? or have you found another great site for instagram gifts?
YoungHouseLove says
We used PicPlum for these, but we just placed an order with Snapstagram this week to try them out (prices seemed to be the same, so we thought we’d give them a spin).
xo
s