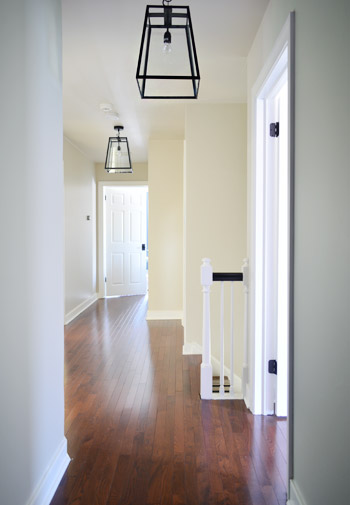
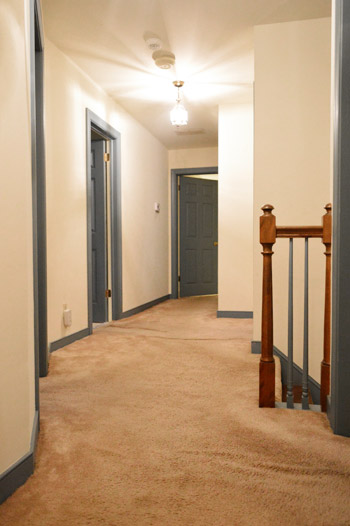
From moment one of seeing this house, something about the view of a series of three lights all in a row(ish) in the upstairs hallway made us inexplicably excited. Just call it “the tri-light zone” effect. We just knew that arrangement had serious potential. You know, once we looked past the old carpeting and the blue trim.
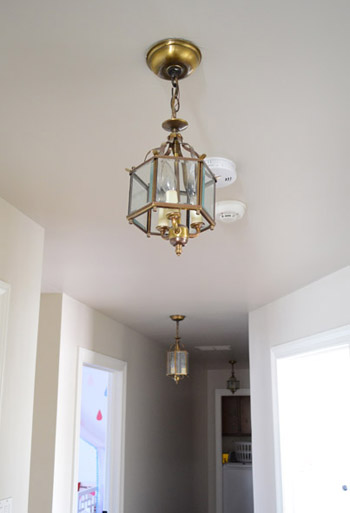
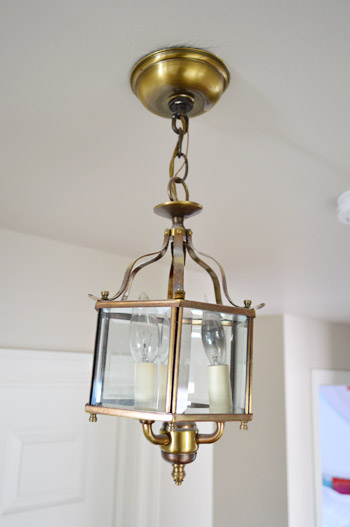
The existing lights were a little undersized for us (pictures don’t do it justice, but this is a 33 foot long hallway!), so although we considered spray painting them another color (oil-rubbed bronze? red? navy?), I worried it’d make them look a bit more gothic cathedral than we wanted. Plus, all three of them were crooked, one of them had a broken stem, and the middle one was actually bigger than the other two.
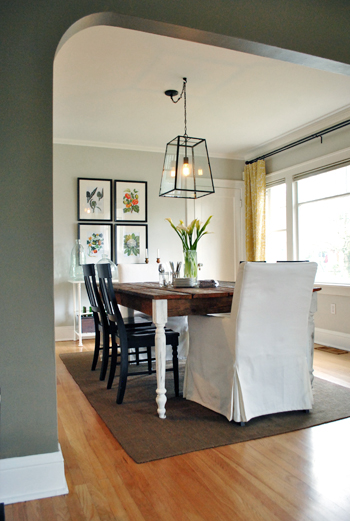
I’ve had these fixtures mentally bookmarked for years. Ever since we saw them in a House Crashing that we did in Portland, OR in 2012 I’ve wanted to work them into our home somehow. I like that they’re a mix of classic and modern, and that their dark finish offers some nice contrast but isn’t too heavy looking thanks to all the glass. The good news is that Sherry was with me (we don’t always agree on lights, so sometimes finding something we both like takes a while). The only issue was that the $250 price tag was a bit much for us since we’d need to buy three of them.
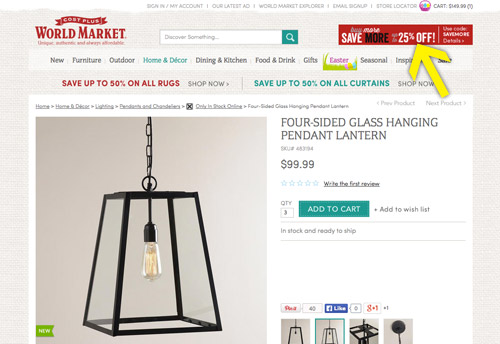
We hoped to find something similar at a local lighting outlet that we frequent (and even checked craigslist and the ReStore occasionally) but coming by three identical fixtures was tough. Then Sherry got an email alert about a World Market sale (25% off orders over $150) which lead her to these puppies – and we realized that after the sale they’d be $75 each, which means we could buy all three for less than the price of our single inspiration fixture!
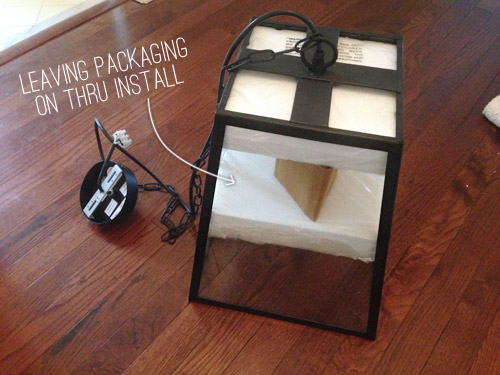
Normally I wouldn’t take you through the installation process again, since I feel like I’ve done lots of posts like these – but I actually picked up a couple of tricks (albeit small ones) from observing the electrician work his magic at the showhouse. Trick #1 being leave the protective packaging on during installation. I guess I’ve always been so eager to unveil our new purchases that the first thing I usually did was strip away all of the plastic, cardboard and styrofoam. But I had a “well duh!” moment watching the electrician leave it all on (well, whatever didn’t interfere with installing it) to help prevent any damage while he worked. Of course he took it off before firing up the power and adding a bulb, but just hanging them with the added protection felt a lot better than rushing to strip it before manhandling things into place.
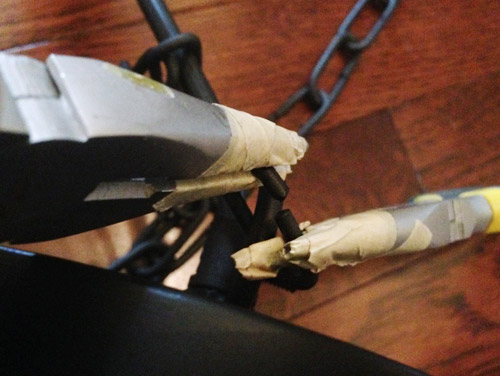
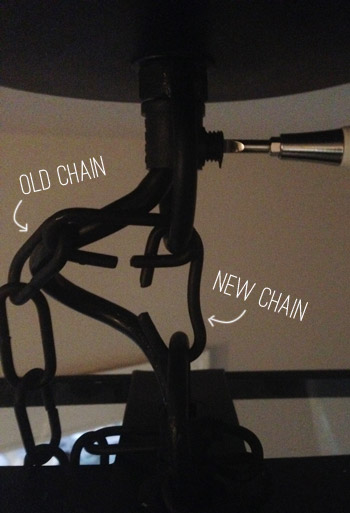
Obviously I would’ve loved to let these babies hang down on their chains a bit, but our 8ft ceilings weren’t gonna let it happen. So we had to shorten the chain by prying the links open with two pairs of pliers, the tips of which I wrapped in masking tape to keep them from scratching the finish off.
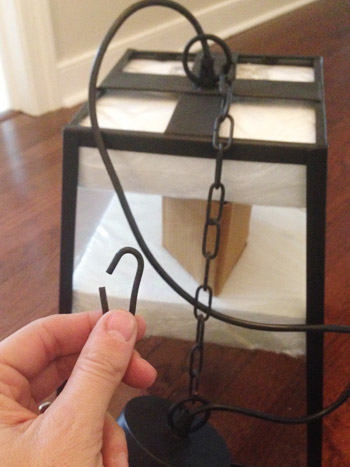
The previous lighting had been a bit low for my 6-foot self (well, the middle one outside of Clara’s room was – since that lantern was inexplicably larger than the other two), so we decided to hang the new lights by just one chain link – which would put them all a couple inches higher than that old middle light (it hung about 75″ from the ground). So even though these are larger scale fixtures, the bottom of each lantern ended up being 77″ from the floor after installation.
But back to the single link method. I kept one link handy, but left a longer string on the fixture for the time being. More on that in a minute.
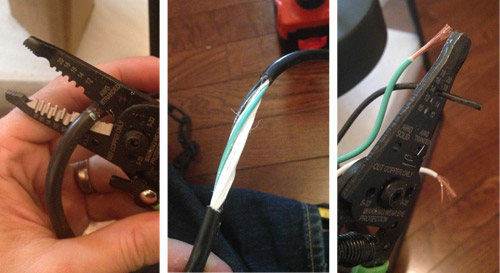
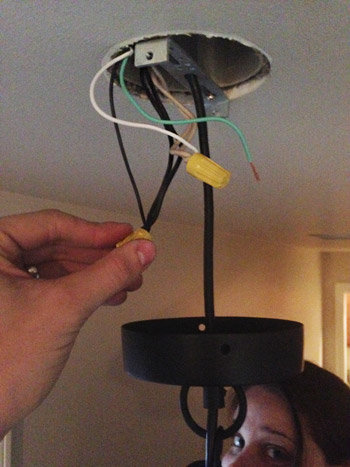
In addition to shortening the chain, I had to shorten the cord. So using my wire cutters I cut open the wire cover, pulled it off, and then stripped the ends of the white, black, and green wires.
With Sherry supporting the fixture, I connected the wires to the matching ones in the ceiling. Sorry for the grainy pic, but we had the power off so lighting was limited up there.
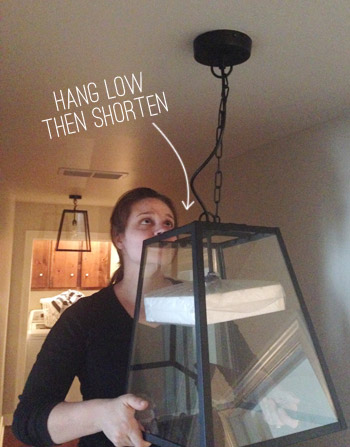
The second trick I picked up was to hang the fixture low and then raise it to your final desired height. With most light fixtures it’s much easier to raise them (by removing chain or feeding more wire into the ceiling) than to make them lower, especially if you’ve already cut your wire. So not only is this an easier way to get your perfect height, in our case it made installation much easier because Sherry didn’t have to hold the light as high and I wasn’t wiring in such a cramped space between the fixture and the ceiling.
Once everything was secured, I swapped out the long chain for the my single link and pushed the excess wire up into the canopy. You can see my screwdriver tightening the screw that pinches the wire in place.
It still took a fair amount of time to get all three installed. Maybe 3 hours? I always have a tough time guessing since I’m slowed down by photo taking and, in this case, fielding showhouse calls. But in the end we love the result.
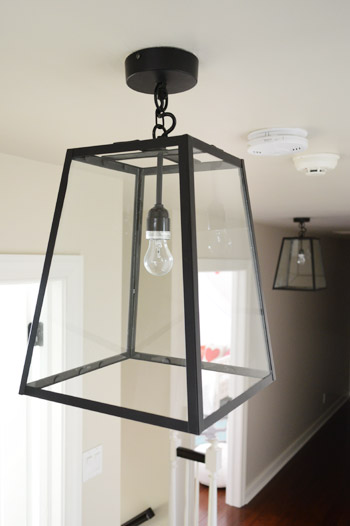
Just like the light in our foyer downstairs, we really like the high contrast look that these add. Even the way they tie into the dark door hinges, doorknobs, and the stained stair rail and runner that lead downstairs seems to make things feel more deliberate. They’re a bit oversized for the space, which may bother some folks – but it’s kinda what I dig most about them.
Adding some substantial wainscoting, interesting art, and other hallway updates should definitely bring more balance. So here’s our remaining to-do list:
- Reinstall & maybe modify the doors in front of the laundry area
- Add crown molding (not looking forward to those angles!)
- Add some nice thick wainscoting (it’ll bring more substance to the bottom half of the hallway)
- Get some art going on
Just for fun, here’s a hallway before shot for comparison.
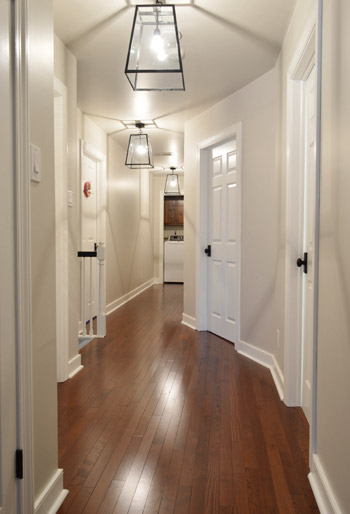
In the function column, I feared that it might be a little darker (going from three 3-bulb fixtures to three single bulbs), but these take a higher wattage (60 instead of 40) and somehow the glass seems to reflect so much that it actually feels brighter. Could also be that half of the old bulbs were burned out too, so there’s that.
Here’s how things look with the clear bulbs that came with the fixtures when they’re on. They throw some angular shadows on the ceiling, but if we want less of that look we can switch them out for frosted bulbs (eventually we’d love to get LEDs in every fixture).
UPDATE! We’ve finally transitioned our entire house to LED lights (they save tons of energy & money, and they’re a lazy person’s best friend because you never have to change them). For anyone wondering, these are our favorite interior LEDs. Their glow is warm & natural (not weird/blue like some of the others we’ve tried) and they use around 90% less energy.
*This post contains affiliate links

Michelle says
I really appreciate the tutorial – even if you have done it before! I’ve got several fixtures I’d like to replace and I’m always looking for tips!
Kaija says
Did you see the light fixture in tonight’s episode of RHNY? RHONY? It was in the kitchen at the Hamptons at Sonja’s friends’s house. I only caught a climpse, but it looked just like these fixtures, only about 3 or 4 times longer. It was over a kitchen table.
You’re in good company :D :D
YoungHouseLove says
No way! So funny!
xo
s
Rachel says
Hello There!
I have been stalking your blog for the last few hours (but i should be folding laundry). I love the way you decorate. Any chance you two offer design consultation?
Thx,
Rachel
YoungHouseLove says
Aw thanks Rachel! We don’t offer them currently, but if we bring them back we’ll make a big announcement on the blog. Thanks for the kind words :)
xo
s
Andrea says
Wow! What a difference! Great light fixtures. :)