Ready for the next chapter of our sandbox project? If you’re not, I can tell you one person who definitely was. Her name rhymes with Blara.
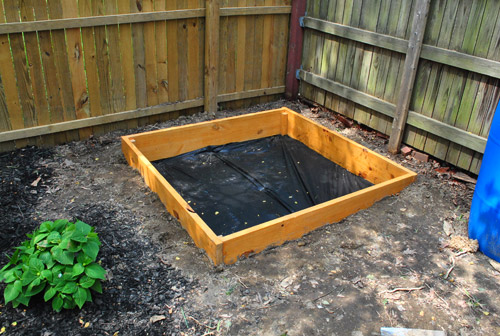
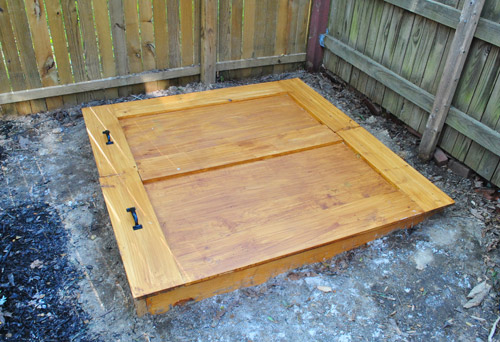
Here’s where we left off. Box built (more on that here) and awaiting sand. But in need of a cover first.
Having looked at a bunch of other DIY sandbox covers (like the awesome ones from Dana Made It, Small & Friendly, Modern Parents Messy Kids, and Dover Projects) and based on our own experiences, we compiled a mental list of what we wanted (and didn’t want) out of our cover. Our checklist was something like this:
- Should primarily keep out natural debris (leaves, acorns, etc) and animal “debris” (from neighborhood cats, birds flying by, etc).
- Should help keep water out, but we weren’t going to be crazy about making it completely airtight.
- Should be sturdy – so no tarps that could fly off or other plastic that might warp. Wood felt like our best bet.
- Shouldn’t be too heavy. If lifting it were a burden, we might be less inclined to use it.
So this is what we came up with. It doesn’t make much sense in it’s pre-constructed phase, but I promise it’ll all come together a bit later.
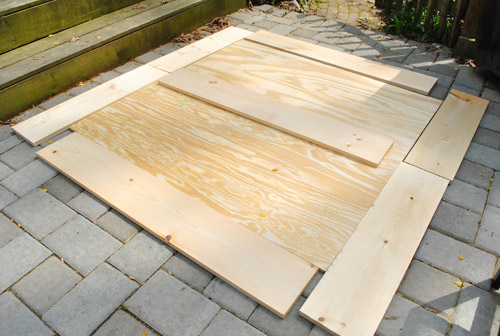
The concept for it was born from the fact that plywood was the cheapest way to cover such a big area (a 5 x 5 ft square, essentially) but my experience with plywood outdoors is that it can warp. So we decided to buy two 2 x 4″ plywood sheets with a frame of 1 x 8″ boards around it – both to add stability and to make it large enough to do the job. Plus since it’s right off of our patio we wanted it to look clean and finished and not like a plank of wood tossed haphazardly over a box.
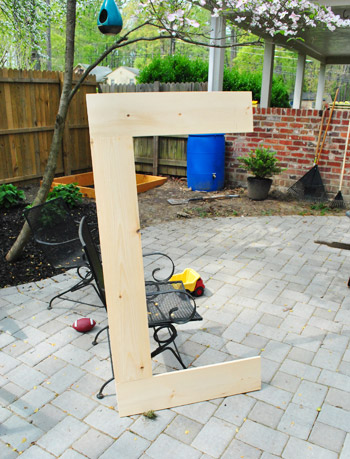
Oh, and since one big 25 square foot cover threatened to be quite heavy – we decided to build it in two interlocking pieces. So here’s the frame for one side (I attached the frame boards using my Kreg jig). Hey look – it’s a C for Clara.
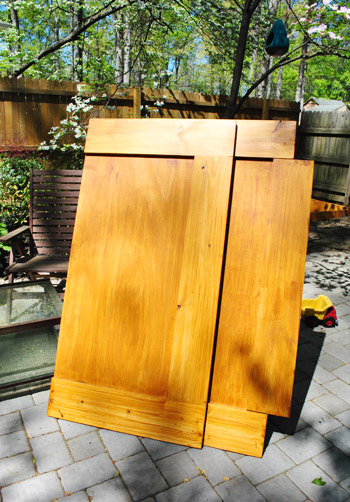
After building both frames and screwing the plywood to it from the underside, I stained both pieces with the same Behr waterproof Deck Stain in a “Natural” color that I used for the sandbox itself. It came out a bit streakier than I would’ve liked, but in my continued efforts to not stress about a sandbox I let it be (will Clara care about a less-than-perfect stain job? I certain hope not). Oh, and you’ll notice that one side has the board kinda dangling off the side. That’s a middle piece that I added to cover up some of the seam between the two sides. It’ll make more sense when you see it all in place in a few pics.
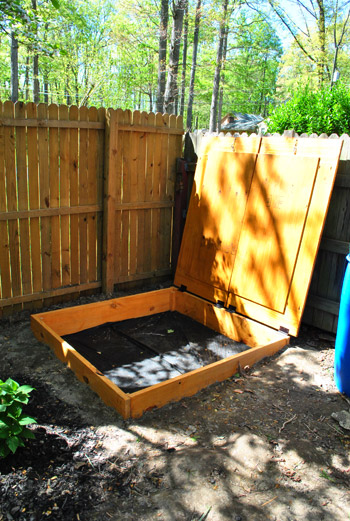
We could’ve just let the cover sit freely on the top of the box, but I opted to attach it with some hinges so that we wouldn’t have to carry the whole thing every time Clara wanted to play.
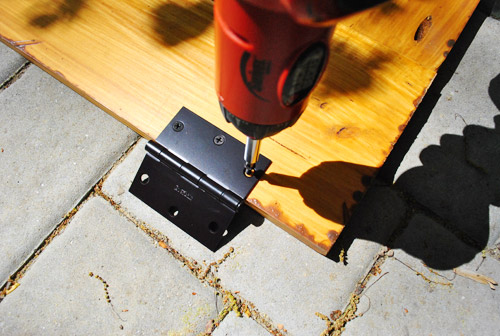
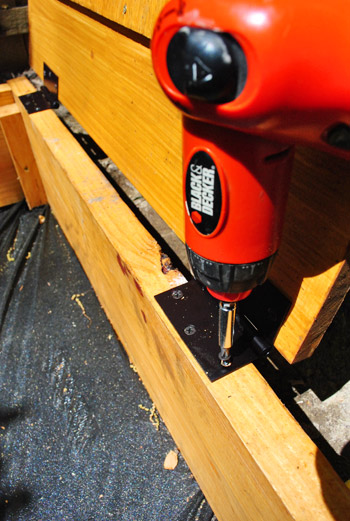
Plus, this meant the cover could rest against the fence rather than having to be stored somewhere else on the patio while the sandbox is in use. So I attached the other half of the hinge right to the top of the box itself.
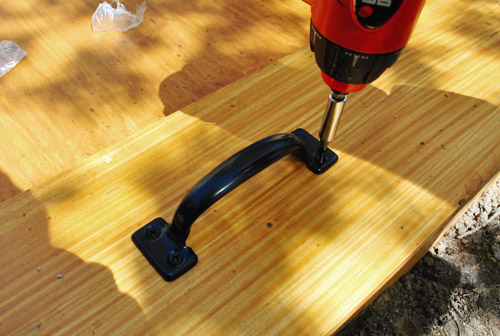
While we’re on the subject of hardware, we also attached a matching handle on each side of the cover for easy grabbing. They actually polished things off a lot. Note to self: add hardware to stuff, it makes it look legit.
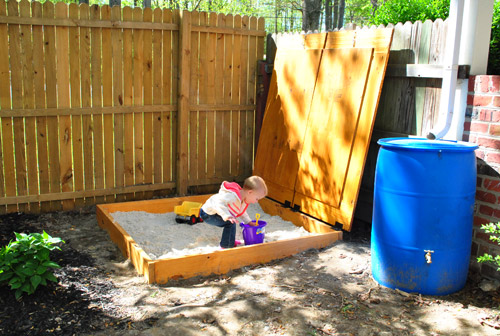
Here it is with the cover finished and attached, but I realize it’s a bit hard to see given the tree shadows…
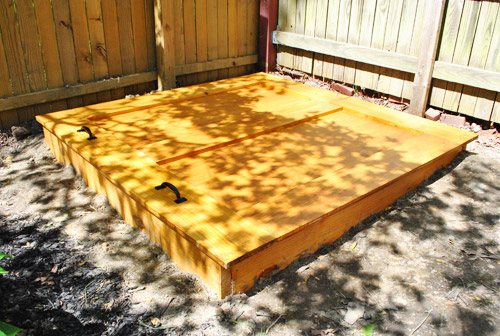
…so let’s momentarily skip ahead to some pictures I took later in the day when the sun was starting to set. It’s not as pretty looking, but there aren’t those blotchy shadows going on. As for rain collecting on those panels, we’re going to see how it goes, but there are a couple of seams and cracks that should let it drain out well. So far (with very small rains) it has been fine. But if we have a gully washer and it’s an issue we’ll alter it with some drainage holes and report back!
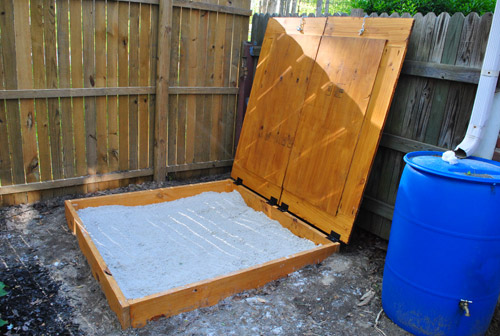
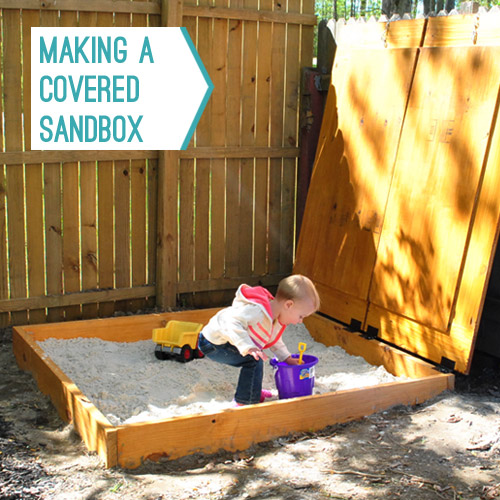
And now you can see how each side can swing open to reveal the sandbox beneath.
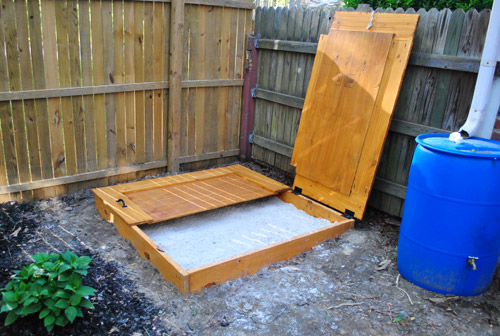
Ta-dah! Oh and you’ll notice that the rain barrel has a fully fused plastic top on it (so there’s no danger of Clara somehow climbing on top of it and falling into water). Sometimes from pics of the side, folks assume that a rain barrel is topless, but it’s closed and has very small mesh circles where the water filters through (to keep mosquitoes out).
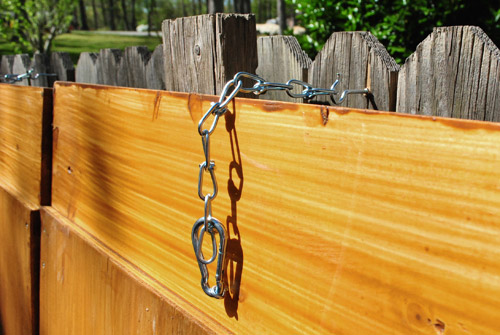
And on the subject of child safety, you may be thinking the same thing we thought – “Ack! What if Clara pulls the cover down on herself?!” So we installed a little safety latch to keep that from happening. It’s a bit of a contraption (again, me over-complicating things) but it’s basically an eye-hook screwed into the underside of the cover with a piece of chain attached via carabiner. When the cover is closed it sits hidden under the box, but when resting against the fence we can hang the chain over a hook we screwed into the fence post.
These may look dainty, but they’re actually nice and heavy duty. We tugged on them more than a few times just to be sure they’re really in there. So when the sandbox cover is open and locked in this position, it’s not going anywhere. It’s especially nice that the hinges rotate more than 90 degrees since the cover can lean back on the fence for more security (if it were frozen in the air at a 90 degree angle we’d worry it might be more apt to fall closed, but when leaning back against the fence and hooked into place, it’s nice and secure). So now that we’ve covered how the cover works, I’m going to rewind to a time when there wasn’t sand yet in the box. A much sunnier, distractingly shadow-y time.
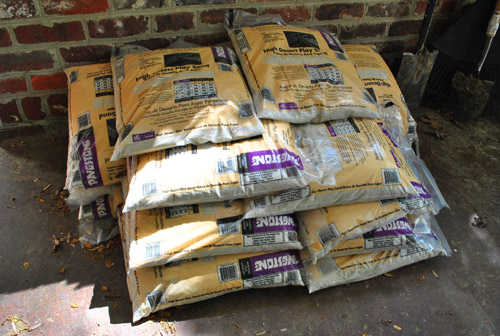
Even though I showed you a few extra bags of play sand that we had sitting around from last year, I still bought about 15 more because I knew it would take a lot to fill it up and give a decent amount depth for Clara to really get her dig on.
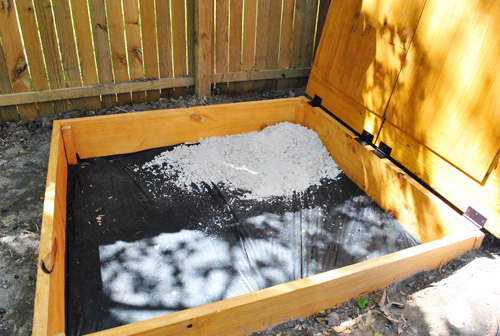
I call this picture “the inaugural sand” – my sand box equivalent to a ceremonial cornerstone or symbolic spike that connected the railroads. But it’s really just the first bag I dumped in there.
As I dumped bag after bag of sand, Clara stood patiently waiting for her cue to play. Patience isn’t always her strongest virtue, but I have to give her props for being a very calm lady in waiting this day. Look at her all poised and ready with her bucket and her shovel.
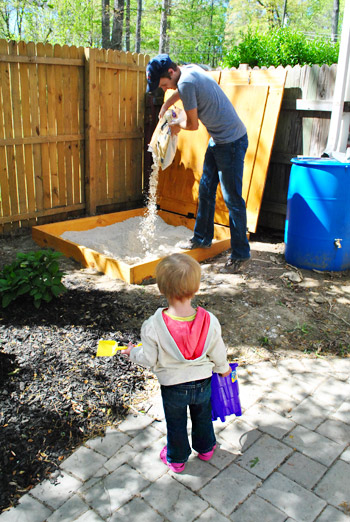
20 bags of sand later – we gave Clara the go ahead.

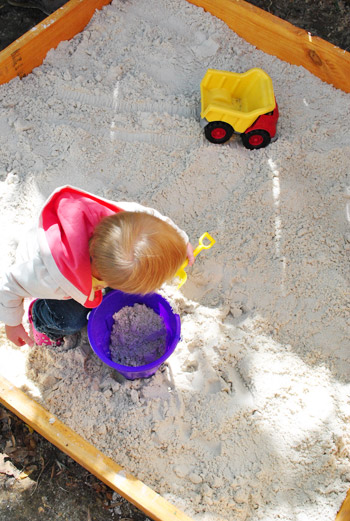
And the rest is history.
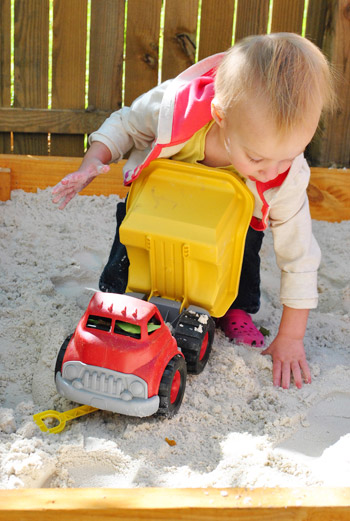
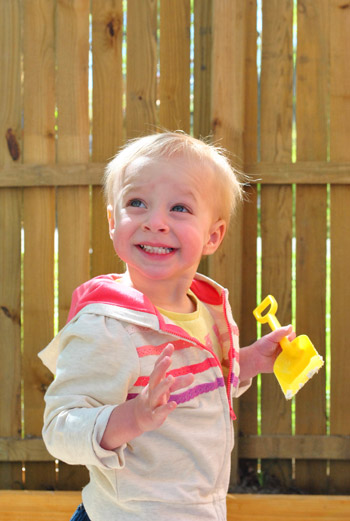
Think she likes it?
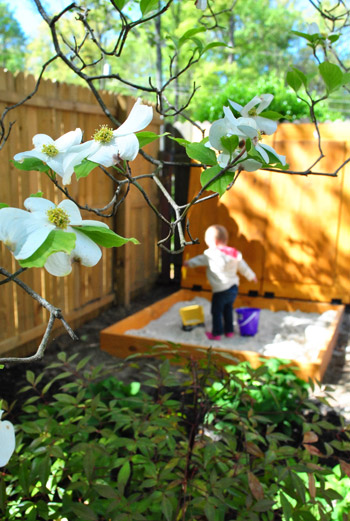
We’re just as happy about it. The location is perfect for letting her play in a contained area (the patio is fully fenced in) while allowing us to sit outside and try to get some work done in a nearby chair. Plus, it’s pretty shaded most of the day too.
I must admit, in addition to be a bit more complex than I had set out to make it – it also was a bit more expensive than I had prepared myself for. Both wood and sand really add up quickly, but after looking up other wood sandboxes (many which didn’t even come with a cover and were $180 or more, like this one from Target) I felt a lot better. Plus sandboxes don’t come with sand, so that’s always an added expense. Here’s our budget breakdown:
- Wood for 5 x 5′ box: $17
- Wood for 5 x 5′ cover: $38
- Stain: $22
- Weed block: $0 (leftover from last year)
- Hinges, handles & safety hardware: $21
- Sand: $48 (thanks to some leftover bags from last year)
- TOTAL: $146
Clara happily digging around for hours on end: priceless. And so ends the two-part saga that was…
OR DOES IT? Just when we thought our sandbox adventures had come to a close, something else happened. And it resulted in a little sandbox remix. More details tomorrow (we just have to edit the pics and write the post up). Then it’s really over. Whew. Who knew a simple sandbox would turn into a trilogy? In the meantime, have you added hardware to anything that suddenly felt more legit? I’m telling you, it’s a thing.
Pssst- To read The Sandbox Chronicles in their entirety, here’s Part 1 (about building the base of the box) and Part 3 (about swapping what we found out was unsafe sand for pea gravel).

Mamaw03T says
Good job! I love how it’s sunk into the ground and self contained. Super love how you did a two section top and it’s supported (held) by the fence/chain. Excellent!
Tara G. says
It looks fantastic- and kid approved! Does the lid fit over all the toys when closed?
YoungHouseLove says
The smaller ones fit (small cars, a shovel, etc) but the bigger buckets and balls come out. We’d love to build or buy a little outdoor storage box for them!
xo,
s
Andy B says
Oh, and I don’t know if you guys saw this one: http://pinterest.com/pin/283937951476735287/ off of Pinterest, but it is incredibly awesome!
YoungHouseLove says
Wow- amazing!
xo,
s
Lisa says
YAY Clara! A sandbox of your very own. How you made a sandbox look that good is beyond me. Well done.
Ann says
Well done John! It looks very professional and you know Clara is going to have happy memories in that yard.
Karen F says
You’re killing me with these sandbox cliffhangers! “tune in tomorrow…”
The picture of Clara waiting with the shovel and pail is sp great. Glad she loves her new sandbox!
YoungHouseLove says
Haha- oh the sandbox suspense!
xo,
s
Karen F says
I am the worst typer – please excuse the past, present and future typos!
I forgot to say that the sandbox itself looks awesome and you did a great job!
YoungHouseLove says
Aw thanks Karen!
xo,
s
Krystle @ ColorTansformedFamily says
I like the child safety features and think it looks beautiful stained. No wonder Clara loves it. Now she can have friends over to play for her birthday.
Leigh Anne says
Is there anything you can’t build?! Your carpentry skills never cease to amaze me!
Lindsey @ arkadian belle woods says
AHH! So cute! Look at the joy on her sweet face!
julie g. says
Love everything about the covered sandbox and the stain and hardware make it! My favorite is the picture of Clara standing by with her pail and shovel waiting for the first dig! I’m wondering if when you have girls you constantly have to say, “The sand is for INSIDE the sandbox!”?
YoungHouseLove says
Haha, there were a few instances of wanting to put the sand in other places, but thankfully some reminders that it stays in the box seemed to have worked.
xo,
s
Dora B says
Yes you do. Our 2 year old throws the sand out and takes it to water the flowers. While our son leaves the sand in.
Love the sandbox. Beautiful and love Clara waiting and her smile when she gets to play.
Good job!
LIZ says
Very very cool.
Love the sandbox… love the addition of hardware! ;)
Jacquelyn says
I thought you guys might do something like this..
http://pinterest.com/pin/223561568972664359/
but it still turned out very cool! My dad built me a sand box as a kid and I remember spending hours playing in it with my brother!
YoungHouseLove says
Oh yeah that’s cool! Poor John had so many ideas but really didn’t want to get too complicated for fear of Clara being five before it was finished!
xo,
s
Matt says
So “Put a handle on it!” is the new “Put a bird on it!”?
YoungHouseLove says
YES. Totally.
-John
Robin @ Our Semi Organic Life says
yes! I can see that!
Tracey says
Lovelovelove the new sandbox – Brilliant idea and construction! So, please don’t kill me for this, but check out: http://safemama.com/2009/05/18/faq-whats-the-deal-with-play-sand/
I thought we should build a box for our babe this summer, but kept remembering, “Sand is bad.” I just looked it up, cuz I couldn’t remember why. What do you guys think? Too picky/paranoid? I grew up playing in a sandbox and I seem (mostly) fine. ;D
YoungHouseLove says
Oh yes, we learned all about that! Stay tuned for the third chronicle!
xo,
s
goldensarah says
Bonus: The cover can double as a ‘stage’ for putting on plays/showing off dance moves/puppet shows, etc. Have fun, Clara!
YoungHouseLove says
Haha- totally.
xo,
s
Allyn says
I love that photo of her waiting for it, with tools in hand! And yes, I kept waiting to see how you were going to keep it from becoming a guillotine. Great job!
Melissa @ A Place to Nest says
I had a sandbox as a kid and loved it. My son has one now and he shares the same passion for digging as me. Here is the link to his current sandbox adventures (we have a cheap walmart plastic one btw-boo).
http://mom2will.blogspot.com/2012/04/sandcastle-mania.html
But wondering if you thought about adding a corner seat on the two corners opposite the hinge corners? That is what my dad built for us growing up so we had a place to sit and play. Kind of a triangle shape if that makes sense.
Otherwise- fantastic job! Amazing how many people I see put sandboxes outside but don’t cover. Gross….
YoungHouseLove says
We did think about that but John had those on his childhood one and said spiders hung out under them and made gross nests/webs so he didn’t want them there for now.
xo,
s
Melissa @ A Place to Nest says
Good call- spiders are bad. And you had quite the house guest in the fall- don’t blame you one bit! :)
Dayna says
It may be late now but we are installing a patio and bought a cubic yard of sand for only $34. They would also sell 1/2 cubed yard for only $17! It was so much cheaper than the bagged sand and perfectly clean and white. So, if you decide to add sand later you might want to look at getting it in bulk…just an idea!
YoungHouseLove says
Wow-that’s awesome!
xo,
s
Dayna says
And it was river sand, which may even be better than the “play sand”.
Tara says
Ive been looking for river sand since its supposedly safer than playsand but I haven’t had any luck finding it in Minnesota stores. Dayna/YHL -where did you find river sand & that too at such a steal?
YoungHouseLove says
We’ll be sharing our solution in this morning’s post! Here’s hoping Dayna stops in with her info too!
xo,
s
Meg@ Green Motherhood says
Best.dad.ever! We have a sand table, but the box is awesome. Maybe we will upgrade when we finally build our house.
Ainhoa@ALittleBite says
It’s awesome! I’m sure Clara loves it. We used a similar chain/carabiner hook contraption to keep our DIY drying racks folded in when they’re not in use and it works great.
Kristin Friesen says
I love it, and it looks so easy! I do have one piece of criticism (and maybe this is addressed in part 3?)… I can’t help but feel like it looks unfinished since it is sunk into the ground, but not completely. The sand box itself it amazing, but the in the ground part looks weird. Its like the dirt needs to come all the way up to the top of the sand box and be even, or not be sunk down at all. But I realize that if it came all the way up then there may be an issue of dirt getting into the sand. So, maybe an edge of pavers or something to separate the dirt from the edge so it could be truly sunken all the way down with the dirt coming up to the top of the wood. Just my two cents :)
YoungHouseLove says
Yes, we built it that sunk so that the sand wouldn’t come out but Clara would be able to easily step in and out. In person the height makes sense because the sand is basically at the same level as the dirt. So she doesn’t step down to come out or go in. Now that it’s mulched it looks more finished! Pics tomorrow!
xo,
s
Ana from Portugal says
It looks really good! And fun!
I predict good photos of Clara playing. You know what would be a great game? A treasure hunt! You hide things in the sand and then go search for the treasure!
;)
YoungHouseLove says
LOVE that!
xo,
s
K (Barking Babymama) says
My sis-in-law just gave my son (almost 3), as an Easter gift, a bunch of rocks that she hand-painted different colorful bugs on and a safari hat and pictures of the rocks so that we could hide them in the yard and he could go on a Safari Bug Hunt – he already loves it!!
YoungHouseLove says
THAT’S ADORABLE! What a thoughtful and fun gift!
xo,
s
karla says
I love that idea! With my daycare kids, I like to bury our plastic dinosaurs and the kids like to dig for them. I kive them old paintbrushes to brush off the sand. We usually incorporate it after reading dino books and watching a dino video. The kids I watch are close to Clara’s age so I’m sure she’d enjoy it too!
Cheltz says
Ok, that was pretty cute. You finally won over my cold, child-hating heart ;).
Lori says
It came out great!! All your hard work really paid off as you can clearly see with Clara’s expression!
Now I’m sitting on the edge of my seat to find out what that mysterious little ending to the post is all about…
Tracey says
LOL! Awesome. Yet another reason I love you guys!
heather s. says
I love the picture of her patiently waiting to play in the sandbox. I totally thought it was going to open to the sides like the doors to a tornado shelter or something but I love the way you have it opening instead. Great job and I have a feeling the post tomorrow is all about the evils of sand. ;)
Kelly.R says
Love it!
PS Your little Clara nugget’s hair is getting long! I don’t think I had that much hair until I was close the 3. So cute.
YoungHouseLove says
Wahoo! It’s finally growing in, although folks think that we cut it into her “boy haircut” and wonder why. I’m always saying “oh no, we don’t cut it- that’s all she has!” – haha.
xo,
s
Erica says
Aren’t you guys worried that water will collect in pools on top of that cover instead of running off?
YoungHouseLove says
I thought about that too. We’re going to see how it goes, but there are a couple of seams and cracks that should let it drain out well. So far (with very small rains) it has been fine. But if we have a gully washer and it’s an issue we’ll alter it with some drainage holes and report back!
-John
kristen says
10 points for use of the term ‘gully washer’
elizabeth says
I literally did one of those dramatic breathe-in-all-loud-like-in-the-movies thing when I saw the covers just propped up on the fence, while thinking “DANGER! Kid smashing DANGER!” Then, by the next pictures, it was all better with the break down of the safety latch. As usual, great job with this project!
I have the best memories from my back yard sand box as a kid. I grew up in VA, so it might be regional. I spent hours on end building little cities and entertaining my dolls. And… it’s where I learned to pull apart works; not my proudest moments.
elizabeth says
Worms. Worms feared me, not works.
YoungHouseLove says
Hahaha, too funny.
xo,
s
Kimberly says
I noticed that your privacy fence is a mix of new and old lumber. We are going to have the exact same issue when we complete the fence in our yard that was unfinished by the previous owners. Would you do a blog post on how you plan to fix this? Or is it best to just leave as is and hope the new wood ages and “catches up”?
YoungHouseLove says
That was originally our hope (that they’ll look more similar over time)! Not sure if it’ll ever catch up though! We have heard from someone who painted theirs a dark gray color and it looked nice on everything. Sounds nice but we like the no maintenance unpainted look for now. Will have to see if the new wood ages and catches up someday!
xo,
s
Jessica says
My parents had to replace a few boards on our deck a few years ago, and now you can barely tell the difference! Oh, and come to think of it, they also added a gate when I was younger, and that is TOTALLY blended in.
Kristen @ Popcorn on the Stove says
Clara is adorable just waiting there with her shovel! Can’t wait to hear part III!
heather s. says
I forgot to say that the mesh on rain barrels doesn’t really keep out mosquitoes unless yours is super duper tiny mesh (and most aren’t) – it is for keeping out debris like leaves since mosquitoes can get through even the finest holes. Hopefully you won’t have issues with mosquitoes near her sandbox.
YoungHouseLove says
Oh yes, ours is the tiny mesh! It’s from a local guy who hates mosquitoes so he’s into the small stuff! We have had the rain barrel over a year and have had no issues with mosquitoes on the patio. On the other side of the house where it’s lower and more marshy, we do have them though. Thankfully we don’t hang out there much!
xo,
s
keri says
another totally cool idea…chalkboard paint on the inside of the cover for drawing? if the door half is already secure standing up, it makes for a perfect easel!
YoungHouseLove says
LOVE it!
xo,
s
Anya says
I was thinking the same thing — two toys in one!!
I love the sandbox, and you’ve made it look super easy to make..
Laura says
I keep looking at the underside of the cover and thinking chalkboard paint! Great project. Can’t wait for part 3!
YoungHouseLove says
Ooh that would be so much fun!
xo,
s
Ashley@AttemptsAtDomestication says
Awesome! So cool how well it fits into that little corner off the patio!
Carol N. says
Why do I have a sudden urge to dig out a sand pail and go find a sand box? Think anyone would notice a 50-something woman having a big time with the same pile? Great job!
YoungHouseLove says
Haha, come on over!
xo,
s
Sarah says
All I remember from my childhood sandbox, besides it feeling enormous (really about 6’x6′) was when I was done with it and my dad turned it into a strawberry patch! He built two tiers into the center, filled with soil and voila, cascading strawberry beds. I think I enjoyed those strawberries as much as the sand!
YoungHouseLove says
So cute!
xo,
s
Stephanie says
This is too cute. Love the sandbox.
Jenny @ House Full of Pretty says
As always, so impressed!!!
Kelly says
ooooohh! cliff hanger ending! can’t wait for tomorrow!
GretchenF says
Great job! You are so right about the hardware.
And when did Clara get so much hair? It seems like all of a sudden she has a ton more. It reminds me so much of my own daughter, who had nothing until after she was two.
YoungHouseLove says
Yay! It’s finally coming! Although it seems to be getting denser but not any longer. Someday she’ll break the “she has boy hair” phase! Oh well, and she’s still a cutie with her boy hair anyway!
xo,
s
Ann says
Looks great and brings back memories of when mine were little. My husband had to add corner seats to ours so I didn’t have to sit in the sand. Will John be building a swing set to go with the sandbox next?
YoungHouseLove says
John didn’t want to add those corner seats since in his growing up they had one and spiders hid under there and made big thick webs and stuff. Maybe someday he’ll get over the bad memories! Haha. So far Clara is happy to sit right in the sand and play while we watch from chairs on the patio. As for a swingset, that’s on the long term list when Clara’s a bit older!
xo,
s
Stacey says
Maybe a couple of big garden stones in the sand could provide a seat that spider’s can’t hide under.
YoungHouseLove says
Love that idea!
xo
s
Brenda says
I was definitely picturing the doors opening like a box, one on each side. The cover looks so great! And that picture of Clara waiting patiently, bucket and shovel in hand, is just precious!
Sarah says
Love the sandbox cover idea… we built a nearly identical sandbox 3 years ago for our little girl. We had heard from many people that had sand boxes that they hated their kids tracking sand all over the place as it gets caught in their clothes etc… We ended up filling our sand box with playground pebbles. Lucy can dig and dig and doesn’t track any thing in with her when she climbs out. It was a lot cheaper than sand in the end because you can buy pebbles in bulk at landscaping/ hardscaping stores which are really common here in MN.
Erin says
How fun would it be to do a little mural painting on the underside of the lid, only to be seen when the sandbox is in use!? Or perhaps some chalkboard paint!?
YoungHouseLove says
Love that idea!
xo,
s
Stephanie says
I was thinking the same thing about the chalk board paint on the underside. We did it on our sandbox top and it gets lots of use.
Also, sometimes the “fairies” visit our sandbox and leave “gems” like the colored glass stones you nwould put in a vase.
Julie says
Aw man, just read the link to the toxic sand information, yuck! Well, we live a couple of thousand miles from the nearest Target down here in the British Virgin Islands, but at least my little girl has all the sand in the world!
YoungHouseLove says
Apparently beach sand is the best stuff! You’re so lucky!
xo,
s
Katie says
Ok seriously, best line ever: “Note to self: add hardware to stuff, it makes it look legit.” I’ll keep that in mind.
Lilly says
Awesome sandbox! Some chalkboard paint on those panels on the cover might be fun too!
YoungHouseLove says
That’s a really fun idea!
xo,
s
Me, Ed and Pea says
So nice!! The hardware definitely makes it look professional! You guys pretty much are professionals at this point :)
YoungHouseLove says
Aw, you’re sweet! We’re definitely still learning as we go. You’ll see evidence of that in tomorrow’s post. Haha. Definitely still learning!
xo,
s
Travis says
I am wondering if tomorrow’s post will be about rain. The sandbox looks fantastic, but it seems like rain will puddle on top of the cover since you have a raised trim border. I was also thinking that if rain gets into the sandbox, the sand will remain wet for awhile since you dug down into the dirt (like making a little bath tub with no way for water to get out). Love the project!
YoungHouseLove says
As for rain collecting on those panels, we’re going to see how it goes, but there are a couple of seams and cracks that should let it drain out well. So far (with very small rains) it has been fine. But if we have a gully washer and it’s an issue we’ll alter it with some drainage holes and report back!
xo,
s