This is supposed to be the post where I declare “The floors are DONE… enthusiastic exclamation point!” But instead I’m here to say “The floors are almost done… sheepish period.” But they’re mostly down and they weren’t actually that hard to do! Seriously, anyone can do this.
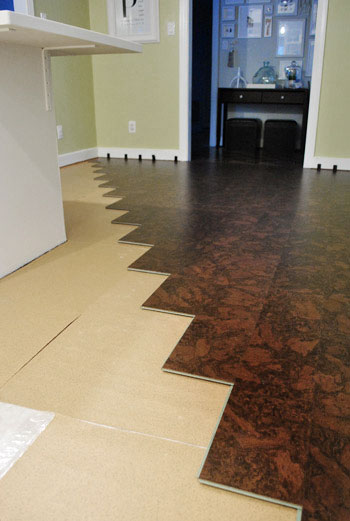
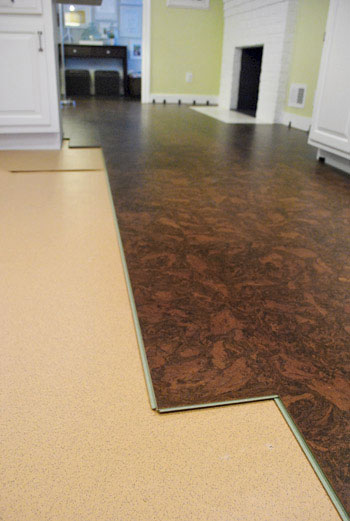
Since we last updated you, they’ve gone from this:
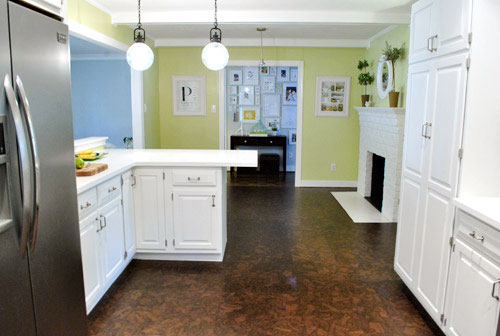
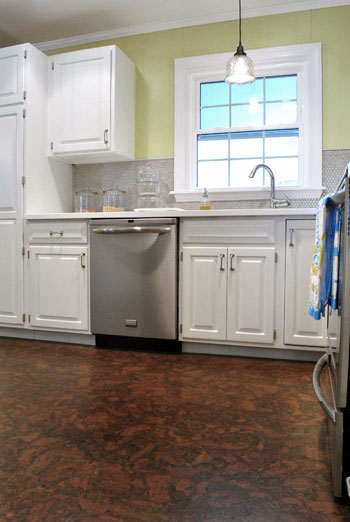
To this:
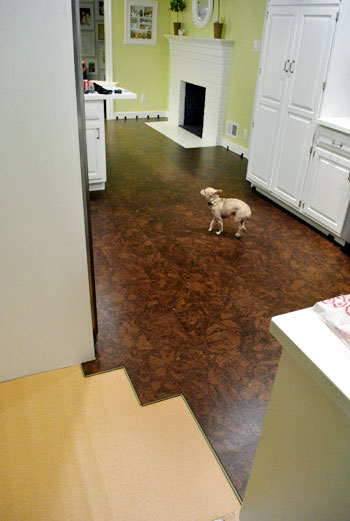
Note: Some of these photos have the cork looking more red/orange than it is in real life. But if you watch the video where we’re installing it (or the one with Clara in it), it’s probably the most true to life (a rich mocha color). We’ll try to take better pics next time!
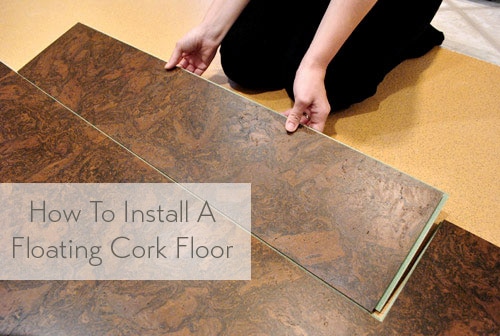
We thought we could knock out the rest of it in the last few days, but between making all of the cuts to snake around our peninsula/cabinets/doorways and moving appliances out to make way for a few planks of flooring under them (to keep them level without pinning down too much cork), it just took a little longer than we thought. And since this whole blog is in real-time, as much as we wish we could fast forward to the end and share all the glossy after pics (no one wants to call this turkey done more than we do, haha) we just have to keep plugging away and share the pics whenever we get ‘er done. We did stop to take some how-to pics and a video along the way this time though – so we’ve got that to share with you. Shall we begin?
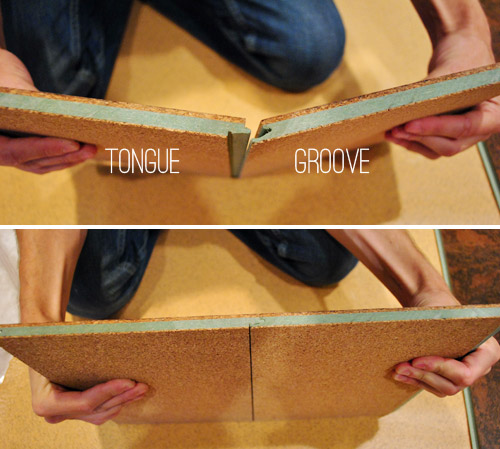
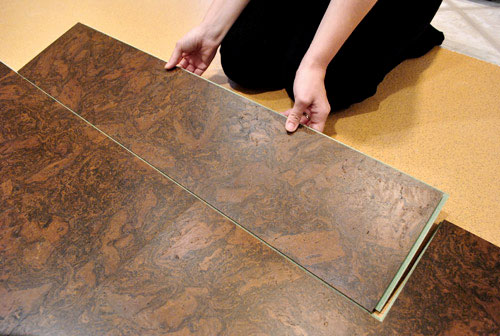
Here’s how the snapping system works on these cork boards. Tongue goes into groove. Boards lay flat together. Everybody’s happy.
When it came to actually putting a board in place, it went something like we show in the video below. If you can’t watch the video (we don’t want to blow your cover at work) we’ve also included the same information via photos below. Watching the video on mute is probably more explanatory though, just to see things in action.
Okay, so now for the photographic, Burger-cameo-free version of that same info. We first slid the tongue into the groove at a slight angle.
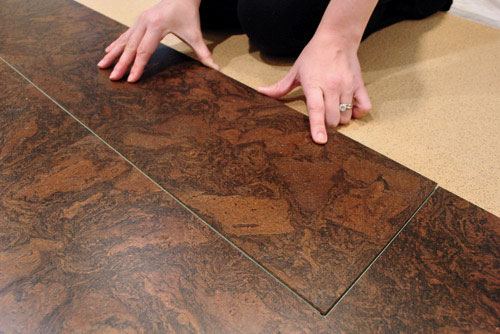
That held it very loosely together so that we could then lay it flat and slide it into the groove on the short end of the board.
Obviously that isn’t enough to hold the board in place, so out came the hammer and the tapping block (we got the tapping block in a flooring kit from Home Depot mentioned here). The block allows us to give the board a pretty solid wallop (technical term) without hurting the cork (since it takes the brunt of the hit instead of slamming the cork directly).
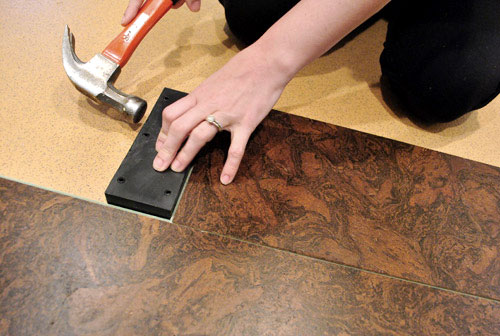
Once we had the short end tapped in enough to make the seam disappear, we did the same on the long side of the board. See that slight seam? After a few taps it was history (you can watch it disappear in the video above).

In our experience, when the long side popped into place the board sometimes, well, popped up a little bit on the outside edge. No bueno if your goal is a nice flat floor. So we found that if we put our weight on the board to keep it flat, then hammered it a couple more times it would get the board to lay flat and behave.
See, it’s behaving.
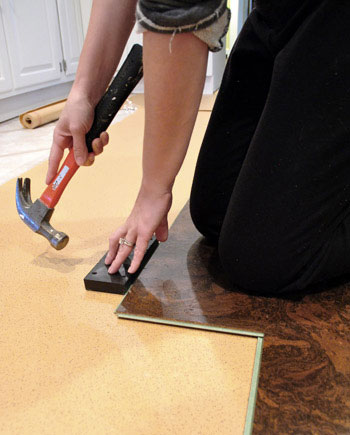
Of course it was a bit different when we got to boards close to the edges because (bummer alert) you don’t have room for your block or hammer.
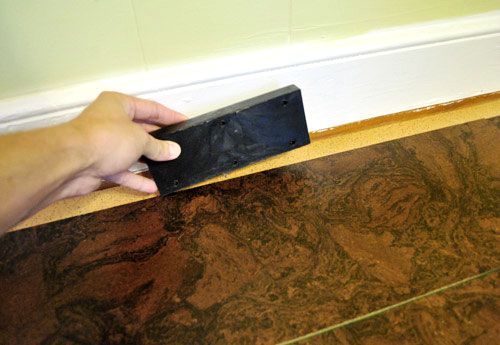
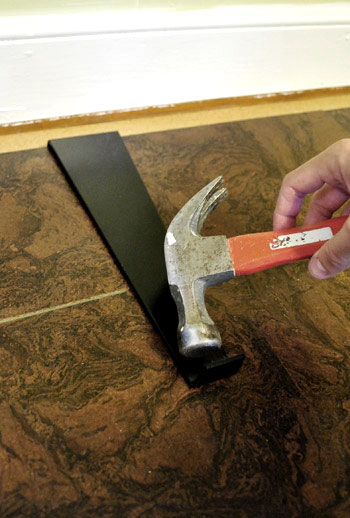
That’s where the pull bar comes in handy (it was also included in the kit from Home Depot along with the tapping block and spacers mentioned here).
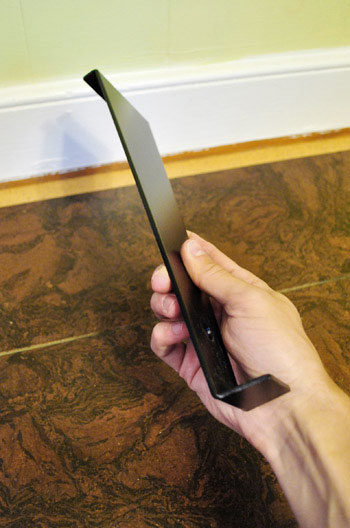
The wide side hooks over the board so that you can tap the other end with your hammer to get that seam to disappear. Oh and see that gap near the baseboard? There’s a recommendation of a 5/16th gap around the perimeter of the room (floating floors need to be able to expand/contract a bit to keep from warping, and the shoe molding will completely cover these slivers of space so they’re undetectable) – so we did have to cut a sliver and stick it in there. But nothing too snug to the wall since we don’t want warping. We used spacers to help us keep our place. More on that here.
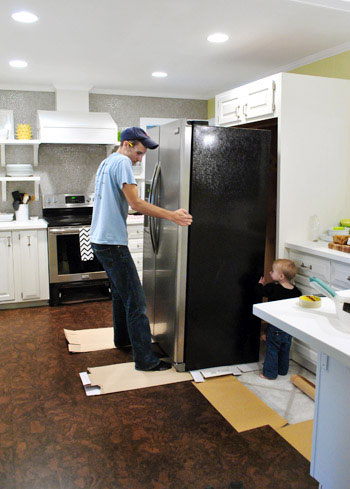
Both techniques weren’t that time consuming, actually. It was the cuts that were a big time suck. Well, that and sliding the appliances out so we could run a few planks of flooring under them to keep them level. And since we got a big groove in our hardwood floors at the old house from sliding the refrigerator out, we were SUPER careful about it. Like two-layers-of-cardboard-over-a-scrap-piece-of-cork careful.
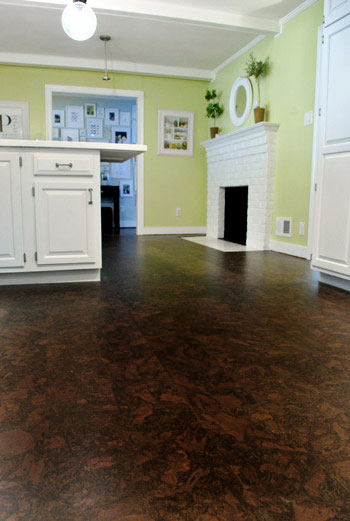
So I’m sorry we don’t have “after” pics for you yet (not that they’d be totally done anyways since we still have to reinstall transitions and shoe molding along with seal all the cork for added durability), but I did try to fake it by taking some pictures from angles where you don’t see the unfinished section in the laundry room. Yep, I’m clever like that.

Who knows, maybe we’ll never finish it and just shoot around it for the rest of our time here.
Just kidding. Of course we’ll finish it. Especially since I couldn’t even shoot one cute video of Clara without blowing our cover. Darn you Clara, always being adorable in the most inconvenient places! Note: for some reason every time Clara throws the football on this video the floor appears to makes a crazy loud sound, but in person the floor is really soft and absorptive of sound, so it doesn’t make loud hollow noises when you walk on it or drop things – must just be the sound quality of the Flip camera (it seems to amplify voices to hear them better, so it must have amplified the football sounds too).
Luckily the laundry room should be pretty speedy. Knock on wood…er, cork.
Anyone else in the midst of a project that’s taking longer that expected? Ever laid a cork floor? We have been so happy with it so far (the rich deep color adds so much for the formerly white-on-white room, there are no scratches/dings where Burger runs around from his nails, no dents where we drop things, it’s very soft and easy on the back/knees, and it should be even more durable once we seal it after it’s all in). We’ll definitely keep you posted! Oh and we did learn that if you’re redoing a kitchen from scratch you should install your cabinets first and then add the floating cork floors around them (like we did in this case as well) since a floating floor shouldn’t have big heavy cabinetry resting on it (remember, it needs to be able to expand and contract a bit to keep from warping – more on that here). So we just thought we’d toss that tip out if it was helpful to anyone.

Ronell says
Did you lay the cork floors over existing flooring? Can I lay cork floors on top of my ceramic tile floor?
YoungHouseLove says
We laid them over laminate (we asked the Lumber Liquidators guys what was ok). I’m not sure about tile, maybe call the vendor and ask what works for that type of flooring?
xo,
s
Pat says
Hi, my daughter told me about your site. We’re about to replace kitchen/dining/laundry room floors due to foundation woes (whole ‘nother story). I read thru your post, but wasn’t sure if you just floated your floor or if you glued just in the grooves of the boards? Would love know know!!
Pat
YoungHouseLove says
Ours just floats since it’s a snap and lock floor. Hope it helps!
xo
s
Pat says
Great to know! Thanks so much.
Pat says
Sorry, one more question, I think you mentioned this product was from Lumber Liquidators, do you happen to remember the brand. It really seems like it might be a great solution for us. Many thanks for your responses.
YoungHouseLove says
It was called Lisbon Cork, and the color was Porto. Hope it helps!
xo
s
Lindsey says
Now that you’ve had the cork floor for awhile, what do you think? Any problems with scratching or water problems?
Looks great!
YoungHouseLove says
So far we love it! It’s wearing really well with a toddler and a dog. Very happy.
xo
s
Anne says
Hi. I’m working up my courage to put vinyl planks (Allure) in my kitchen over the current vinyl floor. (I’m going for the cork version.)
My question is about the appliances. You said you put a few planks under the appliances to keep them level. Were they attached to the rest of the floor? Or did you leave them unattached so that the main floor isn’t attached to something bearing the weight of the appliance?
Thanks…. and good luck with all your book activities. Can’t wait to read it.
YoungHouseLove says
The front legs rest on pieces that are attached and locked in, but the back legs rest on a floating piece we just shoved under the legs so they’re level. So far, so good!
xo
s
Rachel says
Guys, I’m so happy I found your posts. I’m about to lay a floating, click floor in my fabric store and couldn’t find any info about coating it after. Also, do you mind letting me know what you used for underlayment? I see everyone online agrees I should use a plastic moisture barrier, but it looks like maybe you used something additional? I’m going for maximum sound absorption, but wasn’t sure if a cork underlayment UNDER the cork floor was overkill. Sorry if I missed these details in a post somewhere – thanks for any tips!
YoungHouseLove says
We just used the underlayment they recommended under our cork at the store where we got it (Lumber Liquidators). They had two thicknesses and the better one was only slightly more (like 10 cents more per square foot) so we went for it! Hope it helps!
xo
s
Kim says
Hey – did you ever end up sealing your cork? Can you tell me with which product? We just ordered cork flooring last week, yay, I’m super excited!
YoungHouseLove says
Oh yes, here’s that post: https://www.younghouselove.com/2012/03/floor-finishing-finally/
xo
s
Matt says
Thanks for this post! I have been reading your blog for a while but this is my first comment.
We have a few areas in our house where the floor transitions from red oak hardwood to white carpet.
We want to replace the white carpet and trying to figure out the best solution. Considering cork and tile.
Which brand of cork tile did you use? They look beautiful.
YoungHouseLove says
It was called “Porto” by Libson Cork. Good luck Matt!
xo
s
Jeannine says
I am sorry if you answered this already, but what underlayment did you use on your cork floor installation?
Thanks!
YoungHouseLove says
It was just the underlayment that Lumber Liquidators recommended with them, so we bought the rolls of it through them. Hope it helps!
xo
s
Remboo says
Stunning!
Beth Bershader says
What was the manufacturer of your cork flooring. I haven’t found this coloring & really love how it looks. Thanks!
YoungHouseLove says
Here’s the post with that info for ya: https://www.younghouselove.com/2011/10/houston-we-have-liftoff/
xo
s
Beth Bershader says
I was wondering what manufacturer you used for this cork flooring? We love it & want to use it for our master bedroom. Is there a name for the design as well? Thanks!
YoungHouseLove says
It’s from Lumber Liquidators (called “Porto” by Libson Cork).
xo
s
Christy says
Hi guys!! This is an old one for you but I LOVE ITTT!! You guys have helped my hub and I stop talking about the changes that we want and actually start doing them! Yay!!
So my question is, did you get the cork from home depot? I have heard that it is not aged as long as cork from other places, making it softer. But the price is right. We have two dogs and it is the highest traffic area in the house, due to the layout…can home depots stuff live up to the challenge?
Thanks and congrats on the target line!! So exciting!
YoungHouseLove says
We got it from Lumber Liquidators. It held up really well!
xo
s
bosko says
Hi!
I’m preparing to do something like you, but with new cabinets, your posts and pics are detailed that no other info is needed.:)
Can you help me with one detail that I can’t find: how did you finish planks in toe kick of cabinets – better finish it up to or under and behind toe kick? How to seal that last plank and protect it from spills that can go under toe kick? Whether or not installing shoe – it shouldn’t be attached to floor.
Thanks!
YoungHouseLove says
You could seal those pieces before you lay them as well as you can I think, and then just hope for the best! Maybe use some clear caulk along the seam if you’re worried?
xo
s
Judy W says
These look great. I have been thinking about this for over a year. Someone talked me out of it for my basement office. But now I have taken on a DIY update for our kitchen and I think I want cork floors. Did you put it under your appliances as well?
YoungHouseLove says
We went under the fridge since that rolled out but couldn’t go under the dishwasher since it would have raised it too high for the counters.
xo
s